Basic Setup for Your Nest Protect Smoke & CO Alarm
Authored by: Support.com Tech Pro Team
1. Introduction: Nest Protect Smoke and CO Alarm: Basic Setup
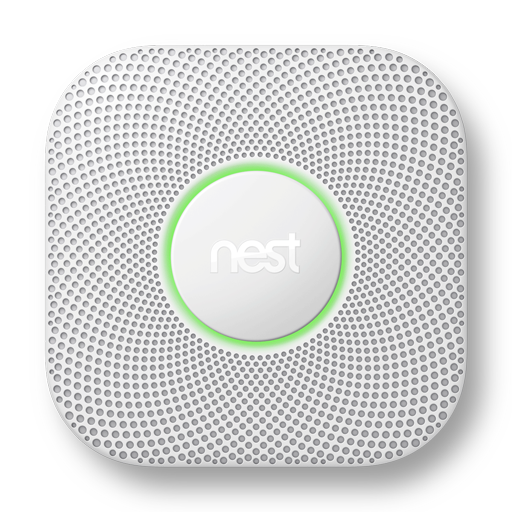
The Nest Protect is a smoke and carbon monoxide detector that tests itself automatically and lasts up to a decade. It’s also the first home alarm you can hush from your phone without any extra hardware required. It can report a detected issue directly to your smartphone.
This guide will cover:
Downloading and installing the Nest App
Connecting your Nest Protect to your Nest account
Physically installing your Nest Protect
2. Wi-Fi Network: Credentials
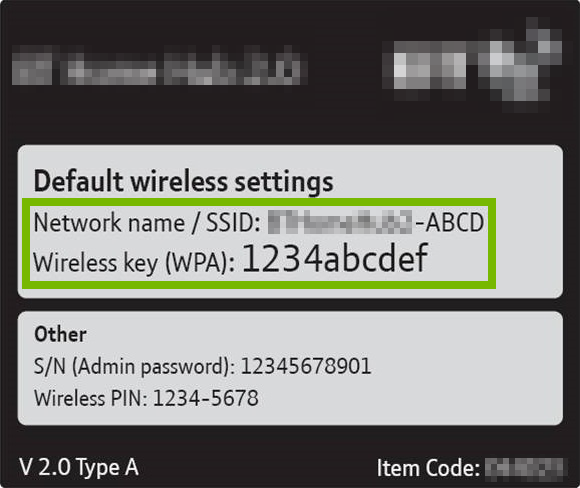
In order to connect to a wireless network, you must have the required credentials. These are:
Wireless Network Name (SSID)
Wireless Network Key (Password)
Finding Network Credentials
Most wireless routers/gateways have a label with the default credentials. If the credentials aren't there, look in the devices documentation.
If your Internet Service Provider (ISP) installed the wireless router or gateway, they might have left you a setup sheet which may have the credentials.
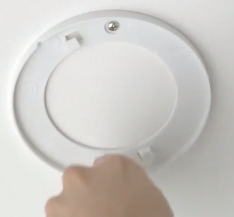
3. Mounted
You'll need to remove the device from the ceiling or wall before you can set it up with the app.
4. Unmount
In order to proceed with the setup we will need the device in hand. Go ahead and remove it from the ceiling or wall.
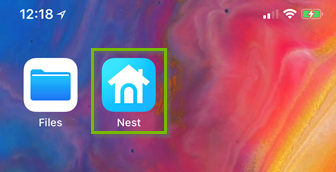
5. Install the App
Now we're going to install the Nest app. In order to do so, we need to know what kind of smartphone you have.
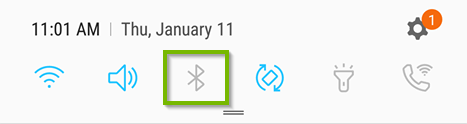
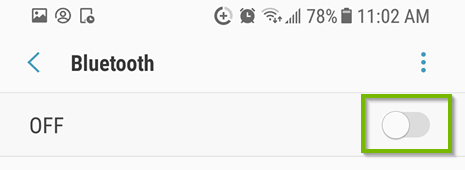
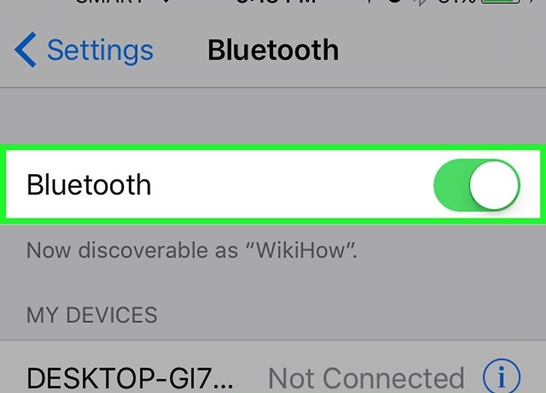
6. Android: Enable Bluetooth
Swipe down on your screen (or up, if using a tablet) to access the menu.
Hold down on the Bluetooth icon to bring up Bluetooth options.
Ensure the Bluetooth switch is set to ON.
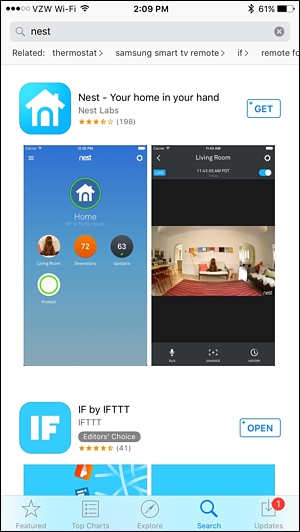
7. Nest Device: Install Android App
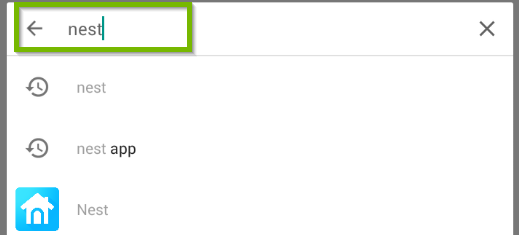
Launch the Play Store.
Search for Nest using the search box located at the top.
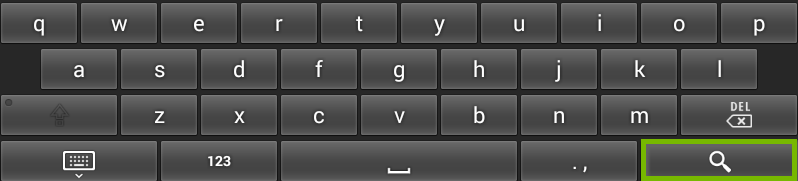
Touch the magnifying glass on the on-screen keyboard to search.
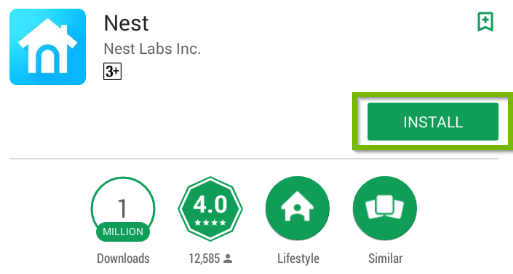
On the App's install page, touch INSTALL.
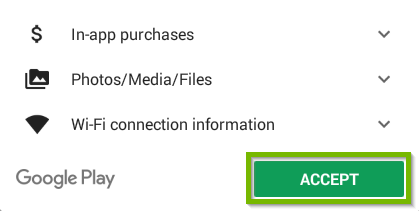
Review the install prompt that pops up. Once done, touch ACCEPT.
Wait for the download to finish. Once done, touch OPEN to launch the App or go back to your apps to access the new App's icon.
8. Nest Device: Create a Nest Account
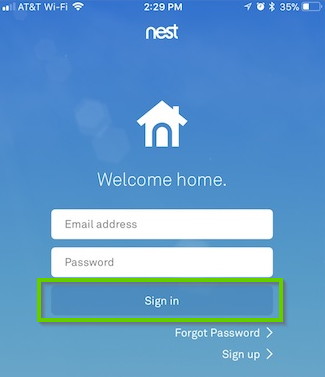
Log Into An Existing Nest Account
Open your Nest App if it is not already open.
If you already have a Nest account, you can enter your account credentials and tap Sign in to proceed.
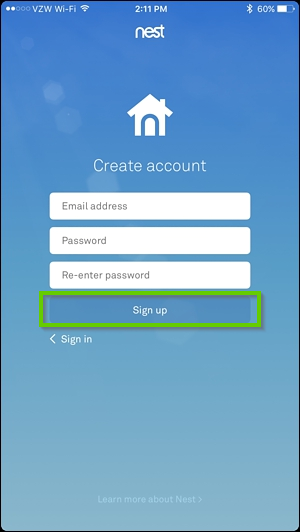
Create a New Nest Account
If you do not have a Nest account, tap the Sign up option beneath the Sign in button to create a free Nest account.
You’ll need to enter your email address and choose a password.
Tap Sign up.
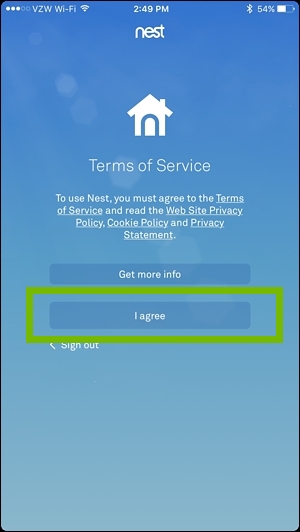
Select I agree to agree to the Terms of Service and Privacy Policy, and tap Continue at the bottom of the next screen.
9. Nest Device: Give your home a name
Log Into An Existing Nest Account
Open your Nest App if it is not already open.
If you already have a Nest account, you can enter your account credentials and tap Sign in to proceed.
Create a New Nest Account
If you do not have a Nest account, tap the Sign up option beneath the Sign in button to create a free Nest account.
You’ll need to enter your email address and choose a password.
Tap Sign up.
Select I agree to agree to the Terms of Service and Privacy Policy, and tap Continue at the bottom of the next screen.
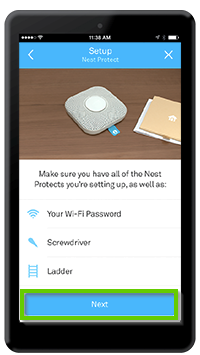
10. Nest Protect: Add Device to App
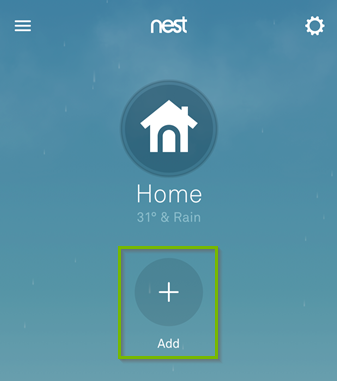
Open the Nest app.
Tap the Add button to begin adding a Nest device to the app.
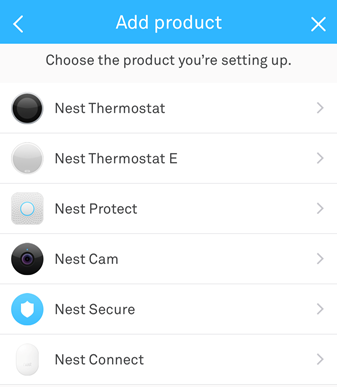
You will then be presented with a list of Nest devices that can be added to the app. Choose your device from the list provided.
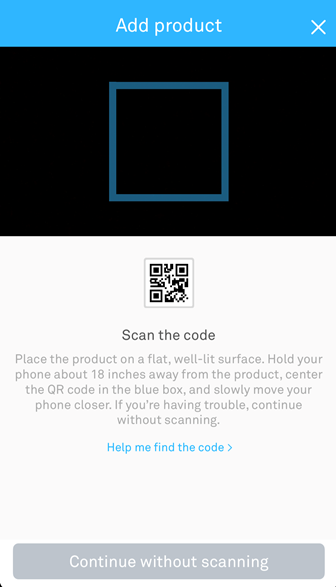
You now have the opportunity to use your smartphone's camera to scan your Nest device's QR code. Alternatively, if you cannot locate your Nest device's QR code, you can tap Continue without scanning.
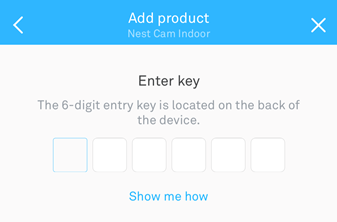
Then enter the 6-digit key that should be on your nest device.
Follow the on-screen instructions and select Next on the following screen.
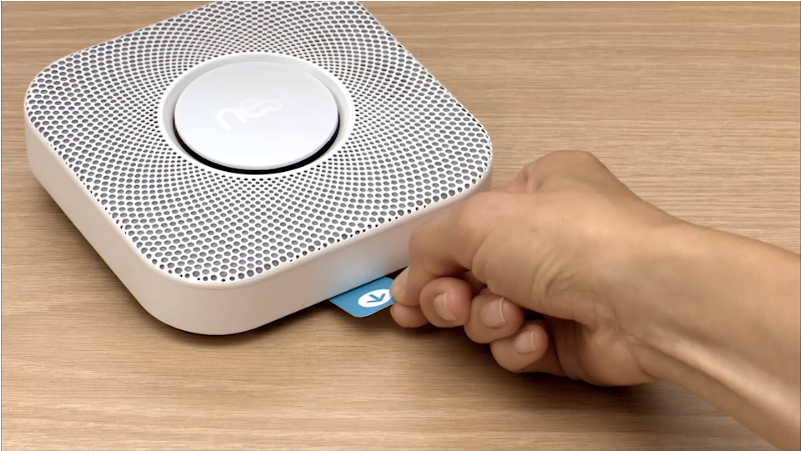
Pull out the blue tab on your Nest Protect.
The Nest Protect will say "Hi from Nest" and the light will glow blue.
Choose your language by pressing the button when it asks.
You will be asked to select a location for your Nest Protect. Choose a selection that applies to your setup.
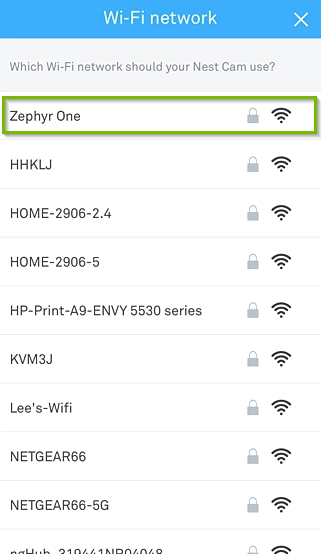
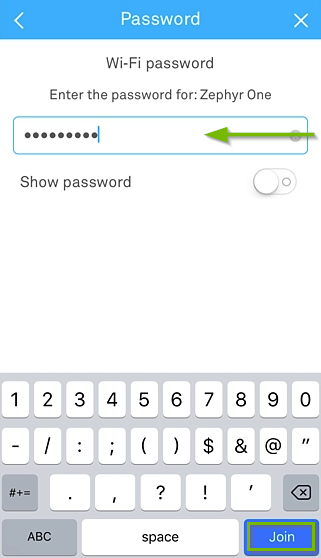
Your Nest Protect will scan for available Wi-Fi networks. Select your Wi-Fi network from the list.
Enter your Wi-Fi network's password and select Join.
Your Nest device will attempt to connect. This process may take a few moments.
Once connected, your Nest Protect will turn green.
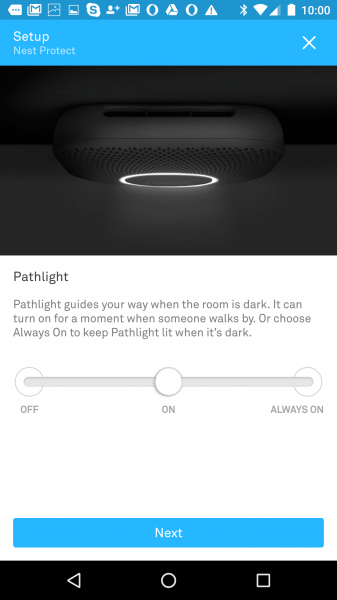
Choose the setting for your path lighting. You can dim it as you wish or turn it off entirely.
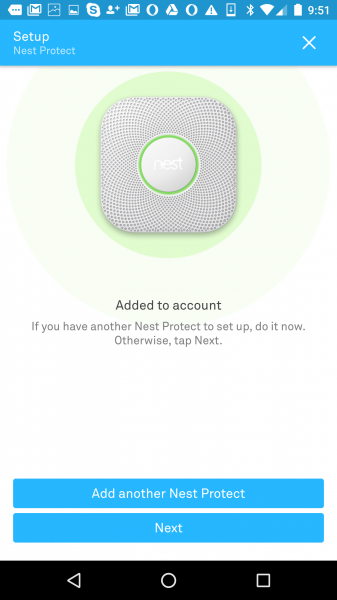
Once finished, the app will ask if you want to add another Nest Protect. If you have another Nest Protect, it will walk you through a faster version of the setup.
Next, we'll physically install your Nest Protect but we need to know whether you intend to install it with batteries or with the wired connectors.
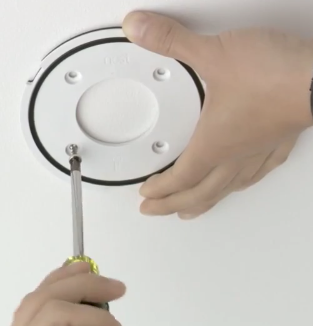
Screw the Nest backplate to the existing electrical box, reusing the existing screws. You can also screw the backplate directly into the wall or ceiling with the Nest screws.
Line up the three tabs on the back of your Nest Protect with the notches on the backplate. Hold Nest Protect against the backplate and turn it clockwise. Continue turning until it's square with the wall or ceiling.
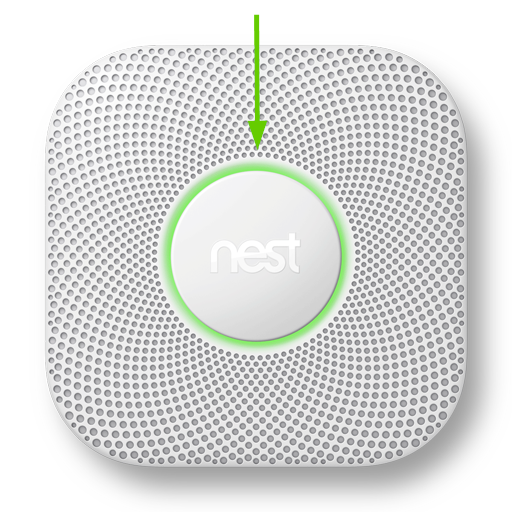
Test your Nest Protect by pushing the Nest button twice. It will check its sensors, power, Wi-Fi connection, emergency horn, speaker, and lights.
If you have more than one Nest Protect, they should all sound off at the same time and show they are connected.
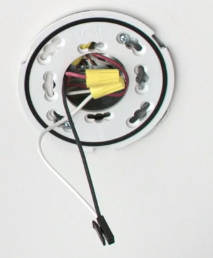
12. Nest Protect: Wired Physical Install
If you're uncomfortable working with high voltage wiring we recommend you use Nest's list of contractors to find a professional.
Turn off the power.
Wait until the current smoke detector's light goes out to make sure you've turned off the correct circuit breaker.
Remove your old smoke alarm.
Remove the old backplate.
Remove the old alarm connector.
Wipe away any dust or particles away from the mounting area.
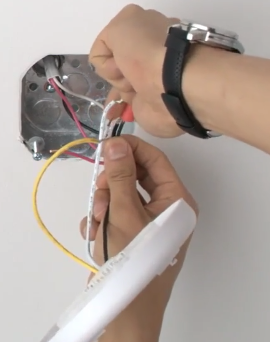
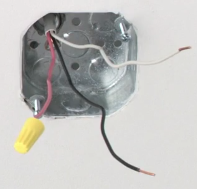
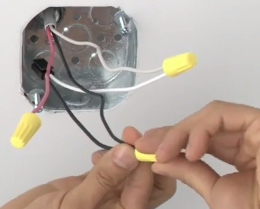
If you have a red/orange/yellow wire go ahead and cap it off with a wire nut. We won't be using that.
Hold the white wire ends together, cap them with a wire nut and twist clockwise until it's secure. Do the same with the black wires.
Screw the Nest backplate to the existing electrical box, reusing the existing screws. You can also screw the backplate directly into the wall or ceiling with the Nest screws.
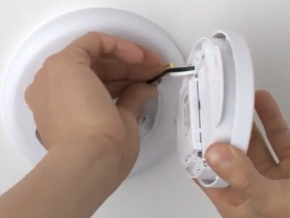
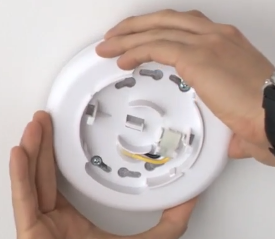
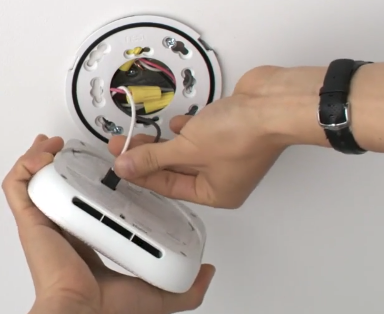
Plug the 120V connector into the back of your Nest Protect.
First, tuck any excess wiring into the electrical box. Line up the three tabs on the back of your Nest Protect with the notches on the backplate. Hold Nest Protect against the backplate and turn it clockwise. Continue turning until it's square with the wall or ceiling.
Switch the power back on.
Test your Nest Protect by pushing the Nest button twice. It will check its sensors, power, Wi-Fi connection, emergency horn, speaker, and lights.
If you have more than one Nest Protect, they should all sound off at the same time and show they are connected.
.png)