Basic Setup for Your Philips Hue Home Automation Device
Authored by: Support.com Tech Pro Team
1. Introduction: Philips Hue: Basic Setup
Philips Hue is your personal wireless lighting system that lets you easily control your light and create the right ambiance for every moment. Philips Hue works with a range of different smart devices. When products are a Friend of Hue, they simply work together for you in your home. You can connect your Philips Hue system with Amazon Echo, Apple HomeKit, Google Home and many others.
This guide will go over basic installation and setup of your Philips Hue lighting system.
2. Phillips Hue: Install Lights
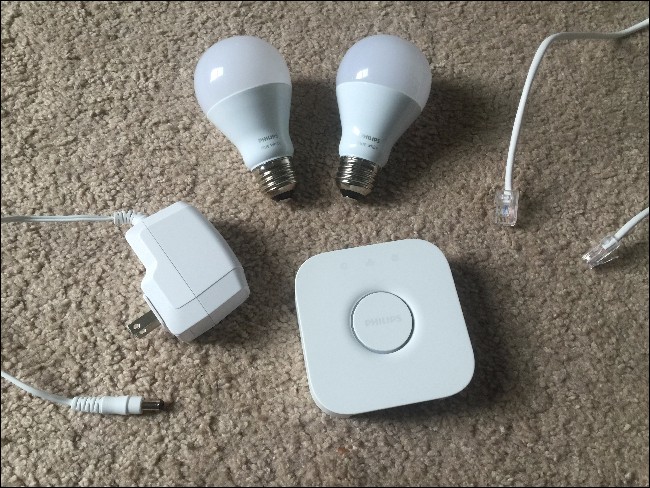
Unbox your Philips Hue lights. You’ll get a Hue Bridge, a power adapter, an ethernet cable, and either two or three light bulbs, depending on which starter kit you bought. The Hue White and Color starter kit comes with three bulbs, while the Hue White starter kit comes with two bulbs.
For safety reasons, make sure the light fixtures you are going to be using are powered OFF before screwing in your new bulbs.
Screw in the Philips Hue light bulbs into the light fixtures that you want to control wirelessly. Once the bulbs have been physically installed, turn each light fixture ON. The Hue bulbs will automatically turn on, letting you know that they’re both working properly and are ready to be paired to the Hue Bridge.
3. Philips Hue: Connect Bridge
Plug in the Hue Bridge by connecting the power adapter to the Bridge and the other end into an available outlet.
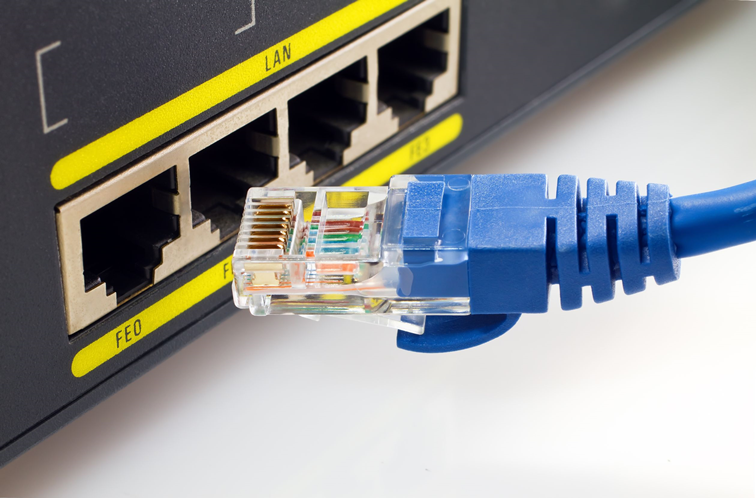
Connect one end of the provided ethernet cable into the Hue Bridge and the other end into an available ethernet port on the back of your router.
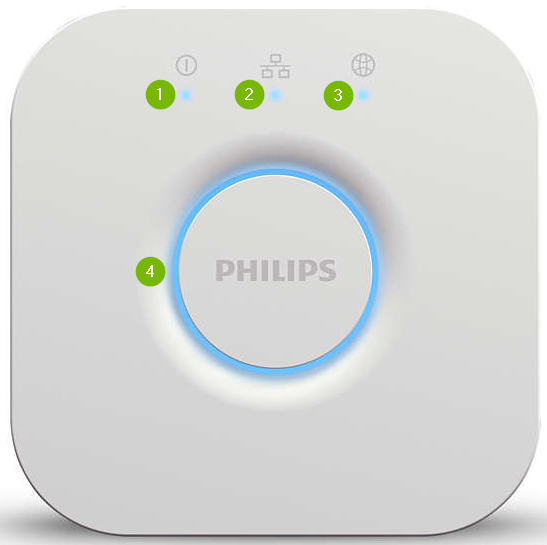
Wait for all four lights to light up on the Hue Bridge, and then the setup process can begin.
First LED indicates Power. If this LED isn’t on, make sure your bridge power adapter is plugged in.
Second LED means your Philips Hue bridge is connected to the home network. This light may or may not blink during the setup process.
Third LED means that your Philips Hue has internet connectivity. A solid LED means that it has an internet connection. Internet connection is not necessary if you don’t want to control your lights through the cloud.
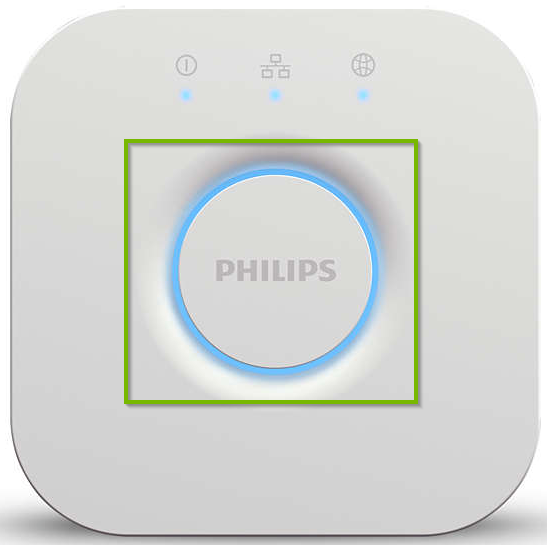
The center button is the Sync button. This can be pressed to allow apps to control your lights. This is a security failsafe that prevents others from being able to control your lights without your permission. The app will let you know when you need to use this button.
The Hue Bridge must be connected directly into your router with an ethernet cable. The Hue Bridge does not have Wi-Fi built in.
4. Introduction: Philips Hue: Install & Setup App
Next, download the Philips Hue App for iOS or Android.
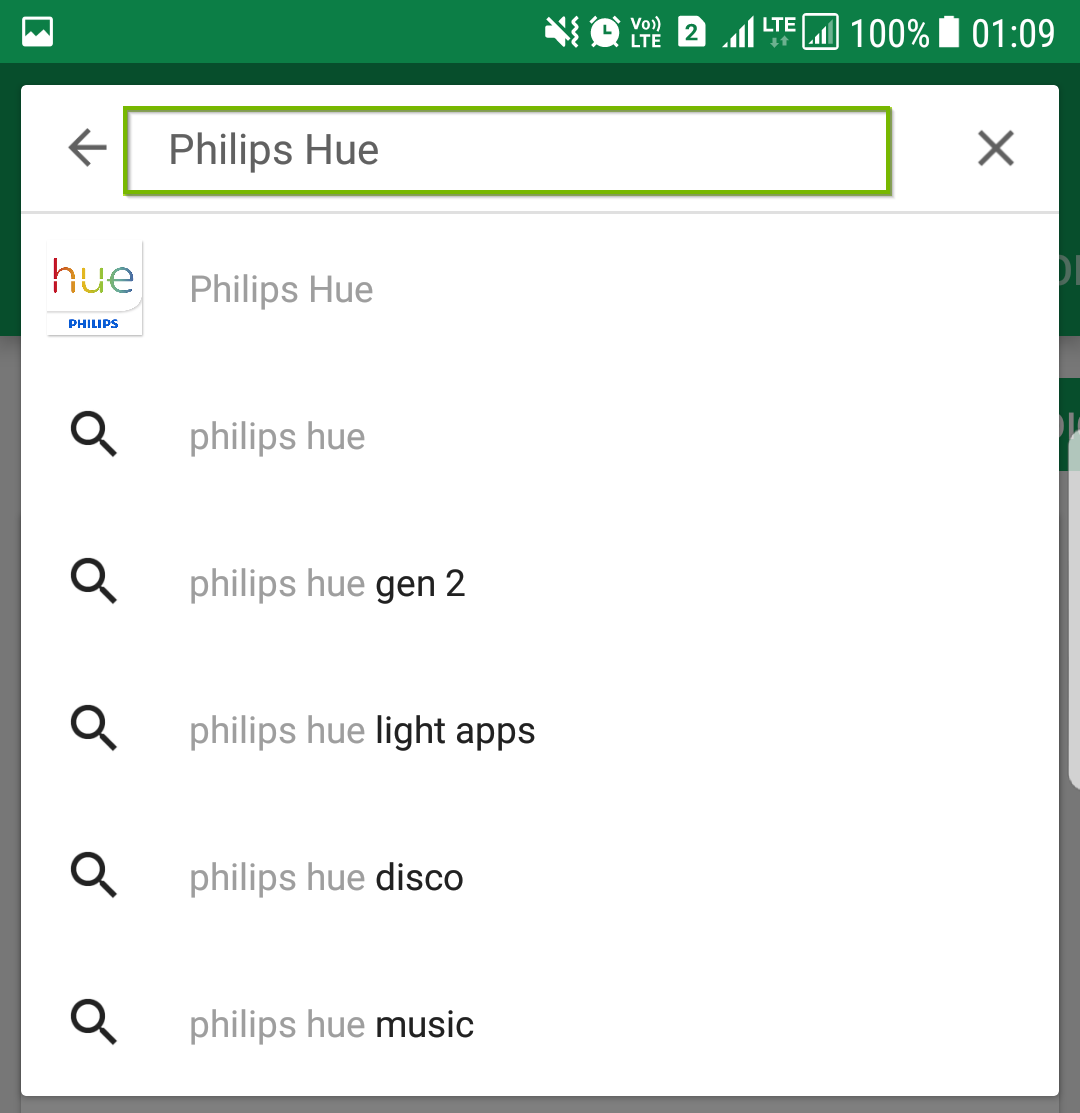
Be aware that there are lots of third-party Philips Hue apps available, so when searching for it within the app store or marketplace for your device, you’ll want to make sure to download the official Philips app in order to properly set up your lights.
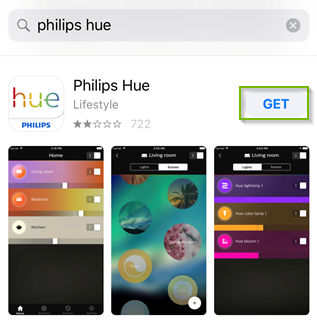
5. Philips Hue: Install iOS App
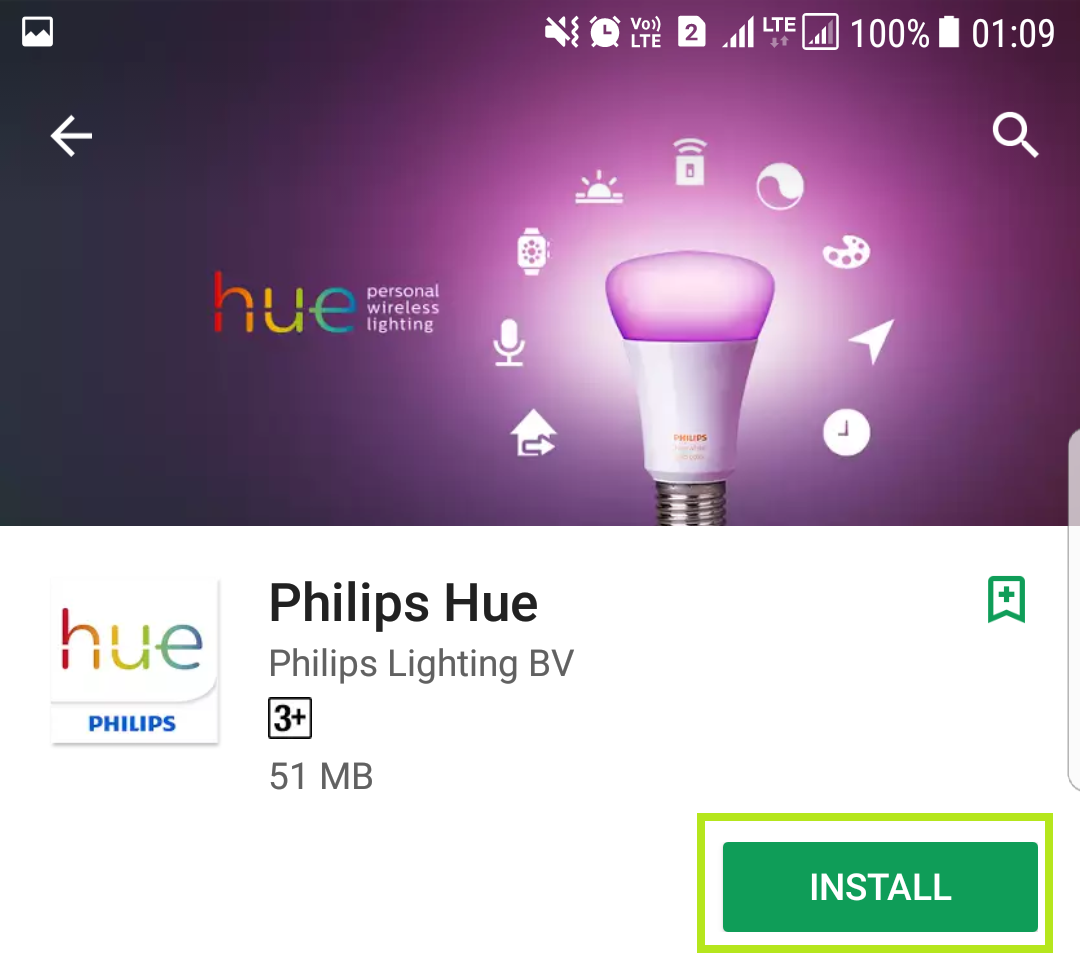
Open App Store.
Type in "Philips Hue" in the search bar.
Select Philips Hue in the search results.
Choose GET and install the app.
Open the app to proceed with the setup.
6. Philips Hue: Setup iOS App
The app will begin searching for nearby Hue bridges.
When your bridge has been found, tap Set up.
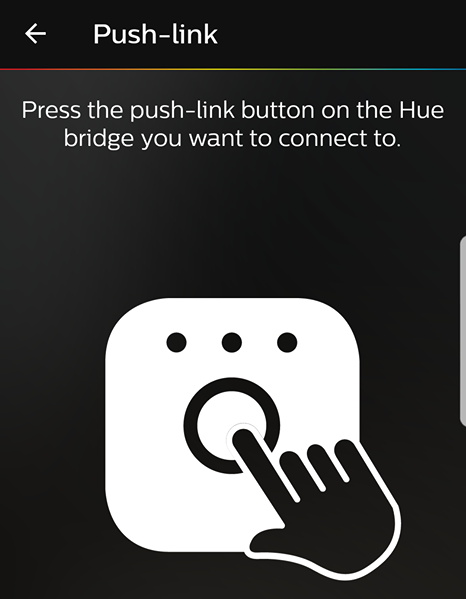
To pair your app to the bridge, you must press the sync button on the bridge.
Go to your Philips Hue Bridge and press the center sync button.
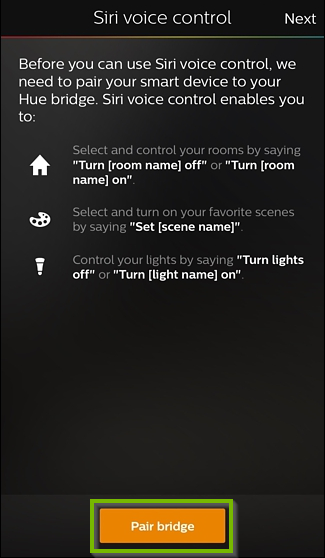
Next, it’s time to set up HomeKit and Siri if you’re an iOS user. Tap on Pair bridge at the bottom.
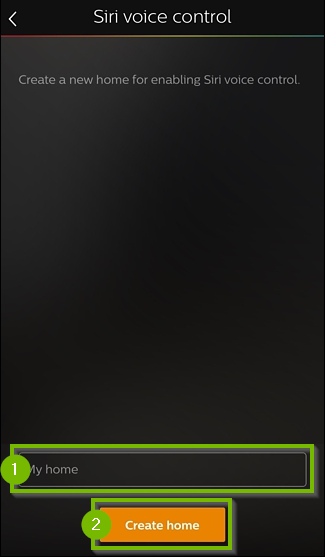
Tap on “My home†at the bottom and give your home a name. “Home†usually works just fine in this case. Tap on Create home when finished.
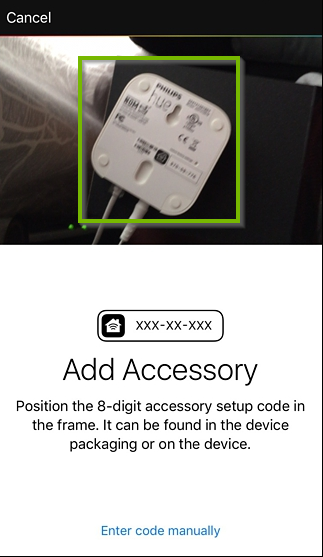
Next, you’ll need to scan the accessory setup code that’s on the back of the Hue Bridge. Hold your phone up to this code and it will detect it automatically. If you need to, you can enter the code manually.
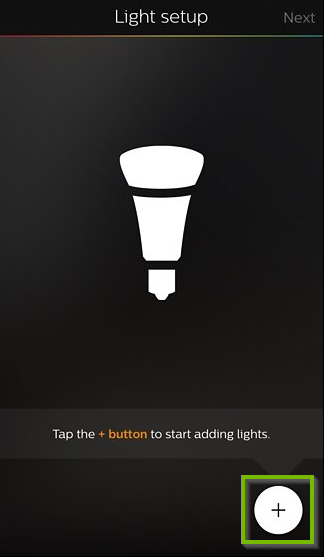
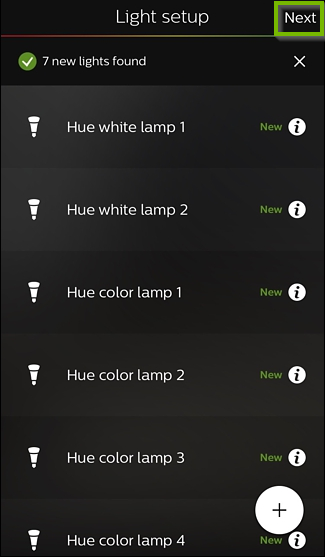
It’s now time for your Hue Bridge to detect all of your Hue light bulbs, so tap on the + icon in the bottom-right corner.
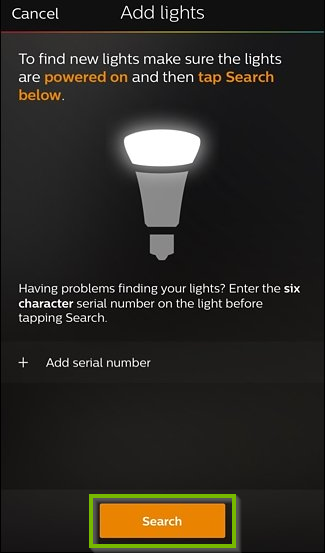
Tap on Search.
It will take several minutes for it to find all of your bulbs. If it doesn’t find all of your bulbs, you can tap on the + icon again and then select Add serial number to manually add the bulbs to your setup.
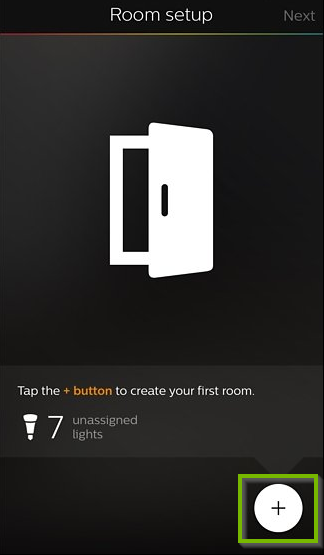
Once all of your Hue bulbs are found, the app will prompt you to group them into rooms for easier control. Tap on the + icon in the bottom-right corner on the next page.
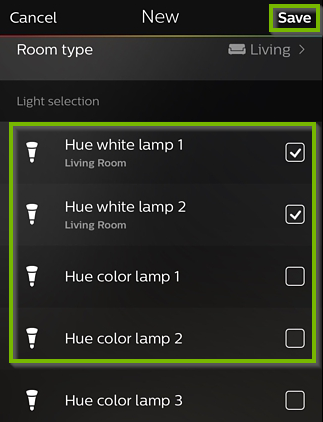
Tap on the text box at the top and give your first room a name. Tap Save when done.
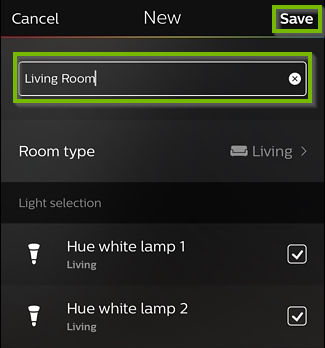
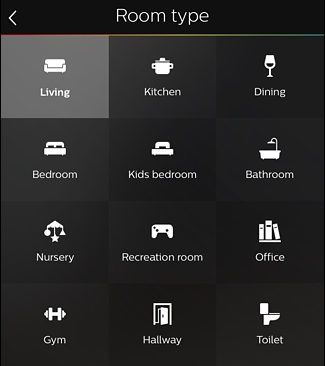
Tap on Room type and select the type of room it is.
Under Light selection, check or uncheck any bulbs that you don’t want associated with this room. Tap Save when done.
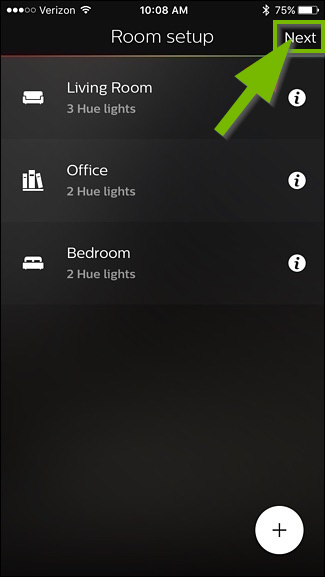
Add more rooms if you want by tapping on the + icon at the bottom. Otherwise, tap on Next.
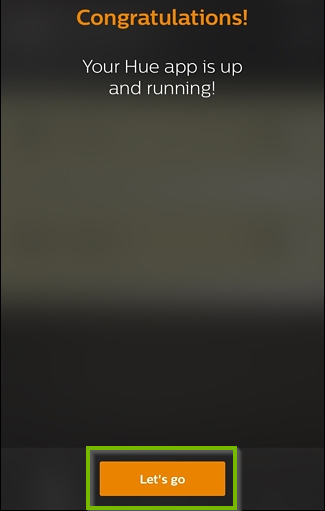
The initial setup is complete. Tap on Let's go to begin controlling your Hue lights.
7. Philips Hue: Setup Complete
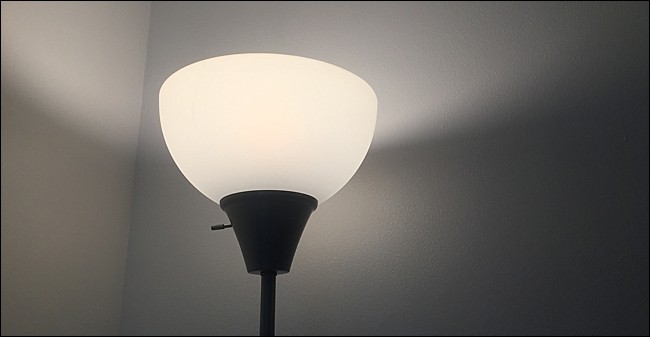
That's it. The Hue is setup and you should now be able to control your light(s) with the app!
8. Philips Hue: Install Android App
Open Play Store.
Type "Philips Hue" in the search bar.
Select Philips Hue in the search results.
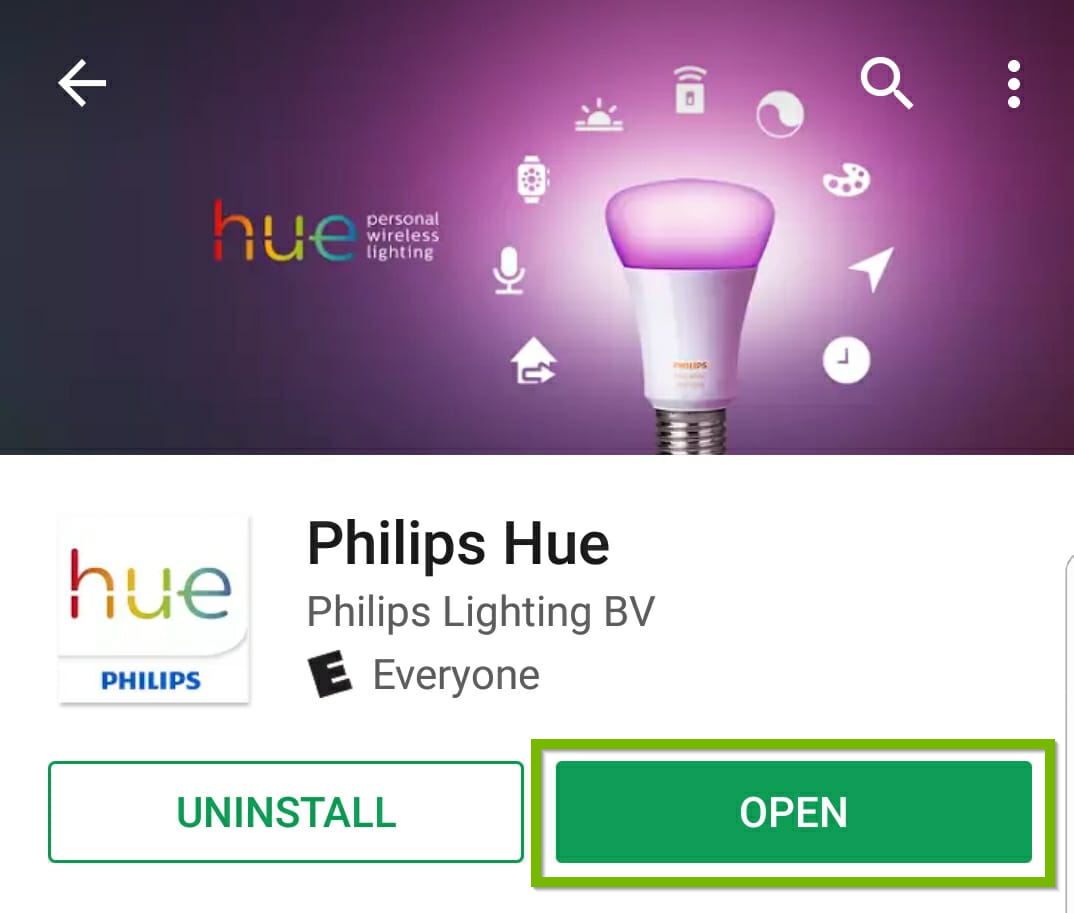
Click Install to start downloading the app.
Once installed, click Open to proceed to the setup. Accept any prompts.
9. Philips Hue: Setup Android App
Tap to open the Philips Hue app.
The app will begin searching for nearby Hue bridges.
When your bridge has been found, tap Set up.
To pair your app to the bridge, you must press the sync button on the bridge.
Go to your Philips Hue Bridge and press the center sync button.
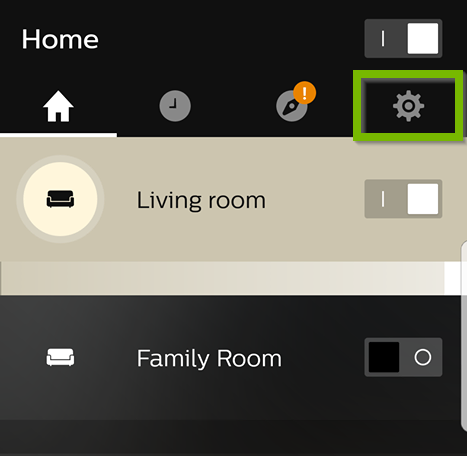
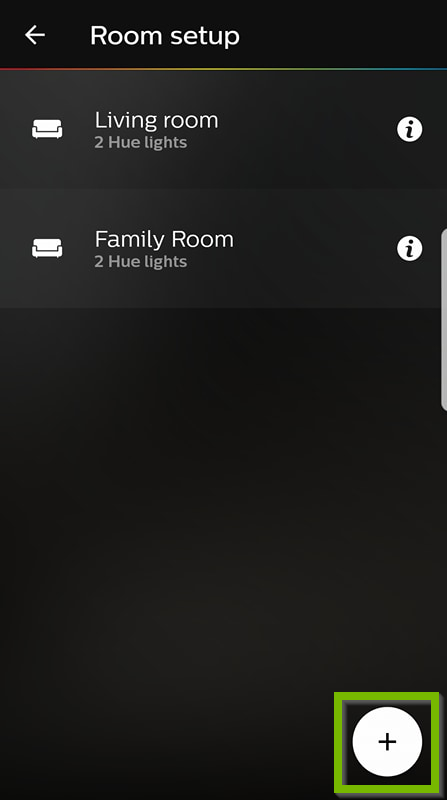
Any rooms that have previously been set up can be seen. You can control the lighting for your rooms here. If you wish, tap the gear icon to begin creating a new room, add new lights or accessories.
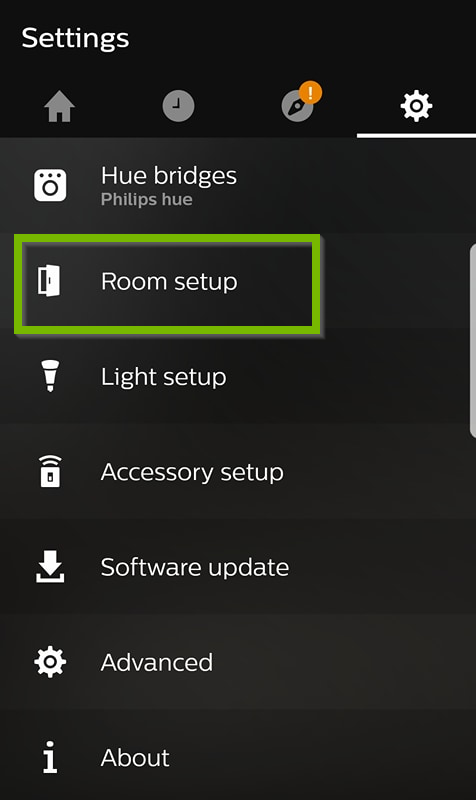
To create a new room, tap Room setup.
Existing rooms will be shown. Tap the + symbol to add a new room.
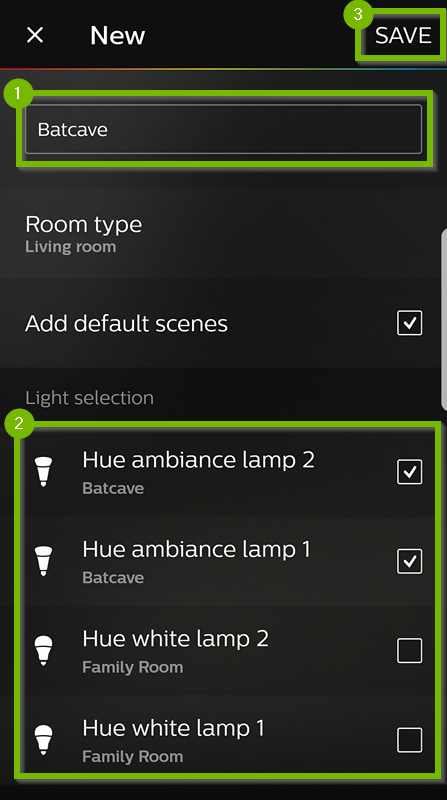
Give your room a name, select some lights to add to this room and then tap SAVE.
Your new room will now show up in the room list where you can now control it.
Remove Hidden Spyware In Minutes For Free
Detect and remove spyware, keyloggers, tracking cookies, and other
threats that slow down your PC or steal your data.
65+ Million Downloads
Spyware scanner with AI-powered detection engine + database
.png)