How to Add a Vivitar Smart Outlet to Alexa
Authored by: Support.com Tech Pro Team
1. Introduction
In This Guide
You'll Learn How To:
- Link your Vivitar Smart Outlet to your Amazon Alexa Assistant so you can remotely control it using your voice or mobile device.
Before We Begin:
2. Add Vivitar Smart Outlet
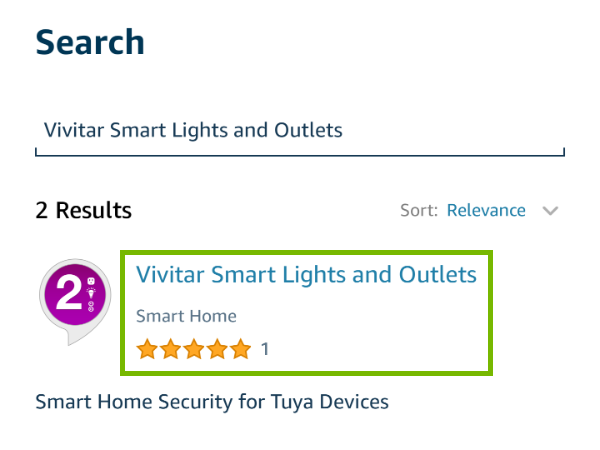
Before you add your Vivitar Smart Outlets to Alexa, you should enable the Vivitar Smart Lights and Outlets skill.
Enable Alexa Skill
- Open the Alexa app on your mobile device.
- Tap the Menu icon and then select Skills & Games.
- Search for Vivitar Smart Lights and Outlets.
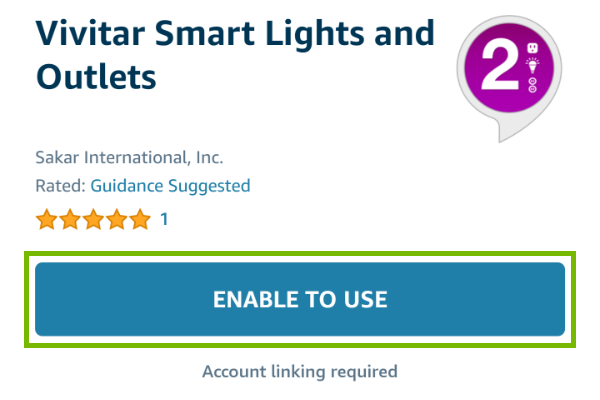
- Tap Enable To Use.
- Enter your Vivitar account credentials and tap Link Now.
Now that we've added the Alexa skill, we can add the device to Alexa.
You may need to switch to another method if one does not work. Some devices need more information to be recognized.
Using Voice Commands
- Activate Alexa (usually, you can say "Hey Alexa").
- Say "Discover My Devices".
- The Alexa system will attempt to find any available smart home devices and prompt you through setting them up.
- Listen carefully to what Alexa says and respond with the information for your device.
Using The Smartphone App
- Open the Alexa app on your mobile device.
- Select Devices.
- Select Add.
- Select Add Device.
- Select Plug.
- Select Other.
- Follow the instructions on the screen to connect your smart home device to Alexa.
Using Your Computer
This option only works if you already have an Alexa speaker setup with your Amazon account.
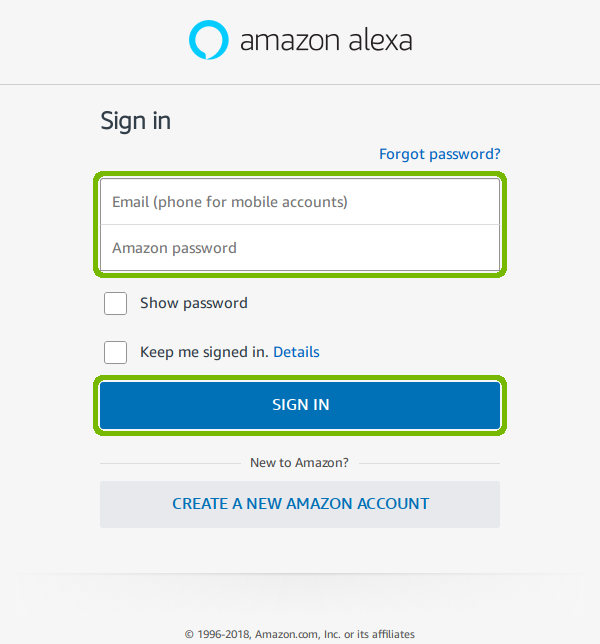
- In the address bar of your browser, type alexa.amazon.com, and press enter or return.
- Enter your Amazon account Email and Password, then select Sign In.
- Follow the instructions on screen to connect your Smart Home device to the Alexa services.
.png)