.png)
Authored by: Support.com Tech Pro Team

How to automate bookkeeping with auto-updates in Wave Financial
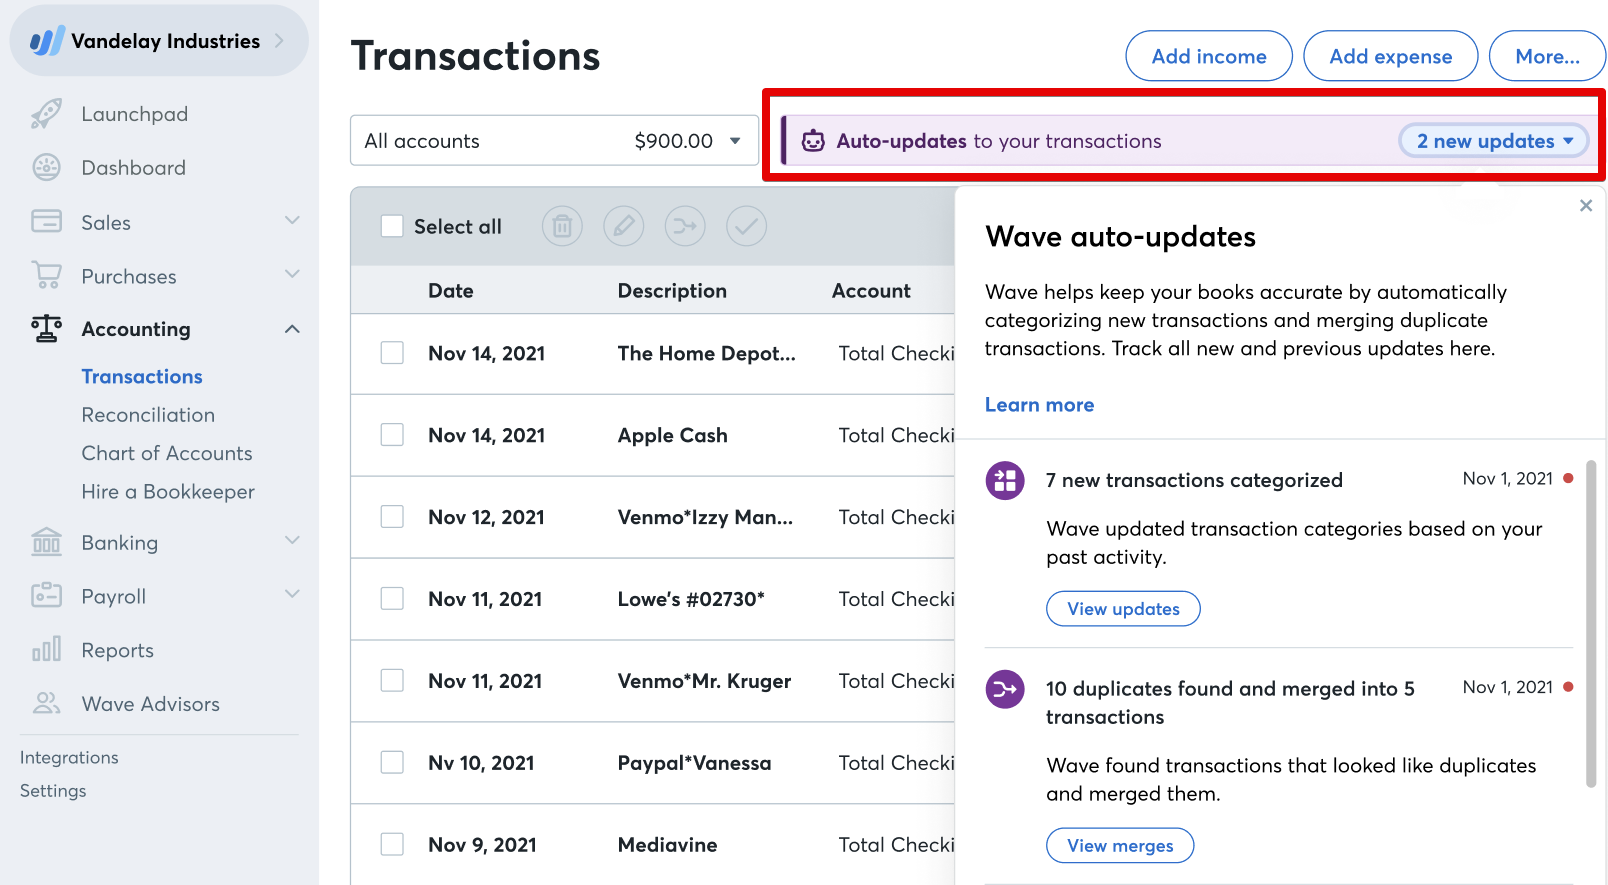
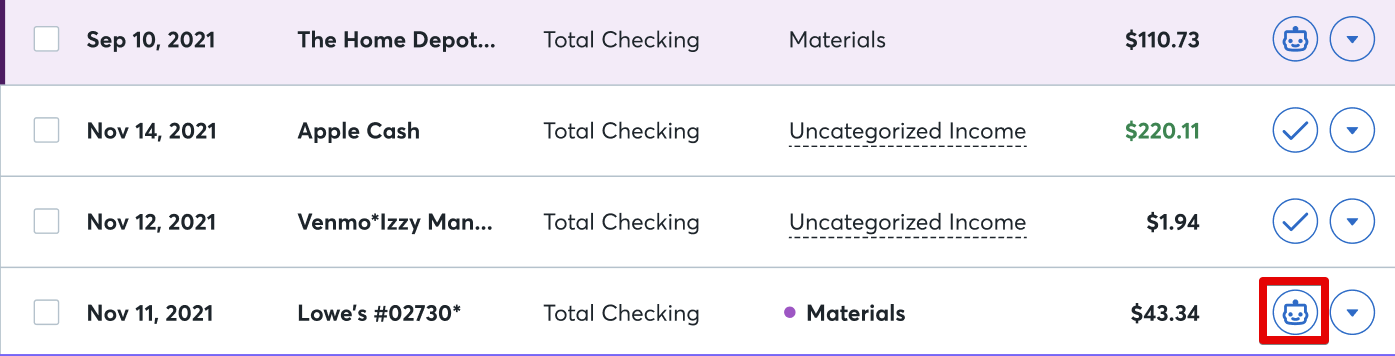
Wave also highlights transactions that were auto-updated on the Transactions page so that you can easily identify them. The auto-updates Wave made are highlighted on a transaction as described below:
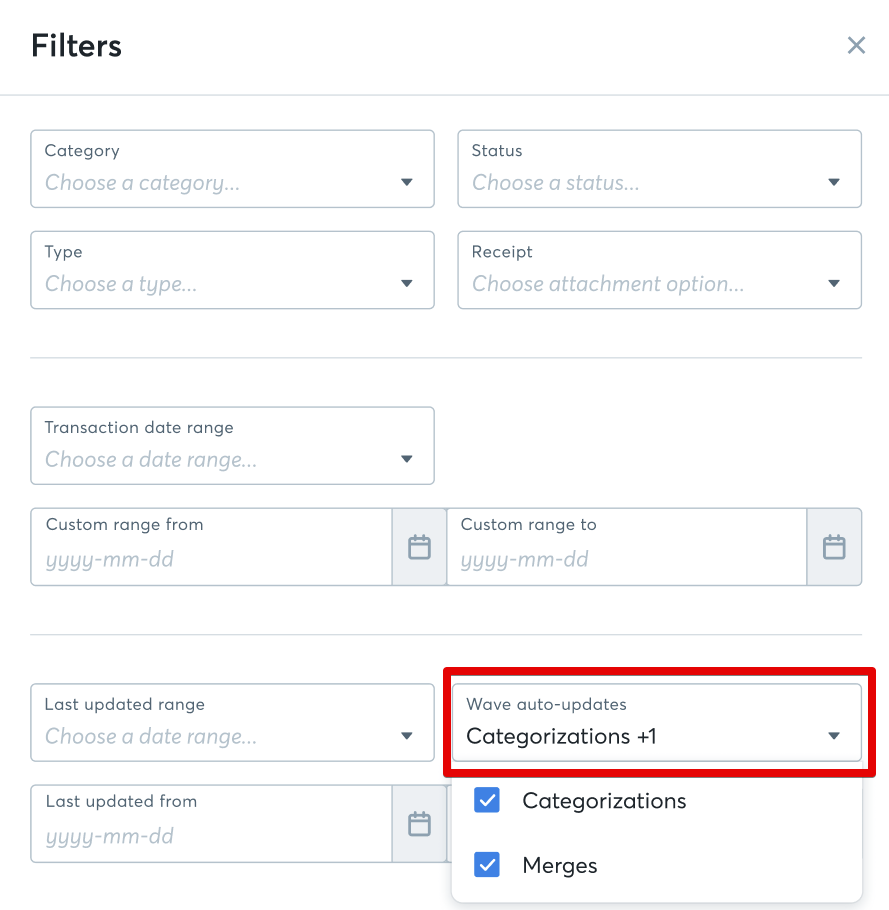
The Wave auto-updates filter replaces the Automerge filter.
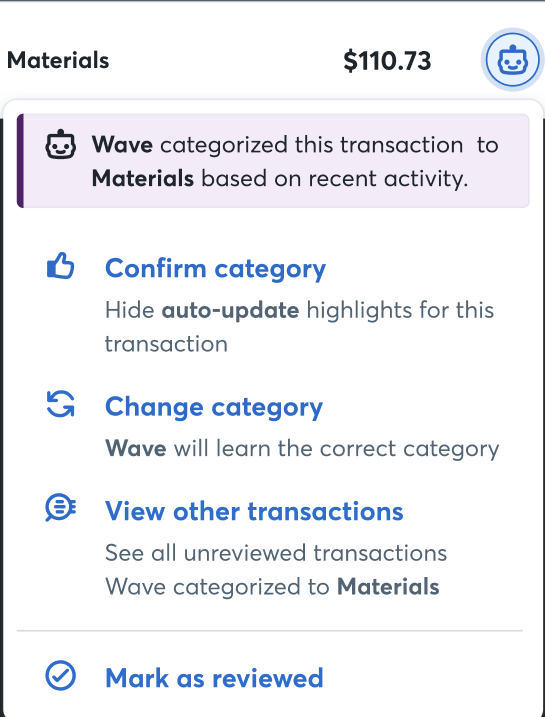
When you identify a transaction that has been automatically categorized or merged, confirm the transaction is accurate, or make necessary corrections.
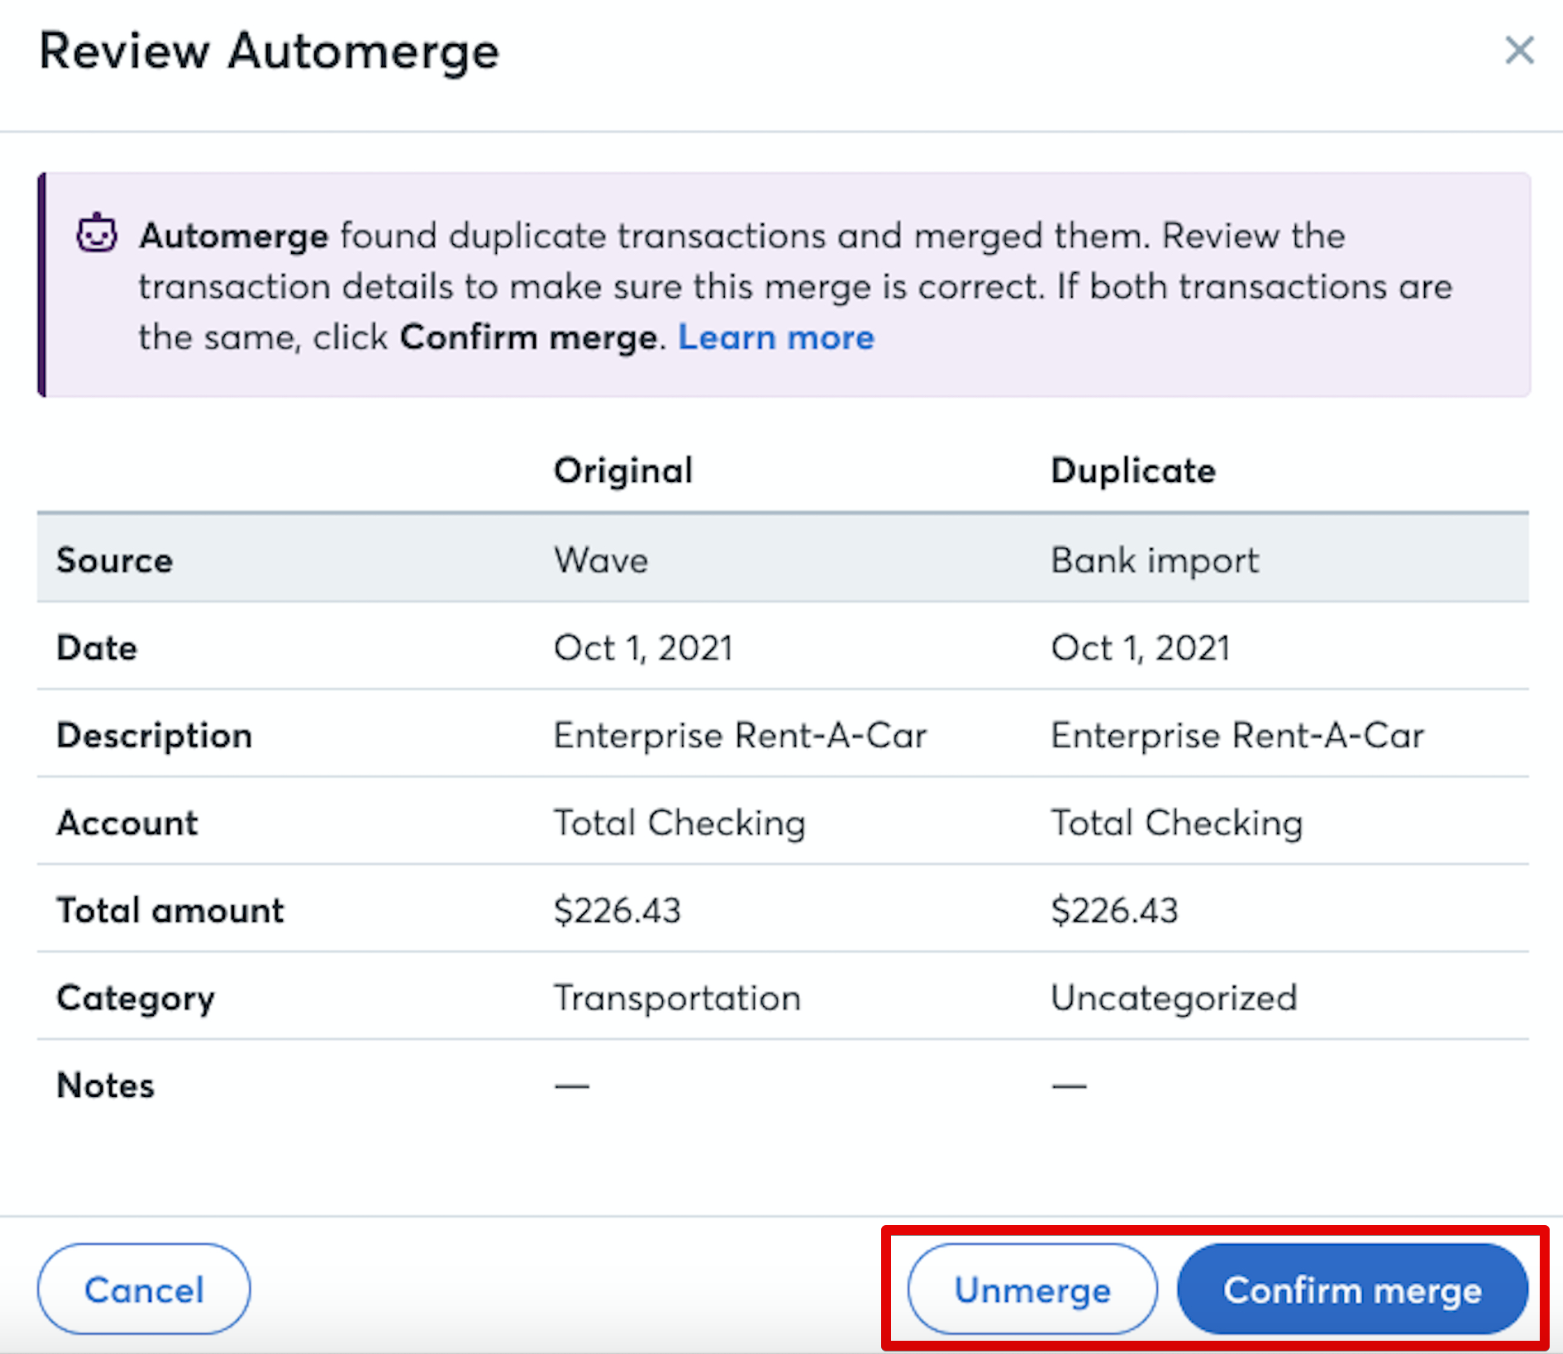
If a transaction has been automatically categorized and merged, you can review the categorization and the merge separately. You can choose which you would like to review first;
If the transaction hasn’t also been automatically categorized, you’ll see Review Automerge instead of Review merge.
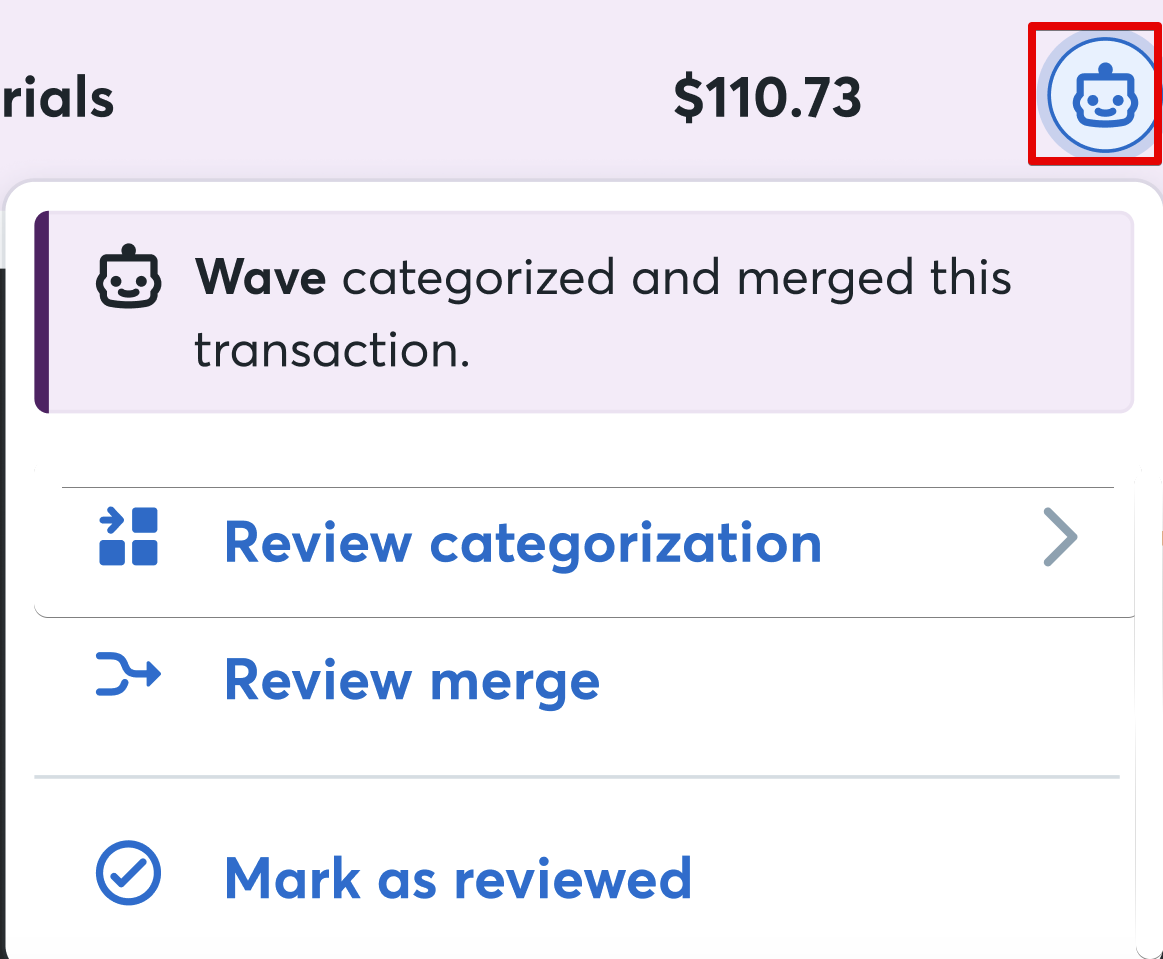
When reviewing the categorization:
Selecting either of these options removes the purple dot on the transaction. If there are other unreviewed transactions that were categorized to the same category, you will see a View other transactions option to view those transactions.
When reviewing the merge:
Selecting either of these options removes the purple highlight on the transaction.

Support.com is committed to your privacy
We do not share or sell your data to third parties. We do use cookies and other third-party technologies to improve our site and services. The California Consumer Privacy Act (CCPA) gives you the ability to opt out of the use of cookies, third-party technologies and/or the future sale of your data. Do not sell my personal information.

Support.com is committed to your privacy
Read our Privacy Policy for a clear explanation of how we collect, use, disclose and store your information
