.png)
Authored by: Support.com Tech Pro Team
Your iPhone or iPad contains a wealth of important data, including photos, contacts, messages, and app data. To ensure that your valuable information is safe and easily recoverable in case of device loss, damage, or data corruption, it's essential to regularly back up your iOS device. In this comprehensive guide, we'll walk you through various methods and tools to back up your iPhone or iPad.
iCloud is Apple's cloud storage service, and it offers seamless and automatic device backup.
Connect to Wi-Fi: Ensure your device is connected to a Wi-Fi network to avoid excessive data usage.
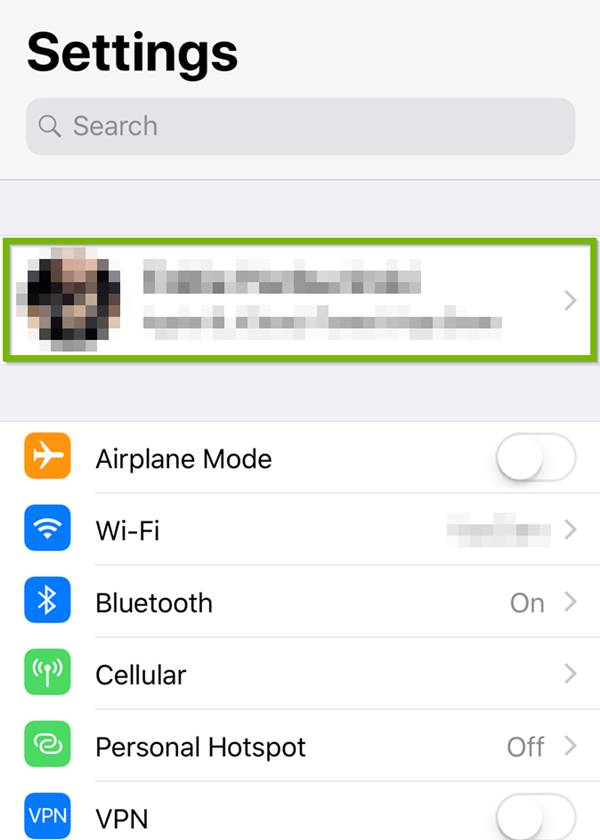
Open Settings: Go to the Settings app on your iPhone or iPad.
Tap Your Name: At the top of the Settings menu, tap on your Apple ID name.
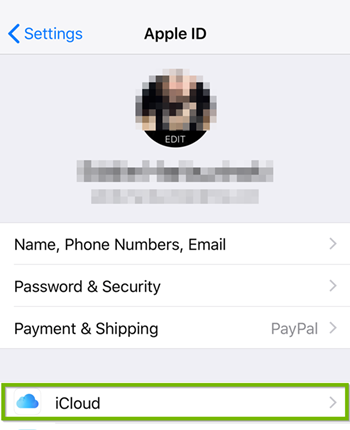
Select iCloud: Scroll down and select "iCloud."
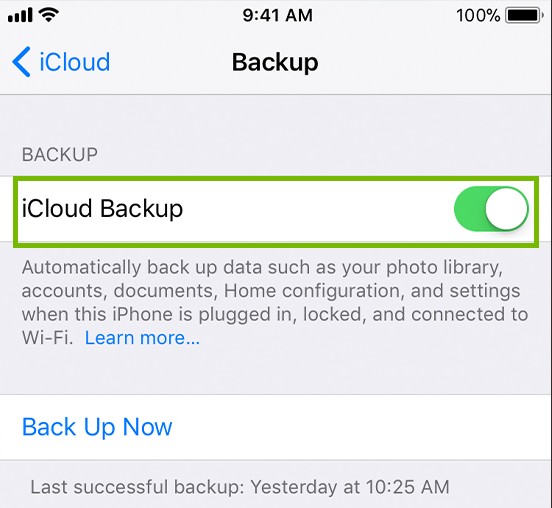
Choose iCloud Backup: Tap on "iCloud Backup."
Turn on iCloud Backup: Enable the "iCloud Backup" toggle switch.
Back Up Now: Tap "Back Up Now" to initiate an immediate backup. Your device will back up automatically when connected to Wi-Fi and charging.
Check Last Backup: In the "iCloud Backup" section, you can see the date and time of your last backup.
Manage Storage: To view and manage your iCloud storage, tap on "Manage Storage" within the "iCloud Backup" section. Here, you can see what's taking up space and delete unnecessary backups.
You can create a local backup on your computer using iTunes or Finder.
Launch iTunes or Finder: Open iTunes (macOS Catalina and earlier) or Finder (macOS Big Sur and later) on your computer.
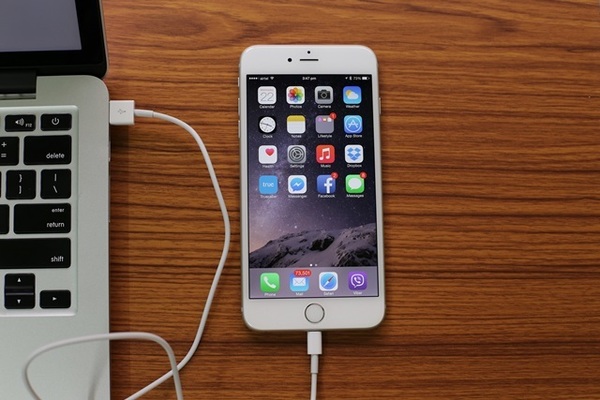
Connect Your Device: Use a USB cable to connect your iPhone or iPad to your computer.
Trust This Computer: If prompted, tap "Trust This Computer" on your device.
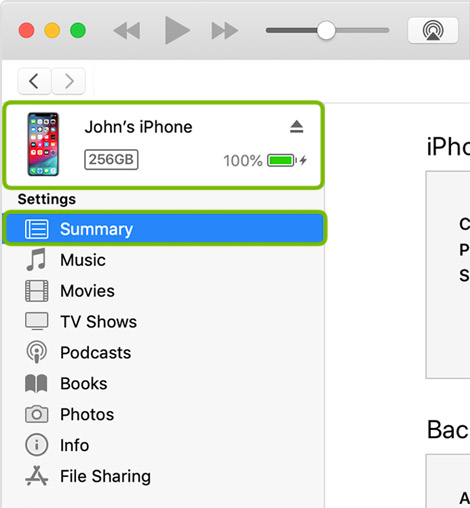
Select Your Device: In iTunes or Finder, select your device when it appears.
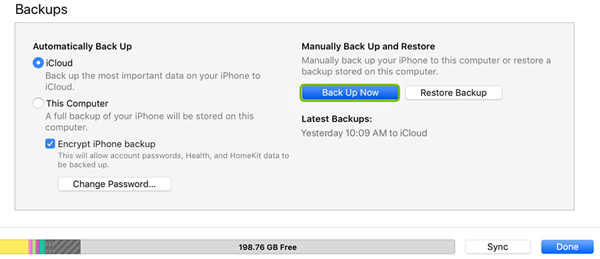
Backup Option: In the "Summary" or "General" tab, under the "Backups" section, choose "This computer."
Back Up Now: Click "Back Up Now" in iTunes or Finder. Your device's data will be backed up to your computer.
Several third-party apps, like iMazing and Dr.Fone, provide advanced backup options, including app data and settings.
Install a Backup App: Choose a backup app from the App Store, install it on your device, and follow the app's instructions to back up your data. Each app may have its own backup process.
Apple provides iCloud Photos, which can automatically back up your photos and videos to the cloud.
Enable iCloud Photos: Go to Settings > Photos and enable "iCloud Photos." This will upload your media to iCloud, and you can access it on any Apple device signed in with your Apple ID.
Ensure your contacts are always safe and accessible.
iCloud Contacts: Your contacts are often synced with iCloud by default. You can access them at icloud.com/contacts.
Export to vCard: You can export contacts to a vCard file, which you can email to yourself or save to a cloud storage service.
To back up text messages and call logs, consider the following options:
iCloud Backup: Your messages and call history are included in your iCloud backup.
iTunes/Finder Backup: When you create a local backup using iTunes or Finder, your messages and call history are also included.
Frequent Backups: Make it a habit to back up your iPhone or iPad regularly to ensure your data is always up to date.
Storage Management: Be mindful of your iCloud storage capacity. If you run out of space, you may need to purchase additional storage or manage your existing data.
Encryption: iTunes and Finder backups are encrypted by default, while iCloud backups are encrypted as well. This ensures the security of your data.
By following these steps and utilizing the tools available, you can ensure that your iPhone or iPad is regularly backed up, safeguarding your data against unforeseen circumstances. Regular backups are essential for a worry-free digital experience, and they ensure that your valuable data is never lost.
If you are still having trouble, refer to the Step-By-Step Guide below or consider seeking personalized assistance from Support.Com.
Just about everyone brings their smartphone or tablet with them wherever they go. Unfortunately, this means that those devices are almost always in danger of getting lost, damaged, or stolen. Making sure those devices are backed up means that you're protected no matter what happens. For iOS devices, iCloud and iTunes are the only truly complete backup options, backing up not only your photos and videos, but also your contact list, text messages, data from apps, and all of your settings. This guide will go over how to make sure your iOS devices are being properly backed up.
Tools You'll Need:
-->
Supplies You'll Need:
-->
Before You Begin:
Installing iTunes
Connect your iPhone, iPad, or iPod Touch to WiFi

There are two ways to backup your iOS device: iCloud, and to your computer via iTunes.
iCloud has been the default way to backup your iOS devices since iOS 5. The first 5GB of files you backup using iCloud are free. Once this has been filled up, you'll have to pay a monthly fee. Photos and videos can fill up your free 5GB fast. If you take a lot of pictures, you may need to consider upgrading your iCloud storage, or backup using iTunes instead.
While iCloud is the default backup method, it will need to be turned on.


From now on, whenever your iOS device is connected to WiFi and not in use (locked), it will automatically back itself up to iCloud.
To backup using iTunes, you will need to connect your device to your computer. You'll be using the USB cable that it came with to do this. While this method is free, it is not automatic and will take some time to download all of the data on your device over to your computer.


Support.com is committed to your privacy
We do not share or sell your data to third parties. We do use cookies and other third-party technologies to improve our site and services. The California Consumer Privacy Act (CCPA) gives you the ability to opt out of the use of cookies, third-party technologies and/or the future sale of your data. Do not sell my personal information.

Support.com is committed to your privacy
Read our Privacy Policy for a clear explanation of how we collect, use, disclose and store your information
