For most people, the Nintendo Wii U will automatically get the proper settings from your home router, to allow you to play your games online easily. Sometimes, though, because of a custom network setup or other reasons, it may become necessary to set the DNS servers manually.
This guide will take you through the steps of changing the DNS servers on your Nintendo Wii U.
2. DNS Settings
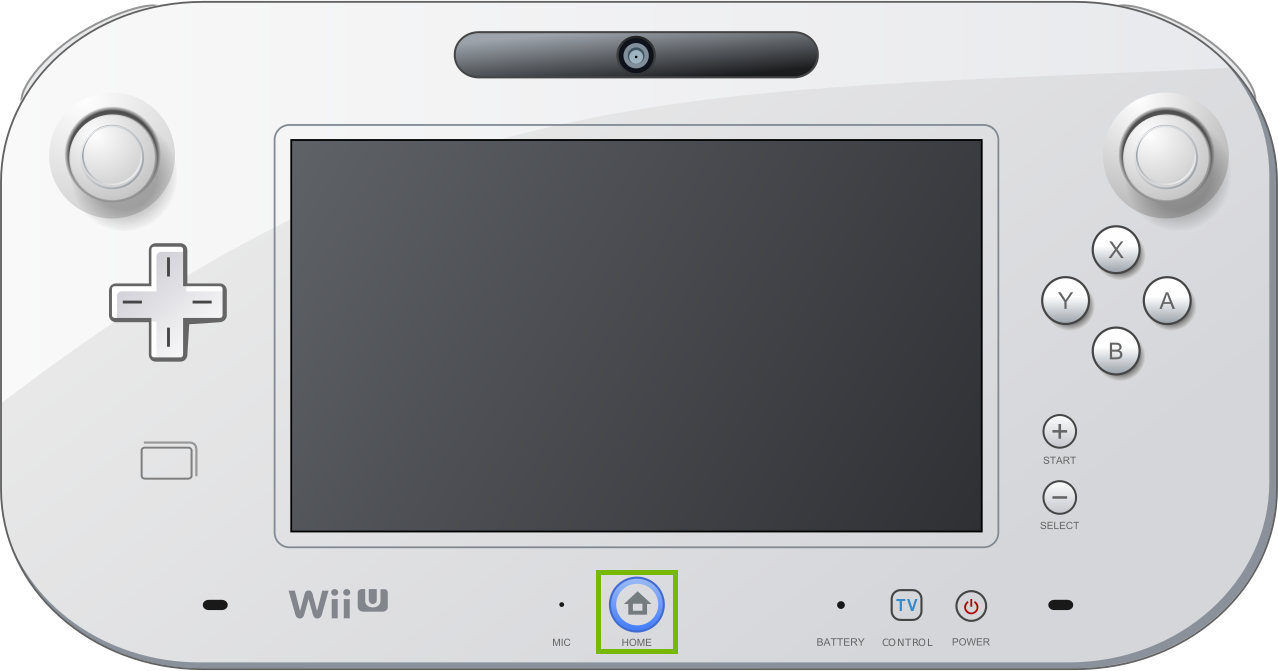
Push the Home Button on your Wii U controller.
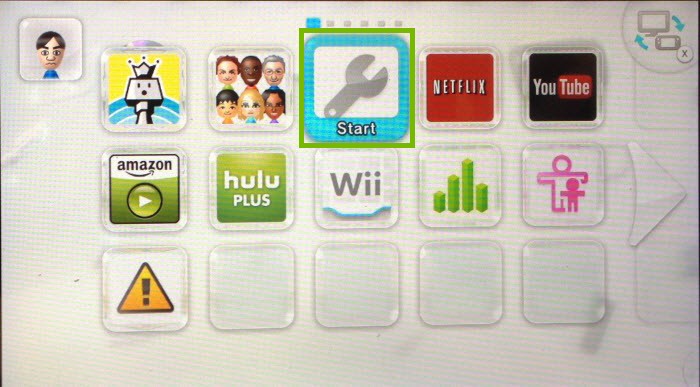
From the menu, select System Settings.
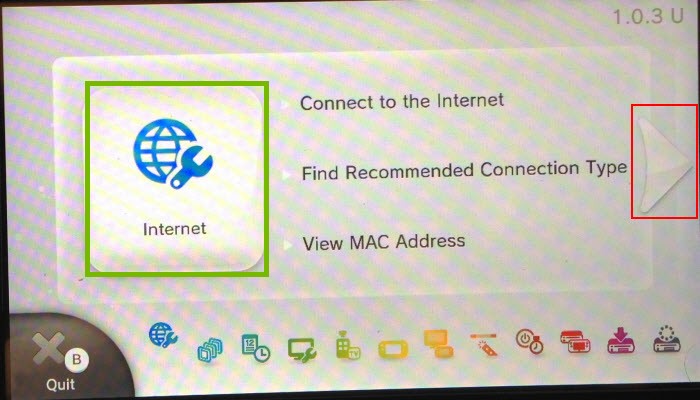
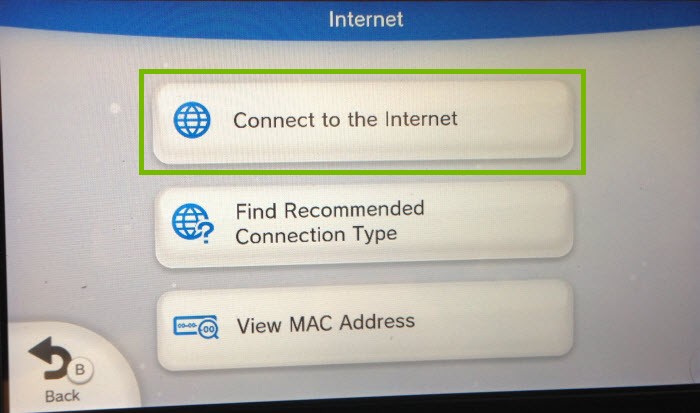
Select Internet.
Select Connect to the Internet.
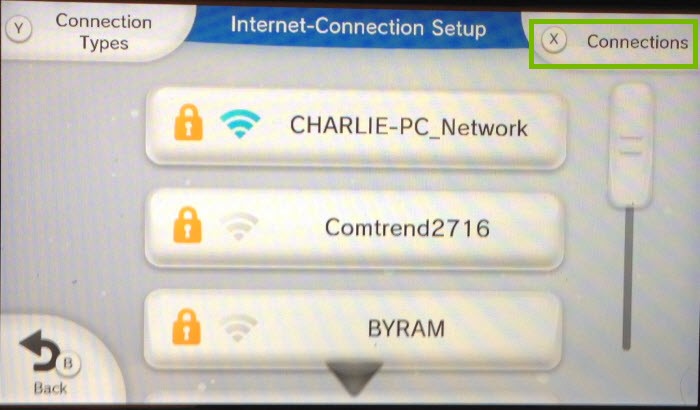
Select Connections in the top-right corner.
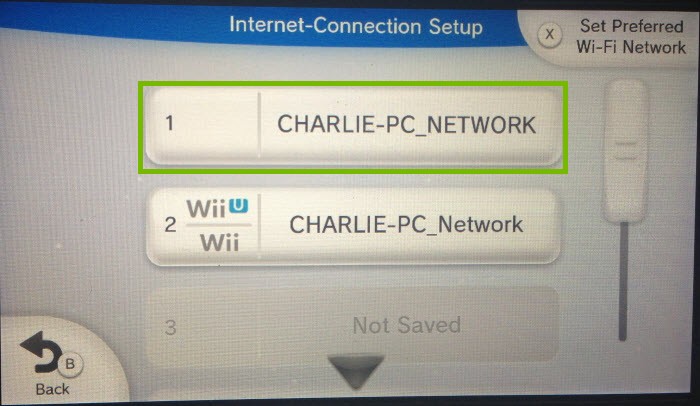
Select your connection from the list. It is most likely the first one.
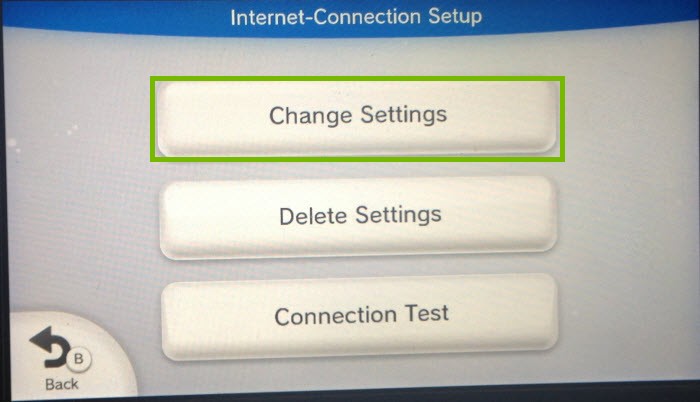
Select Change Settings.
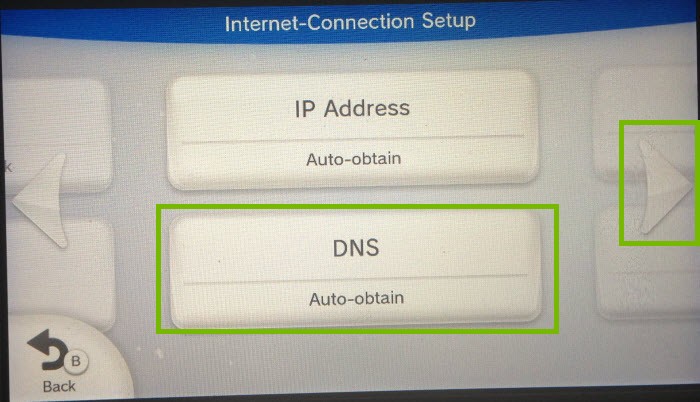
Scroll to the right, then select DNS.
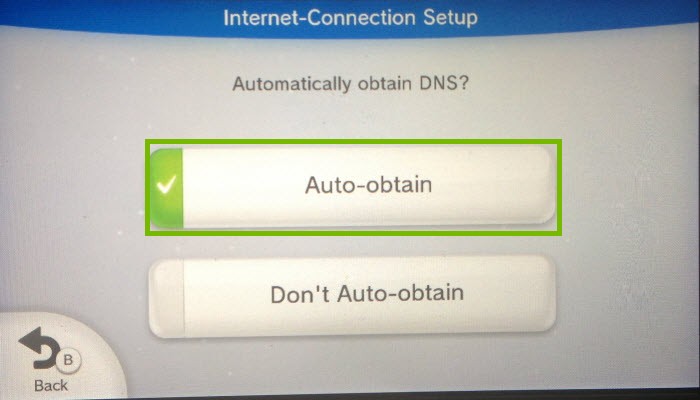
For the next steps, you will be either setting up Automatic DNS or Manual DNS. If you choose Automatic, your router or ISP will pick the DNS. If you prefer to choose the DNS, follow the instructions for Manual DNS setup.
Automatic DNS
If you'd like your Wii U console to automatically get the DNS settings from your router, select Auto-obtain.
Push the Home Button on your Wii U controller to complete setup and exit to the main menu.
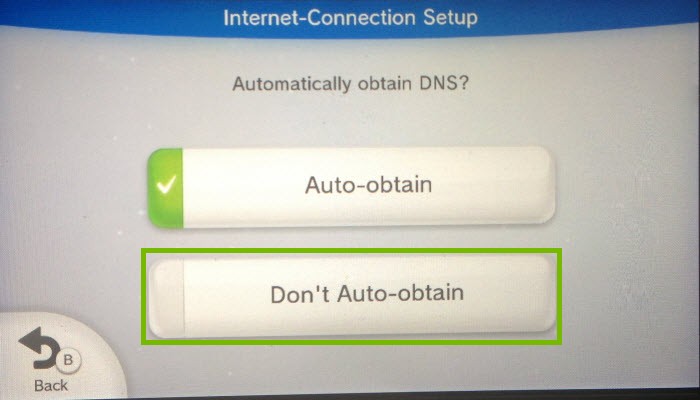
Manual DNS
If you'd like to specify the DNS servers for your Wii U, select Don't Auto-obtain.
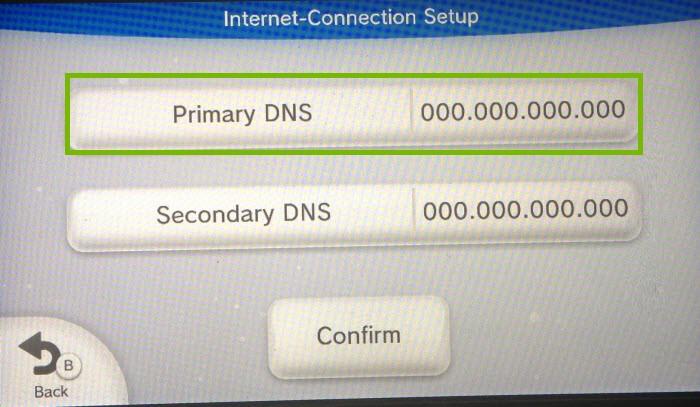
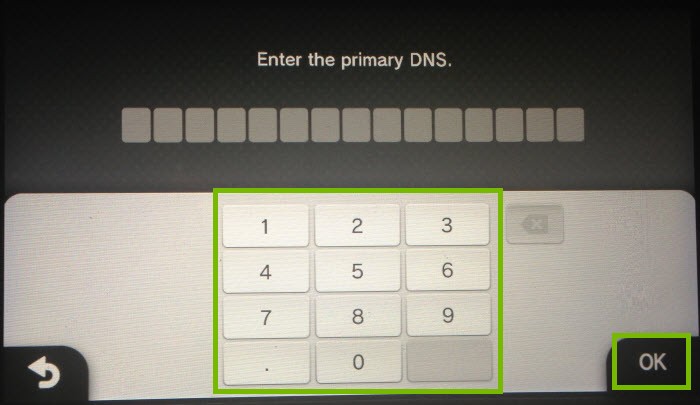
Select Primary DNS.
Using the number pad, enter your Primary DNS server address, then select OK in the bottom-right corner.
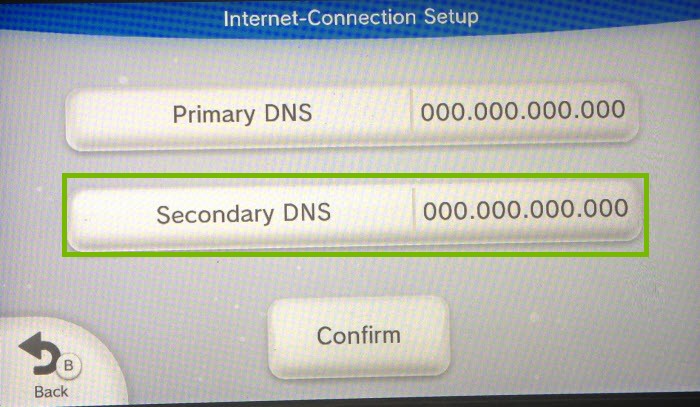
Select Secondary DNS, and enter the Secondary DNS server address, just like you did for the Primary DNS server.
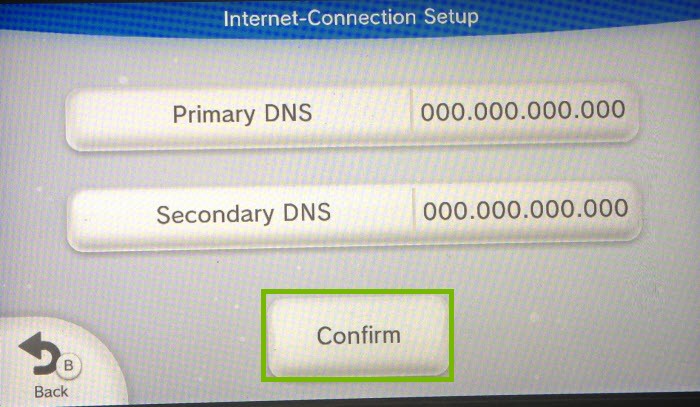
Select Confirm.
Push the Home Button on your Wii U controller to complete setup and exit to the main menu.
3. Test Connection
Push the Home Button on your Wii U controller.
From the menu, select System Settings.
Select Internet.
Select Connect to the Internet.
Select Connections in the top-right corner.
Select your connection from the list. It is most likely the first one.
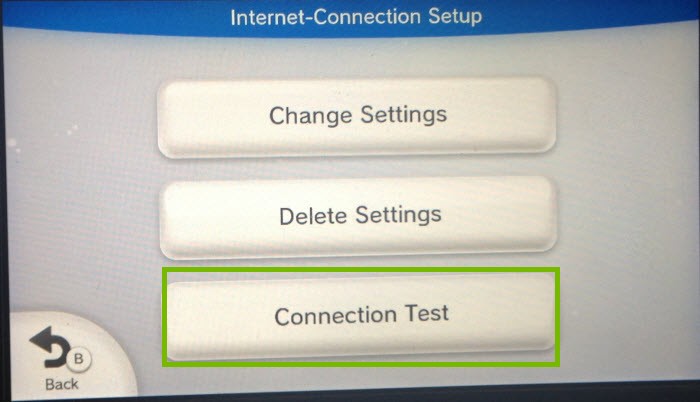
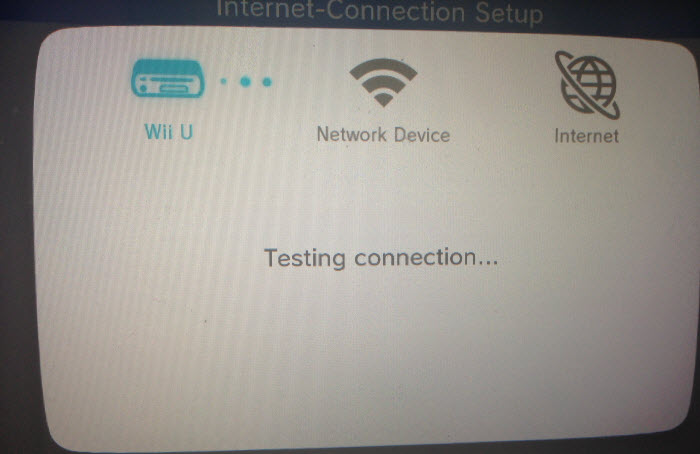
Select Connection Test.
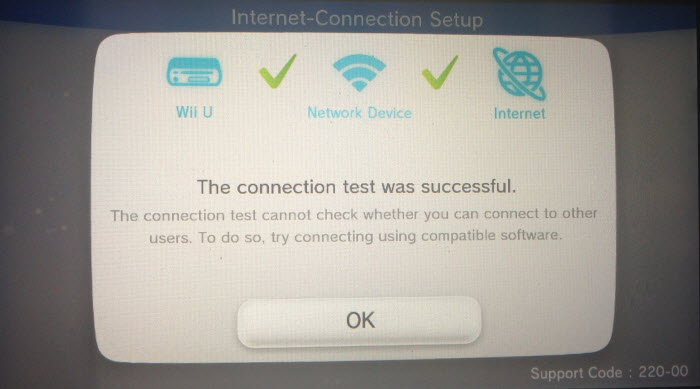
The connection test will run, and complete automatically.
Select OK when done.
4. Restart
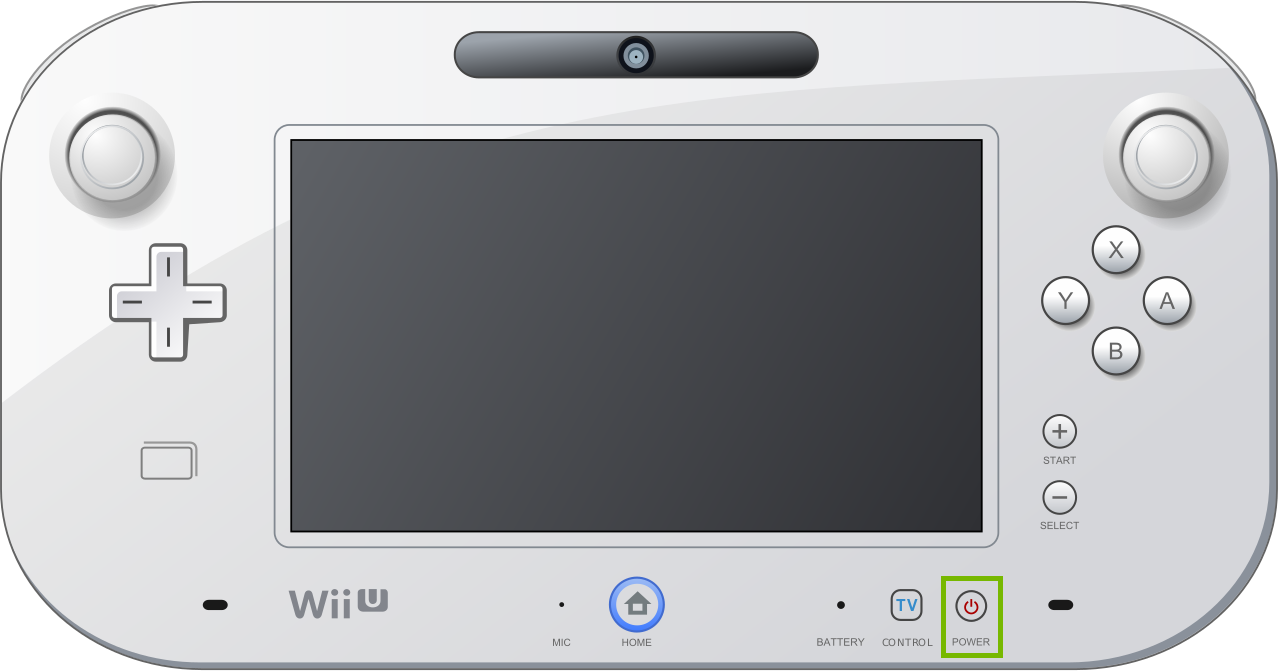
Press and hold the Power Button on the front of the device until the Wii U powers off.
If your Wii U does not power off, unplug the power cable from the wall outlet, wait 15 seconds, then plug it back in.
5. Test Connection
Push the Home Button on your Wii U controller.
From the menu, select System Settings.
Select Internet.
Select Connect to the Internet.
Select Connections in the top-right corner.
Select your connection from the list. It is most likely the first one.
Select Connection Test.
The connection test will run, and complete automatically.
.png)