How to Change DNS Settings on a Sony Smart TV

Authored by: Support.com Tech Pro Team

1. Introduction

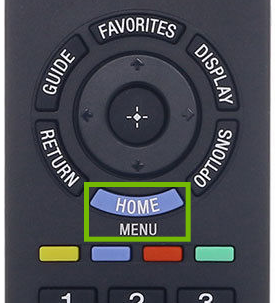
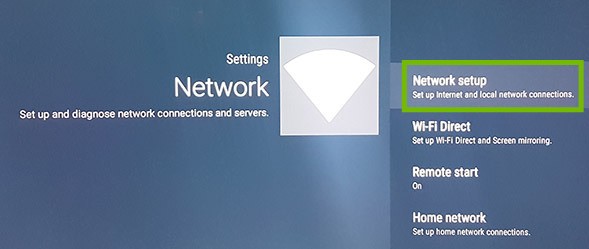
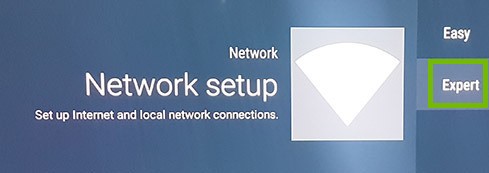
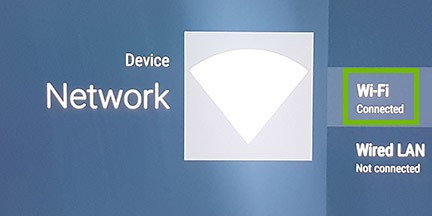
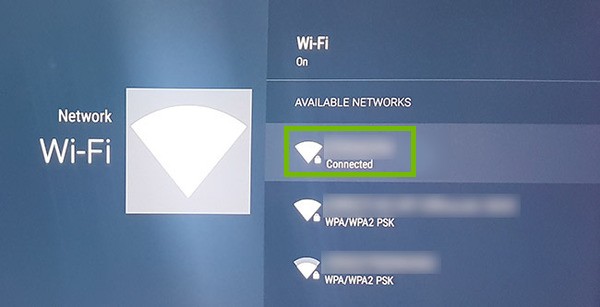
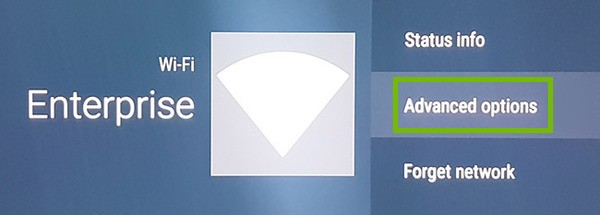
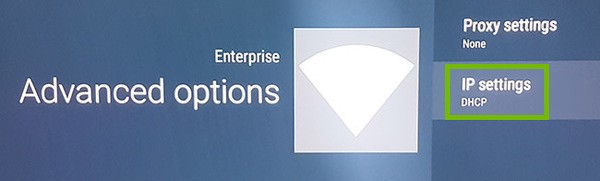
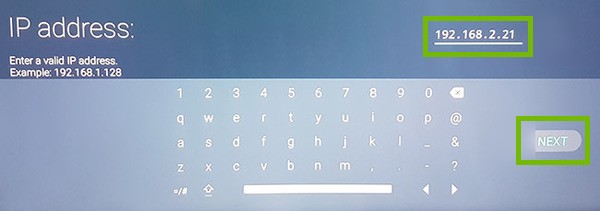
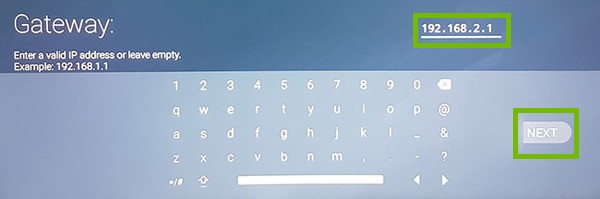
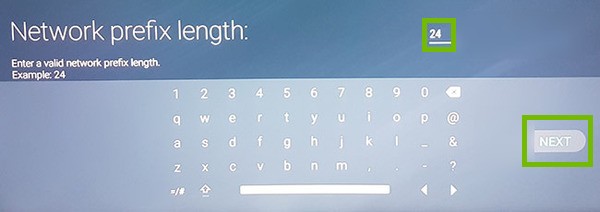
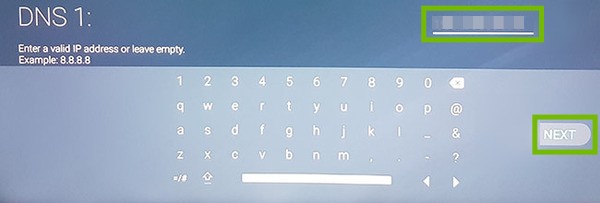
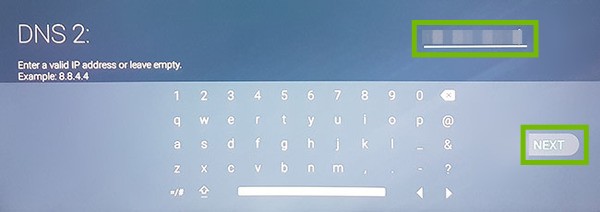
This guide will walk you through setting your own, custom DNS servers on your Smart TV.

Sony and Android TV.

2. Change DNS

  1. Push the Home button on your remote.
Remote inset with Home button highlighted.
  1. Select Settings.
Android Settings.
  1. Select Network.
Settings screen with Network highlighted.
  1. Select Network setup.
Network settings with Network setup highlighted.
  1. Select Expert.
Network Setup with Expert highlighted.
  1. Select your network connection. For example, if you are using a Wi-Fi connection, select Wi-Fi.
Network device selection with Wi-Fi highlighted.
  1. If you chose Wi-Fi, choose your Wi-Fi network. It's usually the one with the word "Connected" underneath it.
Wi-Fi network selection with Connected network highlighted.

  1. Select Advanced options.
Network information with Advanced options highlighted.
  1. Select IP settings.
Advanced options with IP settings highlighted.
  1. For IP settings, select Static.
IP settings with Static highlighted.
  1. Enter an IP address valid for your home network. Usually you can use the one it was using before (filled in automatically). Once entered, select Next.
IP address entry with entered IP and Next highlighted.
  1. Enter your gateway's address. This is the IP address of your router in most cases. Once again, the TV will try to fill this in for you. Once entered, select Next.
Gateway entry with Gateway IP and Next button highlighted.
  1. Next, you'll be asked for your network prefix length. In most cases, 24 is appropriate. Select Next when done.
Network Prefix Length screen with 24 entered and Next button highlighted.
  1. Enter the IP address of the first DNS server you want, then select Next.
DNS 1 with DNS entry field and Next highlighted.
  1. Enter the second DNS server you want, then select Next.
DNS 2 entry with entry and Next highlighted.
  1. Select Ok to complete and confirm your custom settings.