.png)
Authored by: Support.com Tech Pro Team
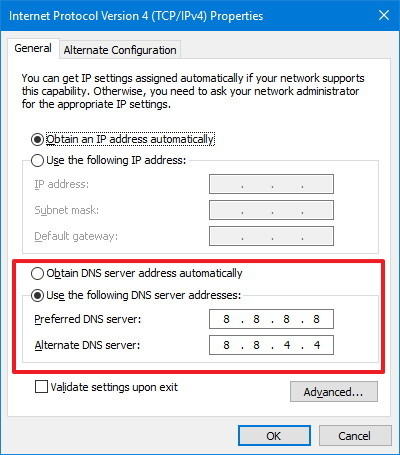
Domain Name System (DNS) servers map domain names to Internet Protocol (IP) addresses. When used in conjunction with search domains, they allow you to go quickly to websites and servers you visit frequently without typing the complete address.
Your home router is likely set by default to use your ISP's DNS servers, which may or may not be very reliable. There are a number of third-party DNS servers available as well.
What you need before you start:


Support.com is committed to your privacy
We do not share or sell your data to third parties. We do use cookies and other third-party technologies to improve our site and services. The California Consumer Privacy Act (CCPA) gives you the ability to opt out of the use of cookies, third-party technologies and/or the future sale of your data. Do not sell my personal information.

Support.com is committed to your privacy
Read our Privacy Policy for a clear explanation of how we collect, use, disclose and store your information
