How to Change DNS Settings on Westinghouse Smart TV
Authored by: Support.com Tech Pro Team
1. Introduction
It may become necessary, for either speed or connectivity reasons, to change the DNS servers your Smart TV uses.
This guide will walk you through changing the DNS server settings your Westinghouse Smart TV uses.
2. Change DNS
Get Your Current Network Information
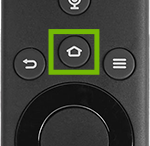
Push the Home button on your remote.
Select Settings from the menu at top.
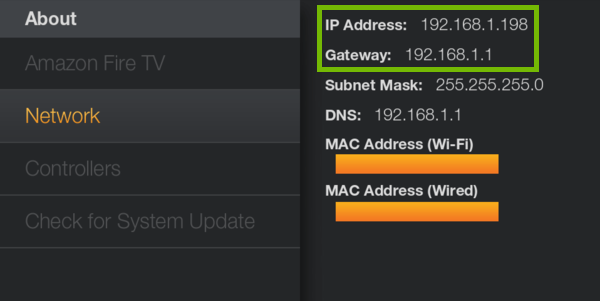
Select About > Network. Make note of your current network information.
At minimum, you will need your Gateway. You will want your IP Address as well unless you're setting up a custom numbering scheme for your network.
Change DNS
Push the Home button on your remote.
Select Settings from the menu at top.
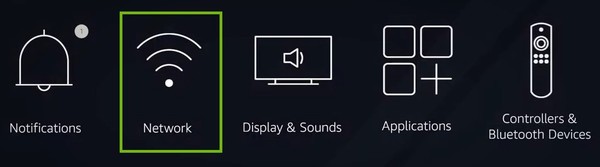
Select Network.
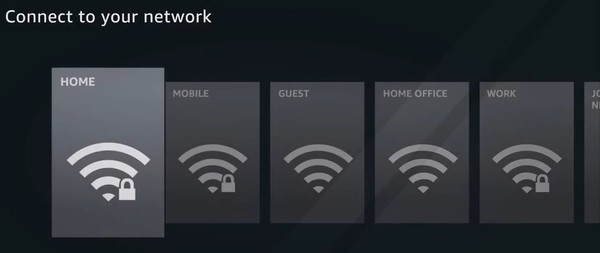
Select your network name.
Choose to Forget your network.
Select your network name.
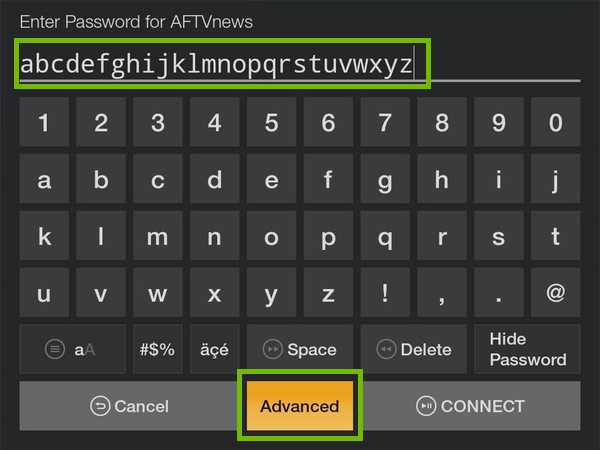
Enter your Wi-Fi password, then select Advanced.
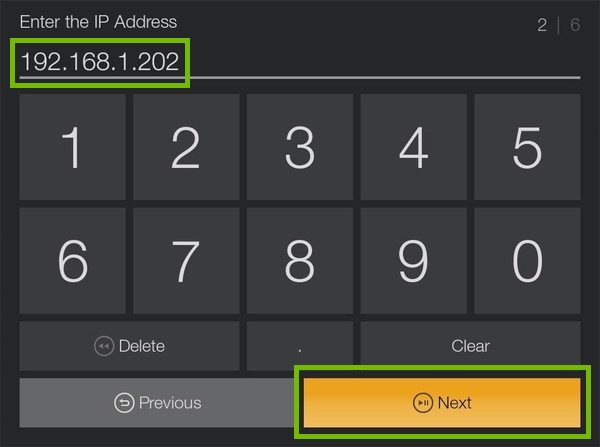
Enter the IP address you'd like for your device, then select Next.If you're not sure, use the same one you wrote down earlier.
Enter the Gateway Address for your router, then select Next.If you're not sure, use the same one you wrote down earlier.
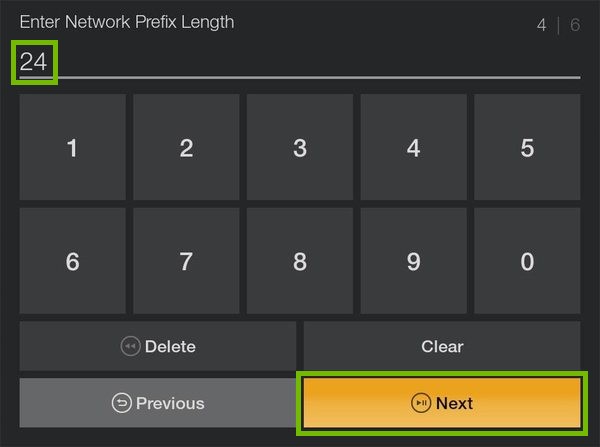
Enter your Network Prefix Length, then select Next.For most home networks, this will be 24. If you are on a managed network, such as at a place of business, talk to your Network Administrator to get this value right.
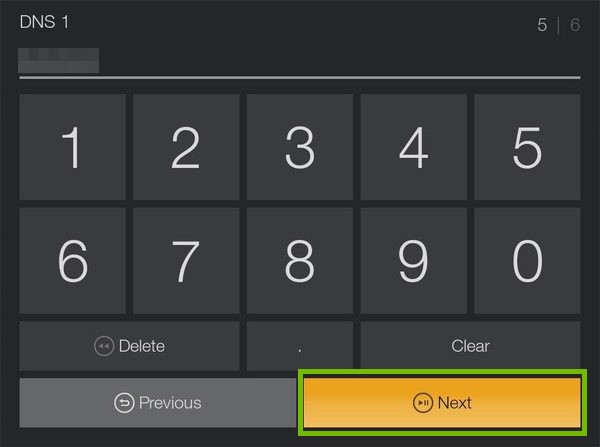
Enter your first, or primary DNS server, then select Next.
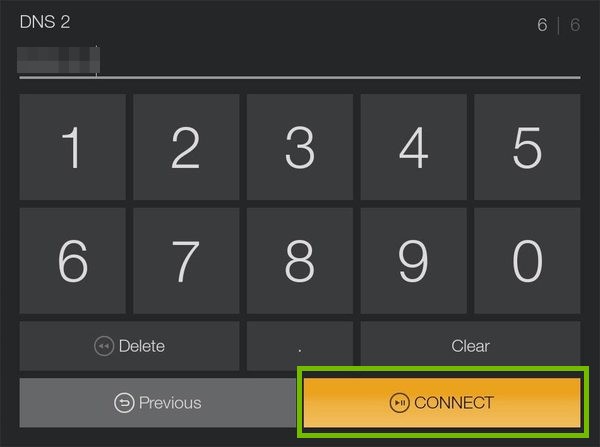
Enter your secondary DNS server, then select Connect.
Test Settings
Make sure you can get online. Bring up some streaming content such as YouTube or Amazon Video and verify everything is working properly.
If there are any problems, repeat these steps from the beginning.
Remove Hidden Spyware In Minutes For Free
Detect and remove spyware, keyloggers, tracking cookies, and other
threats that slow down your PC or steal your data.
65+ Million Downloads
Spyware scanner with AI-powered detection engine + database
.png)