.png)
Authored by: Support.com Tech Pro Team
Updating your operating system software is essential; not only will it bring new features but it will fix vulnerabilities and bugs detected by Microsoft. You can make changes to how Windows checks for and updates itself automatically.
Tools You'll Need:
-->
Supplies You'll Need:
-->
Before You Begin:
Manually Update Windows

There are 3 main versions of Windows currently supported.
Windows 10
Released in 2015, this is the latest version of Windows. It is fully supported by Microsoft.

If you are not sure, most likely you have Windows 10.
Windows 8
Released in 2012, Microsoft only offers extended bug-fix and patch support, no new features.

Windows 7
Released in 2009, Microsoft only offers extended bug-fix and patch support, no new features.

Automatic Updates are on by default and ensure your Windows 10 system is receiving the most up to date patches.


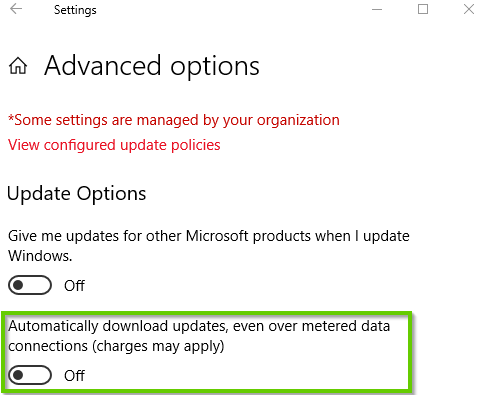
First, let's verify that Automatic Updates is enabled.
First, let's verify that Automatic Updates is enabled.

Support.com is committed to your privacy
We do not share or sell your data to third parties. We do use cookies and other third-party technologies to improve our site and services. The California Consumer Privacy Act (CCPA) gives you the ability to opt out of the use of cookies, third-party technologies and/or the future sale of your data. Do not sell my personal information.

Support.com is committed to your privacy
Read our Privacy Policy for a clear explanation of how we collect, use, disclose and store your information
