How to Connect a Roku to a Windows DLNA Media Server
Authored by: Support.com Tech Pro Team
1. Introduction
DLNA, the Digital Living Network Alliance, is a set of standards to allow sharing video, audio, and pictures easily from a computer or network device to a simpler display device, like a Smart TV or Roku. It provides an easy way to show the movies you have on other screens throughout your connected home.
Tools You'll Need:
Access to your Windows 10 computer to setup the DLNA server
Access to your Smart TV or Roku with DLNA support
-->
Supplies You'll Need:
Zip ties
Any other consumable supplies
Comment out supplies section if no supplies are necessary
-->
Before You Begin:
You must have access to your Windows 10 computer to setup the DLNA server.
You must have access to a Smart TV or Roku with DLNA support.
What is DLNA?
DLNA stands for Digital Living Network Alliance. Usually, it's used to refer to a suite of services that can run on a computer and allow access to a media library by other devices on your home network.
This means it's a quick, easy method to share your whole media library from your computer to the rest of your devices on your home network.
DLNA Server
In this case, you'll be creating a DLNA server on your Windows 10 computer, then connecting your media devices — smart TVs, streaming media players, tablets, and smartphones — to it.
Recommendations
There are a few things to keep in mind when using your computer as a DLNA server.
These are not strict requirements, but rather suggestions to help you have the easiest setup, and best possible experience while sharing your media library.
Your computer is acting as a server. Your computer must remain turned on while you are watching something on your other device.
Power
If your computer is a laptop, it is recommend to keep it plugged into power. Also, it's best to make sure your computer is not set to 'go to sleep' after a set amount of time
Ethernet Connection
It is highly recommended that your computer is connected to a wired Ethernet connection. This provides a more stable, faster connection, as well as lets you use the WiFi bandwidth for the device receiving the video, instead.
2. Enable Media Streaming
First, we need to turn on the media streaming server.
Open the Start Menu and select Settings.
Select Network & Internet.
Select Ethernet (if your computer has a wired connection), or Wi-Fi (if your computer uses a wireless connection) on the left.
Select Network and Sharing Center on the right.
Select Media streaming options on the left.
Select Turn on media streaming.
Name your media library, then select OK.
Shared Files
Next, we need to make sure we're sharing the files you want to share.
In most cases, this will already be setup, but it's best to check to be sure.
Open File Explorer, then select This PC on the left, and Videos on the right.
Make sure you see your movies listed here, and that they have sensible names. Move any other movies you want to be able to play into this folder. This is the folder your other devices will see when they browse for videos to play.
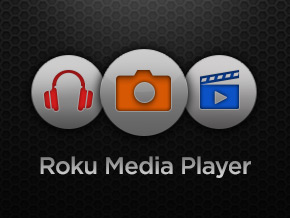
3. Roku Media Player Check
Your Roku has a free media streaming app available that can access the DLNA media server you just setup called "Roku Media Player".
In most cases, this app is pre-installed on your Roku, but it can be removed, either by accident or because it wasn't being used. This isn't a problem, it's fast and easy to reinstall.
Check for Roku Media Player
Press the Home button on your Roku Remote.
Look for Roku Media Player.
4. Install Roku Media Player
Press the Home button on your Roku Remote.
Select Streaming Channels on the left.
Select Search Channels.
Search for Roku Media Player, and select Roku Media Player on the right.
Select Add channel.
Once added, select OK.
5. Roku Media Player
Press the Home button on your Roku Remote.
Select Roku Media Player.
Choose one of the four options.
All
Shows all media offered on the server.
Video
Shows only videos and movies.
Audio
Shows only audio.
Photo
Shows only still photos and still images.
Select your computer from the list of sources.
Select the folders that best describe what you want to see. For example, for videos, select "Videos" then "All Videos".
Select the media you'd like to watch.
Remove Hidden Spyware In Minutes For Free
Detect and remove spyware, keyloggers, tracking cookies, and other
threats that slow down your PC or steal your data.
65+ Million Downloads
Spyware scanner with AI-powered detection engine + database
.png)