If you are still having trouble, refer to the Step-By-Step Guide below, or Contact Support.Com for Personalized Assistance.
1. Introduction
Connecting your computer directly to your Television is a fast, simple way to show what's on your computer directly on your TV, or even use it as a second display.
Tools You'll Need:
An HDMI Cable
Adapters as required by your computer
Supplies You'll Need:
Zip ties
Any other consumable supplies
Comment out supplies section if no supplies are necessary
-->
Before You Begin:
Make sure your computer is close enough to your Television for the HDMI cable to reach between them safely.
What is HDMI?
HDMI provides a near-universal standard for sending video and audio from one device to another. It's a single, relatively thin cable that doesn't get tangled as easily as previous standards, and has full support for high-definition images. As well, it has been designed to be bi-directional, meaning the display will talk to your device or computer, and tell it what resolutions it can support, what color depth is provided, and a myriad of other features your device can use.
Unlike previous standards, HDMI provides a way for both audio and video to be sent by one cable, greatly simplifying setup of home theater equipment, or, when you want to connect your computer to your Television to watch a streaming movie, show family snapshots, or show a presentation at work.
2. Determine the Connection Type for the Computer
For the most part, HDMI "Just Works", meaning it's a simple cable from one device to your display or television, and that's all there is to do!
However, some device manufacturers, especially smaller devices and computers, use a different size HDMI connector, or a different type of connection that, while compatible, requires special cables.
HDMI Connector Types
There are three main types of HDMI connectors available, and they are purely based on size of the devices.
Standard
This is the connector you will see most often. This is the type of connector on the back of modern television sets. It's about 1/2 an inch wide.
Mini
This connection is intended for small, portable devices. Some smaller laptops have chosen this style of connector. You will need a special cable to connect to a standard HDMI port.
Micro
This connection is intended for portable devices. It's most frequently found on digital cameras and camcorders, but a few smaller laptops and single-board computers have chosen this connector type. You will need a special cable to connect to a Standard HDMI port.
Other Connection Types
Along with HDMI, there are a large number of other types of connections available and in use by computers right now. Many are compatible with a simple cable or adapter, while others require converters.
DisplayPort
In most cases, DisplayPort is easily adaptable to HDMI. Cables are simple, and sold online and in larger computer-related stores.
DVI
One of the first digital formats available to computers to talk to monitors. Rare on laptops, but somewhat prevalent on desktops. Easily adapted to HDMI either through an adapter or a cable.
VGA
While encountered regularly, VGA is not a digital format; it's analog. You will need special converter box.
RCA
Rarely encountered on computers, but found commonly on many other components. Again, this is an analog format, and will require a special converter box.
Thunderbolt 2
Used mostly by Apple Mac, the Thunderbolt port requires an adapter or dongle to use an HDMI cable.
Thunderbolt 3
Again, used by Apple Mac, and requires an adapter or dongle to connect to HDMI.
3. Connect the Computer to the TV
Acquire an HDMI cable.
Connect one end of the HDMI cable into an available HDMI port on the TV. Take note of the HDMI input number it is being connected to.
Plug the other end of the cable into your laptop's HDMI out port, or into the appropriate adapter for your computer.
If you are using an adapter, connect that adapter to your computer.
Make sure the TV and the computer are both powered on.
Set the TV to the HDMI Input port that the computer is connected to.
4. Detect and Identify Computer Displays
If your computer's display does not automatically appear on your television screen, you may need to have the computer manually detect the display. Once the television has been detected as a display in Windows, we'll identify it so you can adjust its settings to match your preferences.
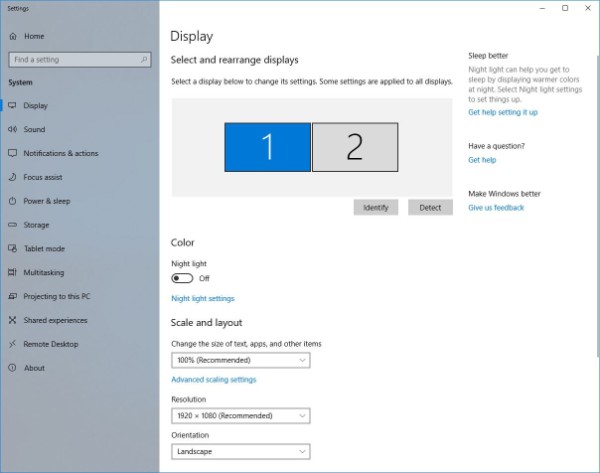
Right-click on any empty space on your desktop, then select Display Settings.
The Display Settings window will appear.
The primary focus of this window helps identify the displays currently connected to the computer. All screens currently detected will be displayed here.
If the computer does not show two displays connected (your computer's screen and the television), click the Detect button. Your computer will attempt to detect the presence of another screen connected to its output port.
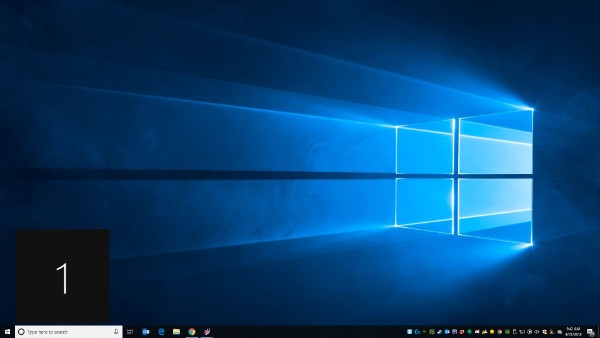
Once displays have been detected, clicking the Identify button will help determine which screen is which.
When Identify is clicked, each screen's assigned number will be displayed on-screen briefly. This will help you determine which screen to select when adjusting settings in the Display Settings window.
5. Set Display Preferences
Now that the computer has detected multiple displays, the next step is to choose how you would like the computer to handle the second display.
Select the display that represents the television from the Display menu.
Scroll down to the Multiple displays heading. From here, you can choose how you would like the television display to function.
There are two settings available for multiple displays within Windows:
Duplicate desktop
Choosing to duplicate the desktop will display the exact same image on both screens. Duplicating is most commonly used for presentations, where the goal is to share what's on your screen to a group or room full of people.
Extend desktop to this display
Choosing to extend the desktop expands the work area across both displays. Extending is most commonly used to get more workspace, allowing you to display different things on each screen, such as multiple programs, web browsers, etc.
If you chose to Duplicate desktop, the picture on your computer screen will be displayed on your television, and you're all set. If you chose to Extend desktop, we recommend taking a look at the following tips that will help you get the best experience while using your television as a second display.
Tips for Extending the Desktop
When your desktop is expanded across multiple displays, choosing a "primary" display is necessary. Typically, the primary display will contain the taskbar, while additional displays will not by default. Under the Multiple displays header, you can designate the primary display by checking the Make this my main display box.
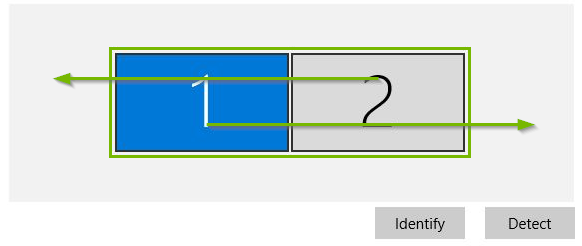
Letting Windows know about the position of the second display is also important. By default, Windows assumes the second display is to the right of your primary display. However, if the second display is actually off to the left, or perhaps above your primary display within the room you're seated in, dragging windows onto that secondary display will be awkward. You can click and drag each display within the display window into a position that most resembles their current physical location. Doing this will make dragging windows into position feel more natural.
Monitors can be positioned both vertically and horizontally.
Depending on how your secondary display is physically set up, you may want to choose a different Orientation for that display. Landscape is the default orientation for all displays, while Portrait will orient things vertically on-screen.
Depending on the size of the television that was connected to your computer, and how far away from it you are sitting, you may not be happy with the size of text and other items on-screen. Under the Scale and layout heading, you can choose a zoom level for items on the screen. This will make items appear a bit larger and will be easier to read on screens that are much larger than your computer's screen.
.png)