.png)
Authored by: Support.com Tech Pro Team
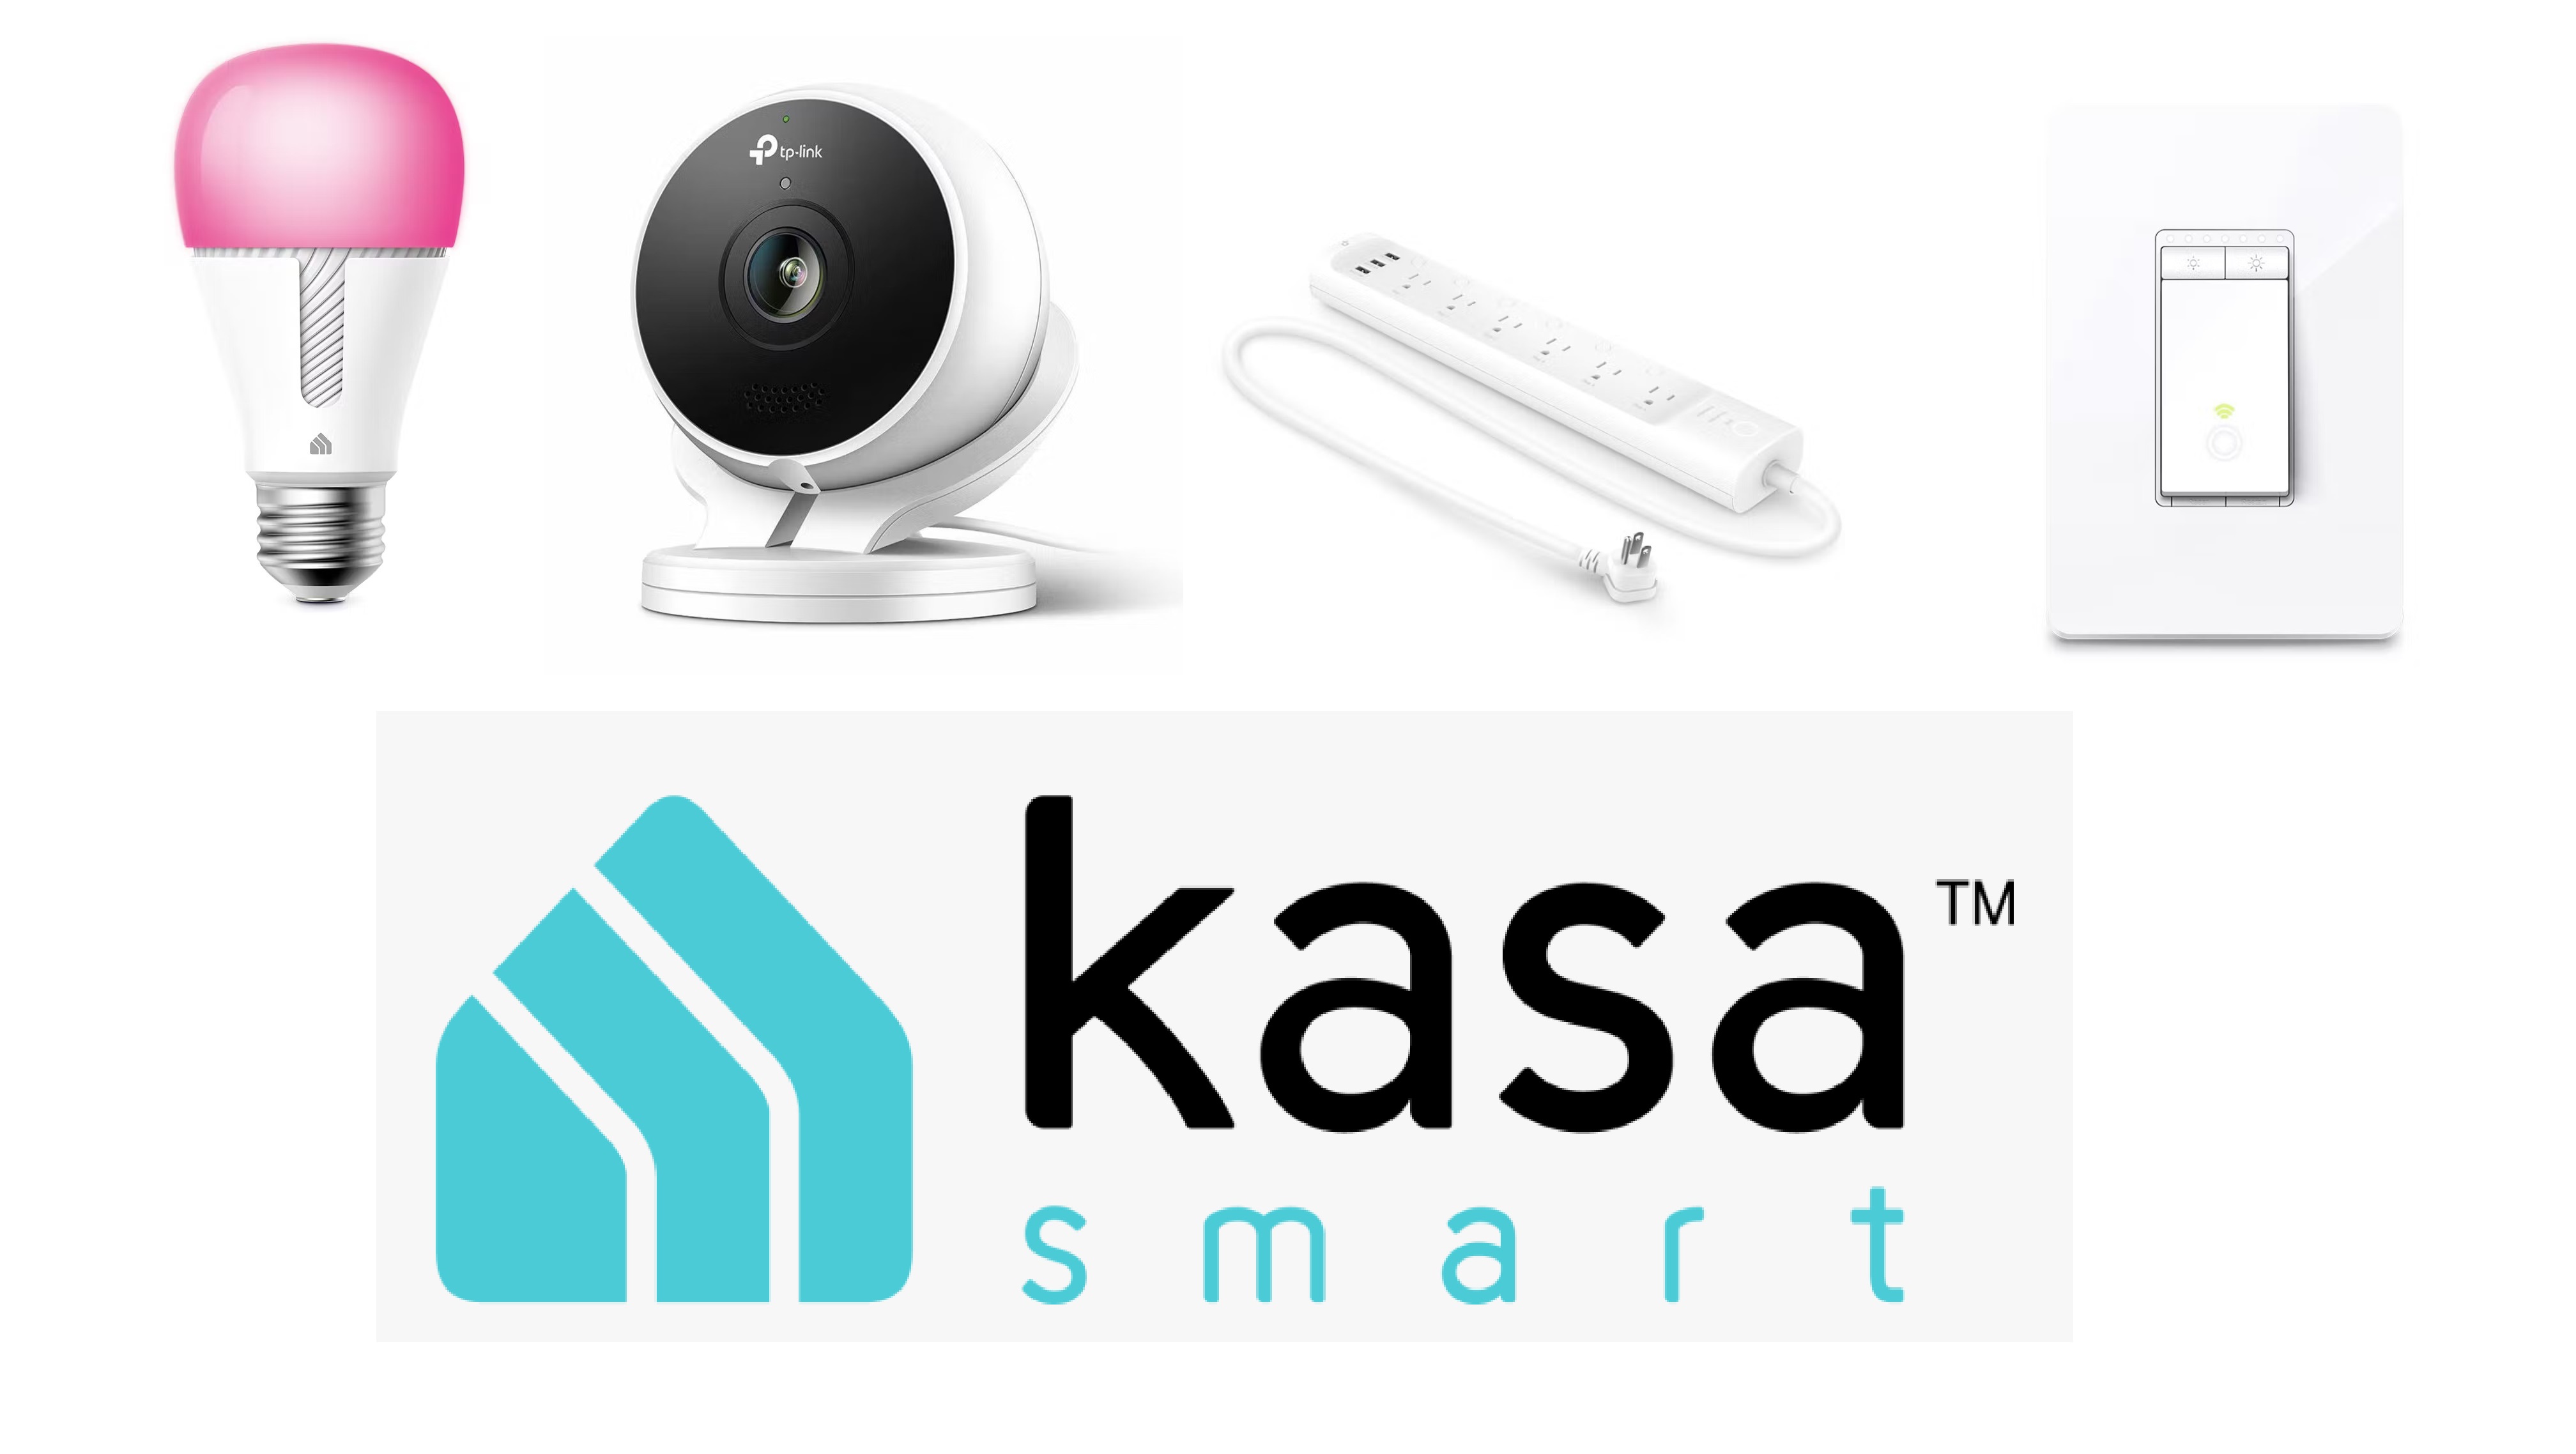
How to connect TP-Link Smart Bulb to home network via Kasa
This guide will walk you through the setup procedures of TP-Link Smart Wi-Fi light bulb. The Kasa APP is currently only compatible with iOS and Android devices, does not support Amazon Kindle device.
Before we begin:
Step 1
Register a TP-Link Cloud account to manage your Smart Bulb remotely.
Open the Kasa app on your smartphone, if it’s the first time installing the smart bulb, please create a cloud account to better use your Smart Bulb:
Launch How to create a TP-Link Cloud Account on Kasa app
Clicking this shortcut will mark this step as "Completed," and if you complete the next Guided Path, this Guided Path will be completed automatically
Step2
Add Smart Bulb into your cloud account
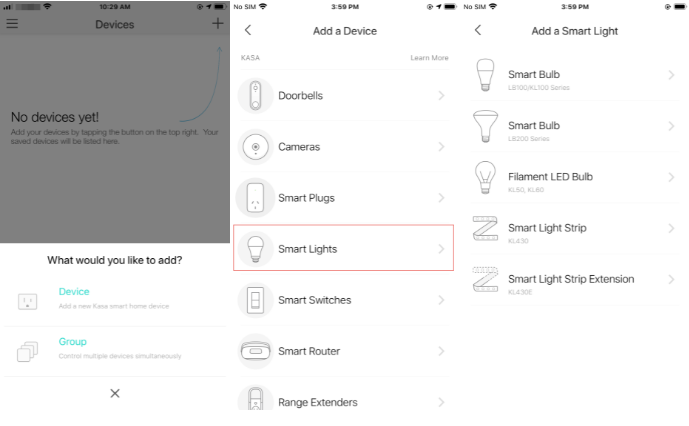
a. Tap the + button in the app, and select Device > Smart Lights > Smart Bulb to add a new smart bulb.
b. Screw on your Smart Bulb and wait for about 5 seconds, the bulb will flash 3 times.
If it’s not flashing, please tap “My Smart Bulb Didn’t Blink†and follow the instruction to flip the switch off- on, off- on, off-on, 3 times.
Please flip your smart bulb slowly, about a 1-second interval in every OFF and ON, and make sure the smart bulb blinks three times before you tap “Nextâ€.
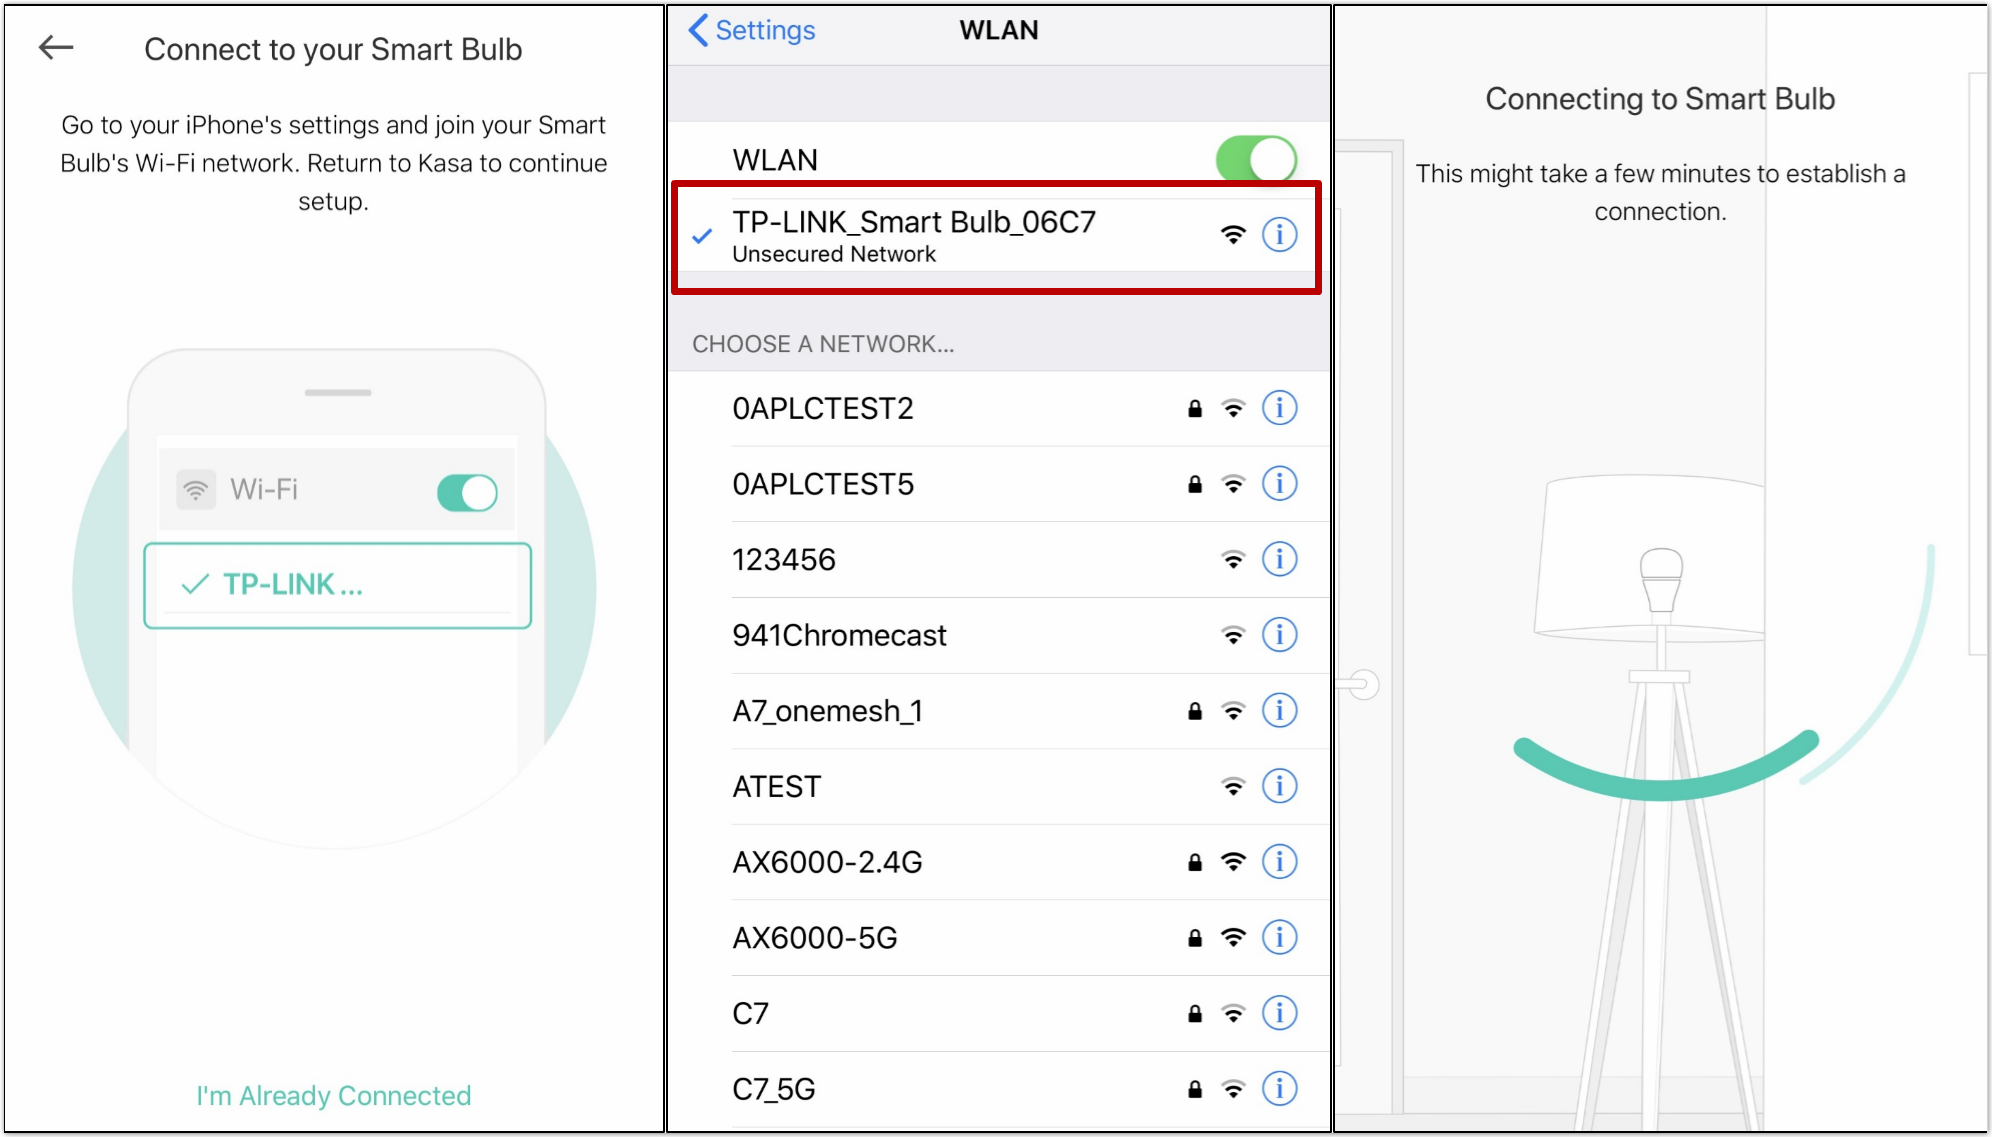
c. Looking for your Smart Bulb.
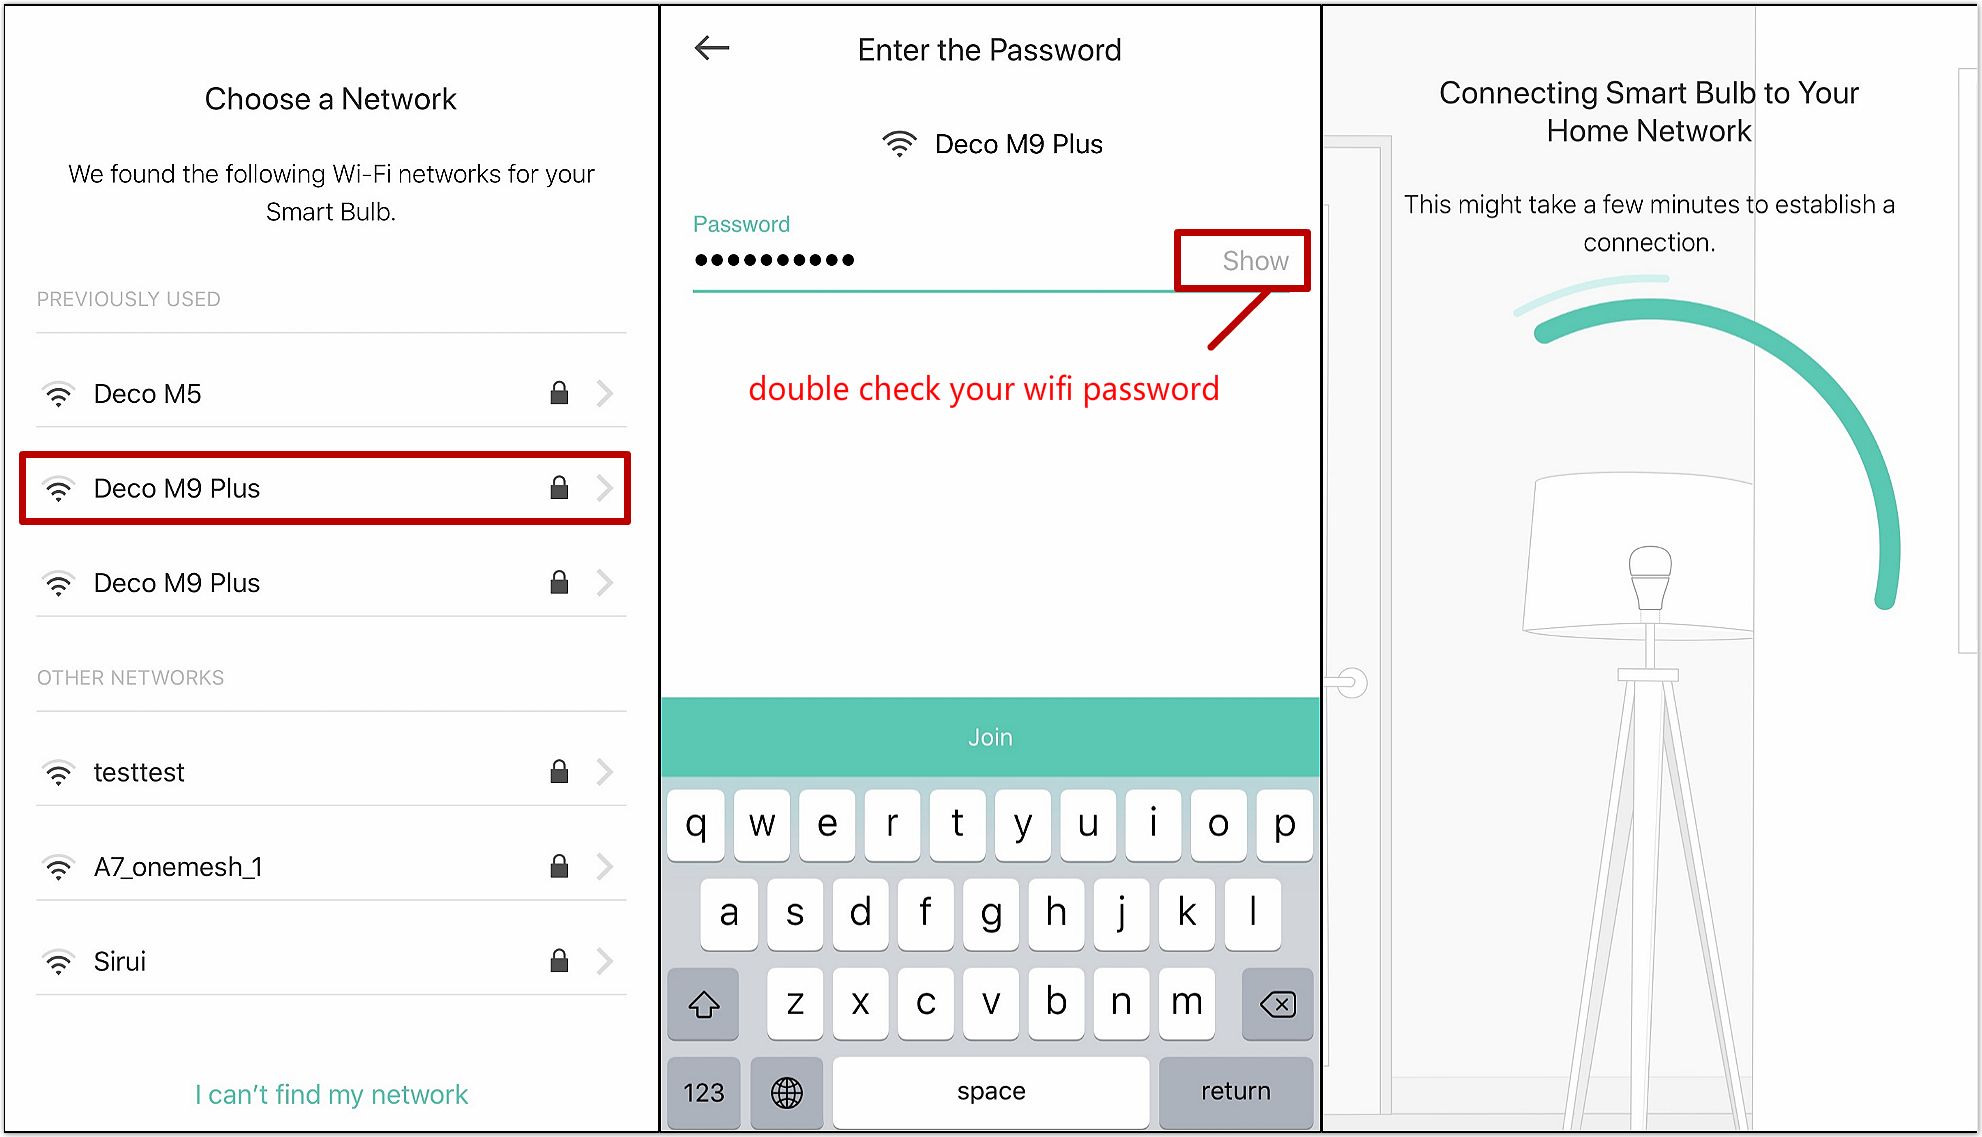
If the phone pops up a message †this Wi-Fi network is unsecured/unprotected, your privacy and data may be at riskâ€.with 2 options " Disconnect or connect anyway / keep using this Wi-Fi / stay connectedâ€, don't worry about it, just select"connect anyway/keep using this Wi-Fi/stay connected", then continue the setup.
For Android:
Kasa will look for your Smart Bulb automatically, and it will take about a minute.
If you have a problem in looking for the smart bulb, please go to Settings->Wi-Fi on your smartphone and manually connect to the smart bulb’s Wi-Fi network (same as iOS).
For iOS:
You need to connect to Smart Bulb’s Wi-Fi manually, please go to Settings->Wi-Fi on your smartphone and manually connect to the smart bulb’s Wi-Fi network (which is named as TP-LINK_Smart Bulb_xxxx), and then go back to the Kasa APP to continue the setup process.
d. Connect your Smart Bulb to your home network.
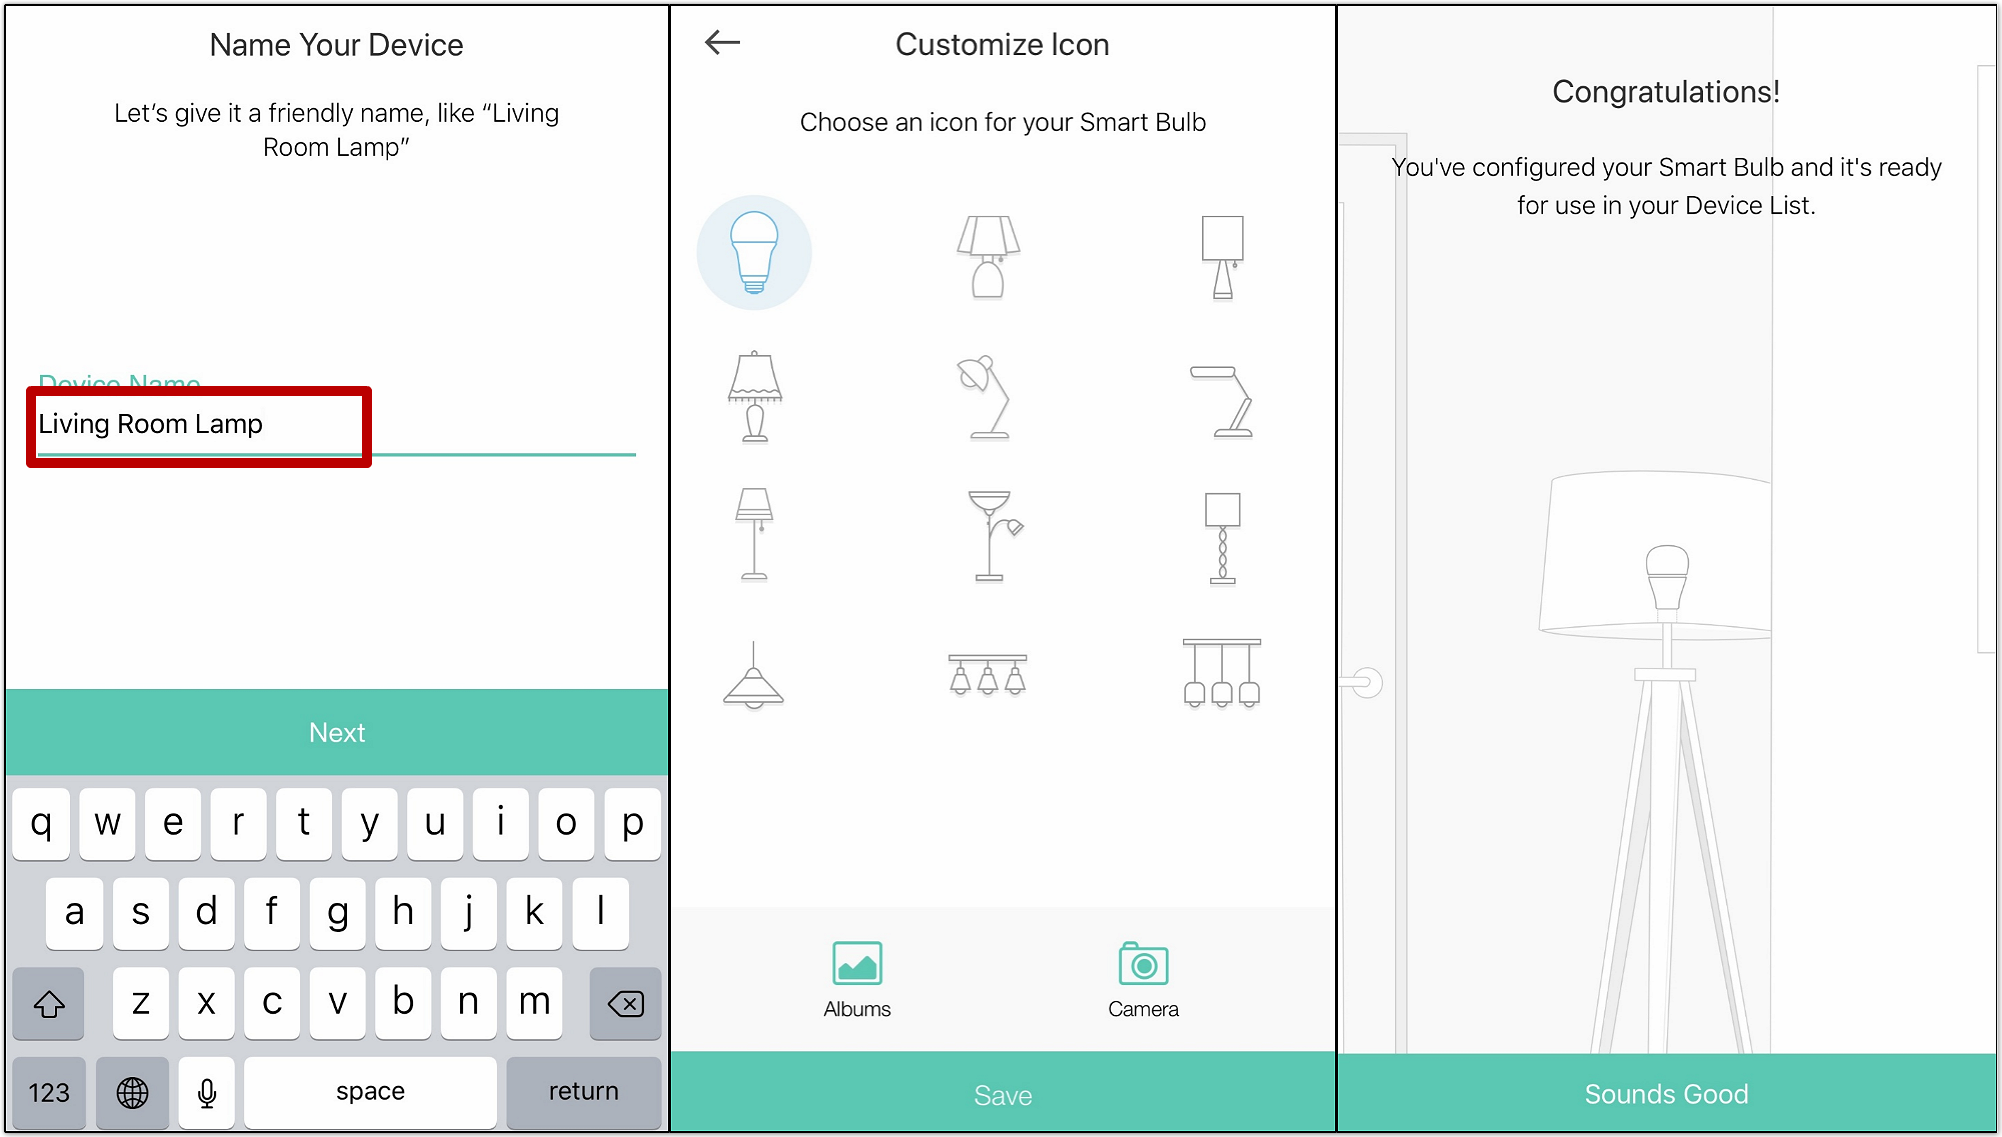
e. Name your Smart Bulb, and choose an icon for it, after that, we have completed the setup of the smart bulb.
Do remember Smart Bulb requires an “always-on†power supply to operate properly.

Support.com is committed to your privacy
We do not share or sell your data to third parties. We do use cookies and other third-party technologies to improve our site and services. The California Consumer Privacy Act (CCPA) gives you the ability to opt out of the use of cookies, third-party technologies and/or the future sale of your data. Do not sell my personal information.

Support.com is committed to your privacy
Read our Privacy Policy for a clear explanation of how we collect, use, disclose and store your information
