Expanding the storage on your Nintendo Switch allows you to download more games and content. Here’s how to do it:
Power Off the Switch:
Press and hold the power button on the top of the Nintendo Switch for a few seconds.
Select “Power Options” and then “Turn Off” from the menu to completely power off the device.
Open the MicroSD Card Slot:
Gently flip the Nintendo Switch over.
Open the kickstand on the back of the device to reveal the microSD card slot.
Insert the MicroSD Card:
Insert a compatible microSD card (SDHC or SDXC up to 2TB) into the slot with the label facing away from the device.
Push the card in until it clicks into place.
Power On the Switch:
Press the power button to turn the Nintendo Switch back on.
Format the MicroSD Card:
Navigate to System Settings from the Home menu.
Scroll down and select “System” and then “Formatting Options.”
Choose “Format microSD Card” and follow the on-screen instructions.
The system will restart and the microSD card will be ready for use.
Verify Additional Storage:
Go to System Settings > Data Management to confirm the additional storage is recognized.
Now you can download games and save data directly to the microSD card, freeing up space on the internal storage.
Managing Storage:
To manage storage, go to System Settings > Data Management.
Here you can move data between the system memory and the microSD card, delete unused data, and check how much storage space is available.
Contact Support.Com
If you are still having trouble, refer to the Step-By-Step Guide below, or Contact Support.Com for Personalized Assistance.
1. Introduction
The Nintendo Switch has 32GB of internal NAND memory, a portion of which is reserved for use by the system itself. This may not sound like a lot of storage for modern games that take up quite a bit of space, and has been a point of contention in the gaming community since the Switch released. Thankfully, the system's internal memory can easily be expanded by adding a microSD card.
This guide will help you determine what your Switch's storage situation is like, how to free up space on your Switch, and how to expand that storage should you feel you need to.
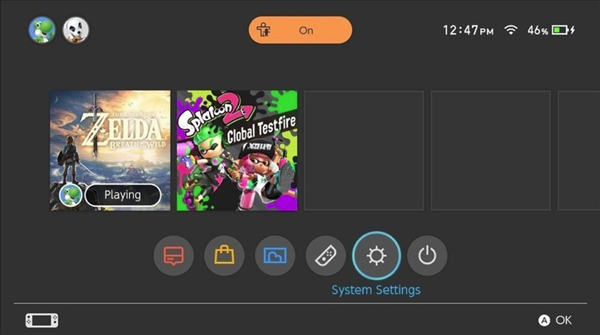
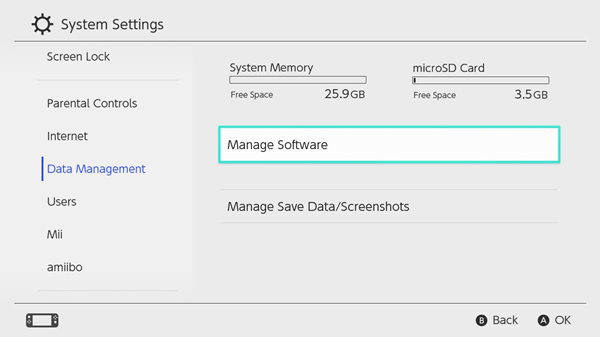
2. Check Storage Space
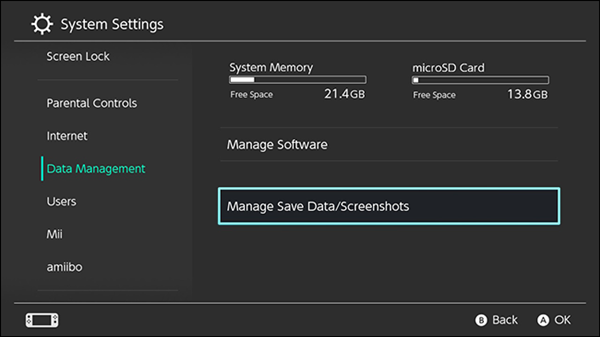
From the Home Menu, select System Settings.
Select Data Management.
The available space for the System Memory and microSD card (if used), will be displayed on the top of the screen.
3. Manage Software
From the Home Menu, select System Settings.
Select Data Management.
Select Manage Software.
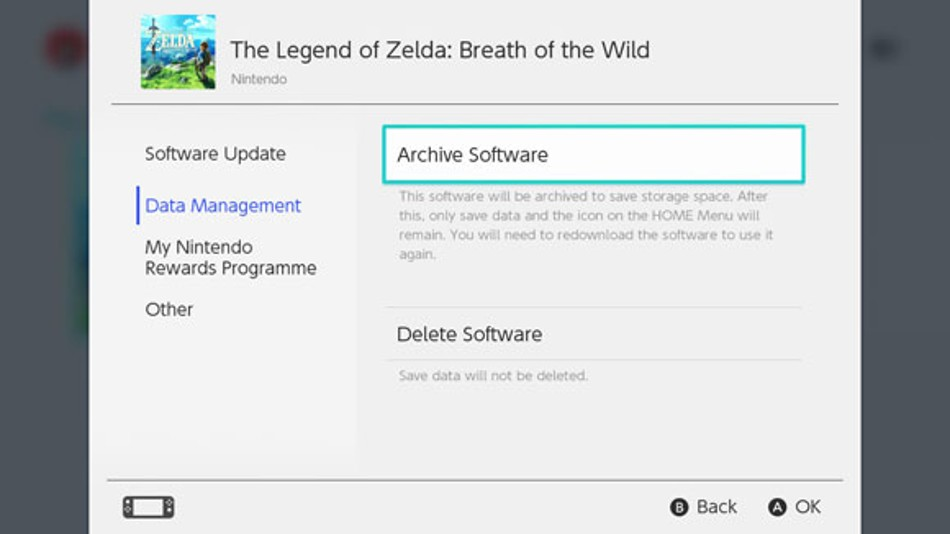
Select the software you wish to manage.
Choose to delete or archive the game. Deleting removes all data including game saves. Archiving deletes the game but keeps the game saves in case you want to download the game again.
4. Manage Save Data and Screenshots
From the Home Menu, select System Settings.
Select Data Management.
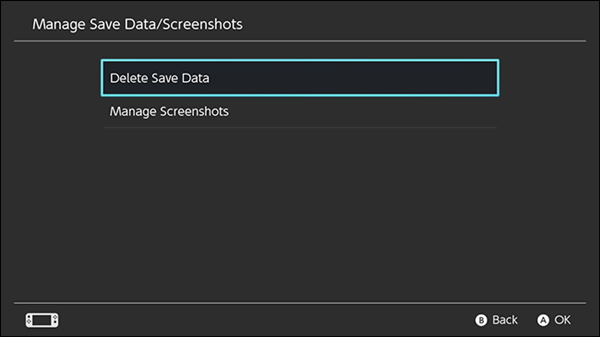
Select Manage Save Data/Screenshots.
Select Delete Save Data to be brought to a list of games that have save data on your switch.
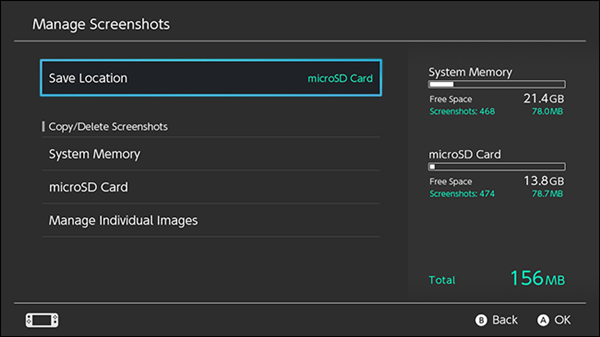
Selecting Manage Screenshots will bring you to a menu so you can adjust your screenshots.
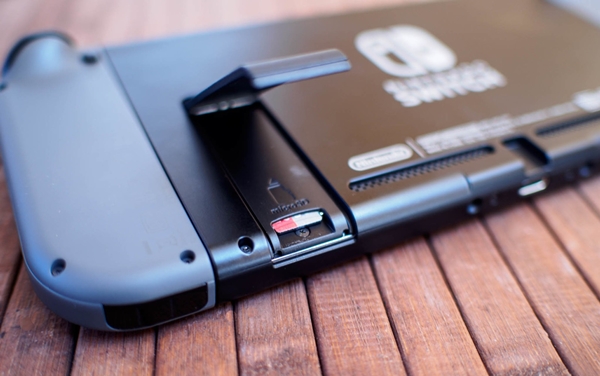
5. Additional Storage Options
The best way to increase storage space for your Nintendo Switch is to add a microSD card to it. These types of memory cards come in various capacities at different price points. As a point of reference, your Nintendo Switch has 32GB of internal NAND memory. The Switch can accept microSD and microSDXC cards, and supports up to 2TB of total storage.
The microSD slot is located under the kickstand.
To insert your new microSD card, simply lift the kickstand and push the card in until it clicks.
.png)