How to Factory Reset Your Apple Mac Pro

Authored by: Support.com Tech Pro Team

1. Introduction: macOS: Factory Reset

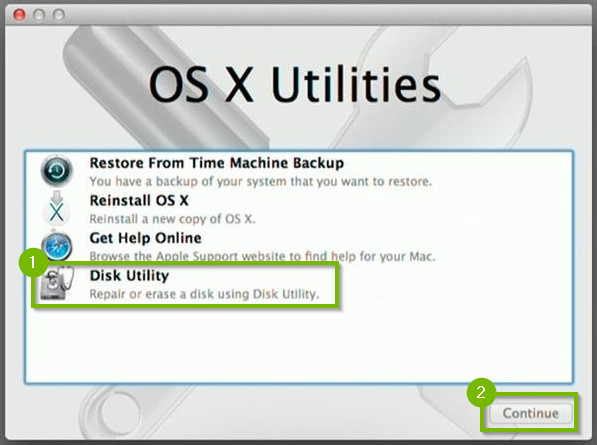
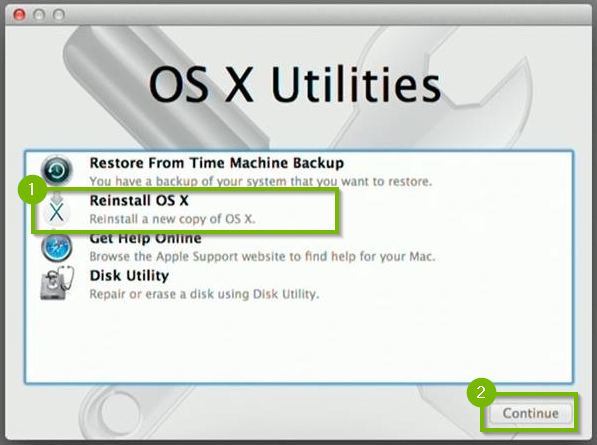
A factory reset will put your machine back to an immaculate factory state, as if it was fresh out of the box, with a clean and working install of macOS. There are a number of reasons that you may want to reset your Mac to its factory settings. Maybe you're selling it and want to wipe your data off of it. Perhaps it's infected with a virus. Maybe it's not working properly.

We can backup your data first or go directly to the factory restore steps.

Performing a factory reset deletes all your data and cannot be undone, you may want to back up your files first to an external hard drive or a USB storage device.

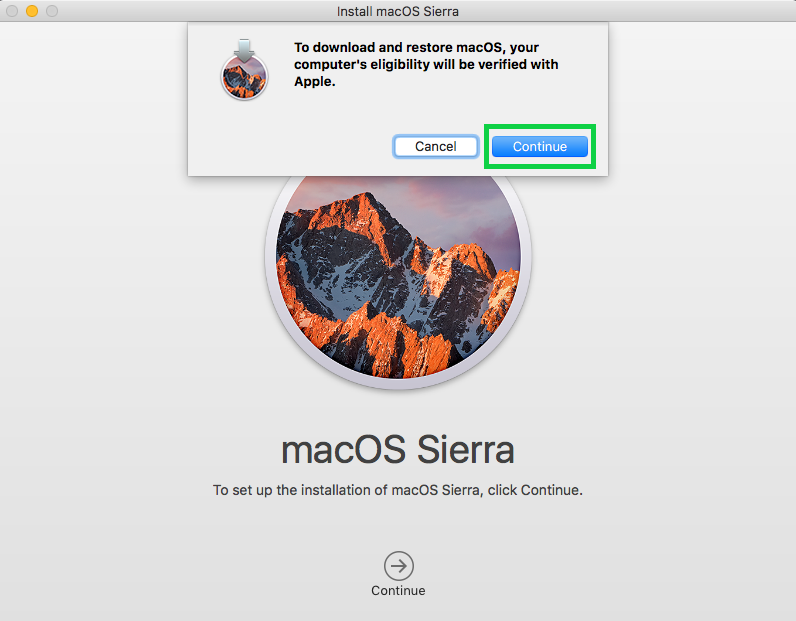
To reinstall macOS, you must be connected to the Internet.

If you are using a portable computer, make sure your power adapter is plugged in.

2. macOS: Set Up Time Machine

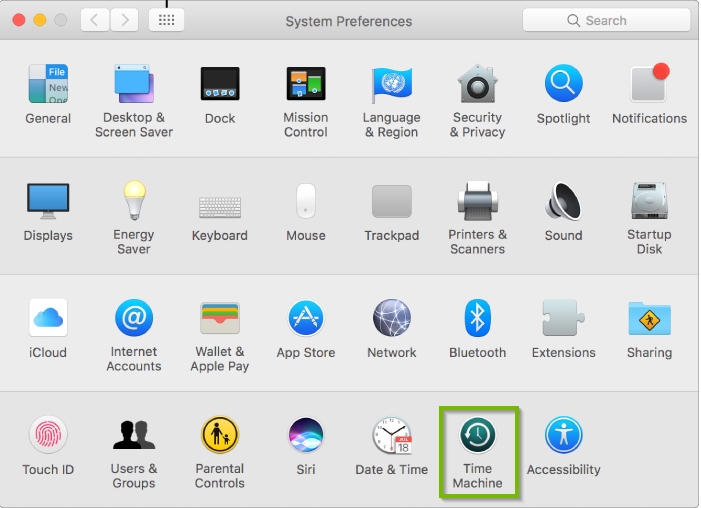
Time Machine is the built-in backup feature of your Mac. To use it, you need one of these external storage solutions, sold separately:

  • External hard drive connected to a USB, FireWire, or Thunderbolt port on your Mac
  • Time Capsule or macOS Server on your network
  • External hard drive connected to the USB port of an AirPort Extreme Base Station on your network

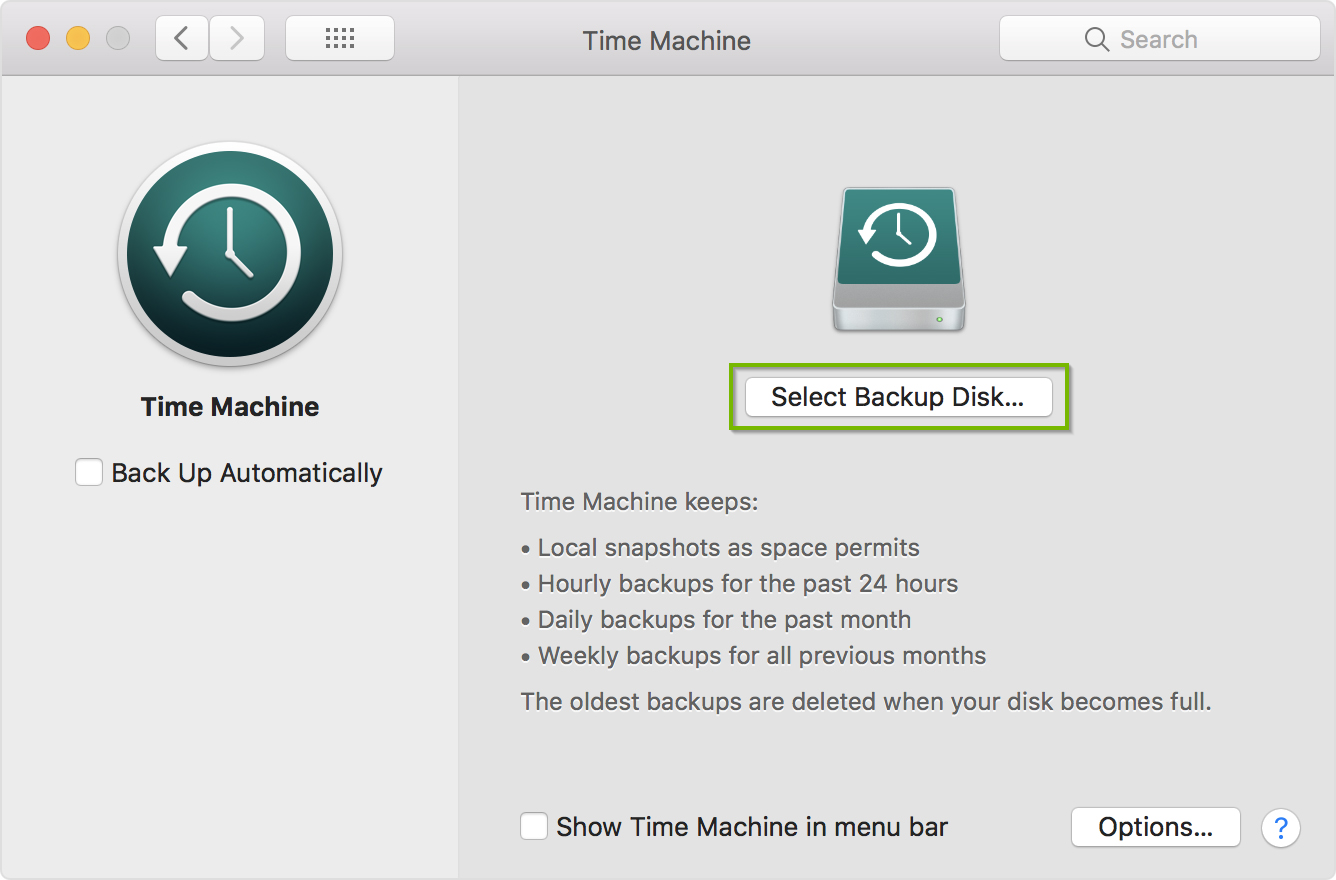
When you connect an external hard drive directly to your Mac, you might be asked if you want to use the drive to back up with Time Machine. Click Use as Backup Disk. If you select the option to encrypt, your backups will be accessible only to users with the password.

Time Machine prompt when new hard drive detected, with Use as Backup Disk button highlighted. Screenshot.

If Time Machine doesn't ask you to choose a backup disk when you connect the drive to your Mac:

  1. Choose Apple menu > System Preferences.
Apple menu with System Preferences selected. Screenshot.
  1. Click Time Machine.
System Preferences window with Time Machine selected. Screenshot.
  1. Click Select Backup Disk, Select Disk, or Add or Remove Backup Disk.
Time Machine screen with Selected Backup Disk button selected Screenshot.
  1. Select a backup disk from the list, then click Use Disk.
  2. For additional backup security and convenience, you can repeat these steps to add another backup disk. For example, you might use one backup disk while at home, and another backup disk while at work.

3. macOS: Create Time Machine Backup

  1. Choose Apple menu > System Preferences.
Apple menu with System Preferences selected. Screenshot.
  1. Click Time Machine.
System Preferences window with Time Machine selected. Screenshot.
  1. To back up now, choose Back Up Now from the Time Machine menu.
Time Machine menu with Back Up Now selected. Screenshot.
  1. Your first backup may take a long time, depending on how many files you have.
  2. You can continue using your Mac while a backup is underway.

4. macOS: Open macOS Utilities

  1. In the menu bar, choose Apple menu > Restart.
Apple menu with Restart selected. Screenshot.
  1. As your Mac restarts, hold down the Command and R keys.
Mac keyboard with Command and R keys highlighted.
  1. Let go of the Command + R keys once the macOS Utilities window appears.
macOS Utilities. Screenshot.

5. macOS: Erase Disk

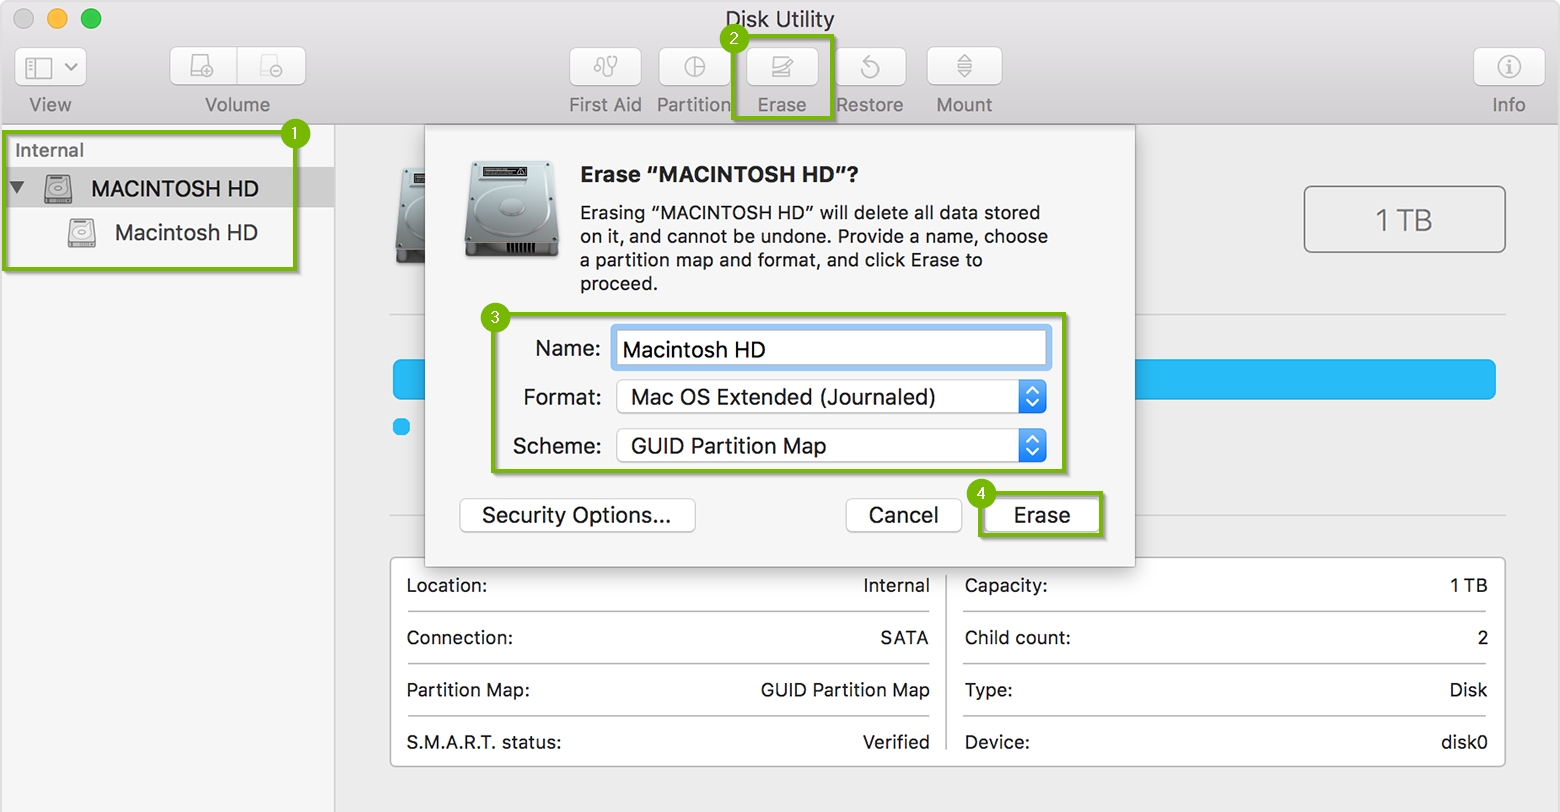
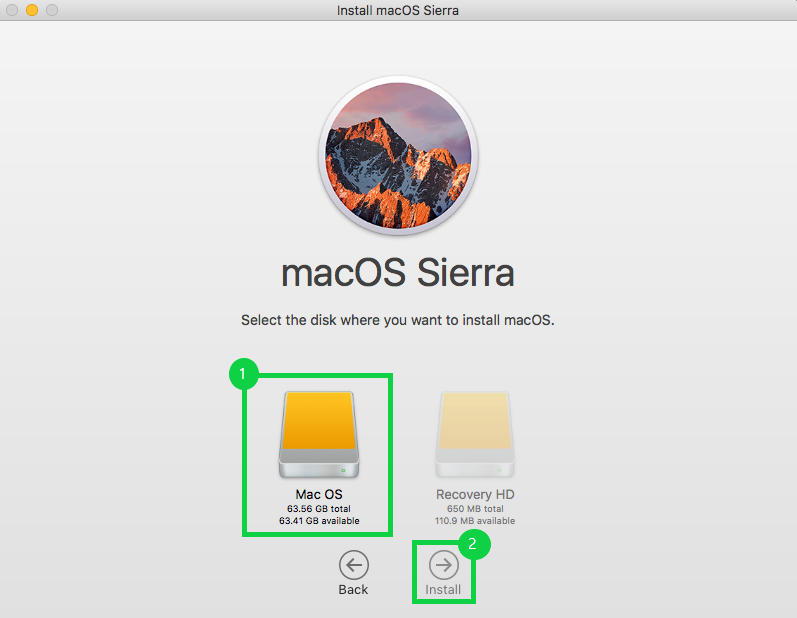
Erasing the disk removes all the information from the disk. Be sure to back up the information you want to keep to an external device.

  1. From macOS Utilities, select Disk Utility, then click Continue.
macOS Utilities with Disk Utility option and Continue button selected. Screenshot.
  1. Select your startup disk on the left, then click Erase.
Erase option being used on selected hard drive within Disk Utility. Screenshot.
  1. Enter a Name.
  2. Click the Format pop-up menu, choose Mac OS Extended.
  3. Click Erase.
  4. After the disk is erased, choose Disk Utility > Quit Disk Utility.
Disk Utility menu with Quit Disk Utility selected. Screenshot.

6. macOS: Reinstall macOS

  1. From macOS Utilities, select Reinstall macOS, click Continue.
macOS Utilities with Reinstall OS X option and Continue button selected. Screenshot.
  1. After the computer reboots, Click on Continue.
macOS Sierra reinstall screen with Continue button selected. Screenshot.
  1. Click Continue to verify your computer's eligibility.
Verify eligibility propmt with Continue selected. Screenshot.
  1. Click Agree to accept the Terms of Service.
macOS Sierra Terms of Service with Agree selected. Screenshot.
  1. Click Agree to confirm you agree with Terms of Service
macOS Sierra Terms of Service with Agree button selected. Screenshot.
  1. Select a Drive to install macOS on and click Install.
macOS Sierra installation prompt for which drive to install on. A drive is highlighted and Install button is selected. Screenshot.
  1. Install will now start and this will take some time. The computer will reboot during this process.

7. Go To: Basic setup for your Apple Mac Pro

Show Me HowClicking this button will open a new guide that will provide you with steps to resolve your issue.