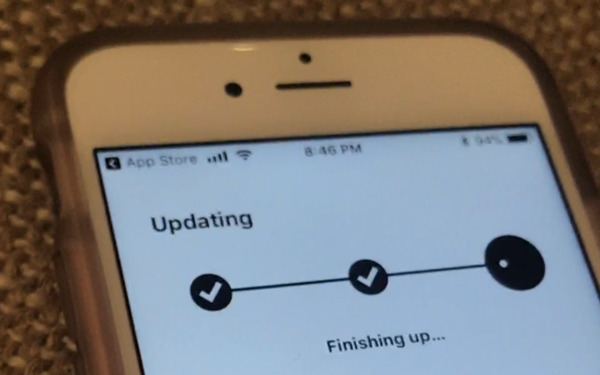
Keeping your Sonos system up to date ensures you have access to all the new features, music services, and player updates that Sonos releases. When a new software update is available for your Sonos system, you will automatically be prompted to update with an Update Now button on all of your Sonos controllers. Simply click or tap the Update Now button to begin the update process.
Sometimes it doesn't work that easily though. The update could stall, fail with an error, or just not download at all. However, it can be pretty easy to fix those issues. This guide will go over common update issues you may encounter with your Sonos system.
Tools You'll Need:
A paperclip
iPhone charging cable
Access to a computer with iTunes installed
Any other non-consumable tools needed
Comment out tools section if no tools are necessary
-->
Supplies You'll Need:
Zip ties
Any other consumable supplies
Comment out supplies section if no supplies are necessary
-->
Before You Begin:
The Sonos Controller app must already be installed.
The first step to fixing a failed update and trying it again is to restart the speaker or speaker system you're trying to update. These pictures may differ from what your Sonos device looks like but you can still do all the steps without an issue.
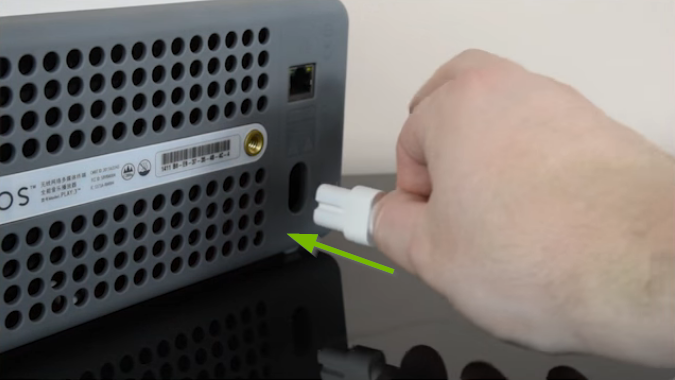
Unplug the power cable from your Sonos device and wait 30 seconds.
Plug the power cable back into your Sonos device. Allow up to two minutes for it to boot up and connect to the network.
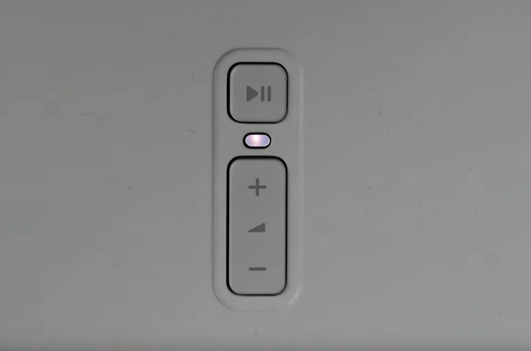
Once connected to the network, the light on the top of your Sonos device should light up a solid white color.
3. Verify Network and Sonos Connection
Make sure that the device that you're using the Sonos Controller app on is connected to the same WiFi network you connected the Sonos system to.
iOS and iPadOS Devices
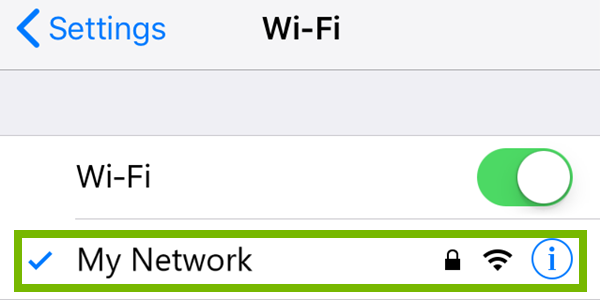
Make sure your controller is connected to the correct WiFi network.
First, we'll check what network your iOS device is connected to.
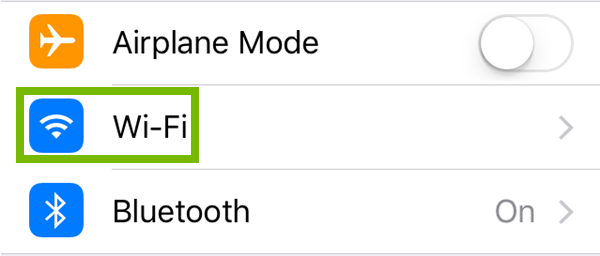
Open Settings.
Tap on Wi-Fi.
The network you are connected to will have a check next to it. Make sure this is not a "Guest" network.
Make sure you are not on a Guest Network. Most guest networks will not let you communicate with your other devices.
Next, we need to verify the network the Sonos products are connected to.
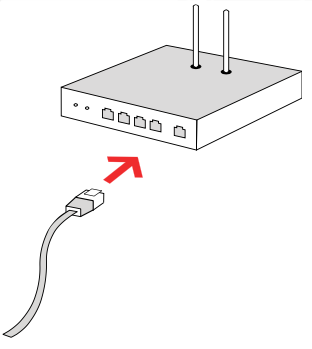
Connect one of your Sonos products to your router using an Ethernet cable, and then connect it to power. Use whichever product is most convenient to temporarily connect to your router.
After a few minutes you will start to see your Sonos Players appearing on your Sonos controller. Confirm that all of your Sonos players are showing up on your controller.
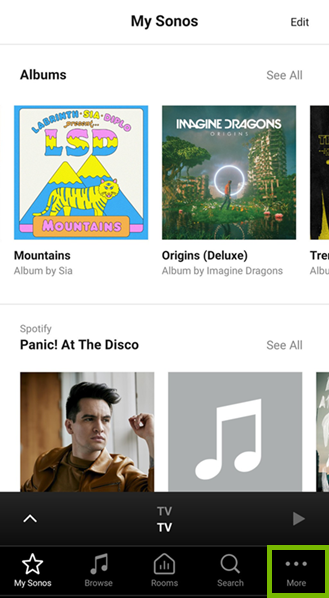
In the controller app, tap More to open the options menu.
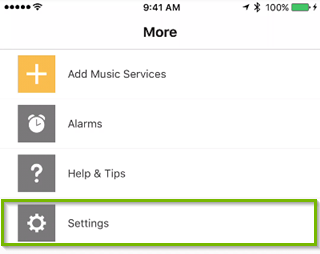
Then, select Settings.
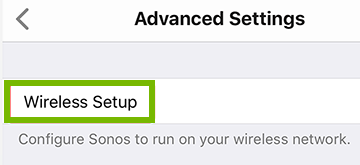
Tap on Advanced Settings.
Tap on Wireless Setup.
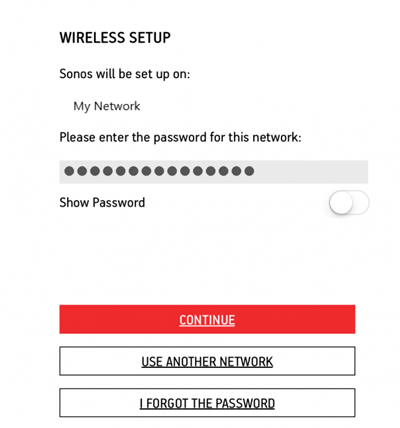
Type in the password (security key) to join your WiFi network and press continue.
Once your Sonos devices are on the same wireless network as your mobile device, you can disconnect the Ethernet cable.
Android Devices
Make sure your controller is connected to the correct WiFi network.
First, we'll check what network your Android device is connected to.
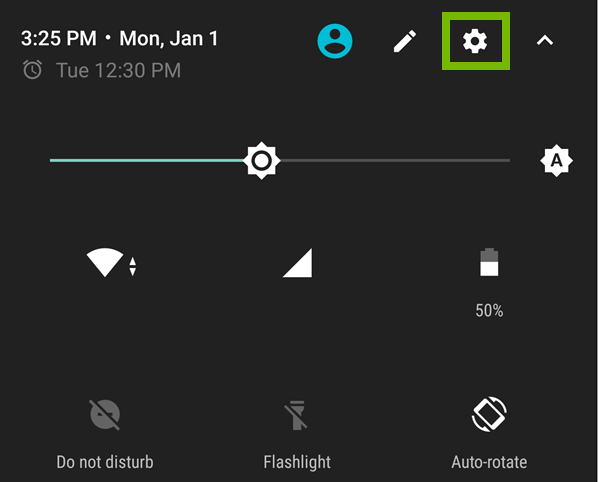
Slide your finger from the top down and tap on the Settings gear.
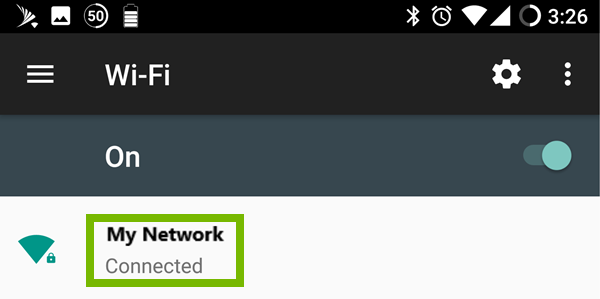
Click on WiFi (Or Wireless Networks)
Verify you're on your primary Wi-Fi Network
Make sure you are not on a Guest Network. Most guest networks will not let you communicate with your other devices.
Next, we need to verify the network the Sonos products are connected to.
Connect one of your Sonos products to your router using an Ethernet cable, and then connect it to power. Use whichever product is most convenient to temporarily connect to your router.
After a few minutes you will start to see your Sonos Players appearing on your Sonos controller. Confirm that all of your Sonos players are showing up on your controller.
In the controller app, tap More to open the options menu.
Then, select Settings.
Tap on Advanced Settings.
Tap on Wireless Setup.
Type in the password (security key) to join your WiFi network and press continue.
Once your Sonos devices are on the same wireless network as your mobile device, you can disconnect the Ethernet cable.
 
4. Reinstall the Sonos Controller App
If you're still having issues even though you're sure you're on the right network you should reinstall the app in case the app has errored.
Uninstall the Sonos Controller App
Uninstall the iOS App
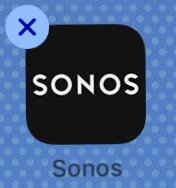
Tap and hold on the Sonos app until icons are shaking and tap the "X".
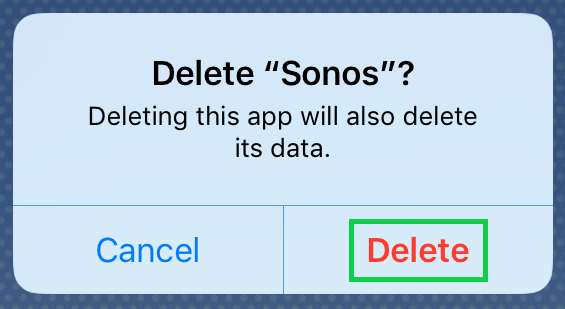
Tap Delete to Uninstall the app.
Uninstall the Android App
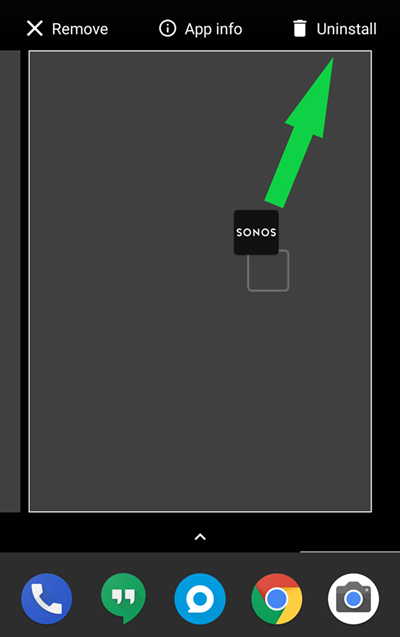
Tap and hold on Sonos Controller app and slide/drag to Uninstall.
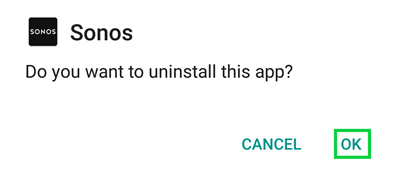
Click OK.
Install the Sonos Controller App Again
Reinstall the iOS App
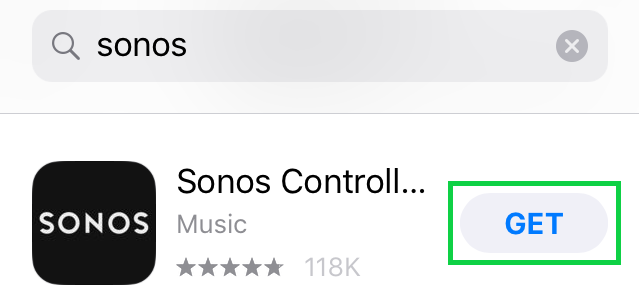
Open the App Store.
Type in "Sonos Controller" in the search bar.
Find Sonos Controller in the search results and tap on GET.
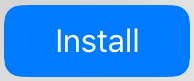
Tap on Install to start download.
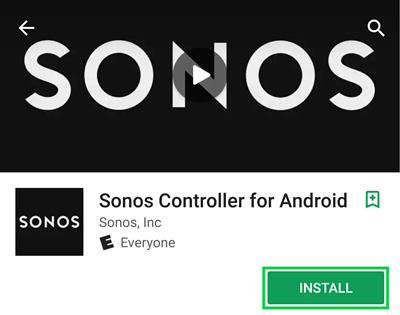
Reinstall the Android App
Open Play Store.
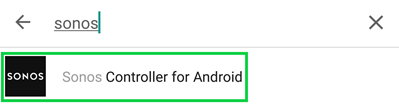
Search for "Sonos Controller for Android" and tap on the app.
Tap Install to start downloading the app.
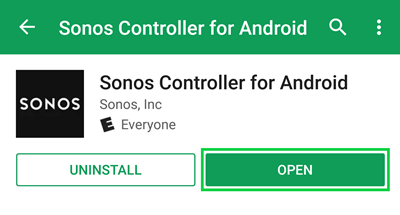
Once installed, tap Open.
Once you've got the app working, you should try to update once again, but you may need to re-add your speakers.
5. You May Need to Re-Add Your Speakers
After reinstalling the app, you may need to add your speakers back to your system. Adding speakers to the Sonos system is similar across all devices. This guide will show you how to do it on smartphones:
Open the Sonos Controller app on your mobile device.
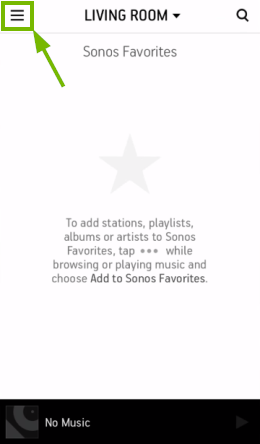
Open the Menu from the top left corner.
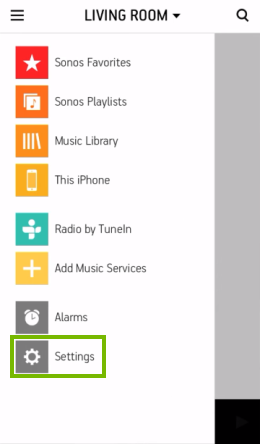
Then go into Settings.
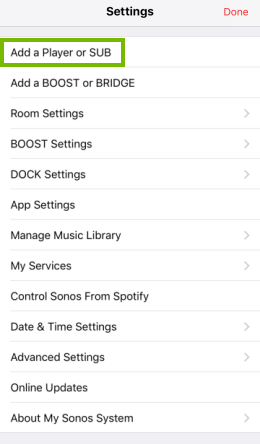
And select Add a Player or SUB.
You will be asked to power up your speaker with the provided cord. Once you've done that tap on Next.
Then look at the light color and pattern. If it matches what it says on the screen tap on Next otherwise tap on I'm unsure about the light.
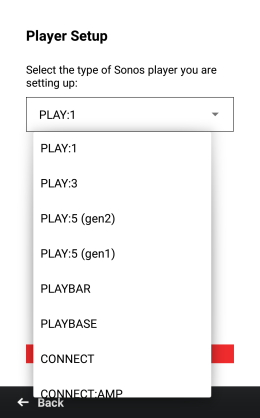
Select your speaker type from the drop down menu and tap on Set up this player.
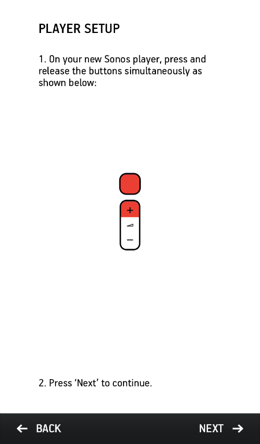
Based on your selection, you will be shown what button or combination of buttons to press on the speaker. Once you've done that tap on Next.
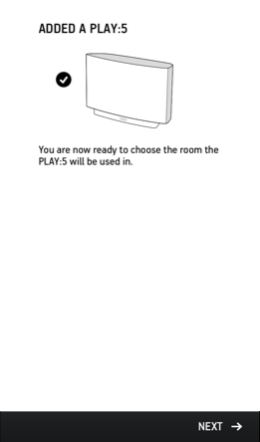
When the speaker is recognized it will be added to the system. Tap on Next to continue.
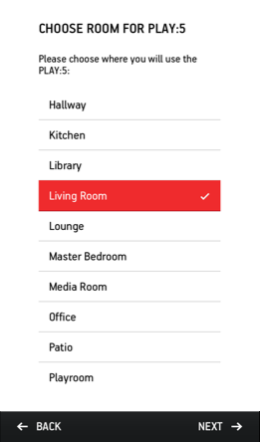
Choose the location of the speaker then tap on Next.
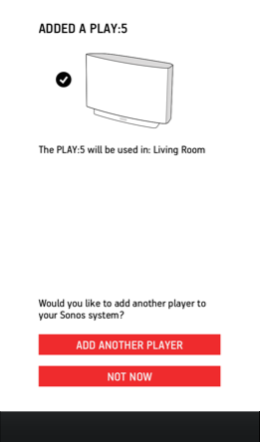
And you will get a final confirmation that it was added to the room you selected.
If you want to add another speaker tap on Add another player otherwise tap on Not now to finish.
6. Try to Perform the Update Again
On iOS or Android:
Launch the Sonos Controller app from your Home screen.
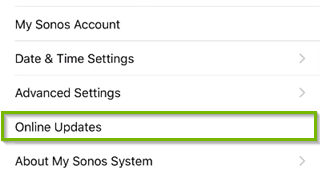
Tap More to open the options menu.
Then, select Settings.
Then, select Online Updates.
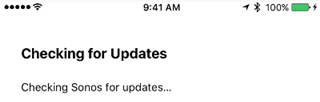
Your Sonos Controller app will then begin searching for available updates.
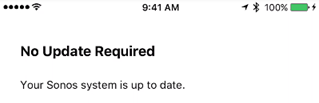
The result will be shown on-screen. If updates are available, you will be given the option to install. Select Let's Do This to begin installation. If no updates are available, your Sonos system is already up-to-date.
Sonos Controller for Mac or PC:
From the Sonos menu (Mac), or Manage menu (PC), click Check for Updates.
On a Mac, the Sonos menu can be found in the toolbar in the top left corner of the screen.
On a PC, the Manage menu is found at the top left of the Sonos application.
.png)