Sometimes you may experience your Mac to abruptly shut off while performing your daily tasks. This can be frustrating especially if it's happening repeatedly.
This guide will take you through some troubleshooting steps that may help fix this issue. The steps are listed in order, so start with the first one, see if that helps, and then continue with the next one if it doesn't.
What You'll Need:
No extra tools or supplies are needed.
-->
Before You Begin:
Extra instructions.
hyperlink
-->
2. Check the Mac's Power Connection
Make sure the Mac is powered up properly by checking the electrical connections.
Make sure you are using a working electrical outlet. You can test another electric device, such as a lamp, with the same outlet. Bypass any power strips for troubleshooting purposes.
Make sure the power connections to and from the Mac are proper. Choose the type of Mac you have below.
MacBook
There are two ways to power up a MacBook:
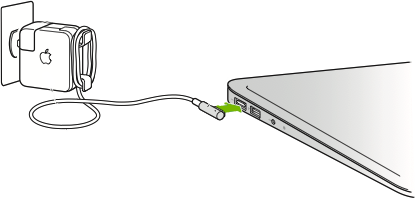
Using the power supply without the extension cord:
Examine the cable and connectors for visible damage. If they are damaged, they may need to be replaced.
Make sure the power supply is firmly plugged into the power socket and power connector into the computer.
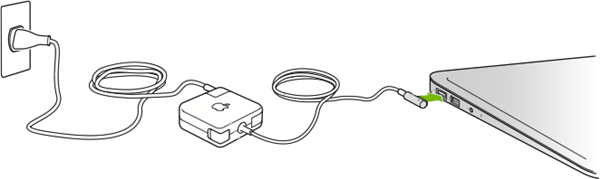
Using the power supply with the extension cord:
Examine all cables and connectors for visible damage. If they are damaged, they may need to be replaced.
Make sure the power supply is firmly plugged into the power socket, the extension cord into the power supply and power connector into the computer.
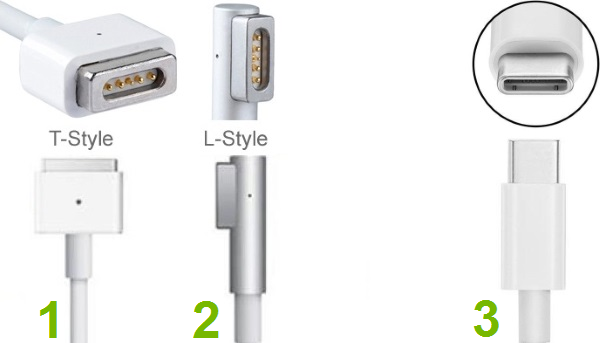
The power adapter shapes and way of connecting them have stayed the same over the years, however the connector types that plug into the computer have changed somewhat and can be of the following types:
Magnetic T style
Magnetic L style
USB-C style
iMac
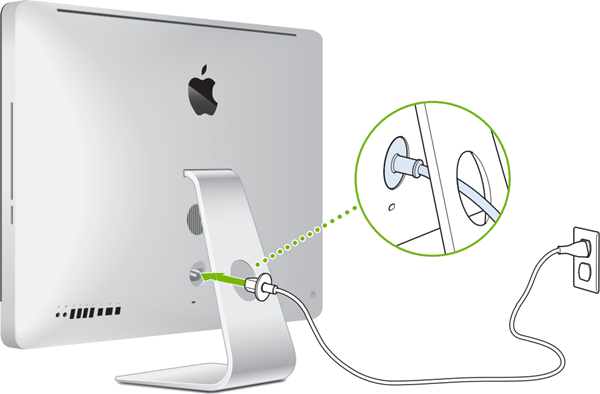
An iMac is powered up by plugging it in directly into a power socket.
Examine the cable and connectors for visible damage. If they are damaged, they may need to be replaced.
Make sure one end is firmly plugged into the back panel of the iMac and the other end into a power socket.
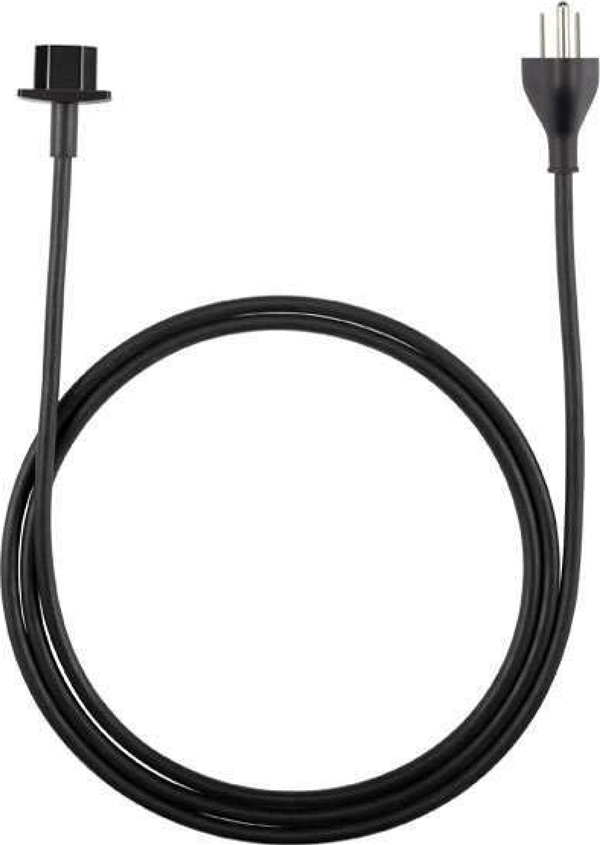
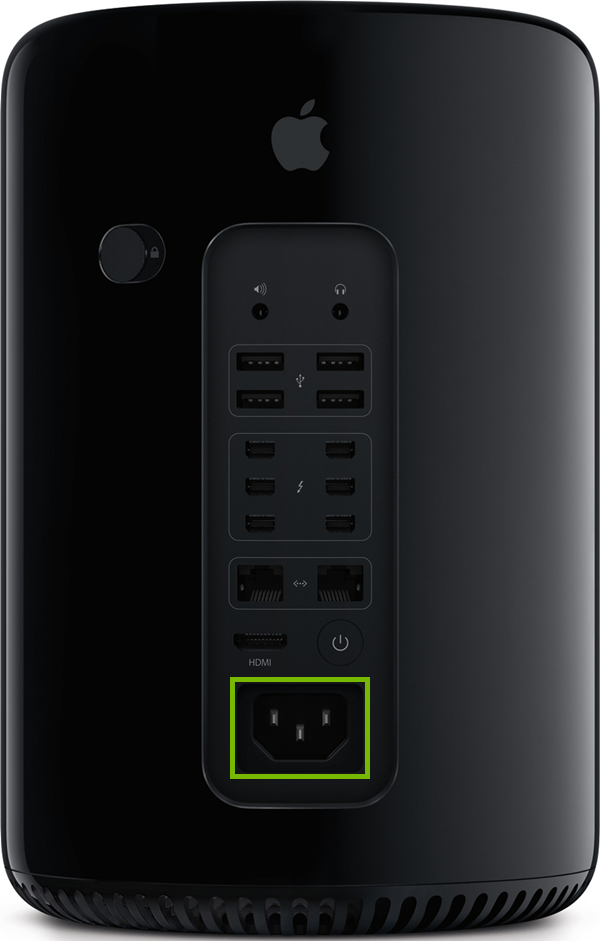
Mac Pro
A Mac Pro has an internal power supply included in the case.
The power cable looks like below. Examine the cable and connectors for visible damage. If you find any damage, the cable may need to be replaced.
Make sure one end of the cable is firmly plugged into a wall outlet.
Make sure the other end is firmly plugged into the power socket on the rear side of the case.
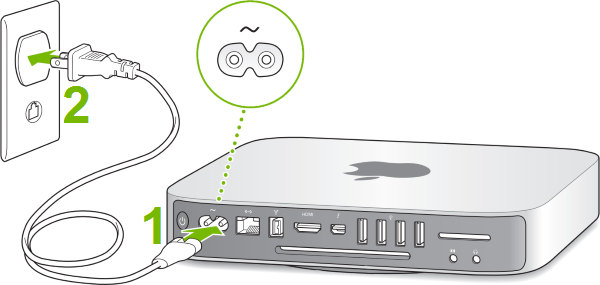
Mac Mini
Mac Mini with internal power supply
Some Mac Mini computers have an internal power supply:
One connector (1) plugs into the computer
The other connector (2) plugs into a power socket
Examine all cables and connectors for visible damage. If they are damaged, they may need to be replaced.
Make sure all connectors are firmly plugged in.
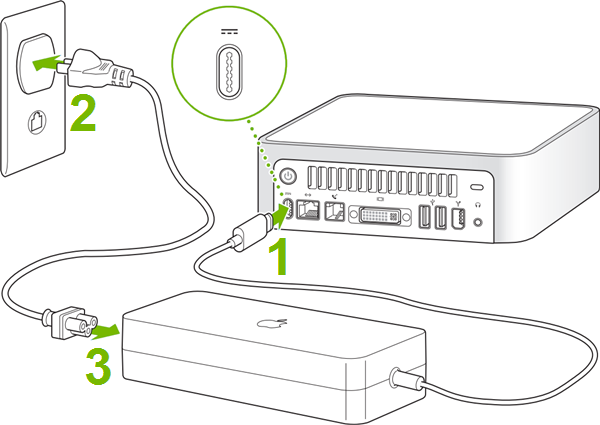
Mac Mini with external power supply
Other Mac Mini computers have an external power supply and plugs in like below:
One connector (1) plugs into the computer
The other connector (2) plugs into a power socket
A third (3) connector plugs into the supply itself
Examine all cables and connectors for visible damage. If they are damaged, they may need to be replaced.
Make sure all connectors are firmly plugged in.
3. Check the Computer's Ventilation
Computers heat up while they're running and their internal parts need to be cooled down and kept at a certain temperature to perform optimally. If the computer overheats it may result in it shutting down to prevent damage to its components. In worst cases, the components may also melt or get fried if the computer is kept running at a high temperature. To check whether your computer still has working fans, try the following:
Look for any vents your computer may have: in the back, on the side or bottom.
With the computer turned on, place your hand in front of the vents and feel if there is any air blowing.The longer the computer is turned on and the more complex the tasks it needs to perform, the warmer and stronger the air flow should be.
Depending on your results, you will have three options:
There is no air blowing – This could mean the fans are not working and the computer has no cooling.
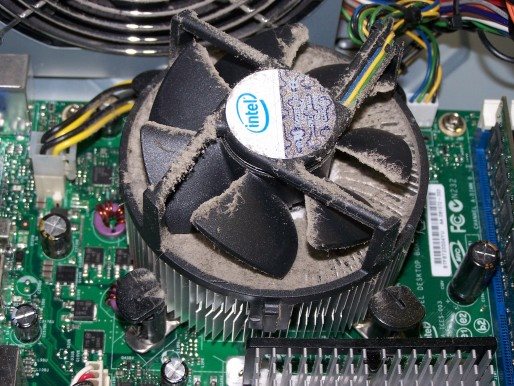
The air flow feels weak – The computer's fans may have dirt built up on and inside them which is causing them to slow down and not blow enough air to properly cool down the internal components. This can be fixed by cleaning up the outside and inside of the computer, and oiling up the fans.
The air flow feels normal – This could mean the issue the computer is having is software related. There are a few different software fixes that may be attempted to resolve the issue.
4. Clean the Computer's Vents
If you had a computer for more then a few months, it is likely to have accumulated some dirt inside and out. Dust, grime, hair and other debris can build up on fans, heatsinks and other parts. Components can also come loose or become unseated over time. All these can affect a computers performance in a negative way.
This is a generic method on how to clean the vents for any type of computer. If your computer looks differently than the one represented in the picture below, the steps you need to follow are exactly the same.
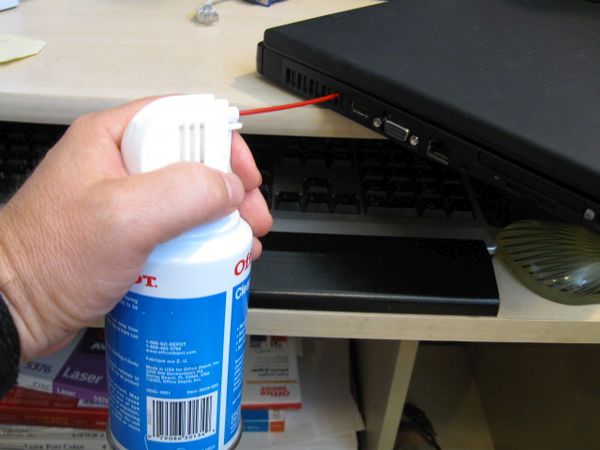
Using a compressed air duster is the best and most recommended way of cleaning a computers vents.
When blowing compressed air, keep the can upright at all times and never shake it to prevent the liquid refrigerant from leaking onto your electronics. Use short bursts of two or three seconds. When the can gets too cold to hold, set it down for a few minutes until it warms up again.
Turn the computer off and unplug its power cable.
Locate the air vents or other openings.
Blow compressed air to clean up the vents or other openings.
Once done, reconnect the power cable and turn the computer on to test it out.
If the Computer Is Still Overheating
5. Check for Updates
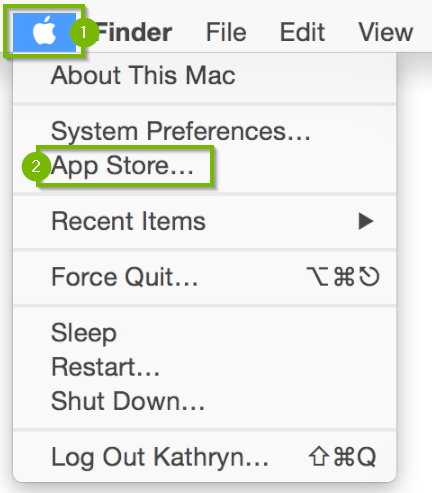
Click the Apple menu, then click onApp Store.
Select Updates on the bar at the top.
Any pending updates for your Mac will be listed here. Select Update All to apply these updates.
MacBook, MacBook Pro, and MacBook Air must have the power adapter plugged in to automatically download updates.
6. Reinstall macOS
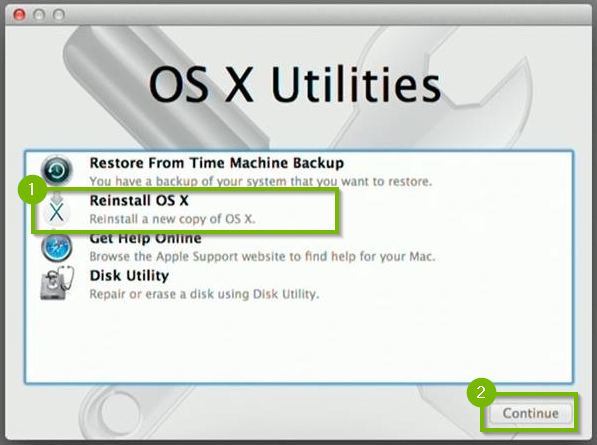
From macOS Utilities, select Reinstall macOS, click Continue.
After the computer reboots, Click on Continue.
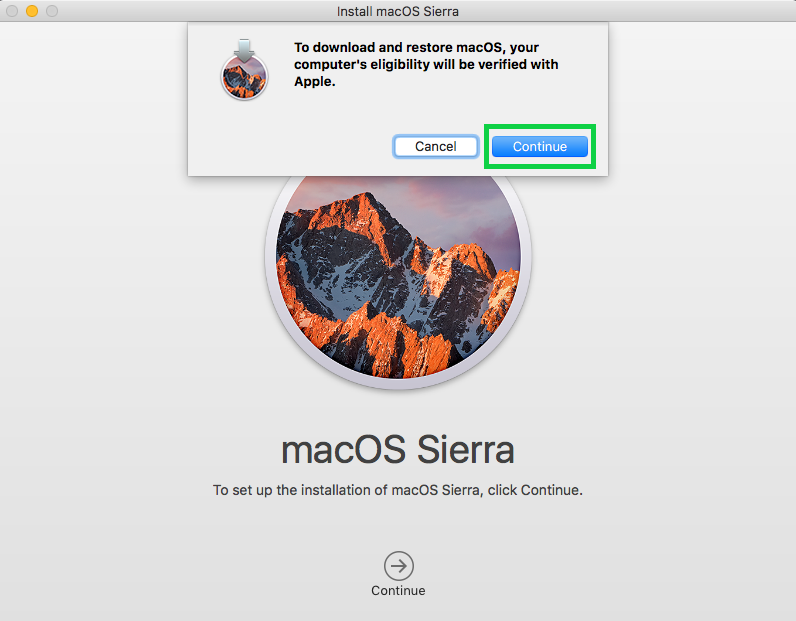
Click Continue to verify your computer's eligibility.
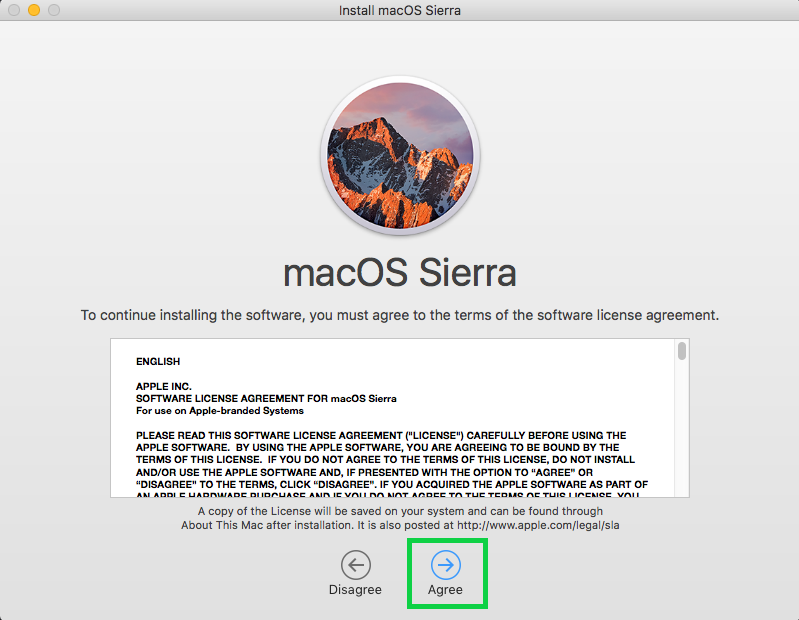
Click Agree to accept the Terms of Service.
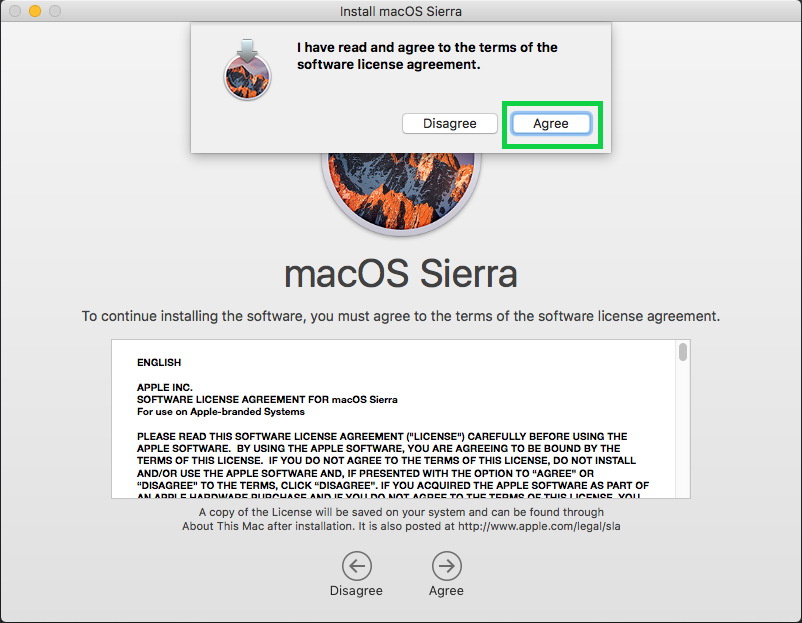
Click Agree to confirm you agree with Terms of Service
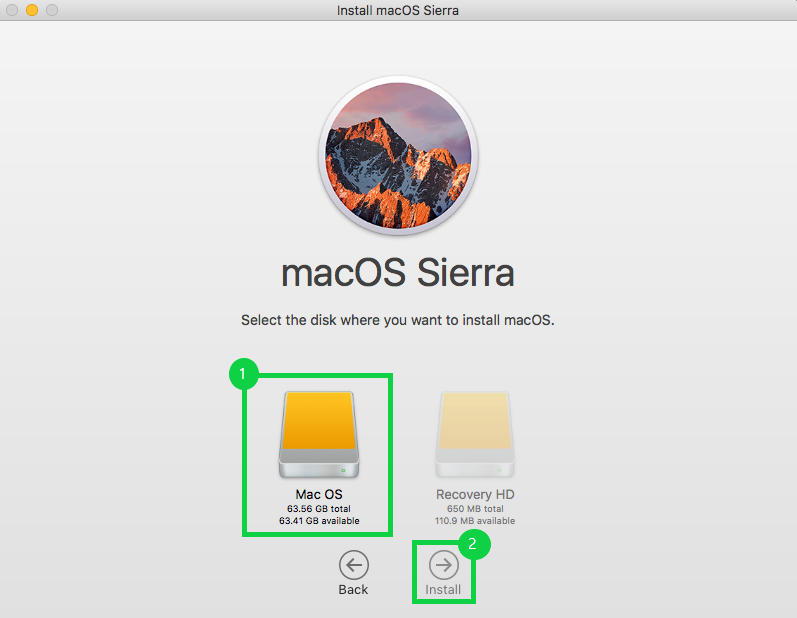
Select a Drive to install macOS on and click Install.
Install will now start and this will take some time. The computer will reboot during this process.
.png)