How to Fix a Printer that Won't Print on Windows 10
Authored by: Support.com Tech Pro Team
1. Introduction
If you're having issues with your printer it could be something as simple as just restarting the printer or your computer. Or it could be something more in depth, needing a full reinstall of your printer.
Tools You'll Need:
A paperclip
iPhone charging cable
Access to a computer with iTunes installed
Any other non-consumable tools needed
Comment out tools section if no tools are necessary
-->
Supplies You'll Need:
Zip ties
Any other consumable supplies
Comment out supplies section if no supplies are necessary
-->
Before You Begin:
You must have access to a computer with iTunes installed.
You must have that thing for the other thing so you can do the thing.
Each individual prereq should have its own box like this. Not all will contain multiple links.
Comment out prerequisites section if no prereqs are necessary
-->
2. Choose the Right Printer
Not all programs obey Windows' default printer settings. Below are some examples of what to look for when initiating a print job. This will vary depending on the program or application you are printing from.
Always ensure that the correct printer is selected when printing a document. Some examples of print dialog boxes are as follows:
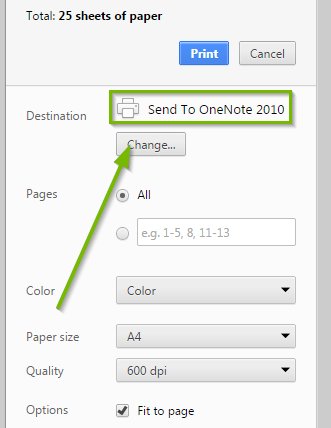
In Google Chrome's print window, the currently selected printer can be shown to the right of the Destination field. You can click the Change button to be given the opportunity to select a different print destination.
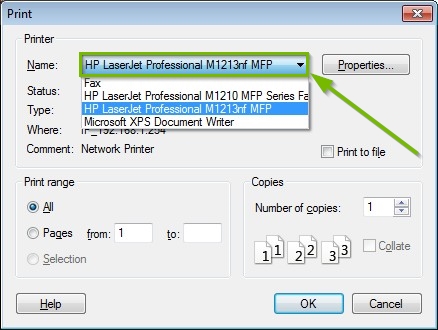
In many Windows applications, the print window will be a dropdown box. Simply click the arrow on the dropdown box to display the full list of available printers.
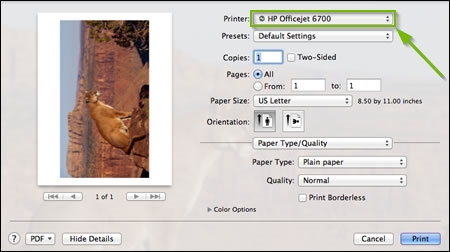
In most Mac apps, the print window displays a dropdown box. Simply click the double-arrows on the dropdown box to display the full list of available printers.
3. Reboot
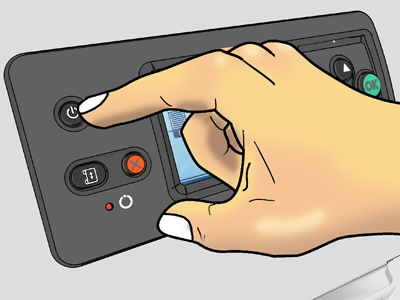
The following illustrations are a general representation of what your printer's power button/switch may look like. Your power button / switch will vary depending on the manufacturer and model printer you have.
Press the Power button on the front panel to turn the printer off. Wait a few moments, and then press the Power button again. This should restart the printer.
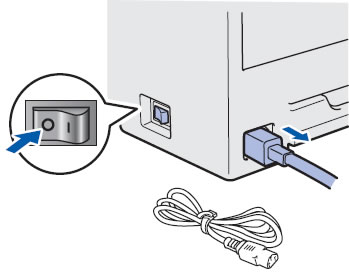
If the power button will not turn the printer off, turn off the printer by using the power switch at the rear of the printer, if your printer has one.
Remove the power cords from the power sockets.
Wait for 10 seconds.
Reinsert the power cords into the power sockets and turn on the power switch if necessary.
Press the Power button to turn on the printer on again.
4. Restart Your PC
Before your restart or shut down your PC, make sure to save all necessary work to prevent data loss.
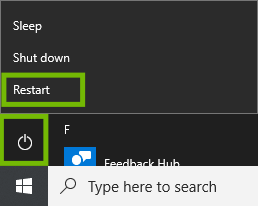
Using the Mouse
Select the Start menu.
By default it is in the lower left corner of your screen.
Select Power, then select Restart.
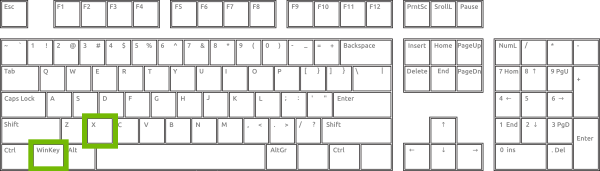
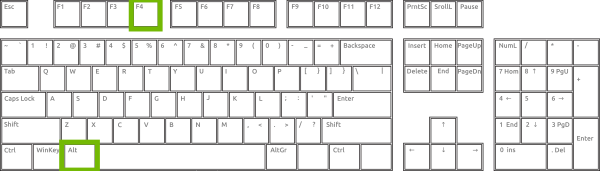
Using the Keyboard
Press the Windows and X keys at the same time. This minimizes any open windows you may have.
Press the Alt and F4 keys at the same time. This tells Windows to close the desktop.
Select Restart, then OK.
5. Check Connection
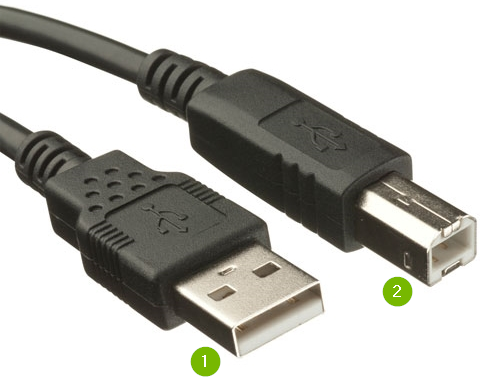
If your printer does not connect via Wi-Fi, it will connect directly to a computer with a USB cable. One end (1) goes into the computer and the other end (2) goes into the printer.
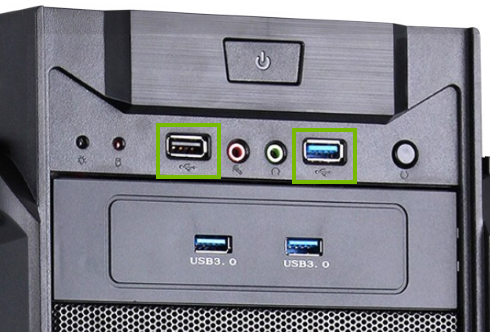
Locate the USB cable that connects the printer to the computer. Ensure the flat end is plugged into the computer correctly and securely.
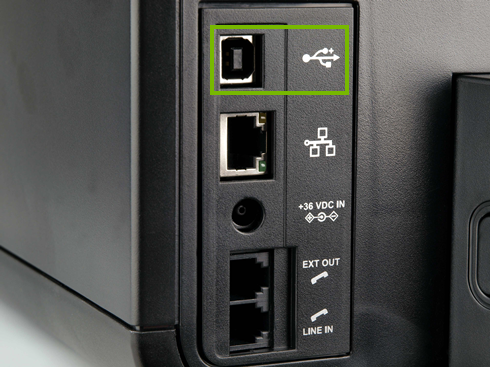
Locate the USB port on the side or back of the printer. Make sure not to confuse it with the any other ports that might be next to it. Look for the USB symbol next to the port. The number and layout of the ports varies by printer. Ensure this end of the USB cable is plugged into the printer correctly and securely.
6. Check Ink or Toner
On a Windows-based computer:The following steps may not work if you have not installed the software that was included with your printer. It's also important to note that every printer is different. These steps are meant as a general guideline.
Locate the printer settings, often found by right-clicking the printer icon in the Windows Notification Area, located in the bottom right hand corner of your screen.
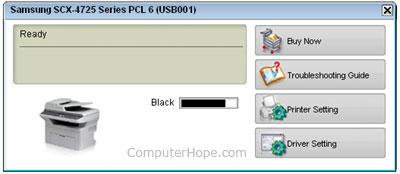
Within the printer settings software, you should see the toner levels for the currently installed cartridge(s). Below are a few different examples of how the ink level screens may look.
Samsung Laser printer available toner example:
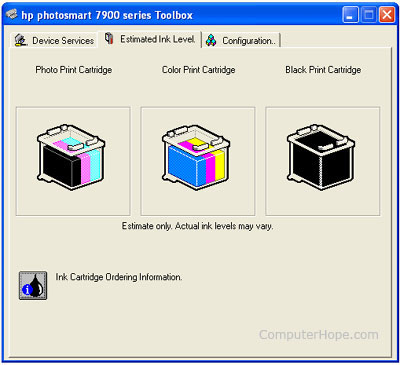
HP Photosmart 7900 available ink example:
Replace any cartridges that are flagged as being low or in a precautionary state.
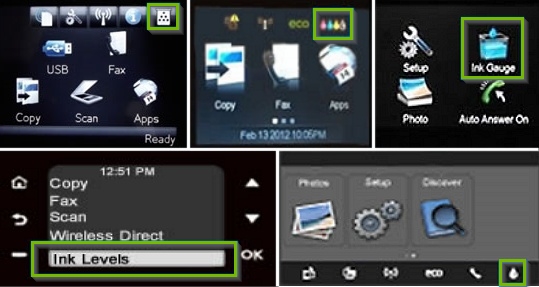
Through the Printer Menu:
Every printer is different and the following steps are generalized. For explicit instructions on checking ink levels, consult your printer's documentation.
Locate the Menu button of your printer and use the appropriate navigation keys to find a Status or Reports section.
Print a Printer Information or Status page to see current toner levels.
If it has one, your printer's screen may display ink / toner levels regularly.
Replace any cartridges that are flagged as being low or in a precautionary state.
7. Check Paper
The following illustrations are a general representation of what your printer's paper tray may look like. Your actual paper tray will vary depending on the manufacturer and model printer you have. However, most paper trays are made in a similar fashion.
Slide the paper guides to their outermost positions.
Load a stack of plain paper with the print-side facing up into the input tray, and then slide the stack forward until it stops.
Slide the paper length and width guides so that they are resting against the stack of paper.
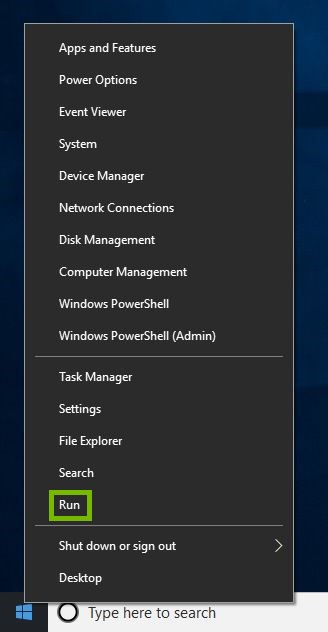
8. Clear Print Queue
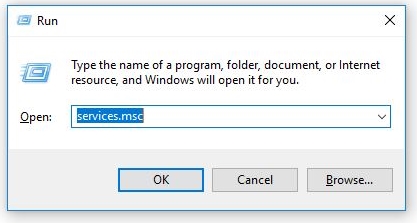
Right click on your Start Menu icon and choose Run.
Type in services.msc into the Run box and click OK.
Find Print Spooler in the list of services. Right click on it and and click on Stop.
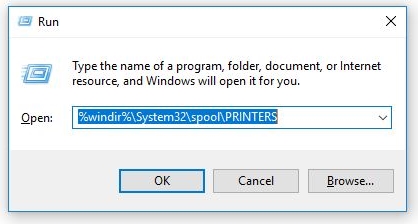
Right click on your Start Menu icon and choose Run.
In the Run dialog box, type in %windir%\System32\spool\PRINTERS and click on OK.
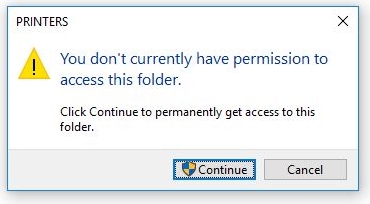
If you are prompted that you need permission to access the folder, click on Continue
If you see any files in this folder, you will want to delete them.
Right click on your Start Menu icon and choose Run.
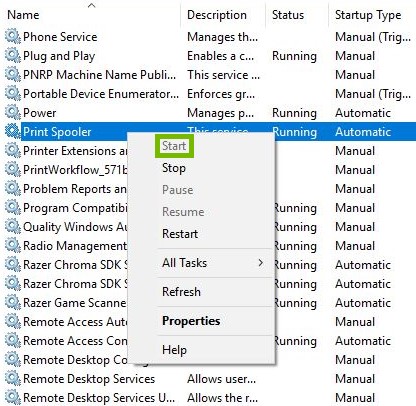
Type in services.msc into the Run box and click OK.
Find Print Spooler in the list of services. Right click on it and and click on Start.
9. Re-Install
In the following steps we are going to uninstall your printer from your system and reinstall it. A generic printer may be pictured as a reference.
10. Uninstall Your Printer Drivers
Click Start then Settings.
Next, Select Apps.
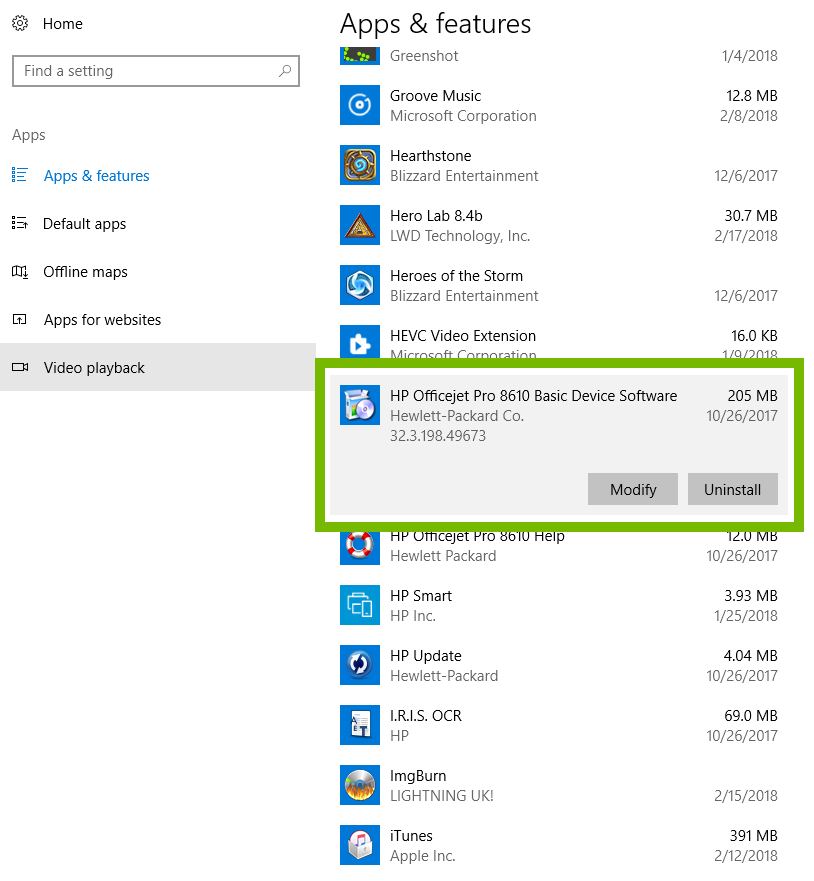
Scroll down and click on the program with your printer name listed.
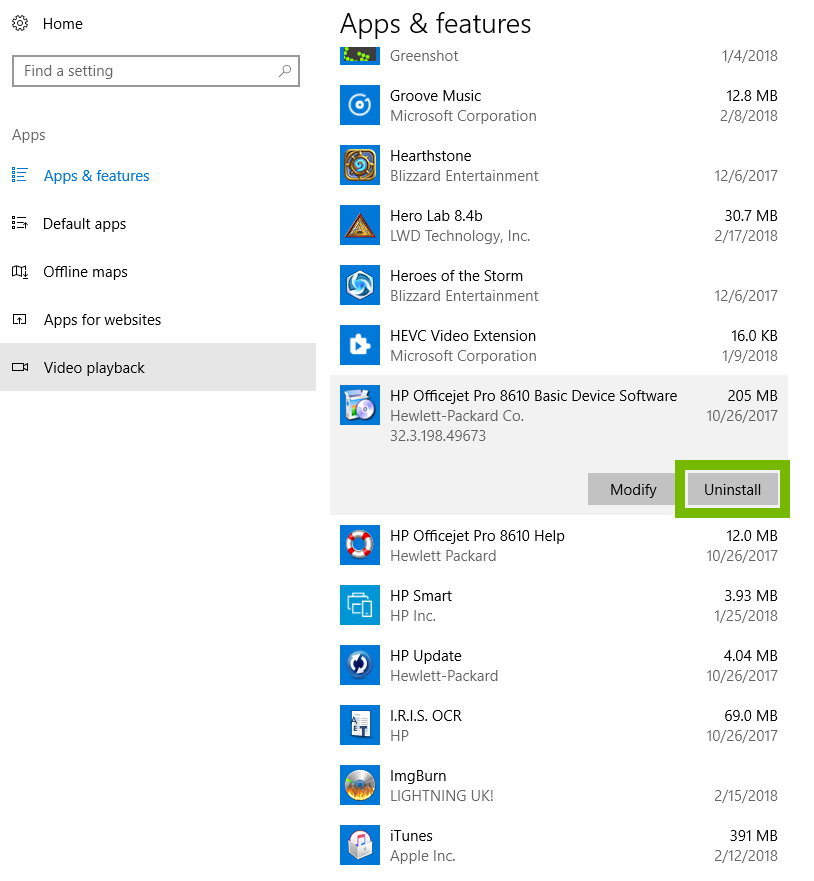
Click on Uninstall.
Carefully read any prompts in case there are special instructions. Proceed until the application is removed.
11. Install Printer Software
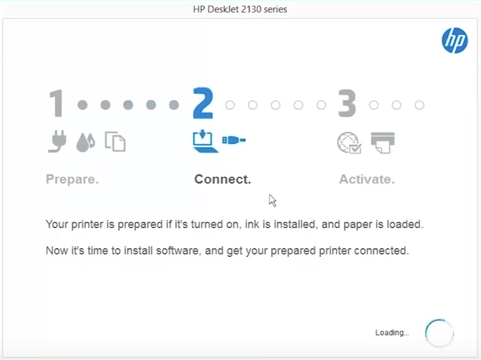
To proceed, you should now install the software that came with your printer onto your PC or Mac computer, following the prompts accordingly.
If you are unable to locate your original disc, you may be able to download the installer from the manufacturer's website.
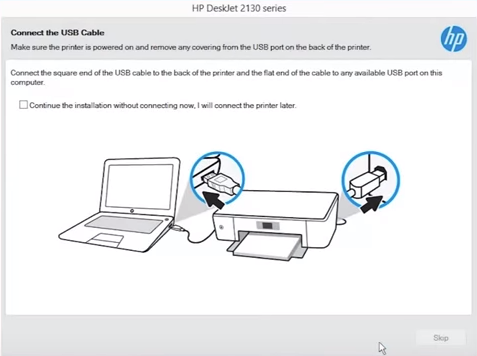
During the installation, you will be prompted to connect the USB and allow the computer to detect the printer.
Answer the decision point after your computer has failed to detect the printer or when you are prompted to review available networks.
.png)