This guide will help you resolve basic problems that can cause your computer to run slowly or sluggishly. These problems could include a faulty or bugged program, corrupted or bugged updates, a full hard drive, insufficient RAM, or an overtaxed CPU.
We'll take you through making sure your system is updated, cleaning up your disk, deleting unwanted programs, checking your memory and CPU, and finally adjusting settings to get the most speed from your system.
Tools You'll Need:
A paperclip
iPhone charging cable
Access to a computer with iTunes installed
Any other non-consumable tools needed
Comment out tools section if no tools are necessary
-->
Supplies You'll Need:
Zip ties
Any other consumable supplies
Comment out supplies section if no supplies are necessary
-->
Before You Begin:
Be at your computer.
-->
2. Make Sure the Computer Is up to Date
Microsoft frequently releases updates to fix bugs, patch security issues, and add new services to the Windows Operating System. In Windows 10, updates are normally installed automatically, but updates can still be checked for and installed manually to ensure they're installed as quickly as possible. If your issues with slowness are being caused by a bug that Microsoft has patched with an update, installing available updates may resolve your issue. You can use online driver scanning software to make sure your drivers are also completely up to date for driver updates that Microsoft update may have missed.
Open the Start menu and select Settings.
Select Update and Security.
Select Windows Update on the left, then select Check for updates.
Once the system has finished checking for updates, it will automatically download and install the latest applicable updates.
The system also may prompt you to restart, if it does, please do so at your earliest convenience, otherwise the update process will not complete.If you system was already recently updated, chances are that no further updates are available and your Update status will indicate: Your device is up to date.
3. Use Disk Cleanup to Free up Drive Space
Windows needs about 2 GB of free hard drive space at minimum to function properly. Ideally, to properly update and perform additional functions, around 5 GB of free hard drive space is recommended. A simple way to help free up space is to remove temporary files; files that were created during an update process, and are now simply taking up space on your hard drive unnecessarily. Windows has a utility that will help safely free up space on your hard drive.
Open the Start menu and select Settings.
Select System.
Select Storage on the left, then select Temporary files on the right.
Place a checkmark next to each item, then select Remove files.
4. Delete Unwanted or Unused Programs
You may need to remove an app because you need the space or simply don't need it anymore. The following steps show you how to easily remove an app.
Click Start then Settings.
Next, Select Apps.
Scroll down and locate the app you wish to remove, and click on Uninstall.
Carefully read any prompts in case there are special instructions. Proceed until the application is removed.
Some applications may require that you reboot.
5. Make Sure Memory Usage Isn't Too High
Your computer's performance can suffer if it is facing limitations caused by system memory (or RAM). Checking how much memory your computer has physically installed, and how much of that memory your system is using will help diagnose a potential memory issue that is affecting your system's performance.
In general, Windows 10 requires 2 GB of memory to work, but performance and stability will be limited. Windows 10 runs better with 4 GB. If you use a lot of programs at the same time, or very large programs (such as games), you may require more memory, such as 6 GB or 8 GB or more.
You can choose to use fewer programs, or add more memory to your computer if you find yourself regularly using up all available memory.
Press the CTRL + ALT + DEL keys on your keyboard at the same time.
Select Task Manager.
Select More Details at the bottom.
Select the Performance tab at the top, then select Memory on the left.
Look at the amount of memory you have on your computer, and how much is in use.
Total Memory
In the top-right corner, you'll see how much memory is physically installed in your computer.
Memory In Use
In the list at the bottom, you'll see how much is in use by Windows, and the programs you have open.
In general, you want 1GB to 2GB available while you have most of your regular programs open.
You can check this information when you have your normal programs open. Open a few programs you usually use, and return to this window. See if you're using more memory than you have; this indicates Windows is using some of your hard drive space as memory, which is very slow.
This is a physical part of your computer, not something you can download or modify through software. If you want to add more memory to your computer, contact the company you purchased your computer from, or a local technical support service.
Virtual Memory or Your Paging File
The paging file is a hidden file on your computer's hard drive that Windows 10 uses as memory, and acts as an overflow of the system memory that holds the data needed for applications currently running on your computer. Increasing the size of your paging file can help with speed issues.
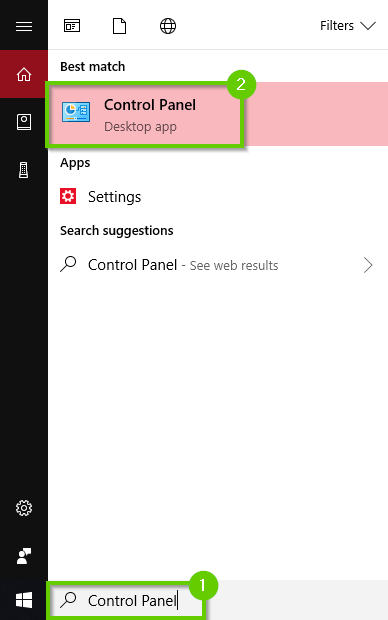
In the search bar, type "Control Panel" and select it.
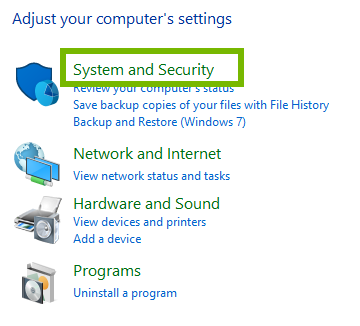
Select System and Security.
Select System.
Select AdvancedSystemSettings.
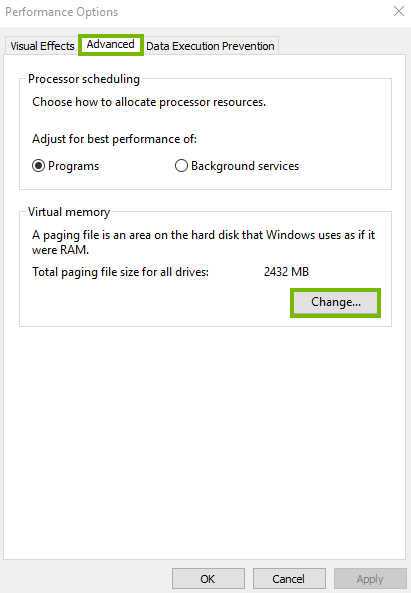
Under the Advanced panel select Settings within Performance.
Select the Advanced tab and under Virtual Memory select Change.
To set your own Paging File size, clear the automatically manage paging file size for all drives selection.
Select Custom Size to set your own Virtual Memory limits. Click Set to finalize your sizes.
The minimum size of the Page file can be up to 1.5 times the amount of physical memory (RAM) you have installed. The maximum size can be 4 times the amount of the physical memory. For example, if your computer has 1GB of RAM, the minimum Page file size can be 1.5GB, and the maximum size of the file can be 4GB.
6. Check CPU Usage During Normal Use
Your computer's central processing unit, or CPU, is arguably the most important component of any computing device. It handles basic instructions and allocates the more complicated tasks to other specific chips to get them to do what they do best.
Your CPU can age, get corrupted, have physical issues, or just not be up to newer tasks with newer technology.
You can check your CPU and see what processes and programs are using up its power by opening the task manager.
Press the CTRL + ALT + DEL keys on your keyboard at the same time.
Select Task Manager.
Select More Details at the bottom.
Select the Processes tab, then select CPU to sort the process list by how much CPU they use.
Look through the top five or ten entries for programs you recognize.
There will be many you don't recognize in the list; this is normal. Windows has a lot of processes, some with odd names, to allow it to run properly.
If you see a program you know about and aren't using, select it, then select End task.
You can check this information when you have your normal programs open. Open a few programs you usually use, and return to this window. See if you're using up your CPU for an extended period. CPU usage spikes are normal, but having your usage being above 90% indicates a problem.
The CPU is a physical part of your computer, not something you can download or modify through software. If you want to upgrade your CPU you need to contact the company you purchased your computer from, or a local technical support service. Depending on your device you may not be able to upgrade your CPU at all. If this is the case you will need to purchase a new device.
7. Disable Programs from Starting up with the Computer
Press the CTRL + ALT + DEL keys on your keyboard at the same time.
Choose Task Manager from the screen that comes up.
Click on More details at the bottom.
Click on the Startup tab at the top.
Look carefully through this list. If you see an item you do not want to startup whenever you turn on your computer, highlight it, and choose Disable at the bottom.
8. Change Appearance and Performance Settings
Your Windows 10 system uses a lot of resources to make itself pretty and streamlined. You can adjust this setting manually to focus on performance (fast) or appearance (pretty).
Select the Start menu, search for Performance. Then, select Adjust the appearance and performance of Windows from the menu.
Select Adjust for best performance at the top, then click OK at the bottom.
9. Change Laptop Power Settings (Optional)
Whether you have a laptop or a desktop computer, you have access to power settings in Windows 10. When it comes to the speed of your computer, certain power settings can actually affect laptop computers in a negative way. This is by design, as most laptops are designed to 'throttle' the amount of power they're using in order to preserve battery life.
Similar to the Appearance and Performance Settings, the power settings you choose can have an impact on your laptop computer. The following steps are optional, as desktop computer users generally won't see any performance boost or increase by changing these settings. However, you may wish to make changes to the settings you find based solely on your own personal preferences.
More power savings means trading some performance for less energy use. Lower energy use makes your laptop battery last longer, as well as makes your computer cost less to operate.
Open the Start menu and select Settings.
Select System.
Select Power & sleep on the left, then Additional power settings on the right.
You'll be able to choose from three power plans; Balanced, Power saver, and High performance.
Balanced
This provides a balance between energy use and the performance of your computer. This is the recommended setting.
Power Saver
This option decreases system performance in order to save more energy. This can help you make your laptop's battery last longer, at the cost of it taking longer to start a program, for example.
High performance
This setting will use the most energy, but will allow the computer to go as fast as it can at all time.
These options provide a great deal of customization. It is perfectly understandable and acceptable to stop after picking one of these choices! To continue to further customize the way your computer manages power consumption, to get the exact setup that is best for you, continue with the steps below.
Once you have chosen a plan, select Change plan settings to the right.
First, set when you'd like your screen to turn off and when your computer will go to sleep when not in use to save power. Then, select Change advanced power settings.
In Power Options, select the + next to each item to expand it, and change the settings to customize the Power Plan to your exact expectations, and balance power savings with performance to meet your needs. When done, select OK.
Remove Hidden Spyware In Minutes For Free
Detect and remove spyware, keyloggers, tracking cookies, and other
threats that slow down your PC or steal your data.
65+ Million Downloads
Spyware scanner with AI-powered detection engine + database
.png)