It can be incredibly frustrating when you can't check your email. This guide will help you troubleshoot common causes of problems you may have with the Windows Mail program on Windows 10, and get you back in contact with everyone.
How To Use This Guide
This guide is designed to take you through a number of different troubleshooting steps. After each step, try to open Windows Mail and check your mail again. When the program opens and works, stop at that point; you do not need to go any further.
While the first few steps here are incredibly simple, they are absolutely crucial, and can solve many of the problems you may have quickly and easily!
2. Make Sure I'm Connected to the Net
Your email uses your Internet connection to send and receive mail. It's best to make sure that it works with things like browsing webpages first, before continuing.
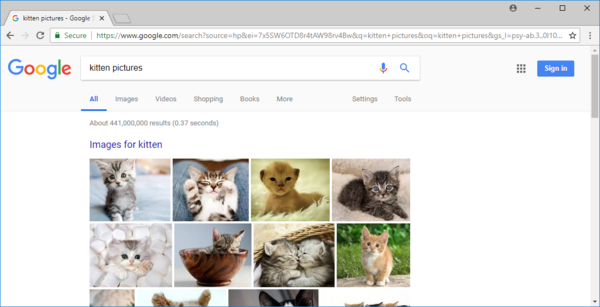
Open your browser. In the address bar at the top, type in google.com, then push Enter or Return.
Make sure the Google page comes up. Type in something to search for, and select Google Search.
Make sure your search results come up.
Troubleshoot Internet Connection If you had problems with searching or using your browser, your Internet connection is the problem. Follow this guide for help resolving your Internet connectivity problems, and your email problems will most likely be fixed as well.
The system also may prompt you to restart, if it does, please do so at your earliest convenience, otherwise the update process will not complete.If you system was already recently updated, chances are that no further updates are available and your Update status will indicate: Your device is up to date.
4. Restart and Install the Update
Before your restart your PC, make sure to save all necessary work to prevent data loss.
Windows 10
Select the Start menu, then select Power.
Select Restart or Update and Restart.
Your computer will close all open programs, apply any pending updates, and start back up.
Windows 8
Select the Start menu, then select Power in the top-right corner.
Select Restart or Update and restart.
Your computer will close all open programs, apply any pending updates, and start back up.
Windows 7
Select the Start menu, then select the small arrow next to Shut down.
Select Restart.
Your computer will close all open programs, apply any pending updates, and start back up.
5. Check These Windows Settings
Windows Mail relies on a number of different settings on Windows itself to do everything from encryption (keeping your mail safe from prying eyes), as well as helping your mail provider make sure you are supposed to have access. A quick check of these Windows settings can often help.
Make Sure Date & Time Are Correct
The Date and Time set on your computer is used to help encrypt your email between your mail provider and you, keeping it safer.
Open the Start menu and select Settings.
Select Time & Language.
Select Date & time on the left. It's usually best to have Set time automatically selected, and make sure the Time zone is set properly, and Adjust for daylight saving time automatically turned on. After that, look at the top and make sure the computer shows the right time and date.
Make Sure the Country or Region is Right
Windows Mail uses some region information to connect to the proper mail server for some mail providers, such as Google.
Open the Start menu and select Settings.
Select Time & Language.
Select Region on the left, and make sure your Country is selected properly.
Sure the Mail App Can Access My Calendar
Windows Mail integrates a calendar system with your email, and will need access to the Windows Calendar app to do so. This is done through the Privacy settings.
Open the Start menu and select Settings.
Select Privacy.
On the left, scroll down to App permissions and select Calendar. Make sure Allow apps to access your calendar is turned On, and Mail and Calendar are On, allowed to access the calendar.
6. Check Mail Settings
If you know your mail server settings, you can check them quickly to be sure nothing changed on accident.
If your mail provider is any of the following, Windows manages these settings for you, and you will not be able to edit them directly; it is safe to skip this step.
Outlook.com Your email address ends with @outlook.com, @live.com, @hotmail.com, or @msn.com
Google Your email address ends with @gmail.com
Yahoo! Your email address ends with @yahoo.com
iCloud Your email address ends with @icloud.com
Corporate Exchange Email Your email address was provided by your company at work and has a custom domain.
If you are not sure of your mail server settings, it's best to contact your mail provider before making any changes to these settings, or continuing with this guide.
Open the Start menu and select Settings.
Select Accounts.
Select Email & accounts on the left, select your mail account, then select Manage.
Verify the settings here are correct for your mail service.
7. Refresh Windows Sync Settings
Sometimes Windows Sync settings don't copy properly, and allowing them to reset can solve problems you may have.
Open the Start menu and select Settings.
Select Accounts.
Select Sync your settings on the left, and turn OffSync settings.
Restart your computer.
Select the Start menu, then select Power.
Select Restart or Update and Restart.
Open the Start menu and select Settings.
Select Accounts.
Select Sync your settings on the left, and turn OnSync settings.
8. Repair Missing or Corrupted Files with SFC
In order to make sure none of your protected operating system files have become corrupted you need to run a tool called System File Checker. This tool will scan all protected files and in the event they are corrupted, replace them with an undamaged version. This guide will walk you through opening it and running it.
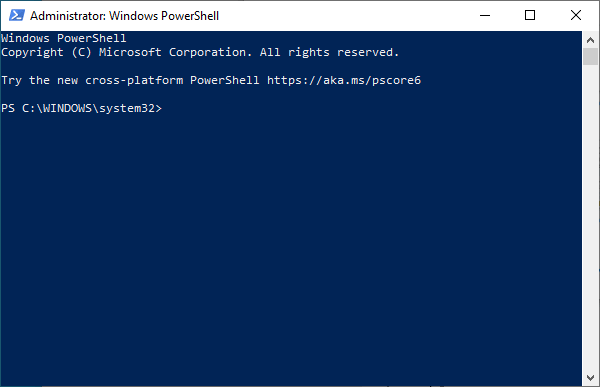
Using your Right Mouse button, right click on the Start menu, and select Windows PowerShell (Admin).
Windows will ask permission to run PowerShell to make changes. Select Yes.
PowerShell will open, and ask for a command.
Your PowerShell may look slightly different, such as slightly different color based on your color scheme or some slightly different text; this is normal, and it will vary from system to system.
Enter the following command and press Enter on your keyboard: sfc /scannow
It will take 15 to 20 minutes to run this command, do not close the PowerShell window or turn off your computer.
Restart your computer.
Select the Start menu, then select Power.
Select Restart or Update and Restart.
9. Repair the Windows Image (DISM)
Sluggishness and freezing could be a result of a corrupted or bugged Windows Image. Repairing the Windows Image using the DISM command will check for corrupted, bugged, or incorrect Windows files and replace them with the proper files.
Make sure you are connected to the Internet before beginning these steps.
Using your Right Mouse button, right click on the Start menu, and select Windows PowerShell (Admin).
Windows will ask permission to run PowerShell to make changes. Select Yes.
PowerShell will open, and ask for a command.
Your PowerShell may look slightly different, such as slightly different color based on your color scheme or some slightly different text; this is normal, and it will vary from system to system.
Enter the following command and press Enter on your keyboard: dism /online /cleanup-image /restorehealth
It will take 15 to 20 minutes to run this command, do not close the PowerShell window or turn off your computer.
Restart your computer.
Select the Start menu, then select Power.
Select Restart or Update and Restart.
10. Remove and Reinstall Windows Mail
If the installation of Windows Mail is corrupt, sometimes simply removing and reinstalling it will resolve the problem.
Any mail stored on your computer and not on your mail services server will be lost.
If this is not acceptable, stop and do not proceed; instead, contact your mail service provider for further assistance first.
Upon reinstalling Windows Mail, you will need to re-set your email settings.
Be absolutely sure you know your Username, Password, and service information before performing this step!
Remove Windows Mail
The Windows Mail program is "special", and considered an integral part of Windows 10; it cannot be removed using normal means.
Instead, you must do so with a special command.
Using your Right Mouse button, right click on the Start menu, and select Windows PowerShell (Admin).
Windows will ask permission to run PowerShell to make changes. Select Yes.
PowerShell will open, and ask for a command.
Your PowerShell may look slightly different, such as slightly different color based on your color scheme or some slightly different text; this is normal, and it will vary from system to system.
Enter the following command and press Enter on your keyboard: get-appxpackage *microsoft.windowscommunicationsapps* | remove-appxpackage
It will take about one minute for this command to run, and no message will be displayed after it completes; this means it completed successfully.
Install Windows Mail
Make sure you are connected to the Internet before beginning these steps.
Open the Microsoft Store, and select Search.
Type in Mail, and select Mail and Calendar from the list.
Select Get.
Wait for the install to complete. A message will display at the top indicating when Windows Mail is installed.
Reinstalling Windows mail will not re-create the Mail icon in the Start Tiles, nor on the Taskbar. But, it will be listed in your Start menu under M, for Mail. You can Pin Mail to your Start menu, Task bar, or add an icon to your desktop through dragging-and-dropping, or the Right-click menu, as with every other program in Windows.
Setup Windows Mail
Open Windows Mail and select Add account.
Select your account type, and follow the instructions on-screen to re-setup your mail account with Windows Mail.
11. If It Still Doesn't Work
Remove Hidden Spyware In Minutes For Free
Detect and remove spyware, keyloggers, tracking cookies, and other
threats that slow down your PC or steal your data.
65+ Million Downloads
Spyware scanner with AI-powered detection engine + database
.png)