The Xbox 360 allows you to install both applications and games from the store or a disc. Sometimes the install doesn't go as planned, so we’re going to show you how to fix that.
What you need before you start:
Make sure that there's no physical damage to the Xbox 360 or the game installation disc.
You have a good internet connection.
Microsoft account.
2. Check Game Disc
Checking the Game Disc
Eject the disc and make sure it is not dirty, scratched or damaged.
Ensure you are using the correct disc for this console.
Insert another disc to see if it works.
If another disc can be read, the disc you are trying to use may be dirty or faulty.
If no other disc can be read, there may be a hardware issue with the console.
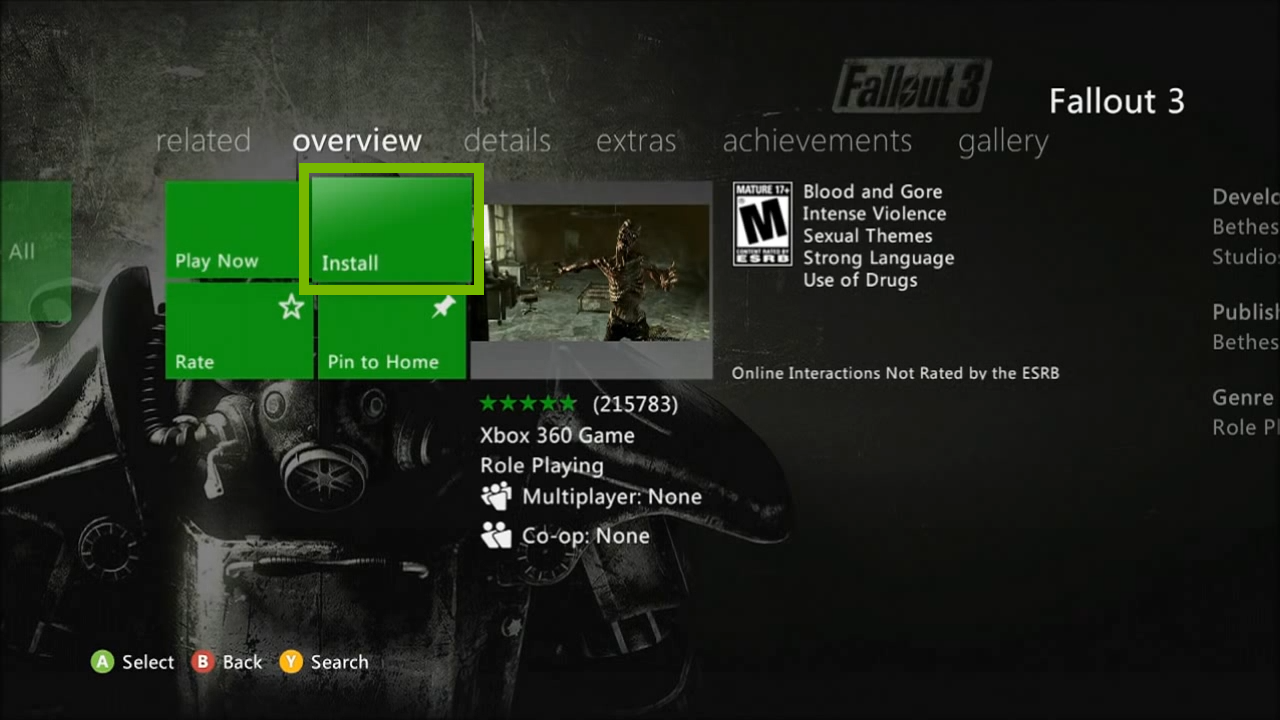
3. Install game from disc
Games that are installed to storage will still require the CD in order to play. This will lower the usage on your optical drive and wear of your game disc.
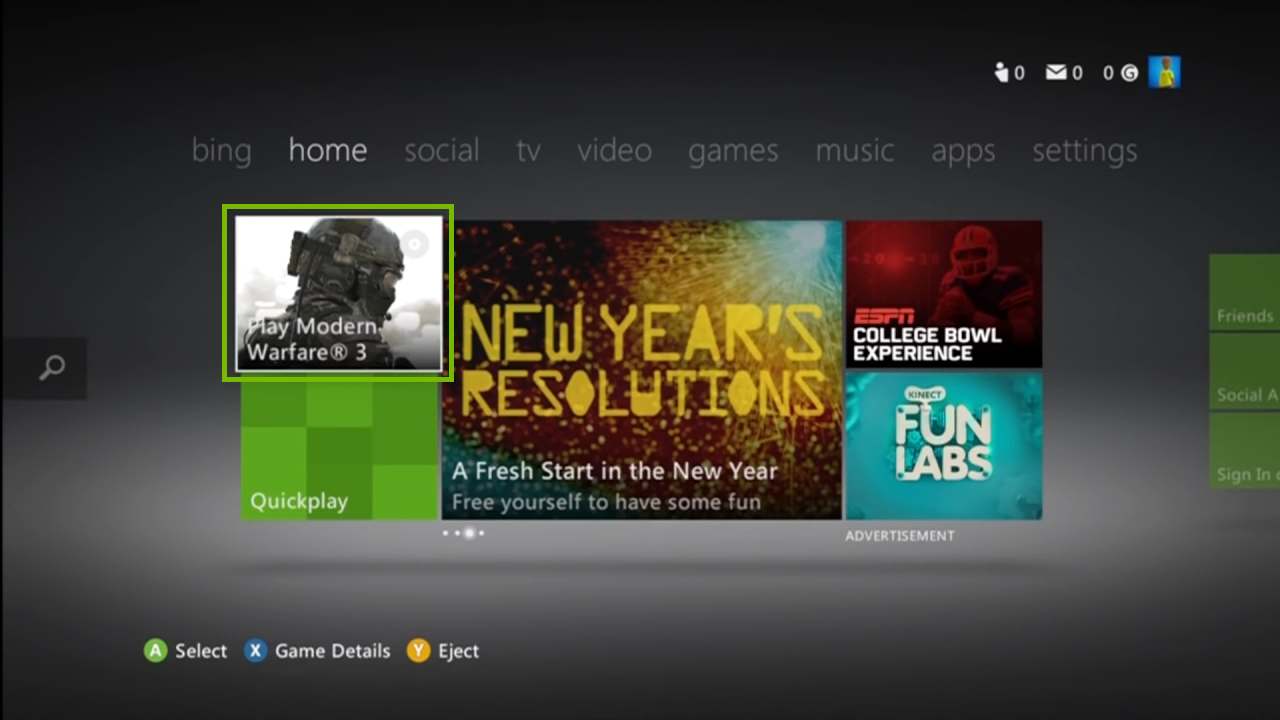
Insert the disc into the tray.
Highlight the game you inserted and press the "X" button on the controller.
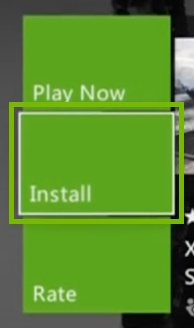
Select Install.
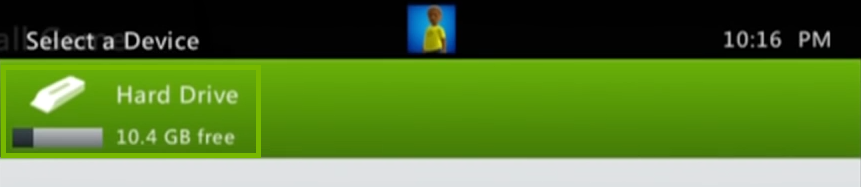
You may have multiple storage options. Select the drive you wish to install your game to.
4. Check Free Space
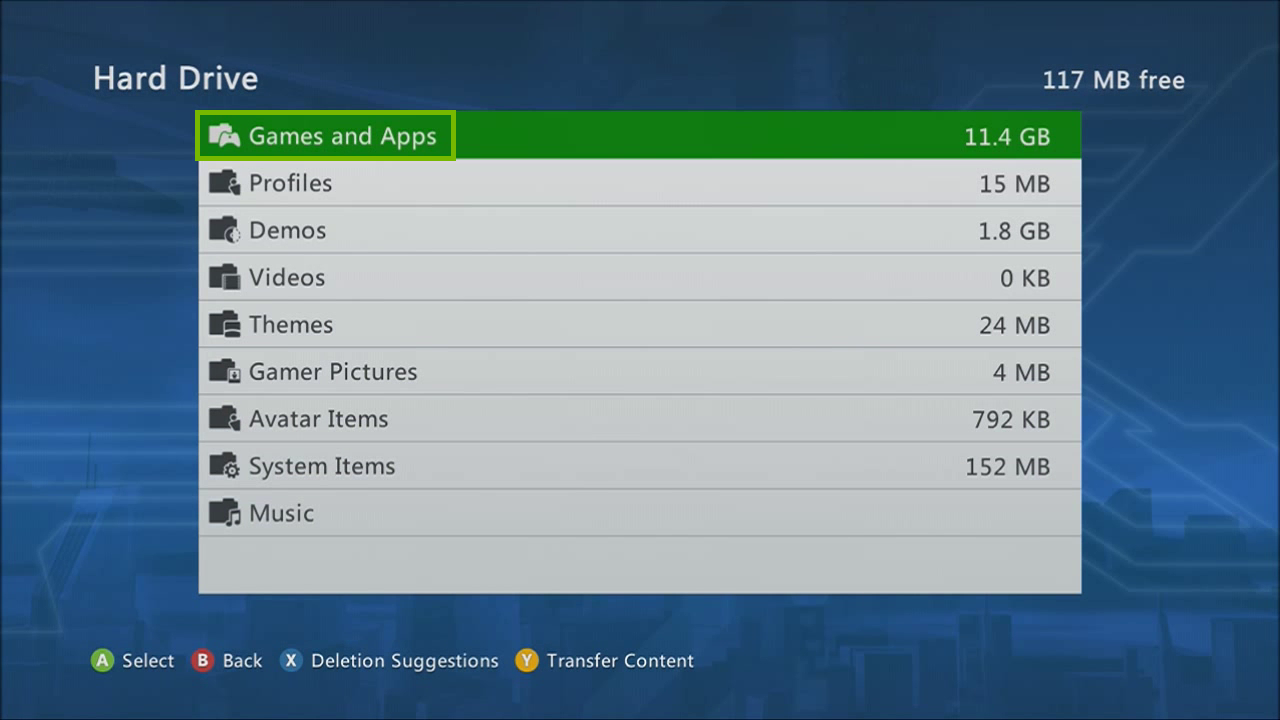
Go to Settings and select System.
Select Storage.
This will show you what storage is currently available.
5. Manage Local Saved Games
This will delete all data related to the game(s) you remove from local storage. This action can not be undone.
Go to Settings and select System.
Select Storage.
Choose a storage device.
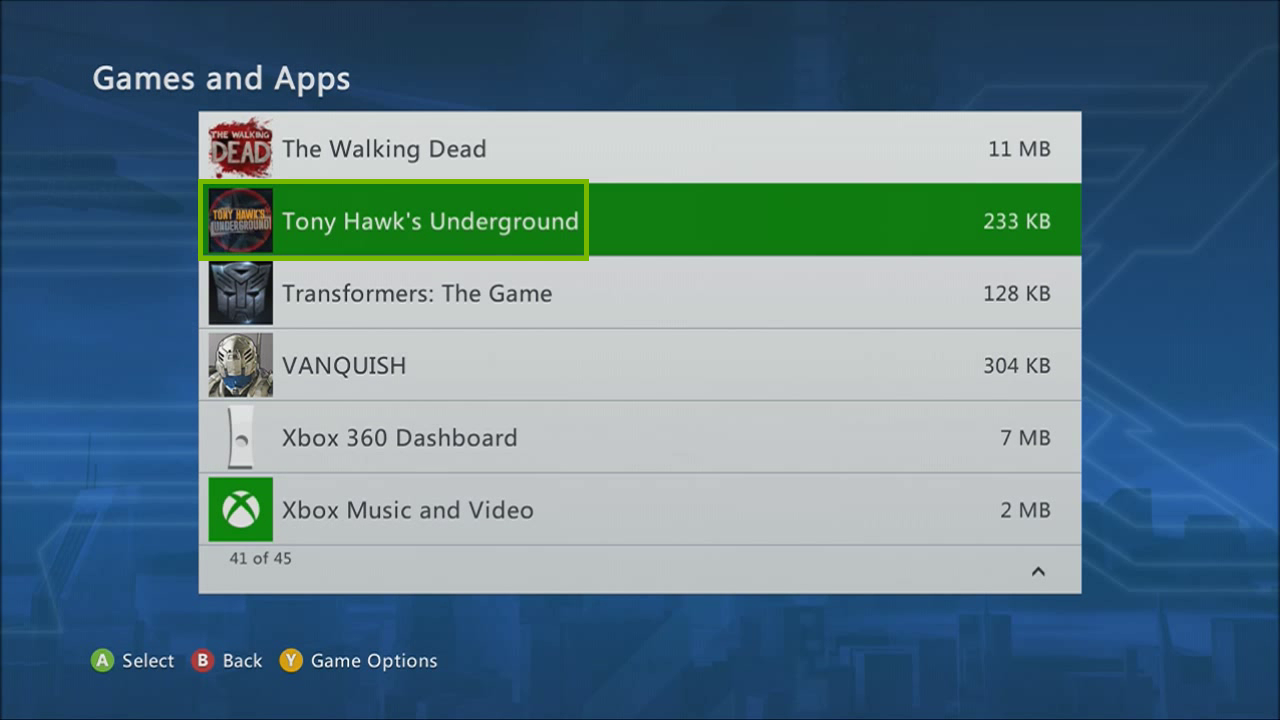
Select Games and Apps.
Select a game.
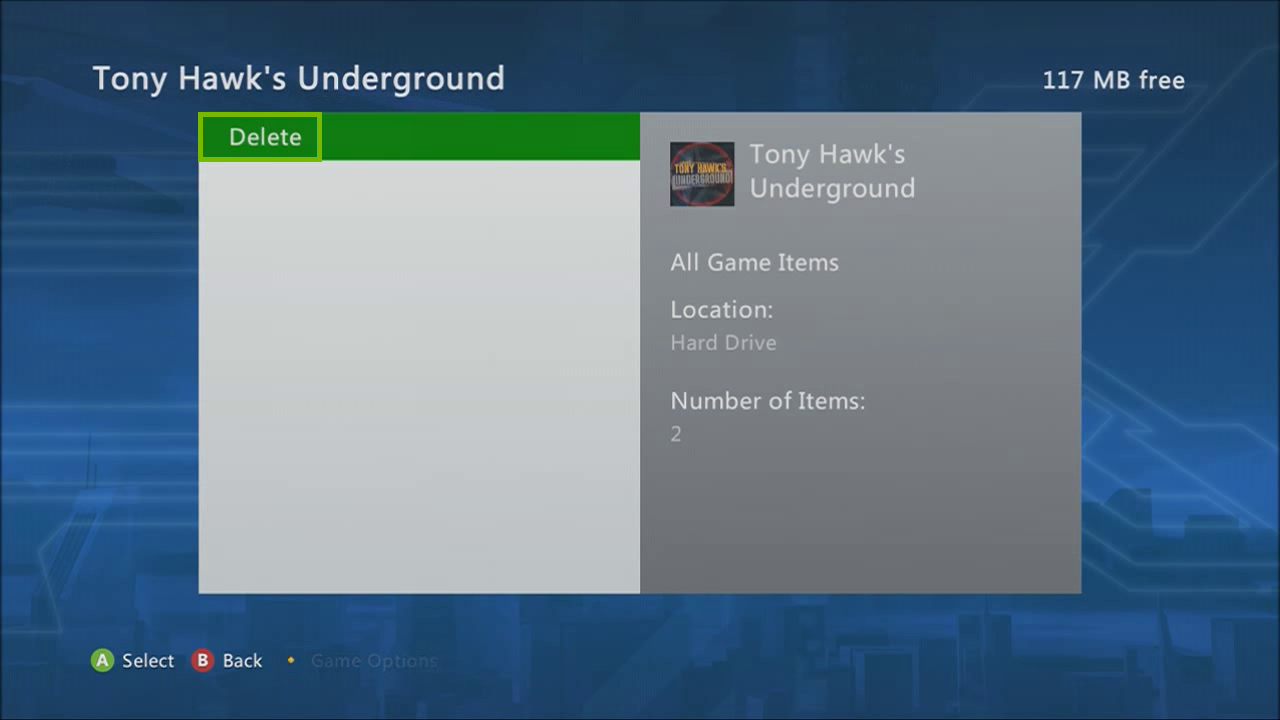
Select Delete.
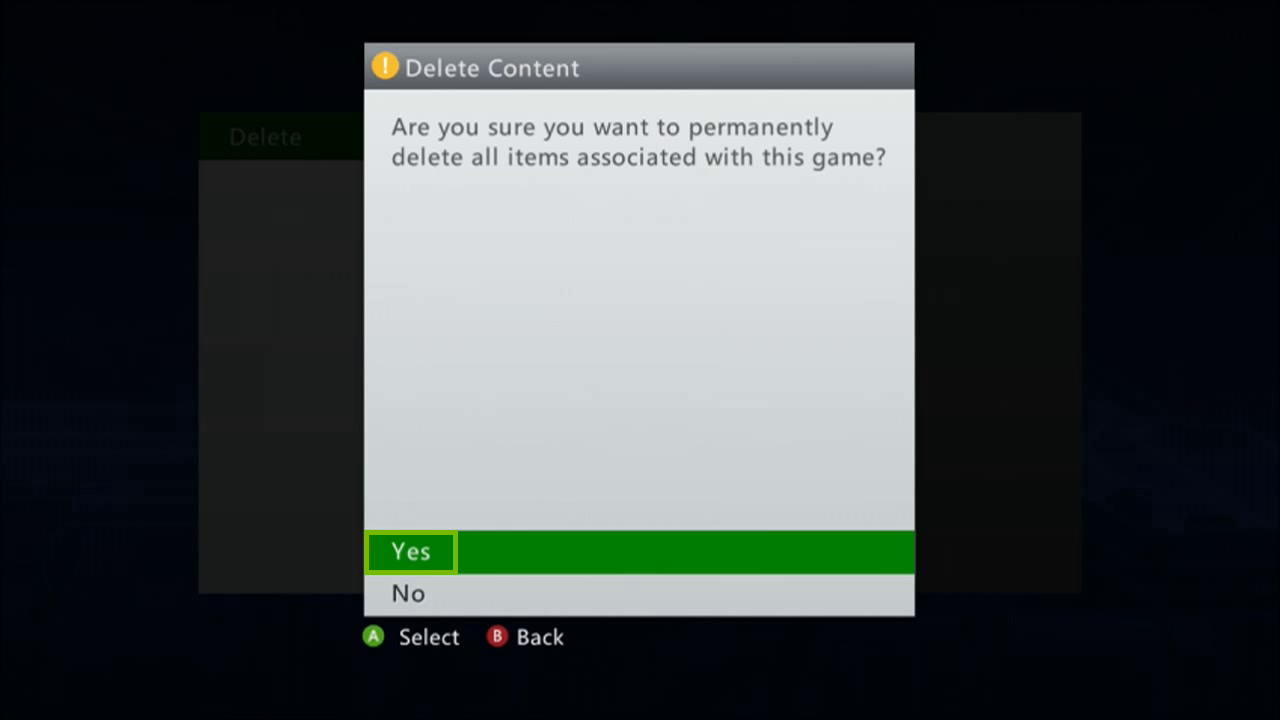
Select Yes to confirm Delete.
6. Install game from disc
Games that are installed to storage will still require the CD in order to play. This will lower the usage on your optical drive and wear of your game disc.
Insert the disc into the tray.
Highlight the game you inserted and press the "X" button on the controller.
Select Install.
You may have multiple storage options. Select the drive you wish to install your game to.
7. What's next?
8. Network / Service Check
Let's attempt to sign into your Xbox LIVE profile.
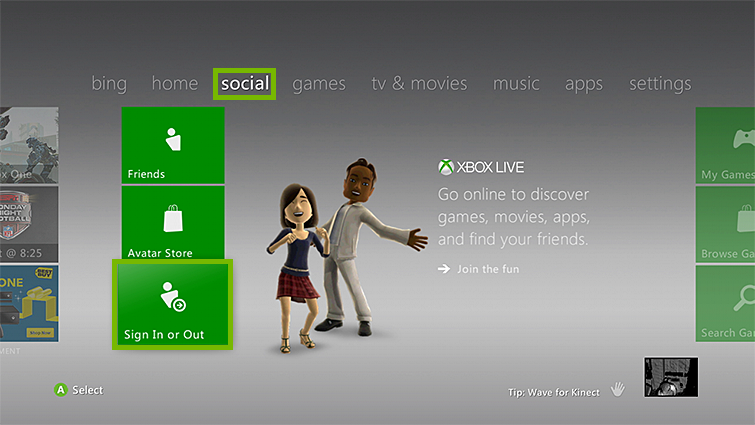
Go to Social and select Sign In or Out.
Select the profile you wish to sign in to.
Select Continue and then sign into your Microsoft account.
If you already purchased the game you're attempting to install, you will want to make sure you're signed into the same profile that you used to purchase the game.
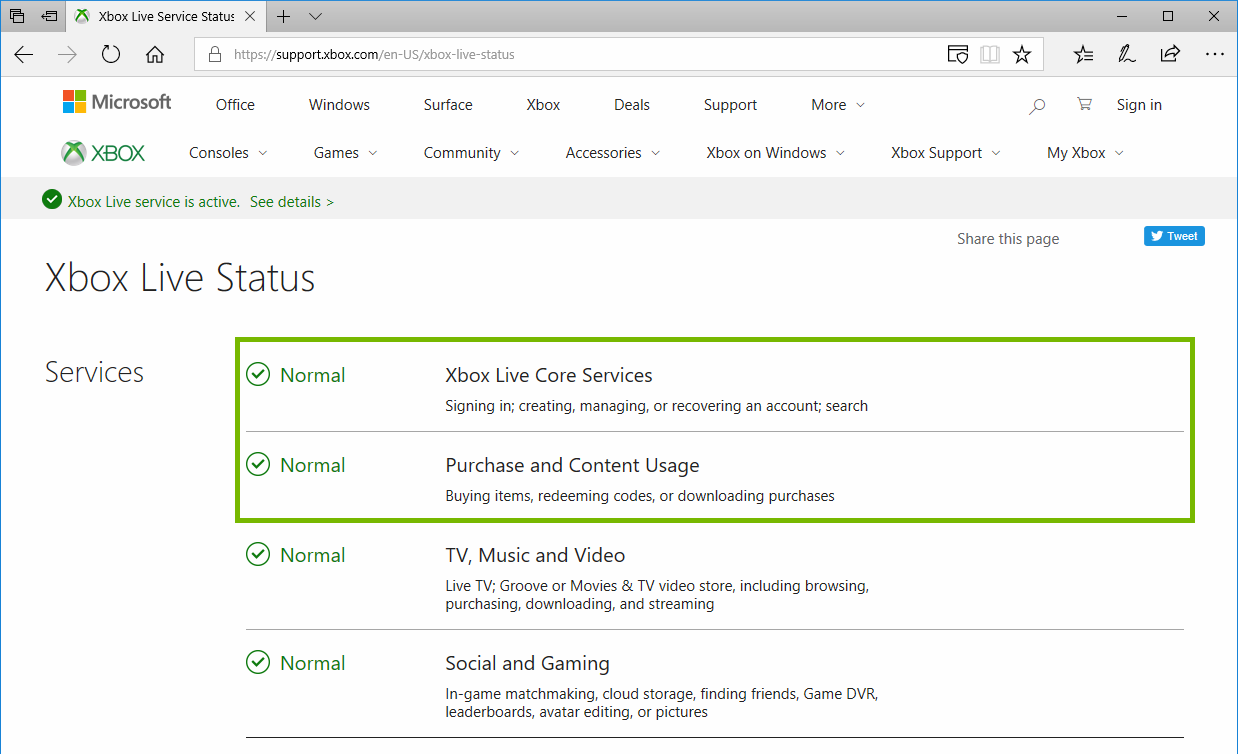
9. Verify Server Status
On your computer, smartphone, or tablet, visit https://support.xbox.com/en-US/xbox-live-status.
Under Services, make sure Xbox Live Core Services and Purchase and Content Usage show as Normal.
If you are having problem with a particular game or app, look under the Games and Apps section of the page, to be sure those parts of Xbox Live are not having problems.
10. Try Again Later When Xbox Services Are Online
Try again later when the services are back up.
11. Check Free Space
Go to Settings and select System.
Select Storage.
This will show you what storage is currently available.
12. Manage Local Saved Games
This will delete all data related to the game(s) you remove from local storage. This action can not be undone.
Go to Settings and select System.
Select Storage.
Choose a storage device.
Select Games and Apps.
Select a game.
Select Delete.
Select Yes to confirm Delete.
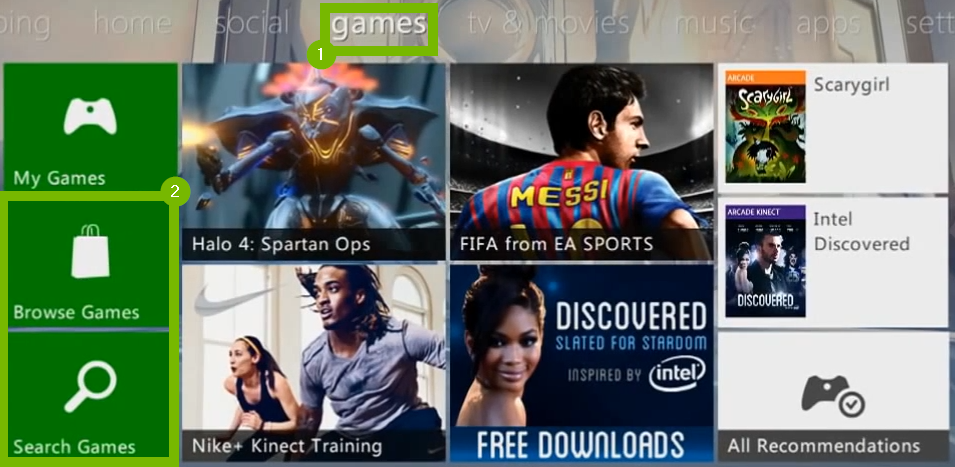
13. Install Game from Xbox Live
Go to Games and select Browse Games or Search Games.
Find the game that you wish to install and select it.
Choose the Install option to download the game.
14. What's next?
15. Test internet connection
Go to Settings and select System.
Select Network Settings.
Select your network from the list, it has a check mark in the corner.
Select Test Xbox LIVE Connection.
By testing your Xbox Live connection, your Xbox will automatically check for any system updates. If prompted, choose Yes to perform the update.
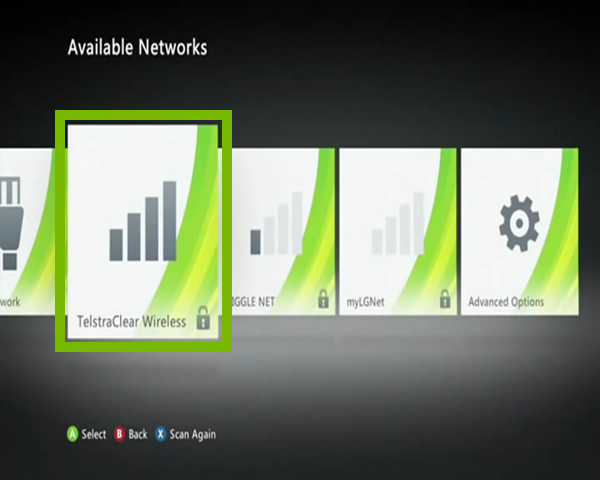
16. Connect Internet
To set up a wireless connection, follow these steps.
Wired connections will be faster and more reliable than wireless connections. If possible, a wired connection is preferred.
Go to Settings and select System.
Select Network Settings.
Select your WiFi Network from the list.
Enter your Security Key and select Done.
Your wireless security key is case sensitive and should be entered as such. If you do not know your wireless password you may find it on your gateway / router.
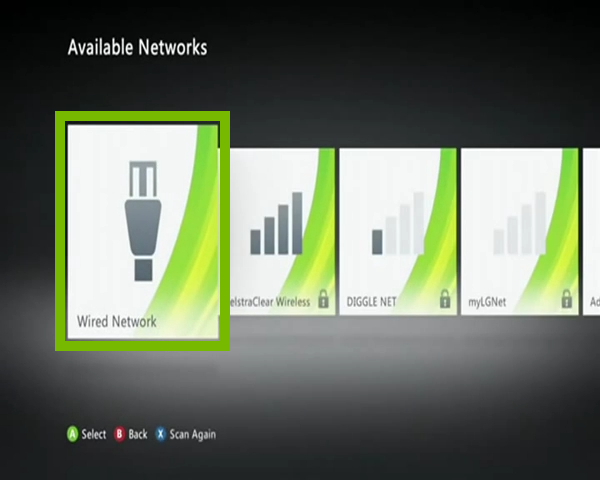
To connect with an Ethernet cable follow these steps.
Go to Settings and select System.
Select Network Settings.
Select Wired Network.
17. Test internet connection
Go to Settings and select System.
Select Network Settings.
Select your network from the list, it has a check mark in the corner.
Select Test Xbox LIVE Connection.
By testing your Xbox Live connection, your Xbox will automatically check for any system updates. If prompted, choose Yes to perform the update.
18. Install Game from Xbox Live
Go to Games and select Browse Games or Search Games.
Find the game that you wish to install and select it.
Choose the Install option to download the game.
19. Verify Server Status
On your computer, smartphone, or tablet, visit https://support.xbox.com/en-US/xbox-live-status.
Under Services, make sure Xbox Live Core Services and Purchase and Content Usage show as Normal.
If you are having problem with a particular game or app, look under the Games and Apps section of the page, to be sure those parts of Xbox Live are not having problems.
20. Try Again Later When Xbox Services Are Online
Try again later when the services are back up.
21. Check Free Space
Go to Settings and select System.
Select Storage.
This will show you what storage is currently available.
22. Manage Local Saved Games
This will delete all data related to the game(s) you remove from local storage. This action can not be undone.
Go to Settings and select System.
Select Storage.
Choose a storage device.
Select Games and Apps.
Select a game.
Select Delete.
Select Yes to confirm Delete.
23. Install Game from Xbox Live
Go to Games and select Browse Games or Search Games.
Find the game that you wish to install and select it.
.png)