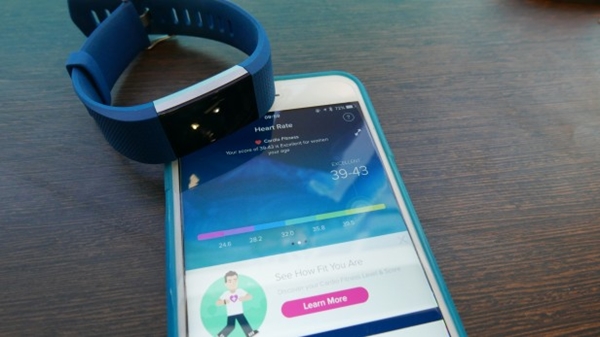
Since the Fitbit Charge 2 does not have a built-in GPS, your Fitbit Charge 2 works with the sensors in your nearby mobile device to track GPS data (known as "connected"GPS). If your Fitbit device begins experiencing issues with GPS functionality, this guide will take you through troubleshooting steps to help you get things working properly again.
Your mobile device needs to be within 20 feet of your Fitbit Charge 2 in order for the devices to properly communicate with one another.
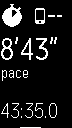
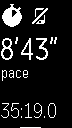
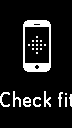
2. GPS Error Messages
The following depicts errors you may experience with your Fitbit Charge 2's GPS functionality.
Phone not found (dashed line): If the phone icon has an animated dashed line next to it, your phone can't find a GPS signal. A weak GPS signal can be caused by environmental factors such as tall buildings, dense forest, steep hills, or even thick cloud cover. All of these factors can interrupt the connection between your tracker and GPS satellites.
Phone not found (crossed out): If the phone icon has a line through it, Bluetooth is likely turned off (meaning your tracker is no longer connected to your phone).
Check Fitbit app: This message means you may need to grant location permissions on your phone.
3. GPS Interference
When it comes to GPS functionality, sometimes nothing is wrong with your Fitbit or your mobile device. A weak GPS signal can be caused by environmental factors such as tall buildings, dense forest, steep hills, or even thick cloud cover. All of these factors can disrupt or completely interrupt the connection between your device and GPS satellites.
Try moving outside or to a location where you can obtain a better signal. If this restores GPS functionality, the issue was with GPS signal and not your devices.
4. Restart Device
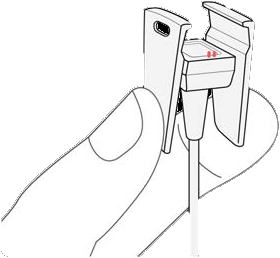
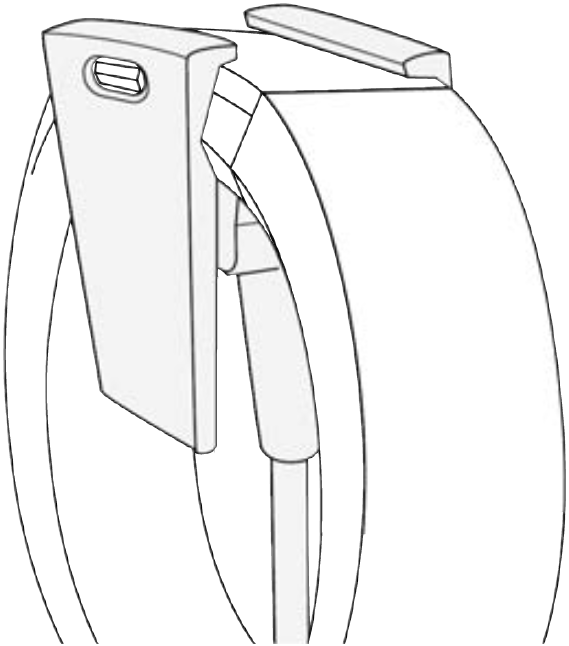
Plug the charging cable into the USB port on your computer or any USB wall charger.
Clip the other end of the charging cable to the port on the back of the tracker. The pins on the charging cable must lock securely with the port.
Make sure the button on your tracker is aligned with the button opening on the charging cable.
You will know the connection is secure when the tracker vibrates and you see a battery icon on the display. Your Charge 2 will begin charging.
Press and hold the button on your tracker for four seconds. When you see the Fitbit logo and the tracker vibrates, this means the tracker has restarted.
Unplug your tracker from the charging cable.
5. Restart Your Mobile Device
On Your Android Device
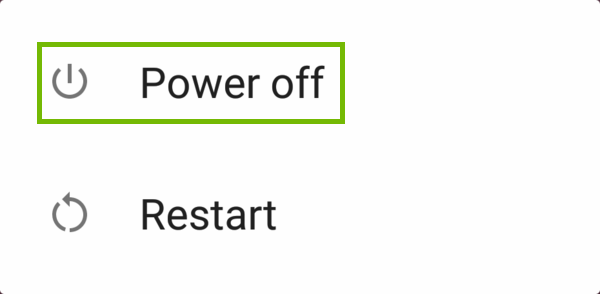
Turn off your phone. Push and hold the power button, then select Power off from the menu.
Wait 30 seconds.
Turn your phone back on by pressing and holding the Power button for a few seconds, until the screen lights up.
On Your iOS Device
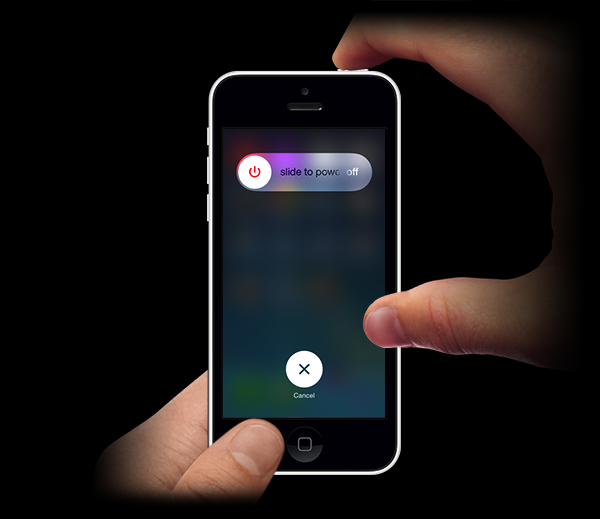
Hold down the lock/power button.
Slide to power off when prompted.
Wait until the phone is off.
Hold down the lock/power button until you see the Apple logo.
6. What's next?
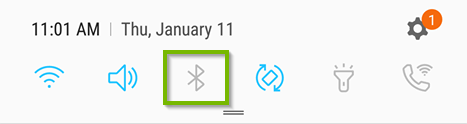
7. Enable Bluetooth
Swipe down on your screen (or up, if using a tablet) to access the menu.
Hold down on the Bluetooth icon to bring up Bluetooth options.
Ensure the Bluetooth switch is set to ON.
8. Remove from Android Device
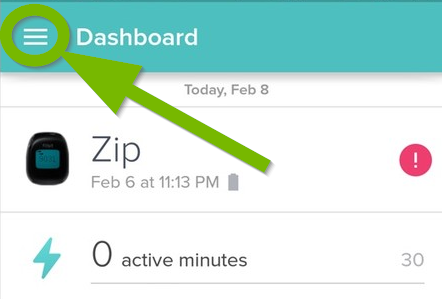
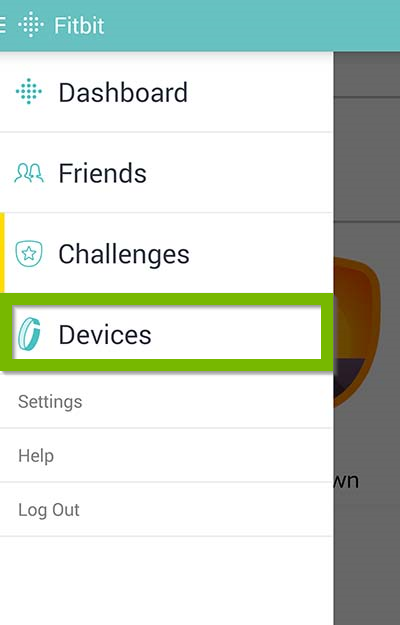
Open the Fitbit app.
Tap the Menu button in the top left of the screen.
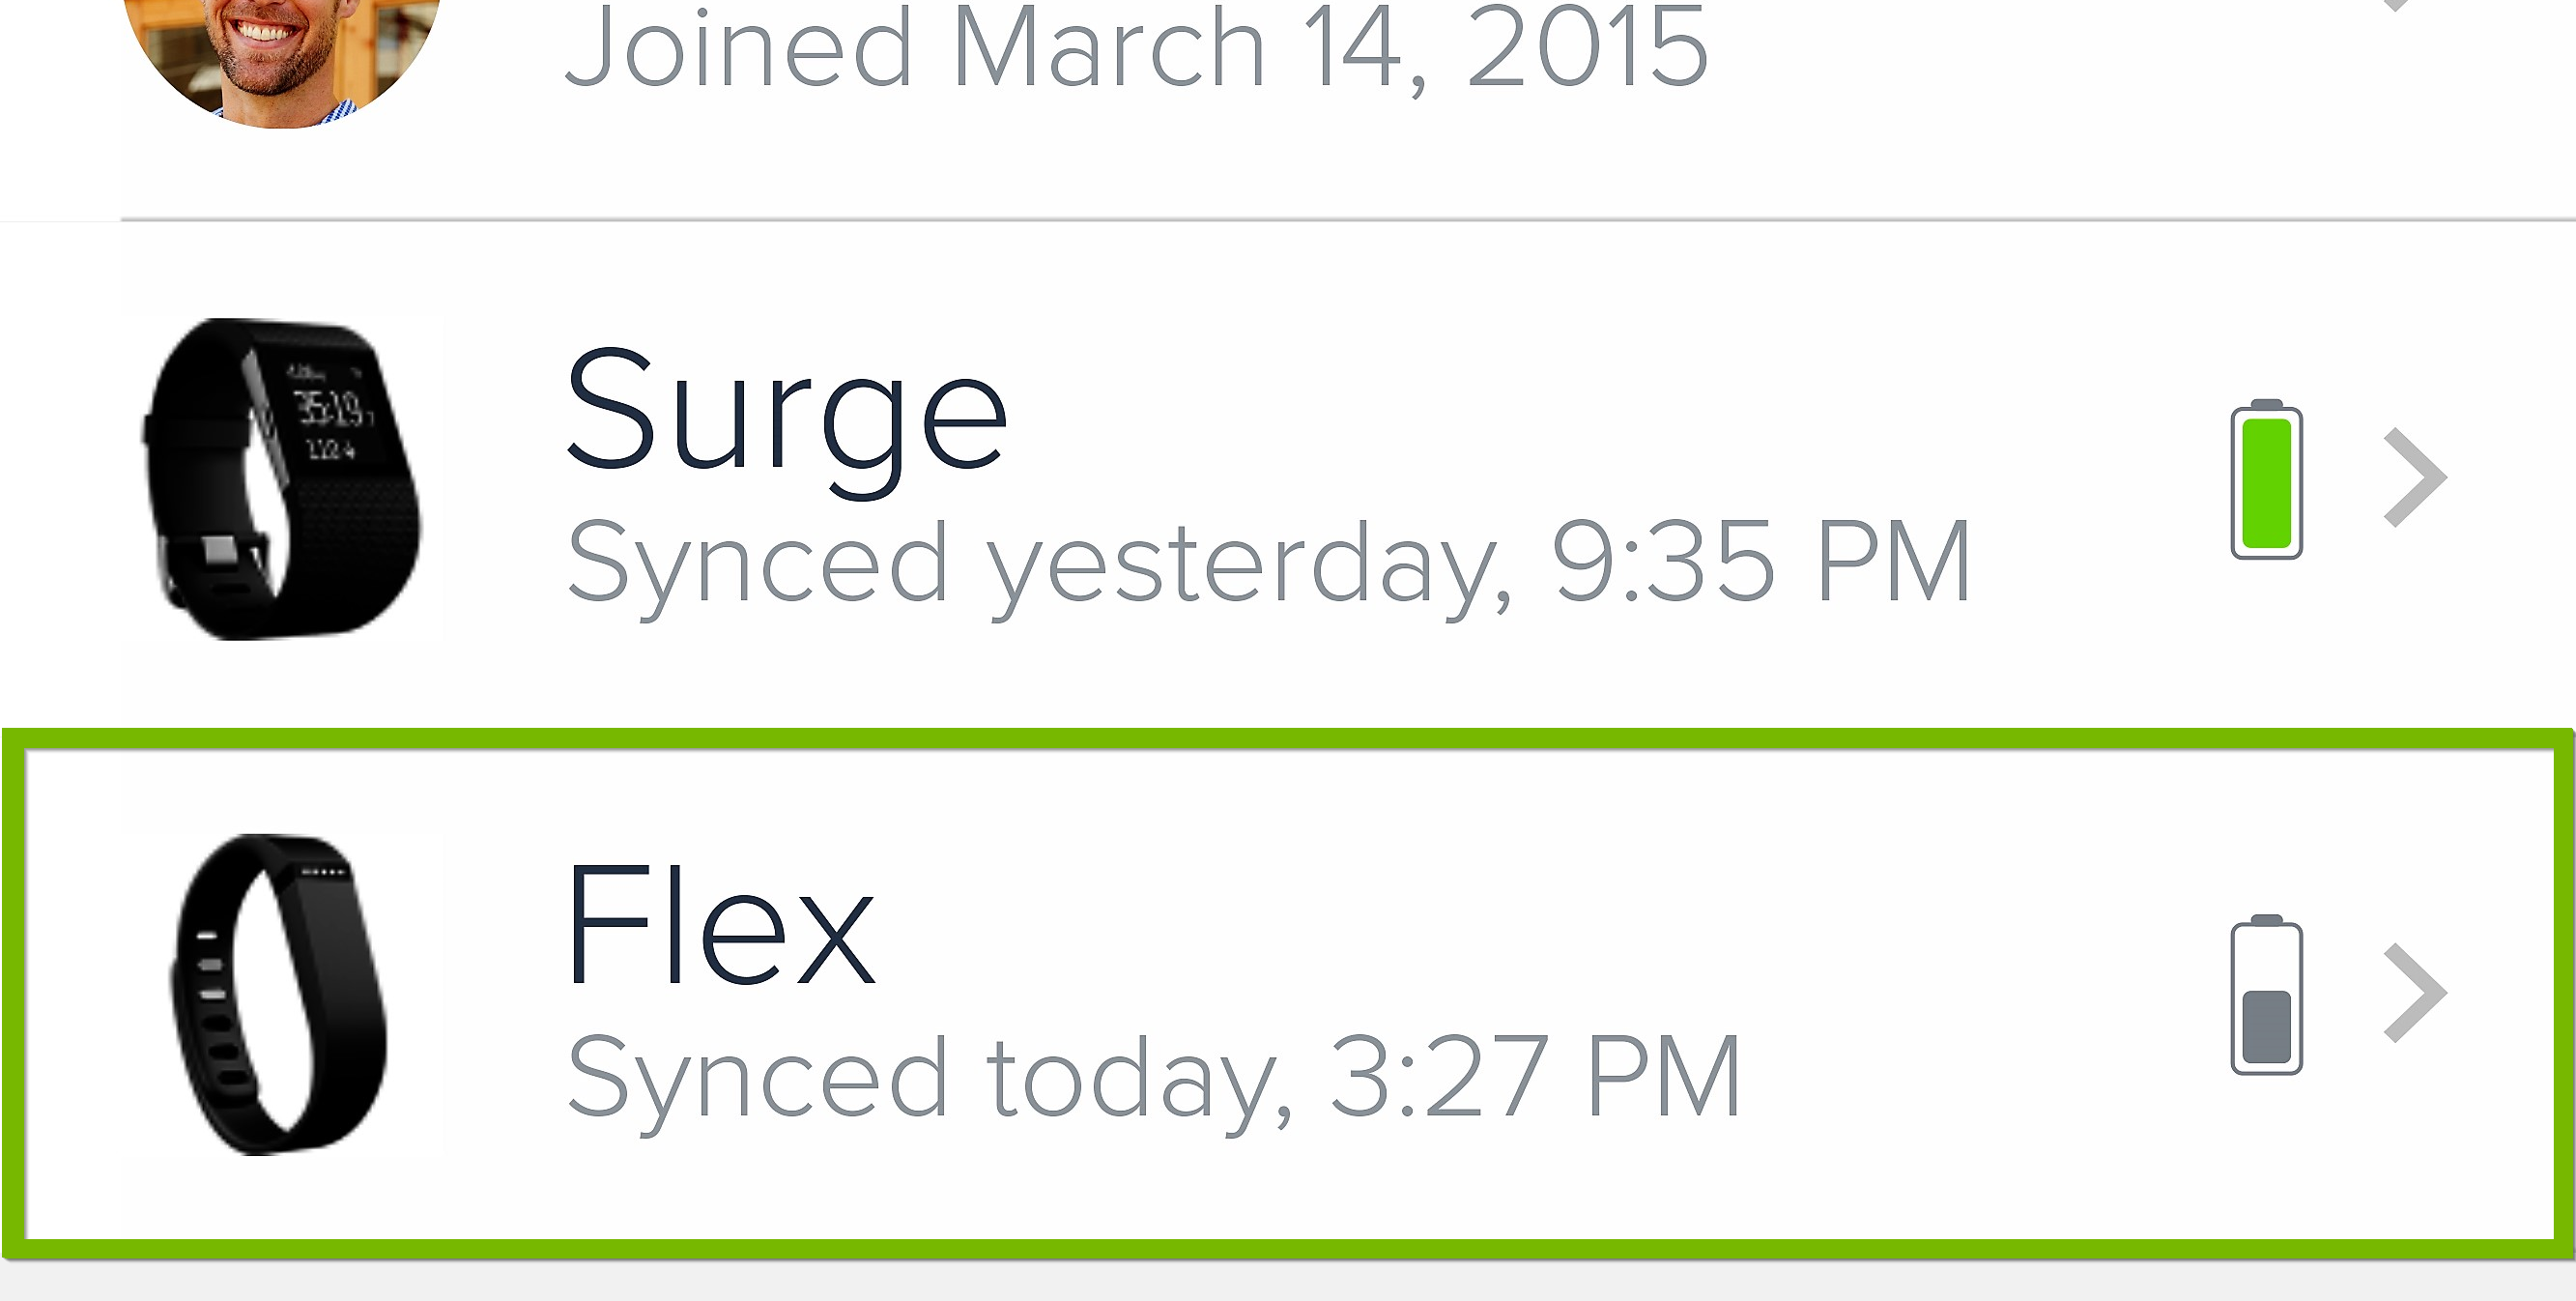
Tap Devices.
Tap and hold [Fitbit Name] that you want to delete.
Tap Unpair again in the dialogue box.
When this Fitbit is added to another account, the tracker will automatically apply the new account settings.
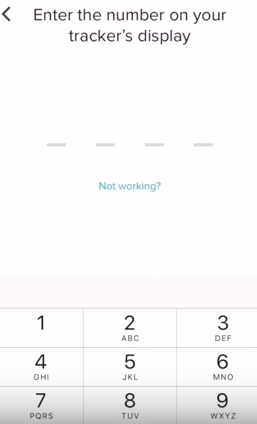
9. Pairing
Your tablet or phone will now try to find your tracker.
Wait for it to connect.
Type the code on your Fitbit into your phone or tablet.
Your Fitbit is now connected!
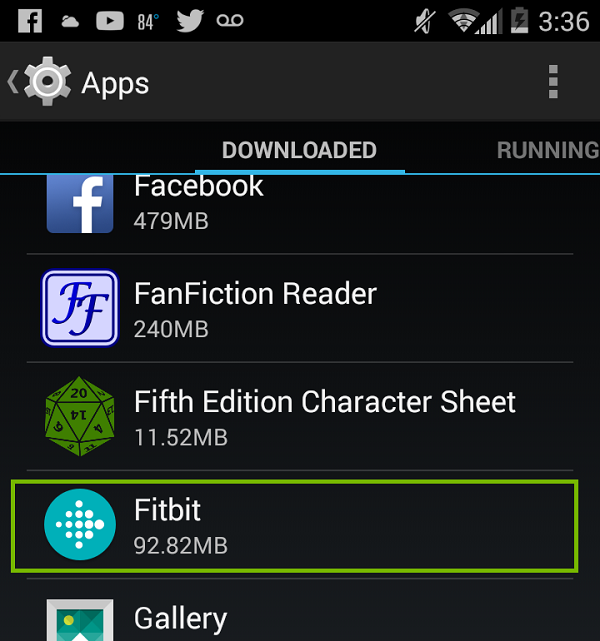
10. Uninstall Android App
On your Android device, tap on the Apps icon on the main screen.
Look for the Fitbit icon.
Tap and hold the apps icon until you see the Uninstall option show up at the top side of the screen.
Drag the icon over the Uninstall option until the icon turns red and release it.
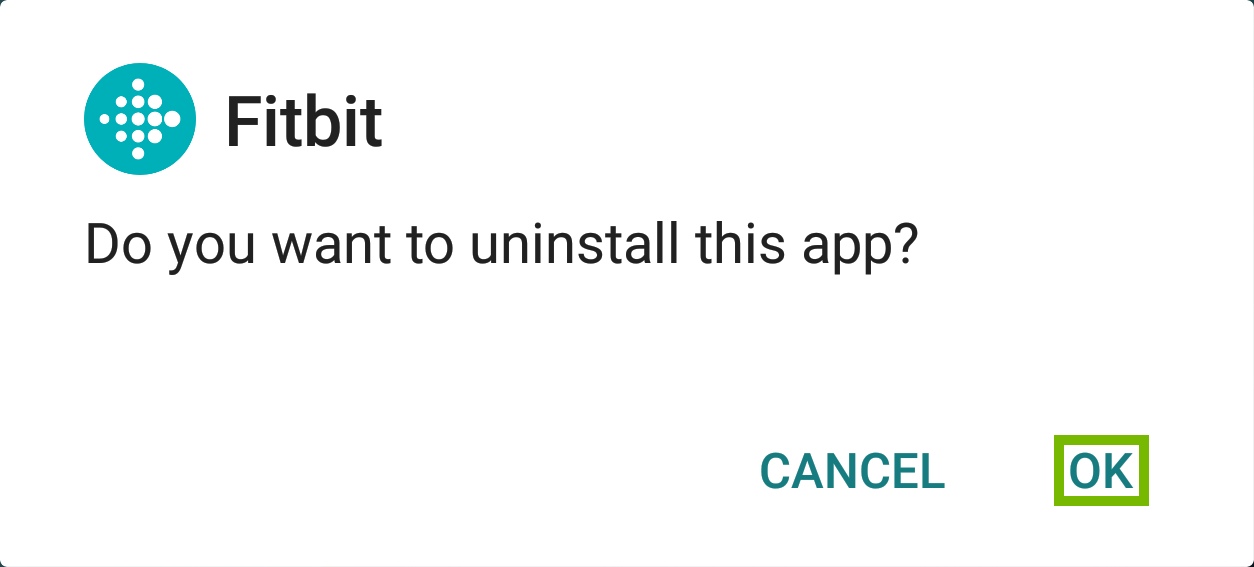
You will be asked whether you want to uninstall the app. Tap on OK to confirm.
11. Install Android App
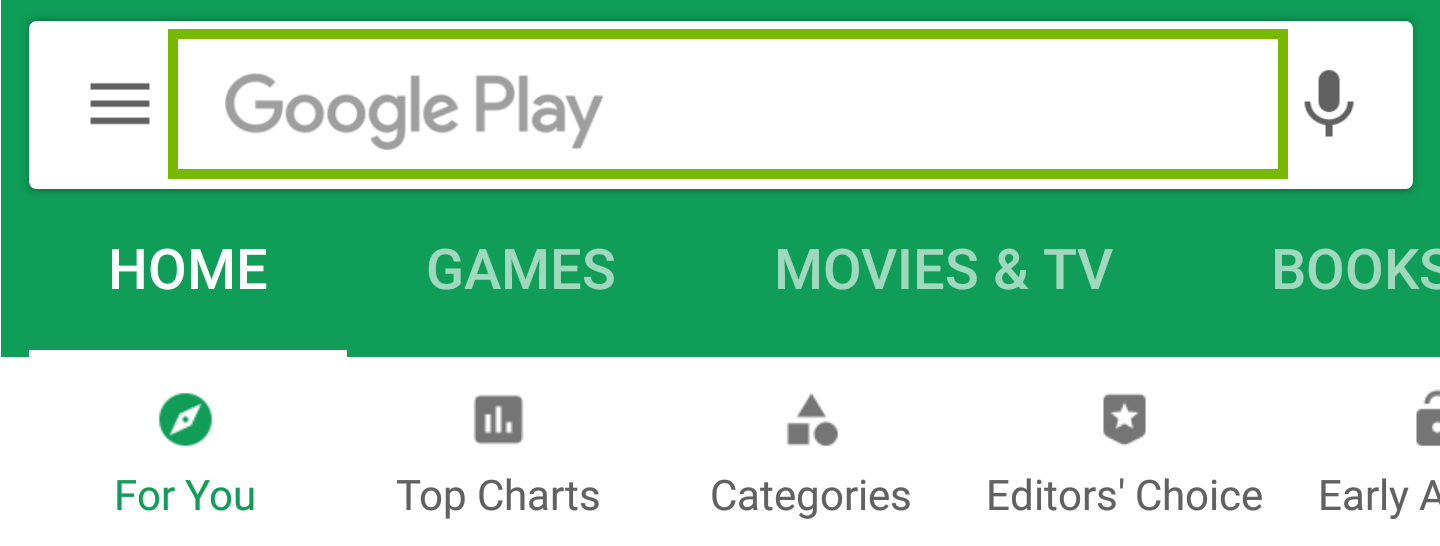
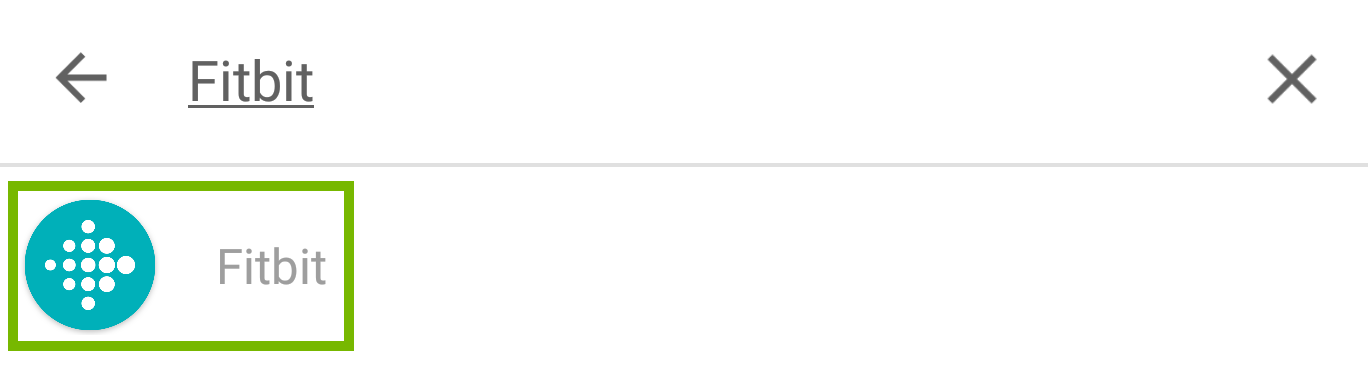
Open Play Store.
Tap on the search bar and search for Fitbit.
Tap on Fitbit.
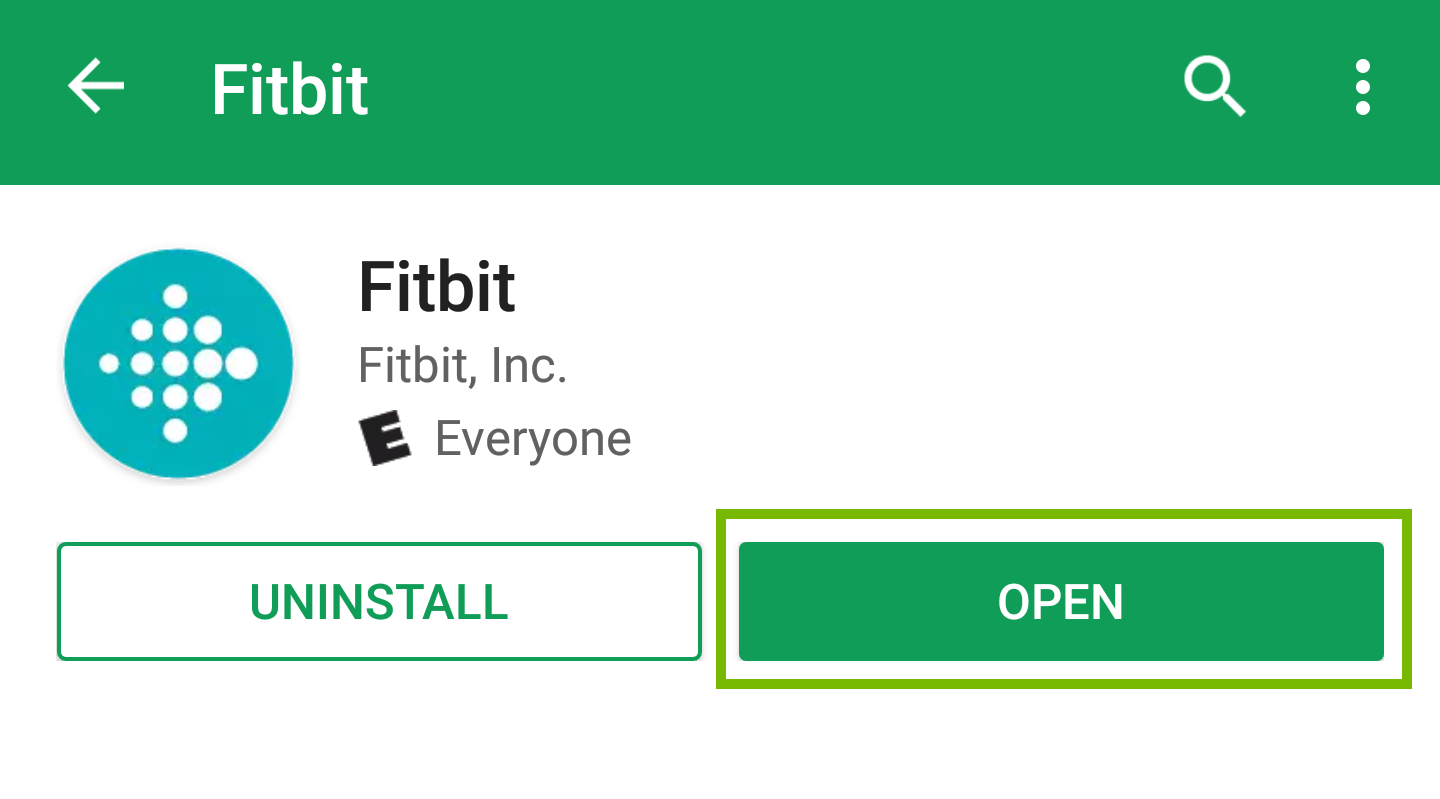
Tap Install to start downloading the app.
Once installed, tap Open to proceed to the setup.
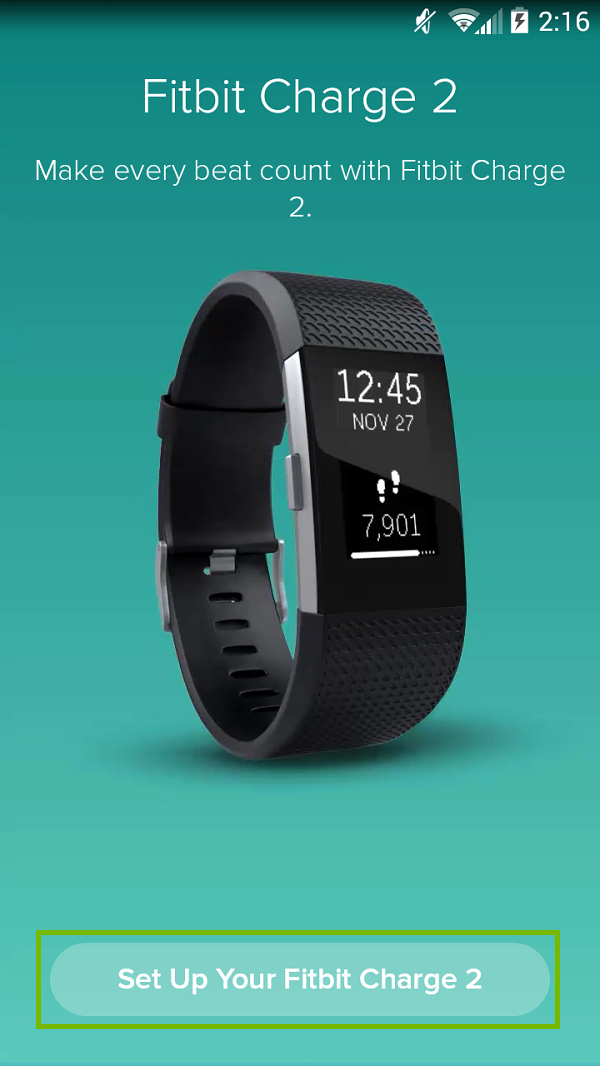
12. Re-Setting Up
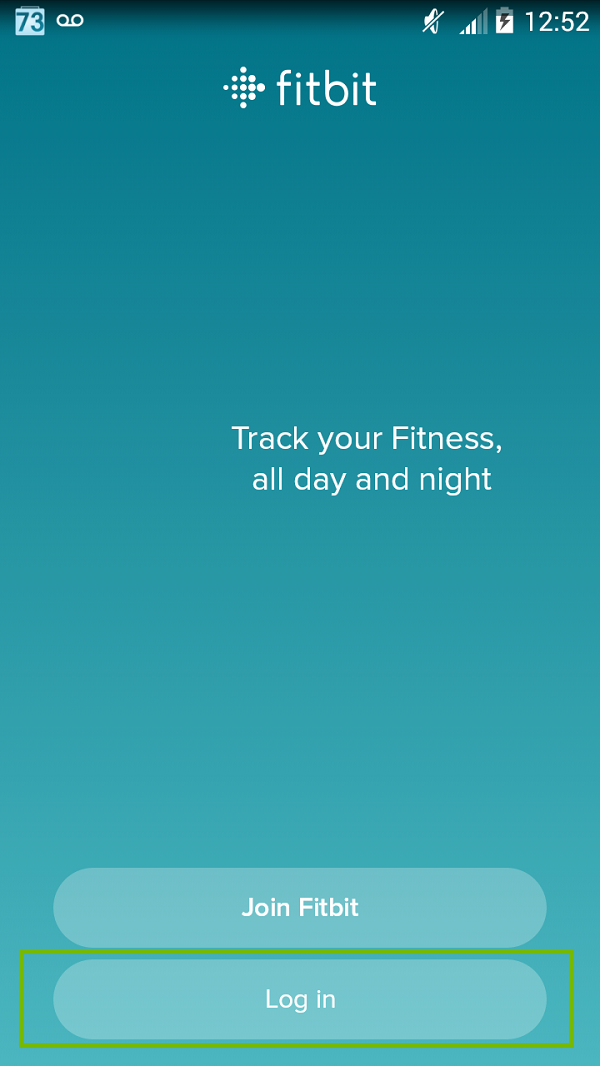
Launch Fitbit.
Tap Login.
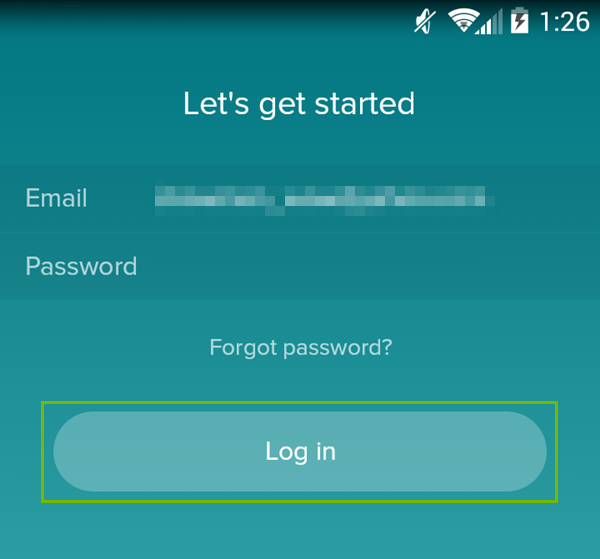
Enter your Email and Password, then tap Log in.
Tap on the Account icon in upper right corner.
Scroll through the list and tap the Fitbit device you're using.
Tap on Set Up Your Fitbit.
13. What's next?
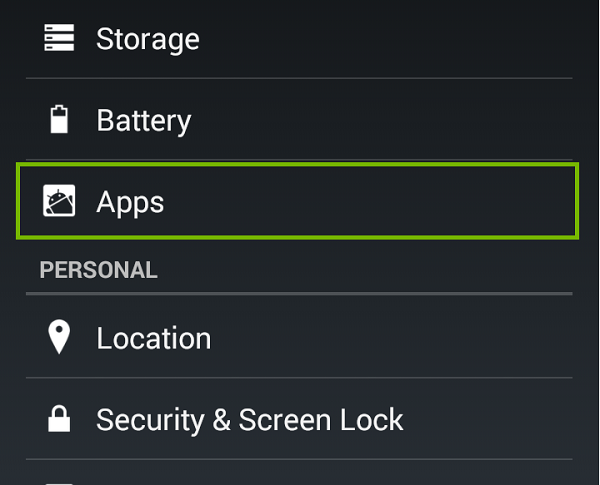
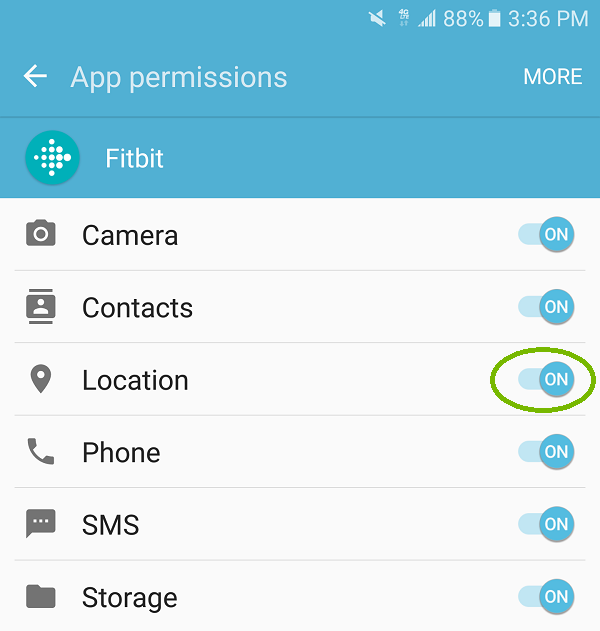
14. Location Permissions
Tap Settings.
Select Apps or Applications.
Select Fitbit.
Make sure Location is set to On.
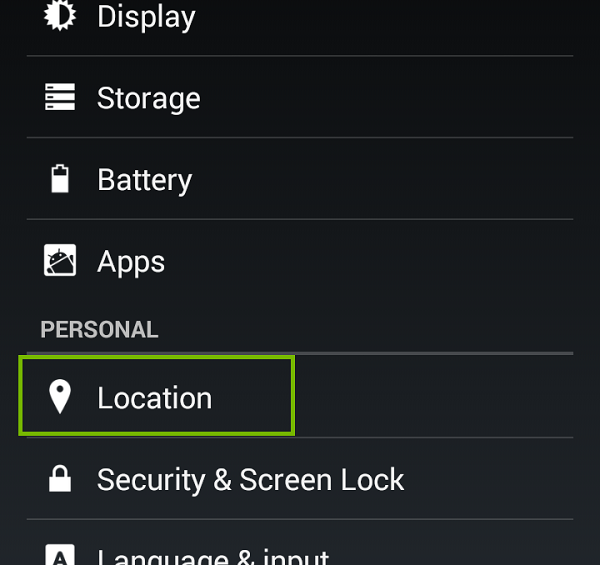
Let's go back to Settings.
Tap on Location.
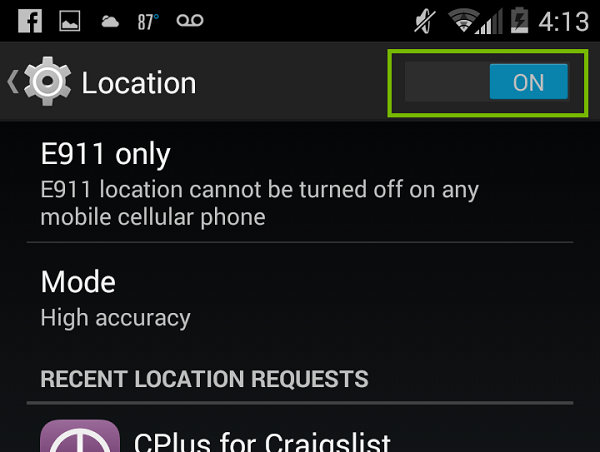
Make sure Location is set to On.
15. Restart
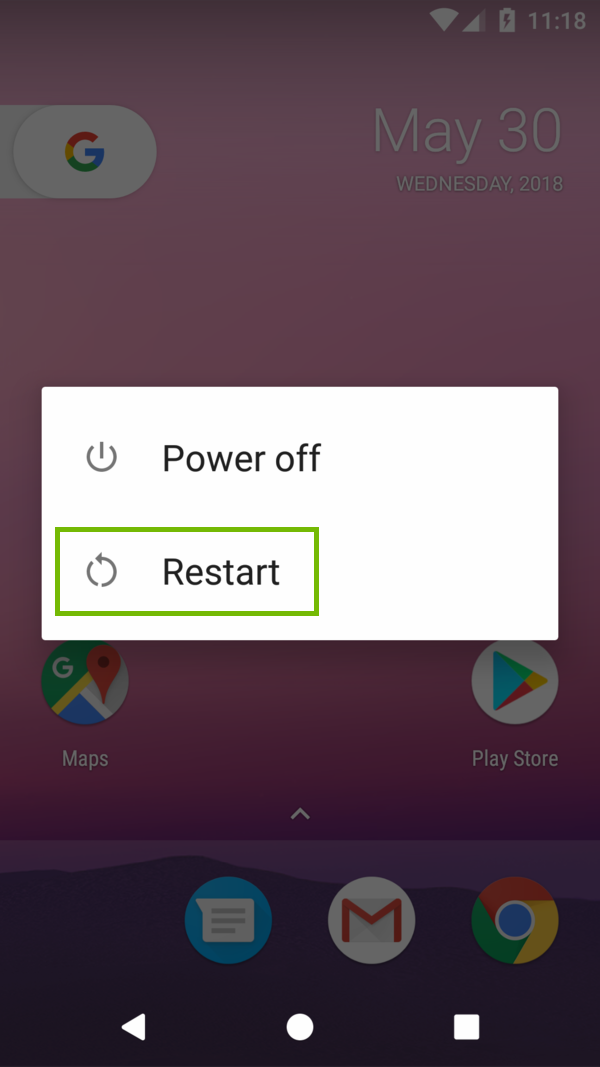
Hold down the power button on your Android device. Depending on the manufacturer and model of Android device you have, the location of the power button will vary.
A prompt will appear on-screen. Select Restart.
If the menu does not pop up, continue to hold the power button, and your Android device will shut off.
If you had to shut down your Android device, wait 30 seconds before turning your device back on.
16. Uninstall Android App
On your Android device, tap on the Apps icon on the main screen.
Look for the Fitbit icon.
Tap and hold the apps icon until you see the Uninstall option show up at the top side of the screen.
Drag the icon over the Uninstall option until the icon turns red and release it.
You will be asked whether you want to uninstall the app. Tap on OK to confirm.
17. Install Android App
Open Play Store.
Tap on the search bar and search for Fitbit.
Tap on Fitbit.
Tap Install to start downloading the app.
Once installed, tap Open to proceed to the setup.
18. Re-Setting Up
Launch Fitbit.
Tap Login.
Enter your Email and Password, then tap Log in.
Tap on the Account icon in upper right corner.
Scroll through the list and tap the Fitbit device you're using.
Tap on Set Up Your Fitbit.
19. What's next?
20. What's next?
21. GPS Error Messages
The following depicts errors you may experience with your Fitbit Charge 2's GPS functionality.
Phone not found (dashed line): If the phone icon has an animated dashed line next to it, your phone can't find a GPS signal. A weak GPS signal can be caused by environmental factors such as tall buildings, dense forest, steep hills, or even thick cloud cover. All of these factors can interrupt the connection between your tracker and GPS satellites.
Phone not found (crossed out): If the phone icon has a line through it, Bluetooth is likely turned off (meaning your tracker is no longer connected to your phone).
Check Fitbit app: This message means you may need to grant location permissions on your phone.
22. GPS Interference
When it comes to GPS functionality, sometimes nothing is wrong with your Fitbit or your mobile device. A weak GPS signal can be caused by environmental factors such as tall buildings, dense forest, steep hills, or even thick cloud cover. All of these factors can disrupt or completely interrupt the connection between your device and GPS satellites.
Try moving outside or to a location where you can obtain a better signal. If this restores GPS functionality, the issue was with GPS signal and not your devices.
23. Restart Device
Plug the charging cable into the USB port on your computer or any USB wall charger.
Clip the other end of the charging cable to the port on the back of the tracker. The pins on the charging cable must lock securely with the port.
Make sure the button on your tracker is aligned with the button opening on the charging cable.
You will know the connection is secure when the tracker vibrates and you see a battery icon on the display. Your Charge 2 will begin charging.
Press and hold the button on your tracker for four seconds. When you see the Fitbit logo and the tracker vibrates, this means the tracker has restarted.
Unplug your tracker from the charging cable.
24. Restart Your Mobile Device
On Your Android Device
Turn off your phone. Push and hold the power button, then select Power off from the menu.
Wait 30 seconds.
Turn your phone back on by pressing and holding the Power button for a few seconds, until the screen lights up.
On Your iOS Device
Hold down the lock/power button.
Slide to power off when prompted.
Wait until the phone is off.
Hold down the lock/power button until you see the Apple logo.
25. What's next?
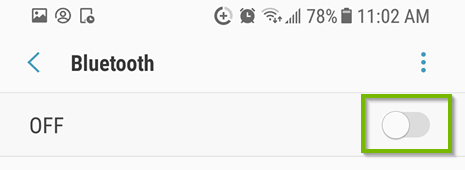
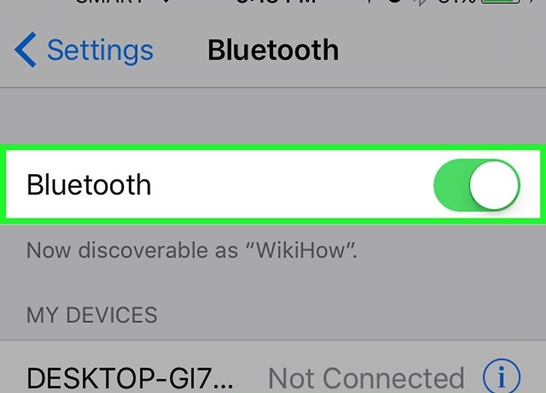
26. Enable Bluetooth
Open Settings on your phone or tablet.
Then tap Bluetooth.
Make sure Bluetooth is set to On.
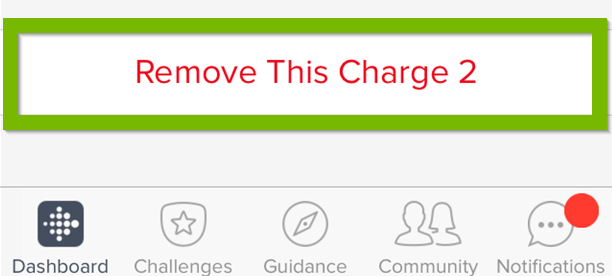
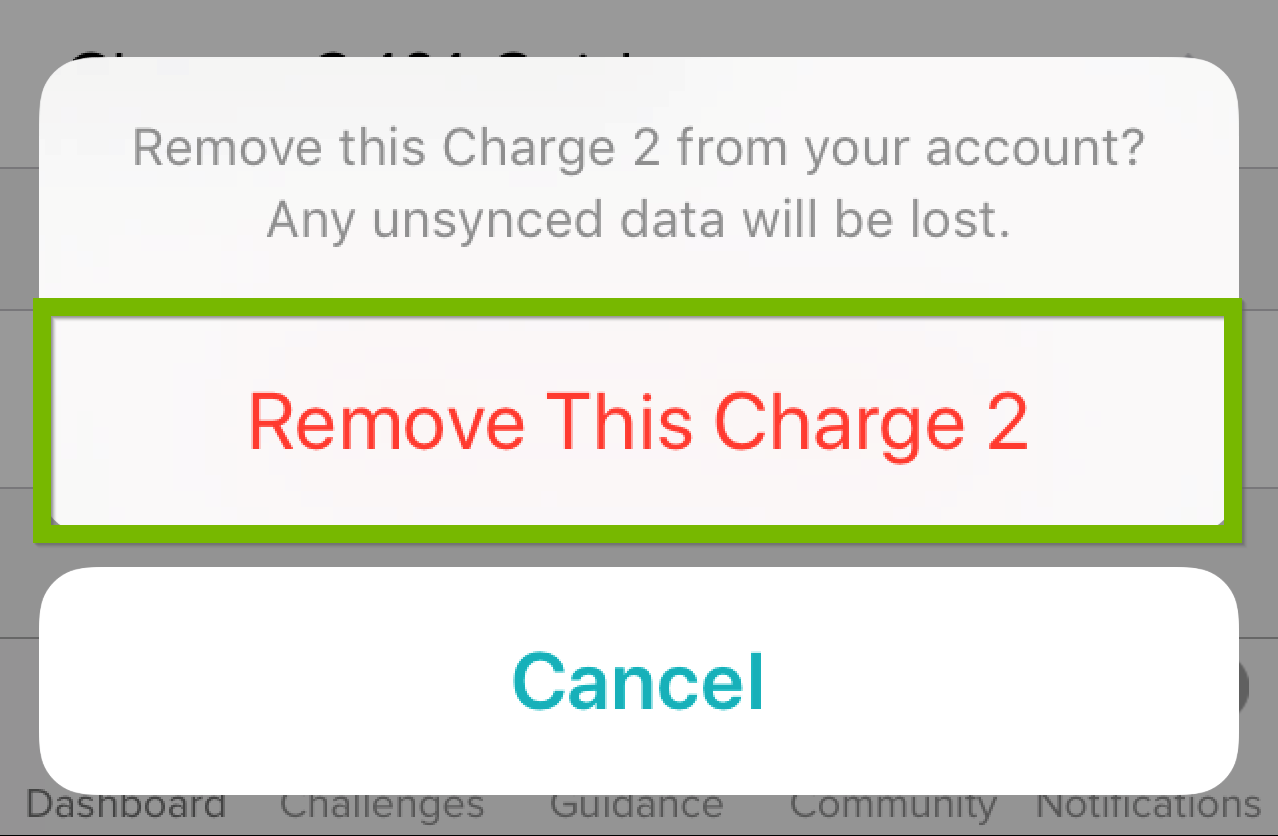
27. Remove from iPhone/iPad
Open the Fitbit app.
Tap on the Account icon.
Tap on the device that you want to delete.
Swipe up to view the bottom of the screen.
Tap on Remove This [Fitbit].
Tap Remove This [Fitbit] in the dialogue box.
When this Fitbit is added to another account, the tracker will automatically apply the new account settings.
28. Pairing
Your tablet or phone will now try to find your tracker.
Wait for it to connect.
Type the code on your Fitbit into your phone or tablet.
Your Fitbit is now connected!
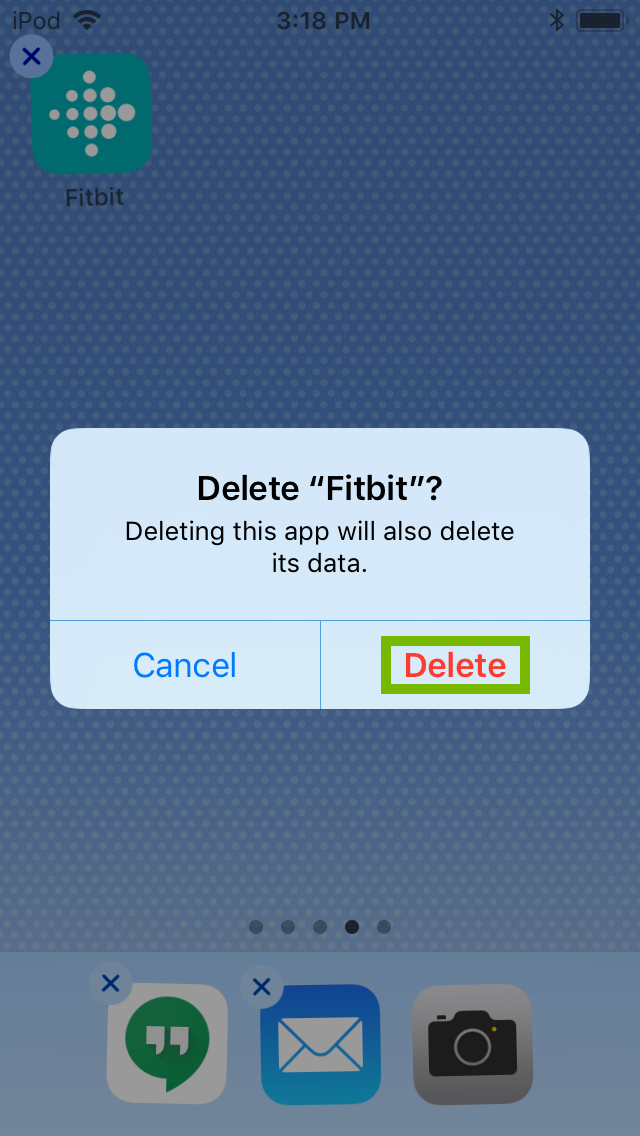
29. Uninstall iOS App
On the main screen of your iOS device, look for the Fitbit icon.
Tap on hold the icon until an X shows up on its top left corner. Tap on the X.
You will be asked whether you want to delete the app. Tap on Delete to confirm.
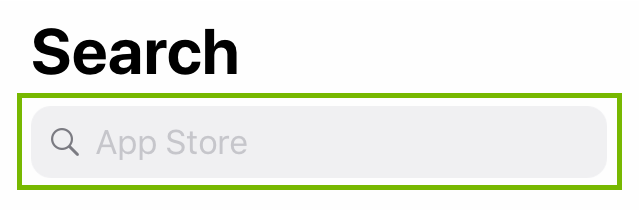
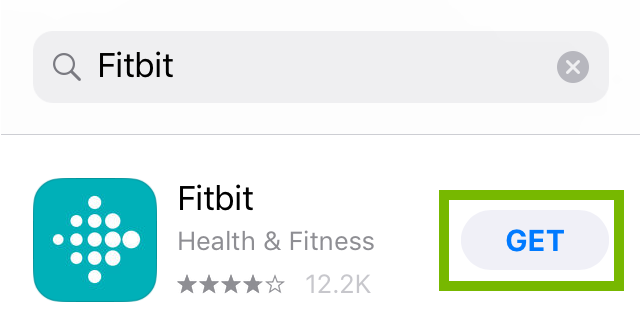
30. Install iOS App
Open the App Store.
Tap on Search.
In the search bar, search for Fitbit.
Find Fitbit in the search results and tap on GET.
Tap on Install to start download.
31. Re-Setting Up
Launch Fitbit.
Tap Login.
Enter your Email and Password, then tap Log in.
Tap on the Account icon in upper right corner.
Scroll through the list and tap the Fitbit device you're using.
Tap on Set Up Your Fitbit.
32. What's next?
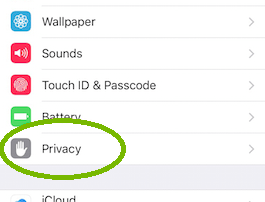
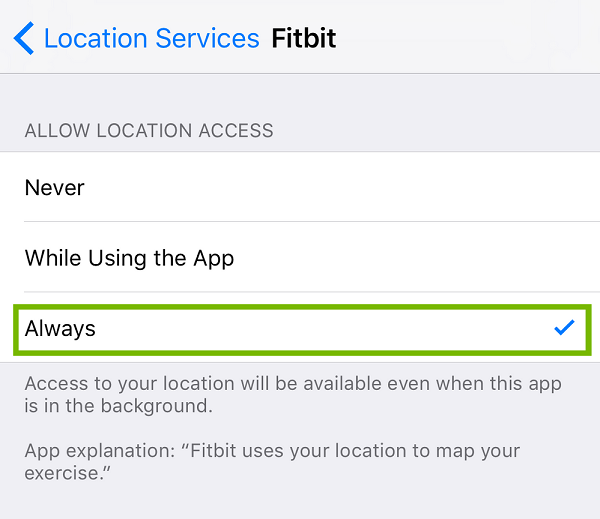
33. Location Permissions
Tap Settings Icon.
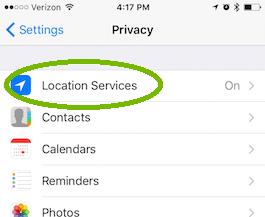
Go to Privacy.
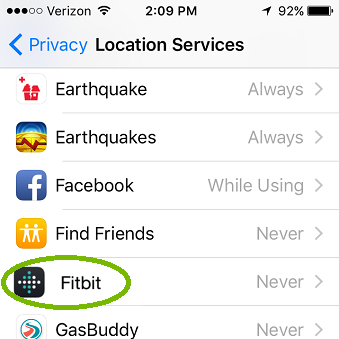
Go to Location Services.
Scroll Down, and tap on Fitbit.
Under Location, tap Always.
34. Restart
Hold down the lock/power button.
Slide to power off when prompted.
Wait until the phone is off.
Hold down the lock/power button until you see the Apple logo.
35. Uninstall iOS App
On the main screen of your iOS device, look for the Fitbit icon.
Tap on hold the icon until an X shows up on its top left corner. Tap on the X.
You will be asked whether you want to delete the app. Tap on Delete to confirm.
36. Install iOS App
Open the App Store.
Tap on Search.
In the search bar, search for Fitbit.
Find Fitbit in the search results and tap on GET.
Tap on Install to start download.
37. Re-Setting Up
Launch Fitbit.
Tap Login.
Enter your Email and Password, then tap Log in.
Tap on the Account icon in upper right corner.
Scroll through the list and tap the Fitbit device you're using.
.png)