.png)
Authored by: Support.com Tech Pro Team
It can be scary to hear your computer make a grinding noise when you turn it on or even just suddenly after running it for a while. The only components that can make this kind of noise inside a computer are mechanical moving parts, such as cooling fans or drives (hard disk drives or optical disc drives). The actual part that is making the noise can either signal a minor or a major issue, so it is important that you determine the source of the noise as soon as possible. Other symptoms that can be noticed during the noise are the computer to be running slower than usual, freezing or even crashing.
In order to find which of these components is causing the noise, you have to listen closely to determine where the sound is coming from. If possible, the computer case may need to opened for a more accurate assessment.
Hearing a grinding noise coming from your computer can be alarming, as it often indicates a mechanical issue that needs immediate attention. The grinding noise could be emanating from various components, such as the optical disc drive, hard disk drive (HDD), or a cooling fan. In this article, we'll explore the steps to diagnose and fix grinding noises from these different sources.
chkdsk in the Command Prompt. On a Mac, use Disk Utility to perform a "First Aid" check.A grinding noise from your computer is a sign that shouldn't be ignored. Whether it's coming from the optical disc drive, HDD, or a cooling fan, prompt attention can prevent further damage and potential data loss. Regular maintenance, careful handling, and being proactive about backups are key practices to minimize the risk of hardware failure. In cases where the issue is beyond basic troubleshooting, consulting with a professional technician is advisable.
It is highly recommended to seek a professional for help in these situations. However, if you feel tech savvy enough, there are few things you can try doing yourself.
If you are still having trouble, refer to the Step-By-Step Guide below, or Contact Support.Com for Personalized Assistance.
For an optical disc to be read properly:
Check your devices documentation if you're unsure what types of discs it can read, how to position your device or how to place the disc into the drive.


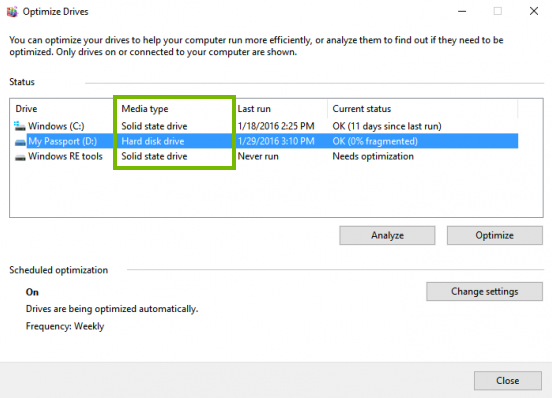
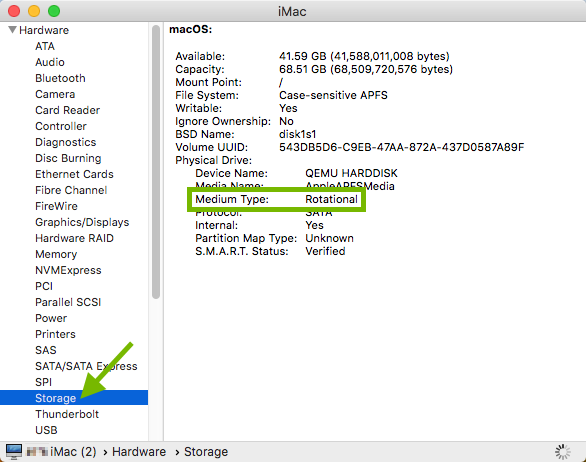
Computer storage drives are devices that allow you to save your data and store it for future use. There are two main storage drive types in use today:
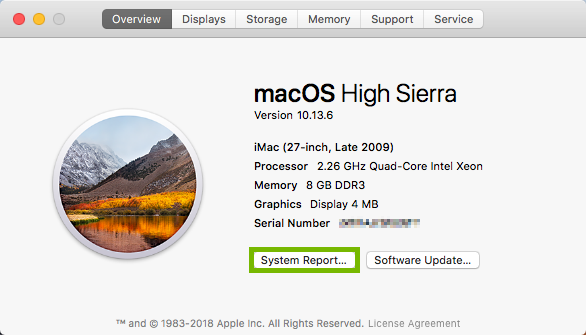
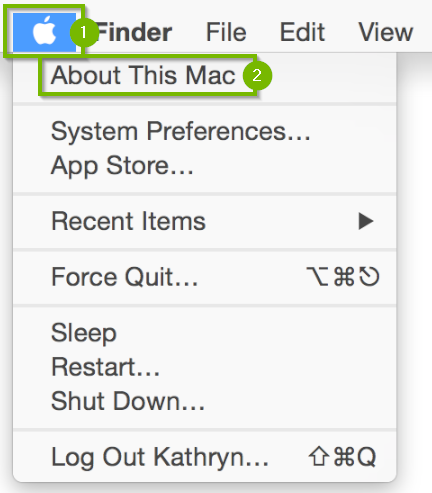
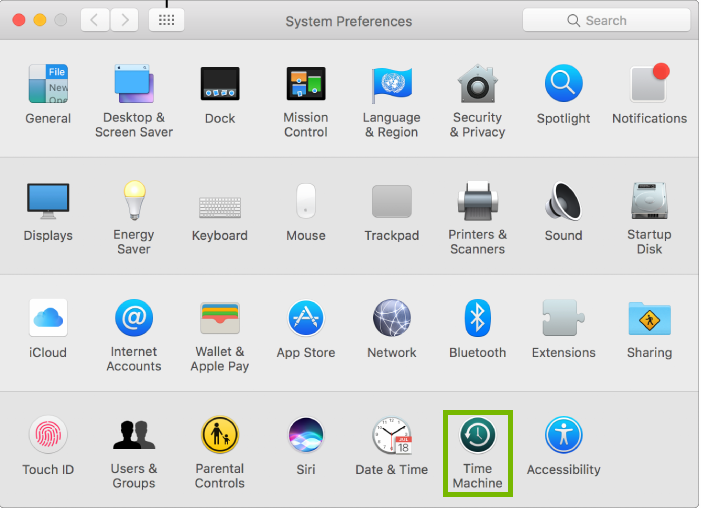
To continue, we need to know what Operating System your computer is using.
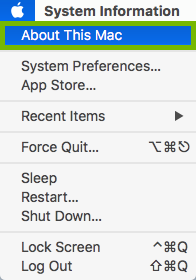
There are 2 main Operating Systems for personal computers currently available, Microsoft Windows and Apple macOS.
Microsoft WindowsApple macOSMicrosoft Windows runs on computers produced by multiple companies, such as Lenovo, Asus, Dell, Toshiba, Hewlett Packard, Acer, and Sony.Apple is the only company that makes macOS computers.


It is always wise to backup your computer's data. Data backups should be performed regularly. Even beyond the scope of malware or for the sake of security, it is always prudent to have frequent backups because hard drives can fail, systems can crash, things can break, "life can happen," so you're always better off safe than sorry.
Data backups, just like any type of backup, are a matter of redundancy. One backup solution is good, two or more is better.
Offsite backups (such as online data backup services) are always a good idea, especially as a secondary backup. That way, in the unfortunate event that a fire, flood, or theft happens, you have a copy of your data in a remote, offsite location to fall back on.
It is always prudent to set your backups to use a versioning scheme. When it comes to backing up data, versioning is like a saved history of your files. Versioning allows your backup service to record multiple copies (or versions) of your files in its system (how many depends on the service). You can use file versioning to go back and retrieve the version you need. That way if files are corrupted, infected, or locked, you don't have to worry about having only one backup which may be the bad version.
If you are using a local backup such as an external hard drive or flash drive, it is always a good idea to disconnect the drive when it is not in use. This is a safety precaution, as some forms of malware can encrypt or corrupt all of the data on any connected drive, so a drive that is no longer physically connected cannot be affected.
We will need an external disk to store the backup on.
Return to this guide when you have purchased an external hard drive.
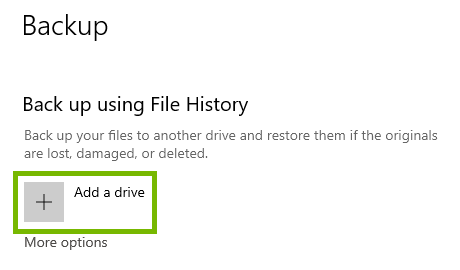
Windows 10 comes with its own backup software.
To begin you'll need an external drive.


It is always wise to backup your computer's data. Data backups should be performed regularly. Even beyond the scope of malware or for the sake of security, it is always prudent to have frequent backups because hard drives can fail, systems can crash, things can break, "life can happen," so you're always better off safe than sorry.
Data backups, just like any type of backup, are a matter of redundancy. One backup solution is good, two or more is better.
Offsite backups (such as online data backup services) are always a good idea, especially as a secondary backup. That way, in the unfortunate event that a fire, flood, or theft happens, you have a copy of your data in a remote, offsite location to fall back on.
It is always prudent to set your backups to use a versioning scheme. When it comes to backing up data, versioning is like a saved history of your files. Versioning allows your backup service to record multiple copies (or versions) of your files in its system (how many depends on the service). You can use file versioning to go back and retrieve the version you need. That way if files are corrupted, infected, or locked, you don't have to worry about having only one backup which may be the bad version.
If you are using a local backup such as an external hard drive or flash drive, it is always a good idea to disconnect the drive when it is not in use. This is a safety precaution, as some forms of malware can encrypt or corrupt all of the data on any connected drive, so a drive that is no longer physically connected cannot be affected.
We will need an external disk to store the backup on.
Return to this guide when you have purchased an external hard drive.

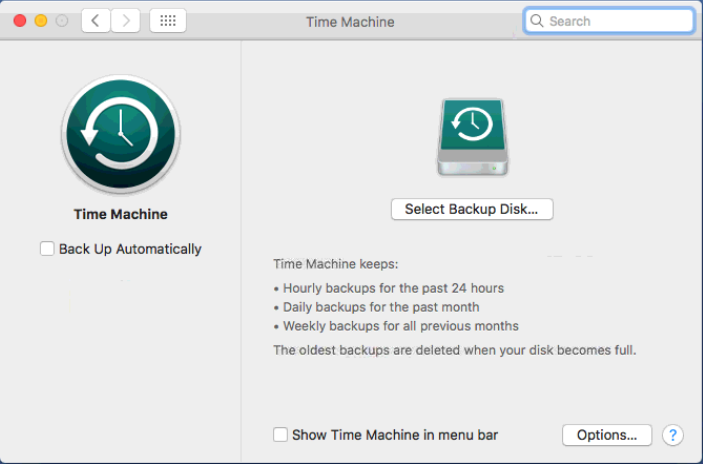

Your initial backup will take a while to complete. Do not turn off your Mac, but you may continue using your Mac. A message will pop-up in the top-right corner letting you know when the backup is complete.
You can check the status of the backup by clicking on the Time Machine icon in the top-right.
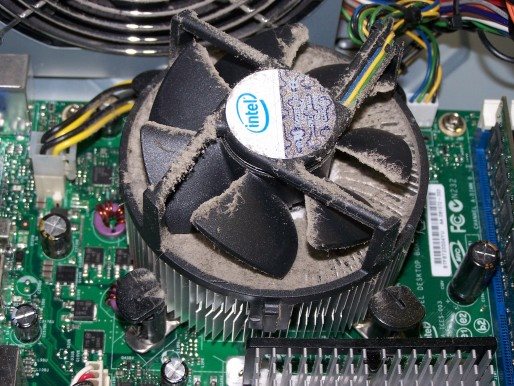
If you had a computer for more then a few months, it is likely to have accumulated some dirt inside and out. Dust, grime, hair and other debris can build up on fans, heat sinks and other parts. Components can also come loose or become unseated over time. All these can affect a computers performance in a negative way.
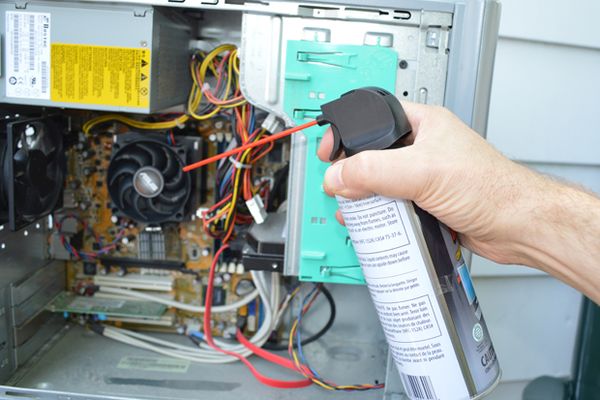
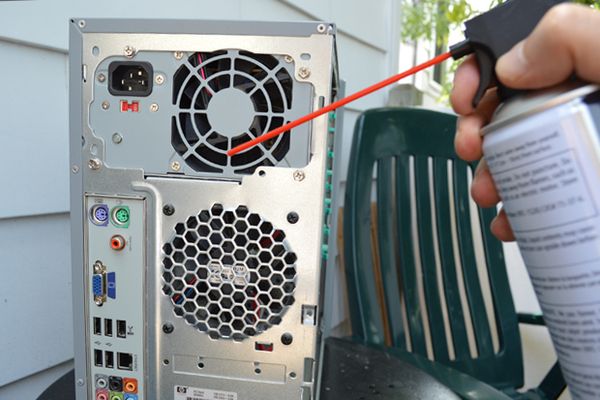
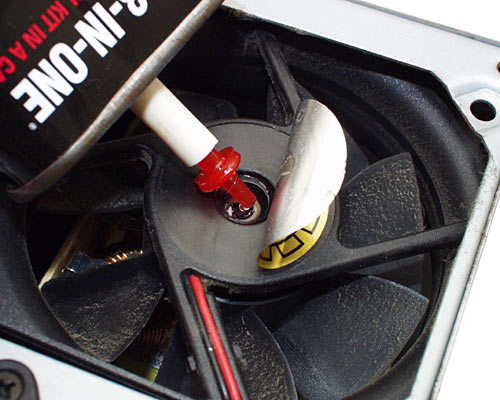
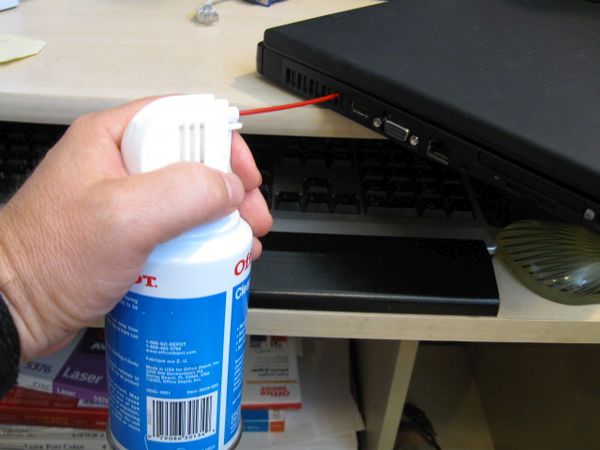
Using a compressed air duster is the best and most recommended way of cleaning inside a computer.
When blowing compressed air, keep the can upright at all times and never shake it to prevent the liquid refrigerant from leaking onto your electronics. Use short bursts of two or three seconds. When the can gets too cold to hold, set it down for a few minutes until it warms up again.

Support.com is committed to your privacy
We do not share or sell your data to third parties. We do use cookies and other third-party technologies to improve our site and services. The California Consumer Privacy Act (CCPA) gives you the ability to opt out of the use of cookies, third-party technologies and/or the future sale of your data. Do not sell my personal information.

Support.com is committed to your privacy
Read our Privacy Policy for a clear explanation of how we collect, use, disclose and store your information
