Correct basic problems with your Nest Secure Alarm System.
Before We Begin:
Make sure your Nest Secure Alarm System is set to Off.
2. Pro Monitoring Check
It is possible to have your Nest Secure Alarm System monitored by Brinks Security.
Faults or troubleshooting of the alarm system can be interpreted as break-in attempts, which will result in calls, and possibly visits by local law enforcement which may incur fees associated with such a response.
It is recommended to notify your monitoring company before performing any troubleshooting to avoid false alarms, or contact customer service for assistance.
3. What's next?
4. Problem Check
Your Nest Secure alarm system does a good job of warning you if there are problems through the App.
Take a look at the Nest app to see if there's a specific error message being shown.
5. Pet Check
Pets are the most common cause of false alarms.
Pets that climb or fly.
This includes birds, cats, and other climbing animal companions. A cat jumping to a countertop tends to be enough to trigger most alarm systems.
Cats and other 'curious' pets.
Cats are curious creatures, and will tend to investigate the lights and sounds of home security systems. Between the rush of movement and vibrations this causes, a false alarm is virtually guaranteed.
Large animals.
This includes all animals over 40 pounds, regardless of type. A simple motion sensor has no way to determine if the moving object is a dog, or a person crawling and attempting to evade a lower-quality alarm system.
Pets of any type or size going up or down stairs.
The large amount of vertical motion will trigger most alarm systems.
Multiple Pets.
Multiple pets tend to play with each other, or otherwise interact. Most alarm systems will see this as one, larger moving object, and trigger the alarm.
Pets bumping the table the control panel is on.
The control panel will tend to have a suite of sensors inside, to detect when the device is moved, as well as simple motion sensors. The panel moving can trigger the alarm.
6. Enable Reduced Sensitivity
Open the Nest app.
Select Settings.
Select Security.
Select Security Levels.
Select Reduced Motion Sensitivity.
Select the switch to turn it on.
7. Disable Motion Sensing
Open the Nest app.
Select Settings.
Select Security.
Select Home and Guarding.
Select Motion detection.
Disable motion detection for the sensors you want.
8. Other False Alarm Sources
Many alarm systems will trigger because of environmental conditions, because they can be signs of attempts to tamper with the alarm.
Heat sources like electric heaters, heat vents and fireplaces.
Most control panels have rudimentary sensors to detect changes in heat, which can be interpreted as a person.
Cold sources like drafty windows, air conditioners and AC vents.
Again, the change in temperature may be seen as attempts to tamper with the system.
Curtains near windows that may move.
A vent or pet moving a curtain can easily magnify movement and trigger an alarm.
Direct sun exposure.
Not only can this cause a serious temperature difference, but it can heat up the delicate electronics inside quickly.
Party balloons left unattended.
As they drift, that motion will trigger an alarm.
Insects that may come very close to the sensor.
Wireless access points within six feet.
Most control panels do not have extensive shielding, and the excess interference can cause problems.
9. What's next?
10. Re-connect Power Cable
These errors happen when the Nest Guard has been disconnected from power.
Unplug, and reconnect the power cable to the back of the Nest Guard.
Unplug, and reconnect the power.
11. Wi-Fi Connection Lost
This message happens when your Nest Secure cannot connect to Wi-Fi.
This can happen if you've recently changed your Wi-Fi Password, switched to a new Wi-Fi router, or the Wi-Fi router does not have power. It can also occur if you've recently moved your Nest Secure or Wi-Fi router, and they are no longer in range of each other.
Use these steps first, to power-cycle your router and Nest Secure.
Power-Cycle Router
Unplug the power cable from the back of your Wi-Fi router.
Wait ten seconds.
Plug the power cable back in.
Wait three minutes for the router to start back up again.
Power-Cycle Nest Secure
Unplug the power cable from the back of the Nest Guard.
Wait ten seconds.
Plug in the power cable again.
Wait one minute for the Nest Guard to reconnect.
12. Connect Your Nest Secure Alarm System to Wi-Fi
We have a separate guide to help you get your Nest Secure connected or re-connected to Wi-Fi.
Clicking this button will open a new guide that will provide you with steps to resolve your issue.
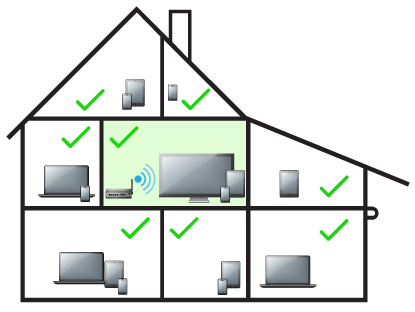
13. Relocate Router Check
Your router may need to be relocated to a more centralized location in order to provide better coverage for all your devices.
Good Placement
Bad Placement
14. Router Relocation
Since this appears to be a range issue that can be resolved by putting the router in closer proximity to the device's intended use area, we recommend moving the router to a more centralized location.
15. Range Extender
If wireless signal is not reaching your device, and relocating your router or the device itself to be in closer proximity is not possible or doesn't resolve the issue, a great way to boost wireless signal without replacing existing equipment is to acquire and install a range extender. Range extenders work with your existing wireless router as a type of wireless repeater used to expand the reach of wireless signal in your home.
16. What's next?
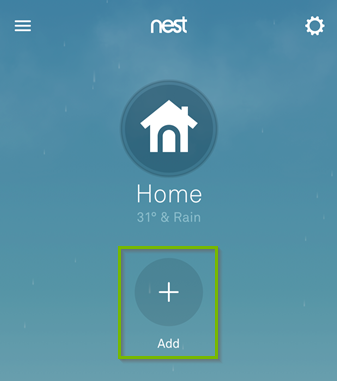
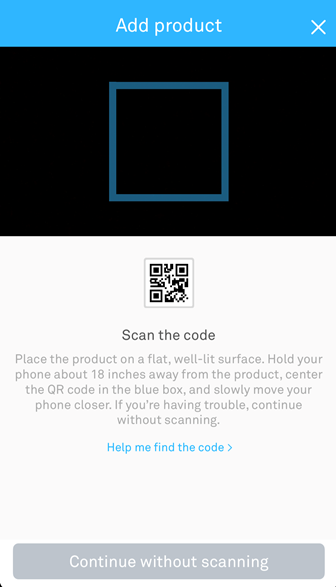
17. Add Device to App
Open the Nest app.
Tap the Add button to begin adding a Nest device to the app.
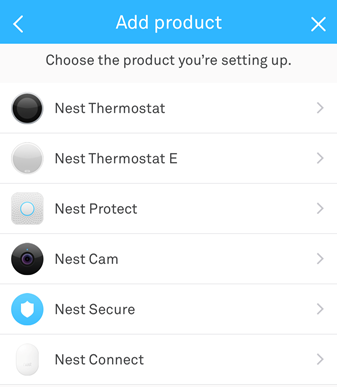
You will then be presented with a list of Nest devices that can be added to the app. Select Nest Tag from the list provided.
You now have the opportunity to use your smartphone's camera to scan your Nest Tag's QR code. Alternatively, if you cannot locate the Nest Tag's QR code, you can tap Continue without scanning.
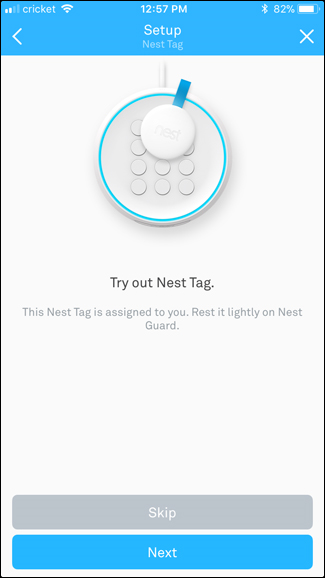
On the next screen, the app will describe what the device does. Tap Next at the bottom to continue.
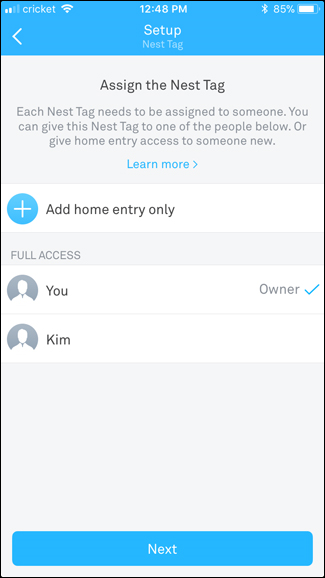
Assign the Tag to someone in your Nest Family. Tap Next when finished.
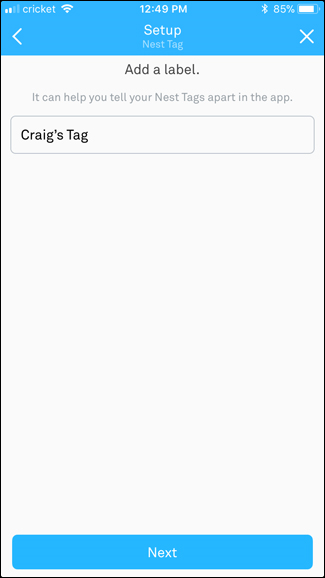
Name your Nest Tag and tap Next.
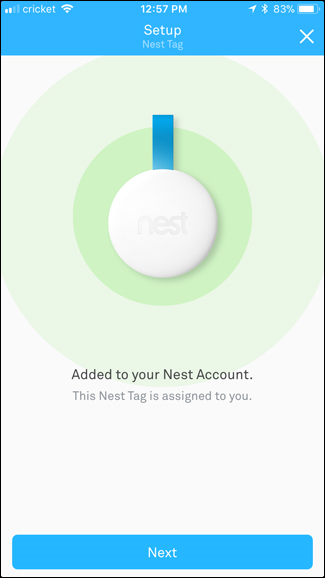
The Tag had now been added. Tap Next.
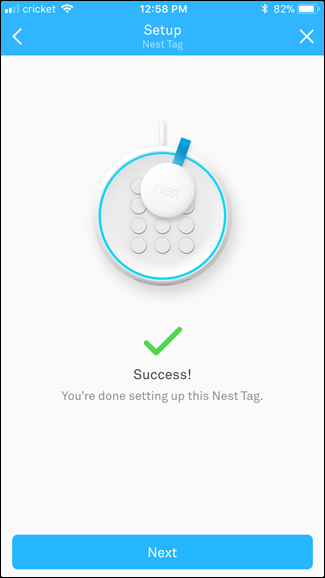
Test your tag by placing it near the Nest Guard. It will make a chime sound and the light will turn green when it is read. Tap Next in the app.
Success! Your Tag has been added!
These steps can be repeated for each additional Nest Tag you need to add to your system.
18. What's next?
19. What's next?
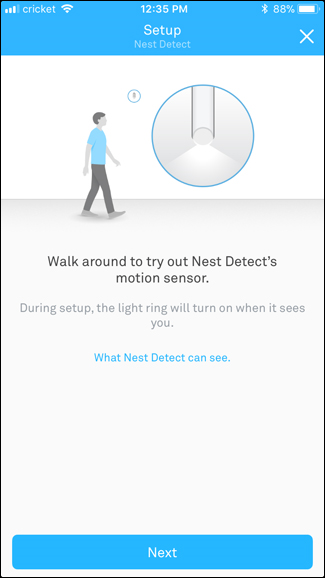
20. Press Button Check
Try pressing the button on the bottom of the Nest Detect sensor.
The Ring around the button will glow based on the status of the Nest Detect.
Blue
1 Blue Pulse
Your Detect is working properly. If Quiet Open is enabled, you can open the door or window within 10 seconds while the alarm is still armed.
Continuous Blue Pulses
This sensor hasn't been setup with the Nest Secure Alarm system yet.
Yellow
5 Yellow Pulses
The battery has less than 30 days left.
The Nest Detect has hardware problems.
Red
Blinking Red
The battery is critically low, and will fail very soon. It needs to be replaced right away.
No Light
No Light
The battery has been entirely drained. The sensor will not work till the battery is replaced.
21. Add Device to App
Open the Nest app.
Tap the Add button to begin adding a Nest device to the app.
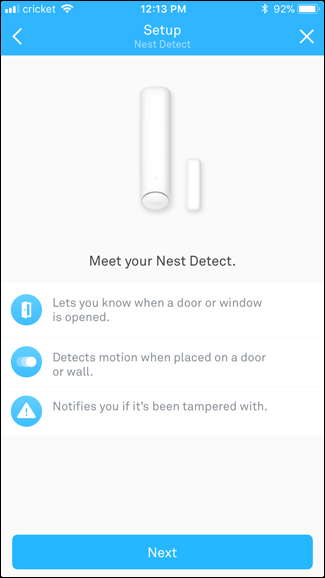
You will then be presented with a list of Nest devices that can be added to the app. Select Nest Detect from the list provided.
You now have the opportunity to use your smartphone's camera to scan your Nest Detect's QR code. Alternatively, if you cannot locate the QR code on your Nest Detect Sensor, you can tap Continue without scanning.
On the next screen, the app will describe what the device does. Tap Next at the bottom to continue.
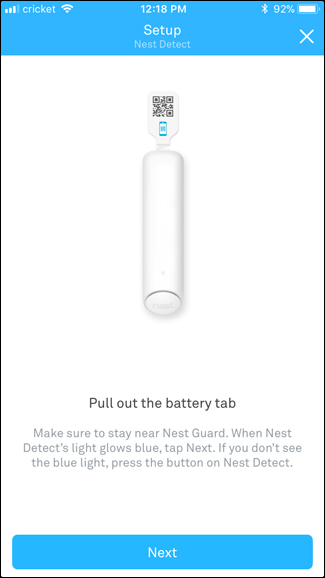
Follow the on-screen instructions and pull out the battery tab, then wait for the blue light to illuminate on your Nest Detect Sensor. Select Next on the following screen.
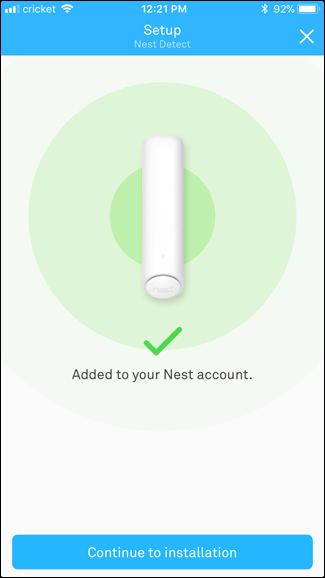
Wait for your sensor to pair with your Secure Alarm System and select Continue to installation.
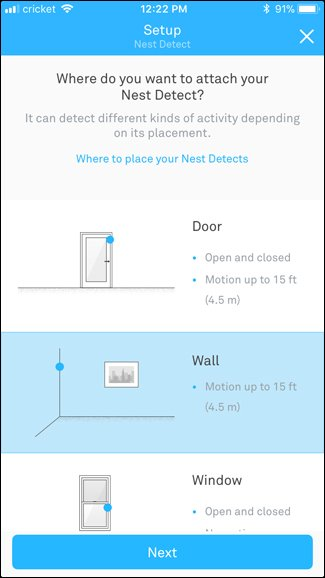
Select the location for your Nest Detect and tap Next.
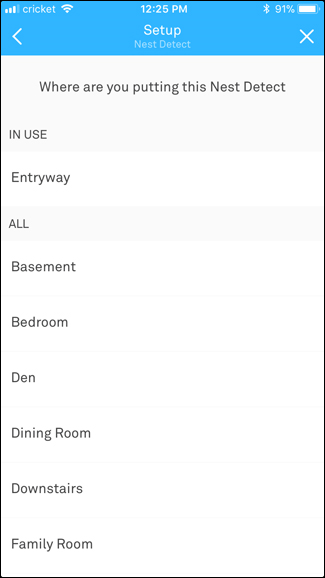
Select where you've placed your Nest Detect.
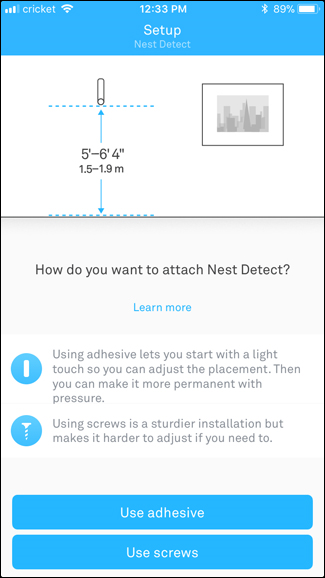
After that, you'll need to physically place your sensor. The app will tell you what you need to install the sensor and take you through that process, including how high to install it for the most accurate motion detection. Select whether you'll be using adhesive or screws.
Tap Next.
Congratulations! Your Nest device has been added to the Nest app and is ready to use.
These steps can be repeated for each additional Nest Detect Sensor you need to add to your system.
22. What's next?
23. Replace Battery
Make sure Nest Secure is set to Off. An alarm will trigger otherwise.
Make note of what direction the Nest logo is facing. You will need to re-install the sensor in the same way later.
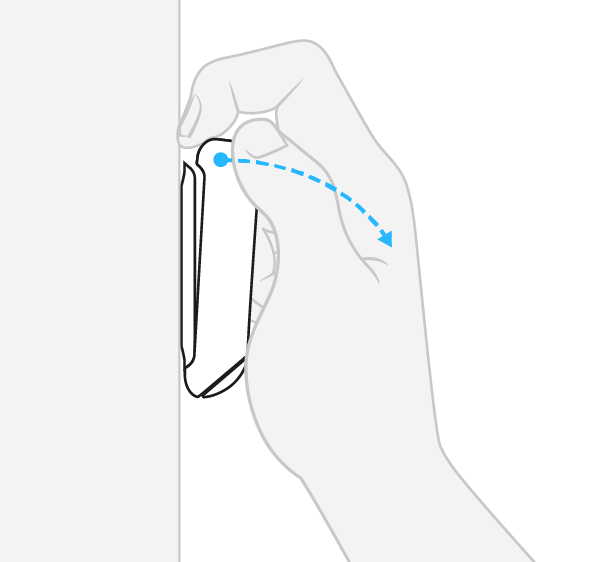
Grip the top of the Nest Detect sensor, pull, and rotate to detach it from the backplate.
Remove the old battery.
Replace with a new CR123A lithium cell.
Do not use rechargeable batteries. They do not put out enough energy over a long enough period of time to operate the Nest Detect sensor properly.
.png)