The Xbox One Chat Headset allows you to communicate with others while you're gaming on the Xbox One console. If you're having trouble with the headset, this guide will provide some troubleshooting steps that may resolve most issues. Sometimes, the issue may be caused by the Xbox One Controller itself and you may want to troubleshoot that as well.
The Xbox One Chat Headset is designed for use with Xbox One controllers only. The headset is not intended to be used with any other device. The Xbox One console does not transmit game sounds or music through the Xbox One Chat Headset.
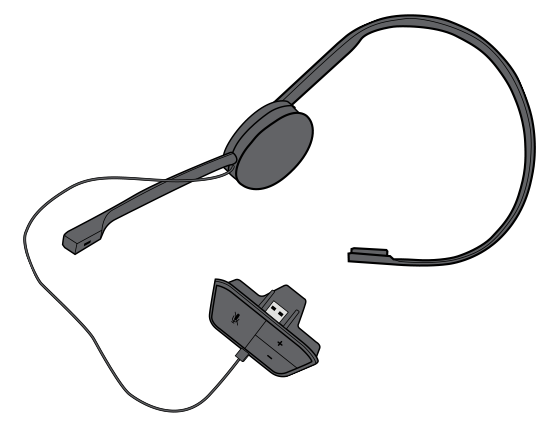
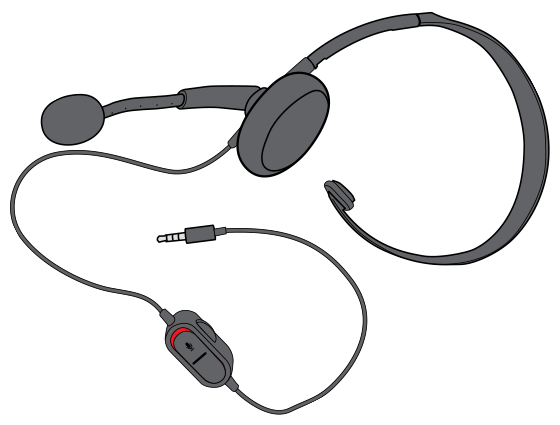
There are two types of Chat Headsets for the Xbox One:
Chat Headset with an expansion connector.
Chat Headset with a 3.5 mm audio connector.
4. Reconnect
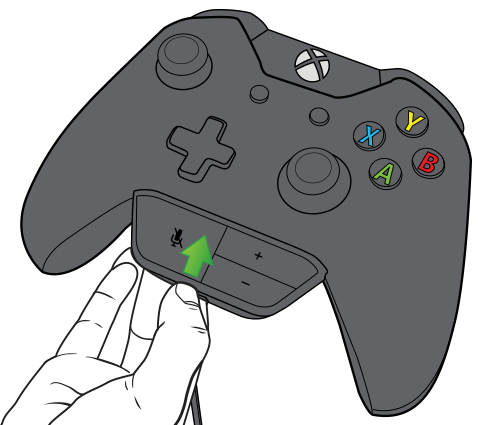
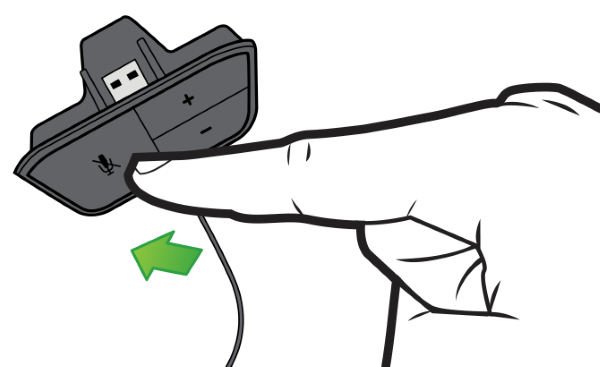
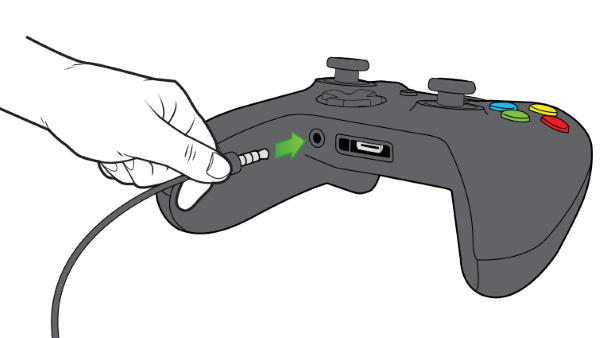
Disconnect the headset from the bottom of the controller.
Reconnect the headset firmly to the bottom of the controller.
5. Adjust Audio
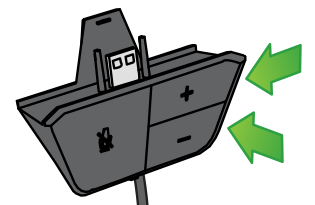
To toggle the chat microphone volume on/off:
Press the microphone mute/unmute button.
To adjust the chat sound volume:
Press the volume + and volume - buttons.
6. Power Cycle
From the console
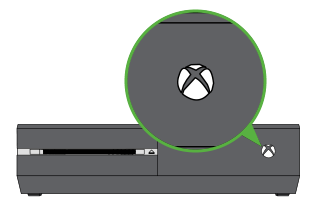
Press and hold the Xbox button on the front of the console for approximately 10 seconds or until it turns off.
Press the Xbox button to turn it back on.
From the controller
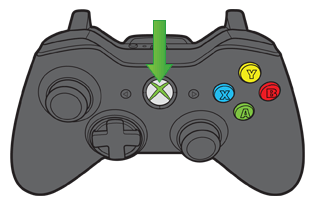
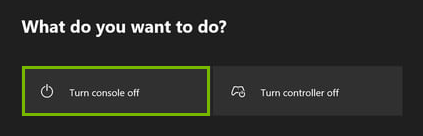
Press and hold the Xbox button on the controller.
Select Turn console off from the on-screen prompt.
Press the Xbox button to turn it back on.
7. Examine and Clean
Examine the headset, the cord, and the connector for visible defects.
Make sure that no dirt or debris is on the headset connector. To clean the connector, use a cotton swab dipped in rubbing alcohol.
8. Associate Controller to Profile
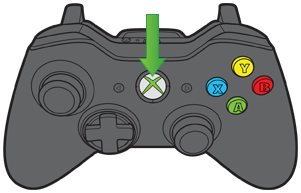
Press the Xbox button on the controller.
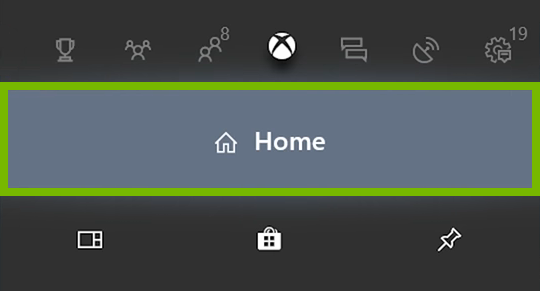
Select Home.
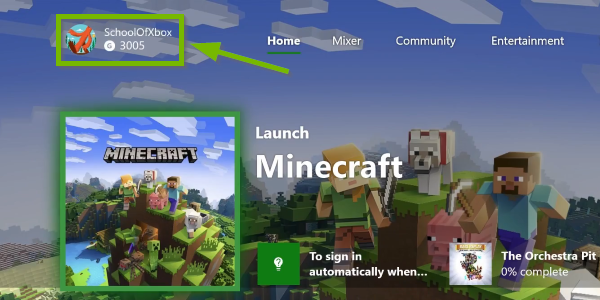
Select the gamerpic in the top left corner of the screen.
Locate your profile and select Choose this person.
9. Check Privacy and Online Safety
Press the Xbox button on the controller.
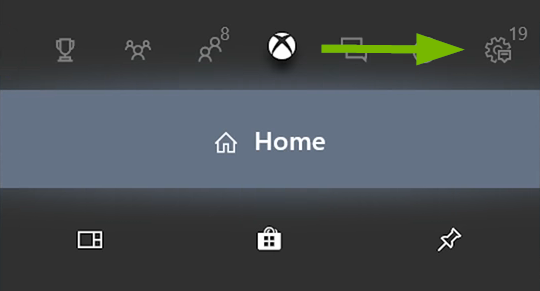
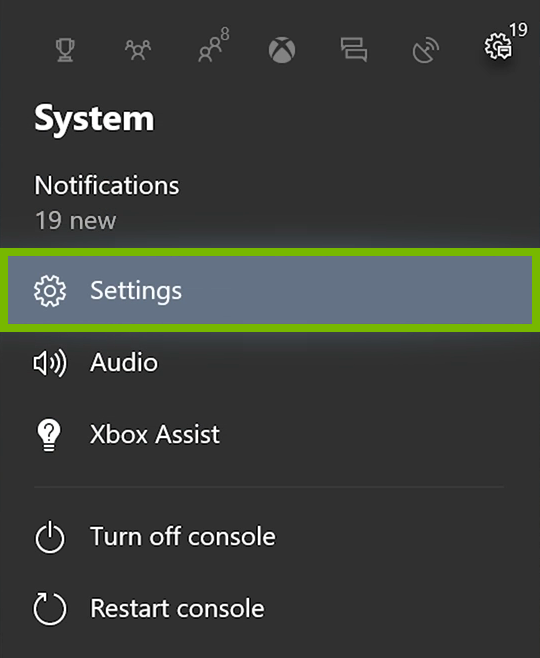
Go to the System tab.
Then go to Settings.
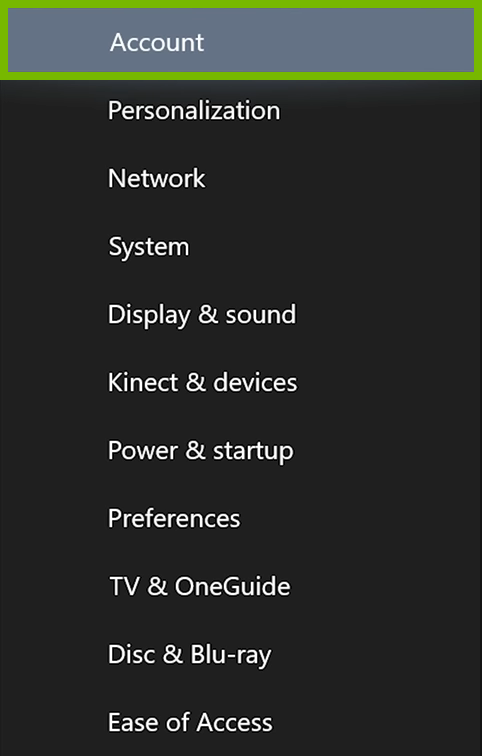
Then go to Account.
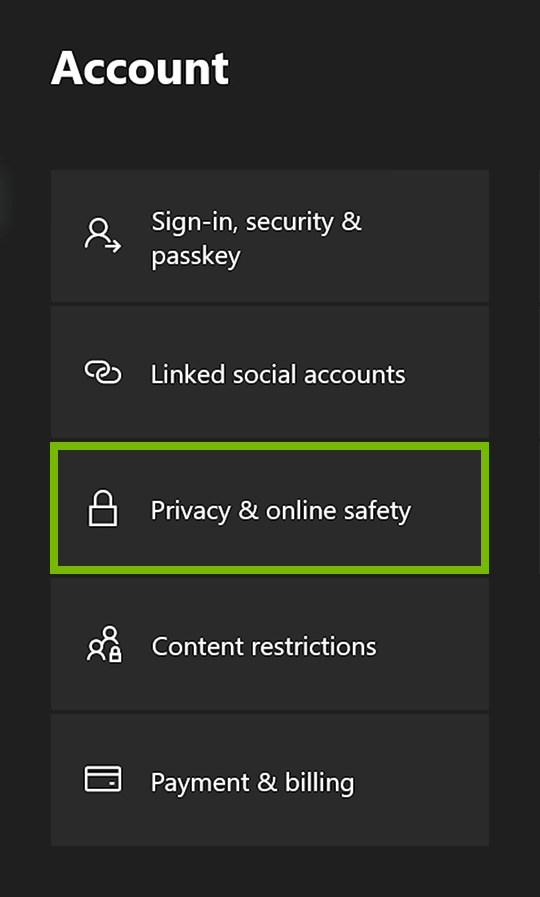
And then go to Privacy & Online Safety.
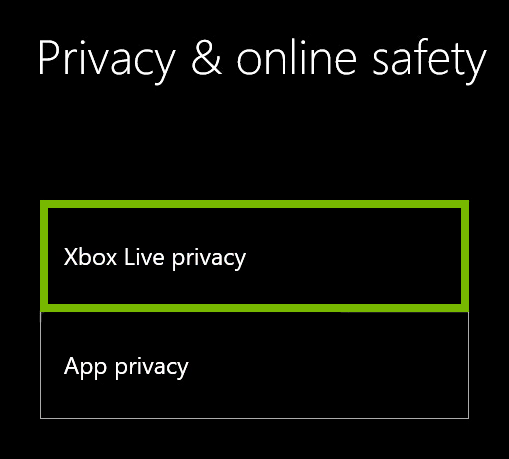
Select Xbox Live Privacy.
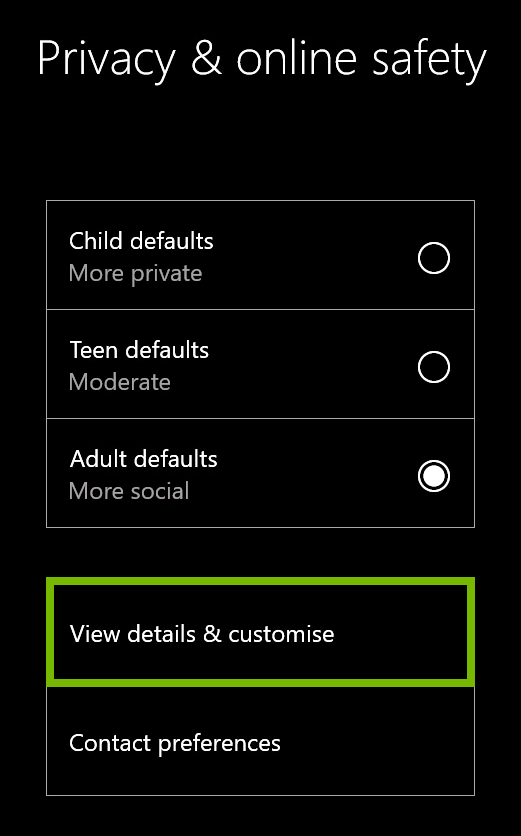
There are three default sets of settings that can be selected: Child, Teen and Adult. For each of them more information can be shown or changed by selecting View details & customize.
Further subsets of settings can be selected where each setting can be assigned different privileges and permissions, such as: Allow, Block, Everybody, Friends.
10. Set Privacy Settings
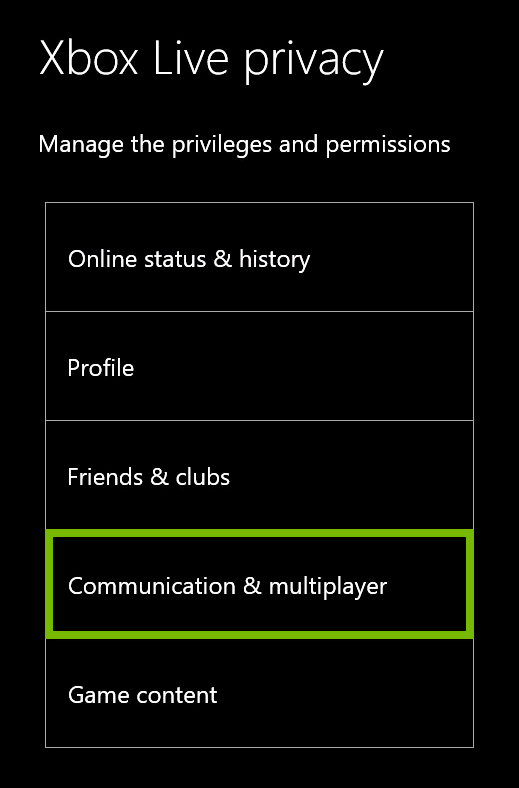
Select Communication & multiplayer.
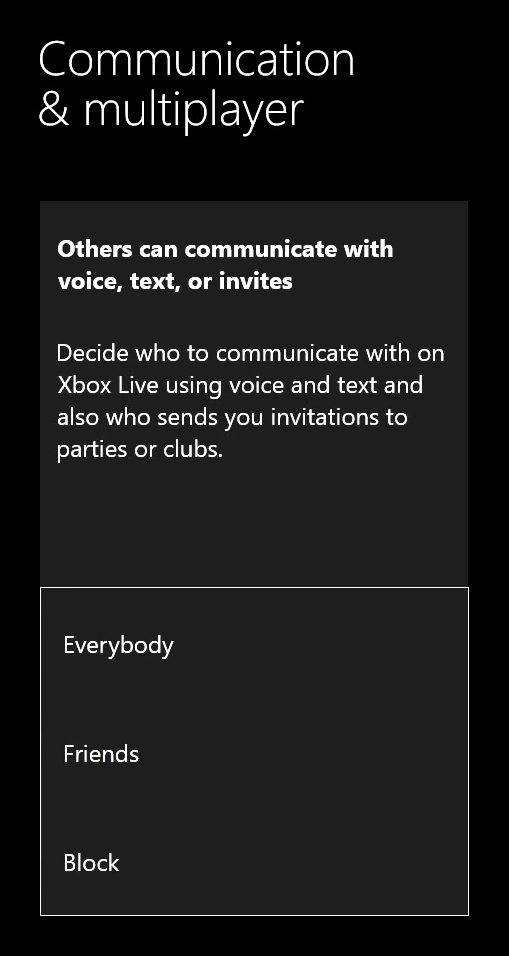
Look for the Communicate with voice and text option or a similar name then set the privacy level that you prefer.
11. Introduction
Network Address Translation (NAT) is a technology that allows you to have multiple devices connected to the internet at the same time while only having one physical connection to your Internet Service Provider (ISP). The connection to the ISP is established through a modem whereas the NAT is accomplished with the use of a router. Interconnecting a modem and a router is how all your devices in your home are able to connect to the internet at the same time. Units that can replace the combined use of a modem and a router also exist and are called gateways. The NAT has the following effects on a network:
Connections initiated from inside the home network like surfing the web, checking email and joining a game work fine because the router passes the connection request out. Once the connection is established data flows both in and out.
Connections initiated from outside the home network are dropped by default. This is because the router doesn't know to which device on your home network the incoming connection was intended for. In a multiplayer game these incoming connections are sometimes required for joining lobbies and voice chat.
Your NAT type is determined by the settings or features of the router on the network you are using to connect to the Internet. Your NAT type, combined with the NAT type of other online players, determines whether you can successfully communicate with them in party chat or use multiplayer gaming.
12. NAT Types
The Xbox console has the following NAT types:
Open: You can chat with other people, as well as join and host multiplayer games with people who have any NAT type on their network.
Moderate: You can chat and play multiplayer games with some people; however, you might not be able to hear or play with others, and you typically won’t be chosen as the host of a match.
Strict: You can only chat and play multiplayer games with people who have an Open NAT type. You can’t be chosen as the host of a match.
If your NAT type is Open, your console is connected properly. If you are having problems, it may be due to a glitch with your connection and may be resolved with a simple reboot. If your NAT Type is Moderate or Strict, this generally indicates that there is some sort of restriction or blockage that is preventing your console from communicating properly. This means that your router's settings will have to be altered to allow proper communication, or might be altogether incompatible with your game console.
The table below illustrates who you can play multiplayer games with and communicate with in a party chat.
Xbox BXbox ANAT TypeOpenModerateStrictOpen✔✔✔Moderate✔✔✖Strict✔✖✖
13. Check Network Status
Press the Xbox button on the controller.
Go to the System tab.
Then go to Settings.
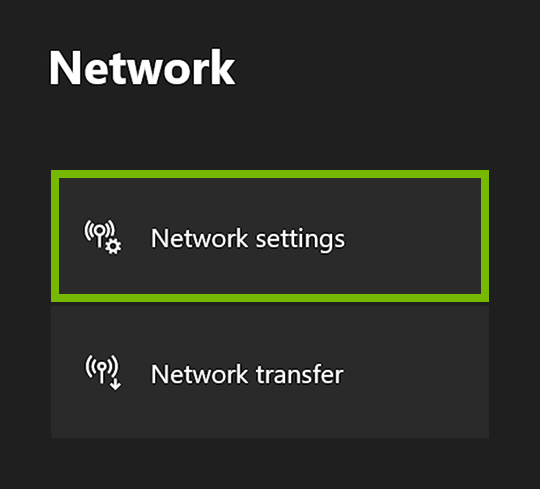
Then go to Network.
And then go to Network Settings.
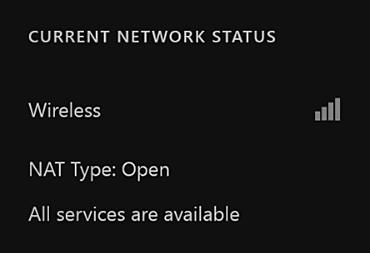
This screen is divided into three columns. The middle one shows you the network status.
The first indicator tells you whether you're connected and through what type of connection, wired or wireless. If you are wireless, it also displays a signal strength indicator.
The second indicator displays your Network Address Translation (NAT) type. NAT allows you to have multiple devices connected to the internet at the same time while only having one physical connection to your internet service provider.
The third indicator tells you whether all of the Xbox Live services are up and running. If any services are down, this indicator will also detail which ones are down.
14. What's next?
15. What's next?
16. Reconnect
Disconnect the headset from the bottom of the controller.
Never pull on the headset cable when removing it from the controller. Always pull on the body of the headset plug.
Reconnect the headset firmly to the bottom of the controller.
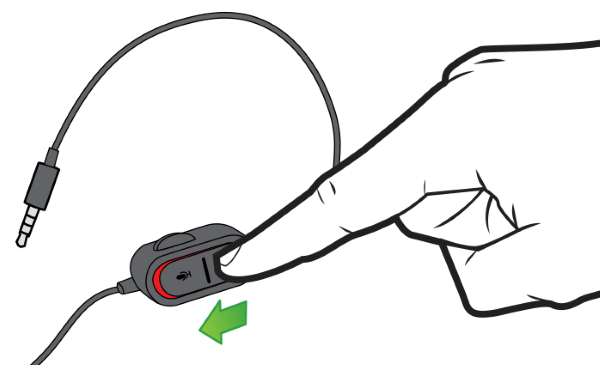
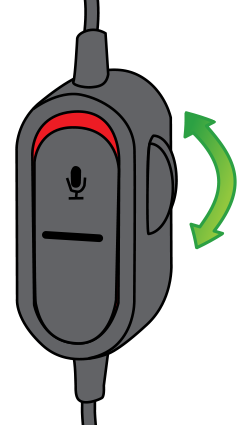
17. Adjust Audio
To toggle the chat microphone volume on/off:
Press the microphone mute/unmute switch.
To adjust the chat sound volume:
Scroll the volume dial up or down.
18. Echo or Noise
If an echo effect is heard during gameplay, it can often originate from the person who is talking and not necessarily from the person who hears the echo. For example, if you hear an echo only when someone else talks, the problem may be with the headset connection of the person who is talking.
The following conditions may cause an echo or noise during gameplay:
The microphone detects ambient noises. This includes voice transmission that comes from the earpiece.
The headset plug is not fully inserted into the controller.
You’re using the Xbox One Wireless Controller, and the battery levels in the unit are low.
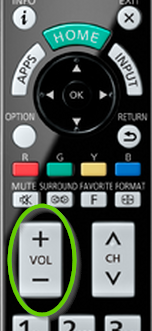
19. Adjust Volume
On your TV remote, use the Volume Up/Down buttons.
If you are using a separate home theater, surround sound, or sound bar with your television, be sure to check the volume levels and settings on that device as well.
20. Chat Headset Types
There are two types of Chat Headsets for the Xbox One:
Chat Headset with an expansion connector.
Chat Headset with a 3.5 mm audio connector.
21. Reconnect
Disconnect the headset from the bottom of the controller.
Reconnect the headset firmly to the bottom of the controller.
22. Examine and Clean
Examine the headset, the cord, and the connector for visible defects.
Make sure that no dirt or debris is on the headset connector. To clean the connector, use a cotton swab dipped in rubbing alcohol.
23. Replace or Recharge Batteries
To make sure the controller is working as intended, replace the AA batteries or recharge the battery pack.
The Xbox One Wireless Controller works with standard AA alkaline (LR6) batteries, rechargeable AA alkaline (LR6) batteries or rechargeable battery pack included in the Xbox One Play & Charge Kit. Rechargeable AA batteries don’t charge in the controller. They have to be recharged by the method recommended by the manufacturer.
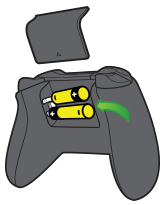
Replace AA batteries
Install the AA batteries with their positive (+) and negative (–) end positions as shown in the controller's battery compartment.
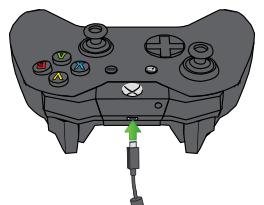
Charge battery pack
Connect the charge cable to the USB port on the front of the controller.
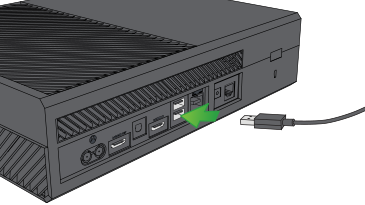
Connect the other end of the charge cable to a USB port on the Xbox One.
If your Xbox One console is off, turn it on. The console must be turned on after the controller is connected or the battery won’t charge. However, you can then turn it off again if you want to.
The light on your charge cable glows amber to indicate the battery is charging. When the light changes to white, the battery pack is fully charged.
24. What's next?
25. Reconnect
Disconnect the headset from the bottom of the controller.
Never pull on the headset cable when removing it from the controller. Always pull on the body of the headset plug.
Reconnect the headset firmly to the bottom of the controller.
Remove Hidden Spyware In Minutes For Free
Detect and remove spyware, keyloggers, tracking cookies, and other
threats that slow down your PC or steal your data.
65+ Million Downloads
Spyware scanner with AI-powered detection engine + database
.png)