From small speakers to large, connected hubs to connected amps, soundbars to sub woofers, Sonos makes wireless, connected speakers for all kinds of people and all kinds of environments.
This guide will help you to troubleshoot issues with your Sonos devices and your mobile devices.
2. Power Cycle Network & Devices
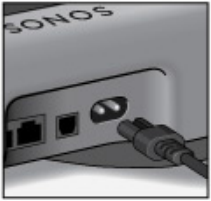
Unplug the power to all of your Sonos devices.
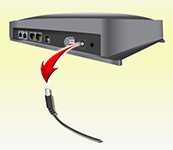
Unplug the power to your Gateway/Router.
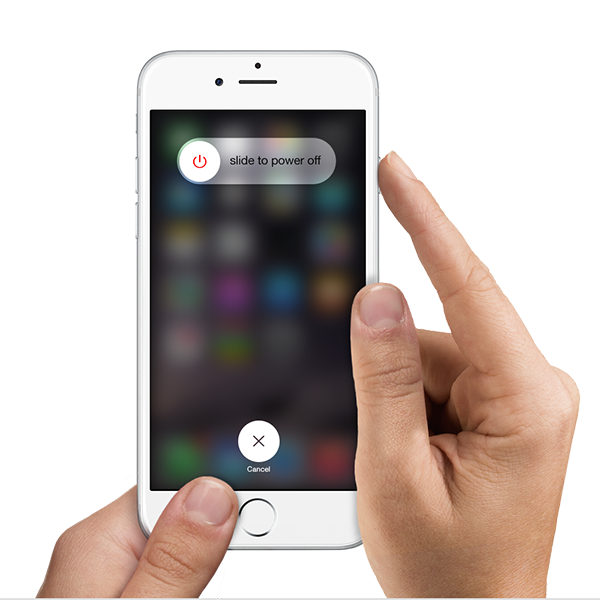
Power off your mobile device (Android/IOS).
Plug in the power to your Gateway/Router.
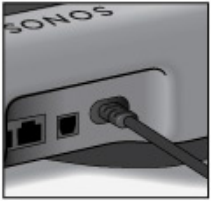
Plug in the power to your Sonos devices.
Power on your mobile device (Android/IOS).
3. Troubleshooting
Next, we will troubleshoot your Sonos devices according to the type of mobile device you're using.
4. Verify Network on Android
Make sure your controller is connected to the correct WiFi network.
First, we'll check what network your Android device is connected to.
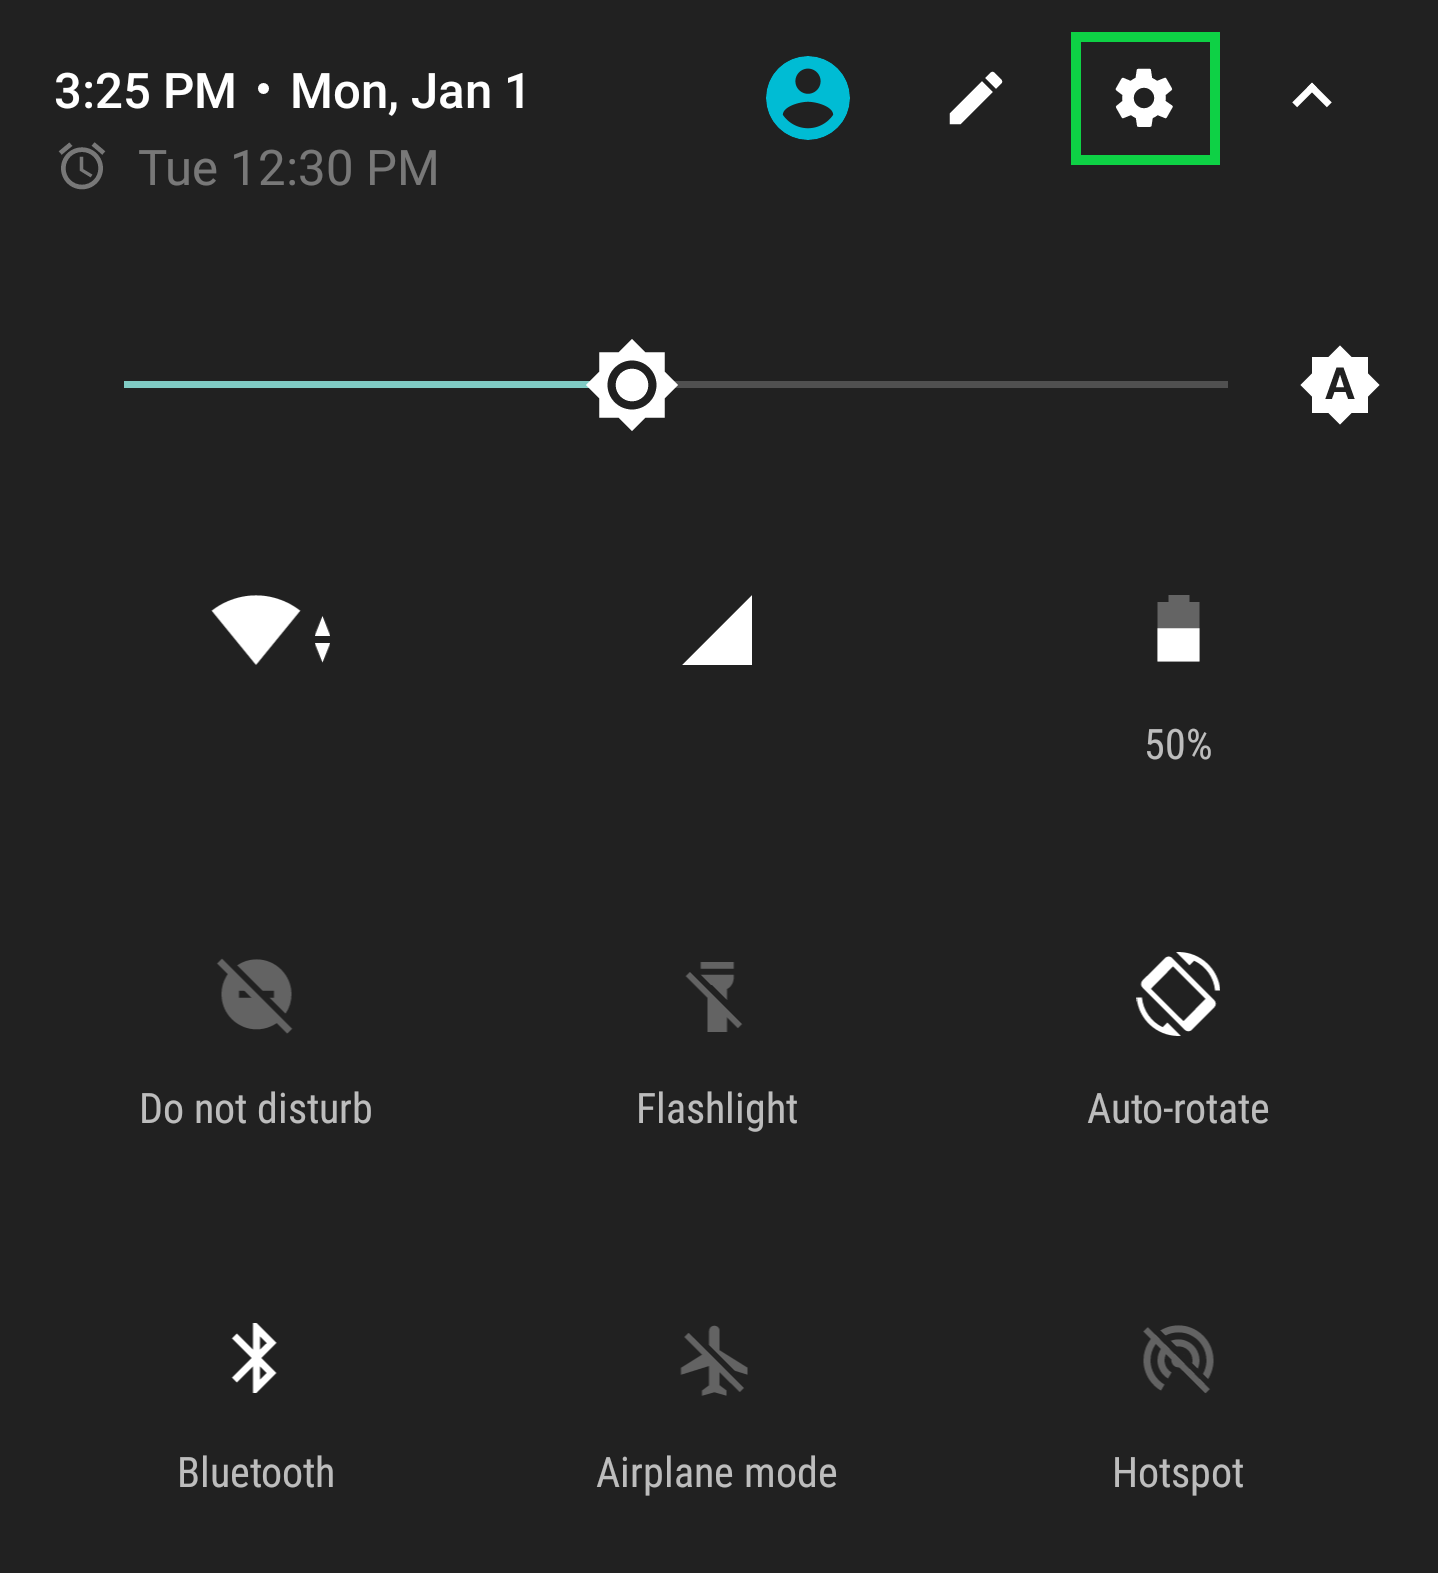
Slide your finger from the top down and tap on the Settings gear.
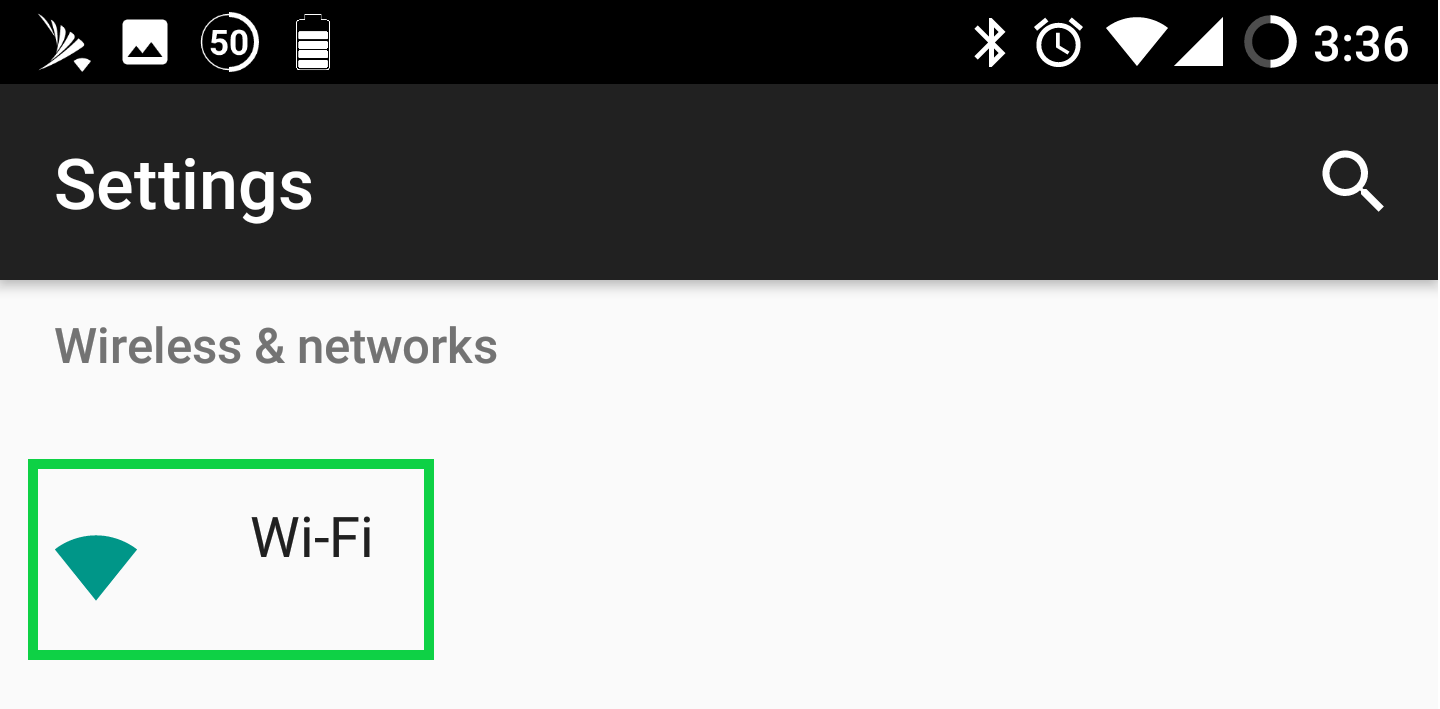
Click on Wi-Fi (Or Wireless Networks)
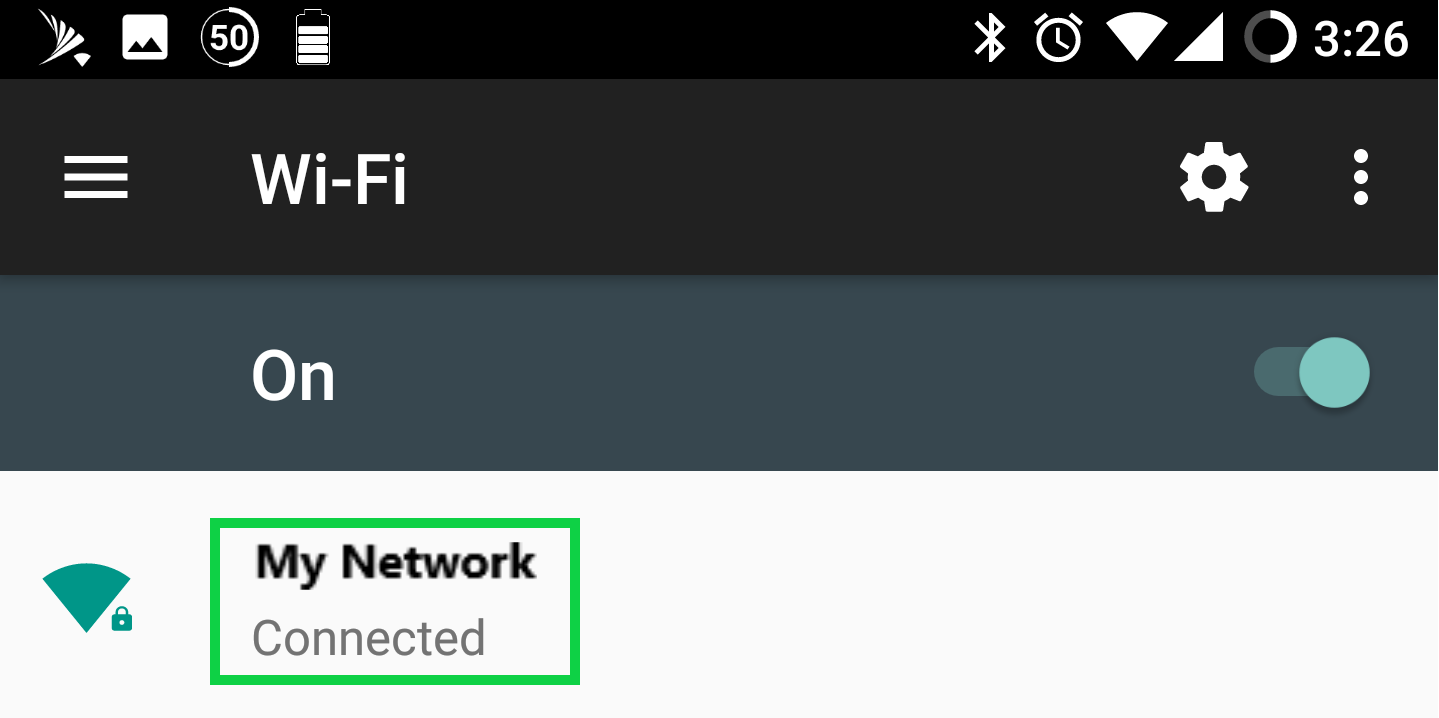
Verify you're on your primary Wi-Fi Network
Make sure you are not on a Guest Network. Most guest networks will not let you communicate with your other devices.
Next, we need to verify the network the Sonos products are connected to.
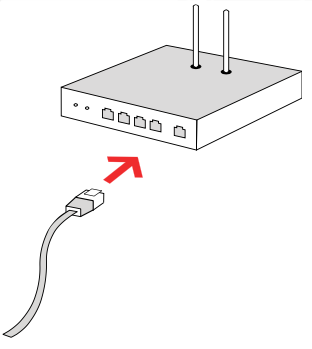
Connect one of your Sonos products to your router using an Ethernet cable, and then connect it to power. Use whichever product is most convenient to temporarily connect to your router.
After a few minutes you will start to see your Sonos Players appearing on your Sonos controller. Confirm that all of your Sonos players are showing up on your controller.
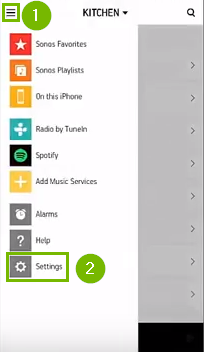
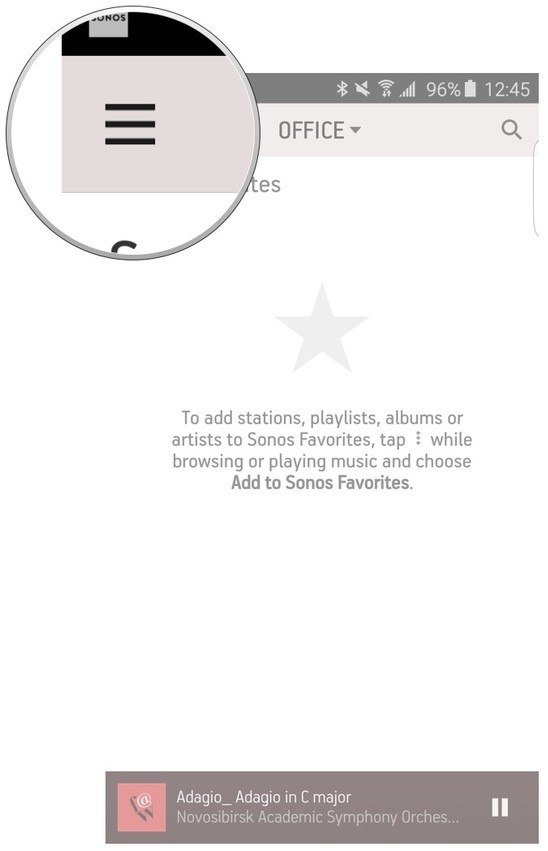
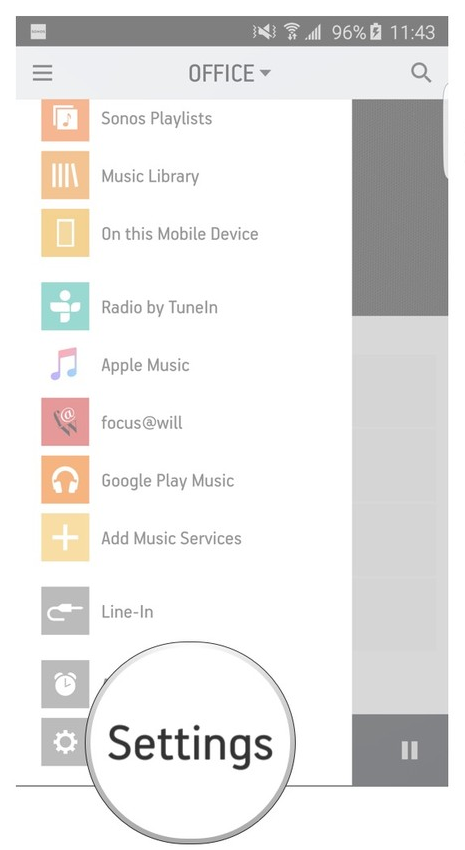
In the controller app, tap the Menu button and tap on Settings.
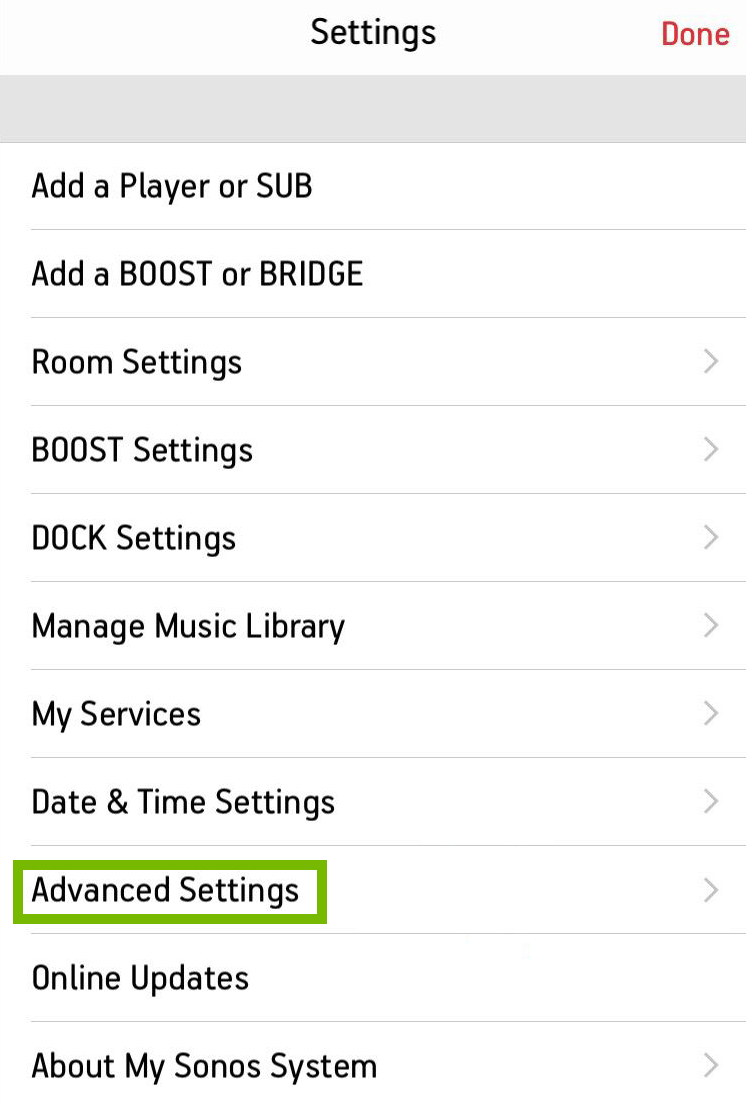
Tap on Advanced Settings.
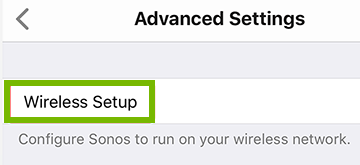
Tap on Wireless Setup.
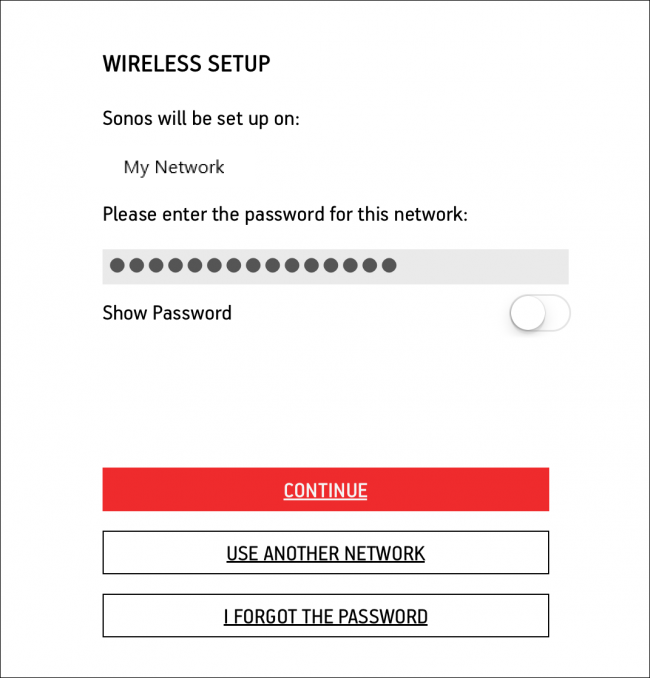
Type in the password (security key) to join your WiFi network and press Continue.
Once your Sonos devices are on the same wireless network as your mobile device, you can disconnect the Ethernet cable.
5. Uninstall Android App
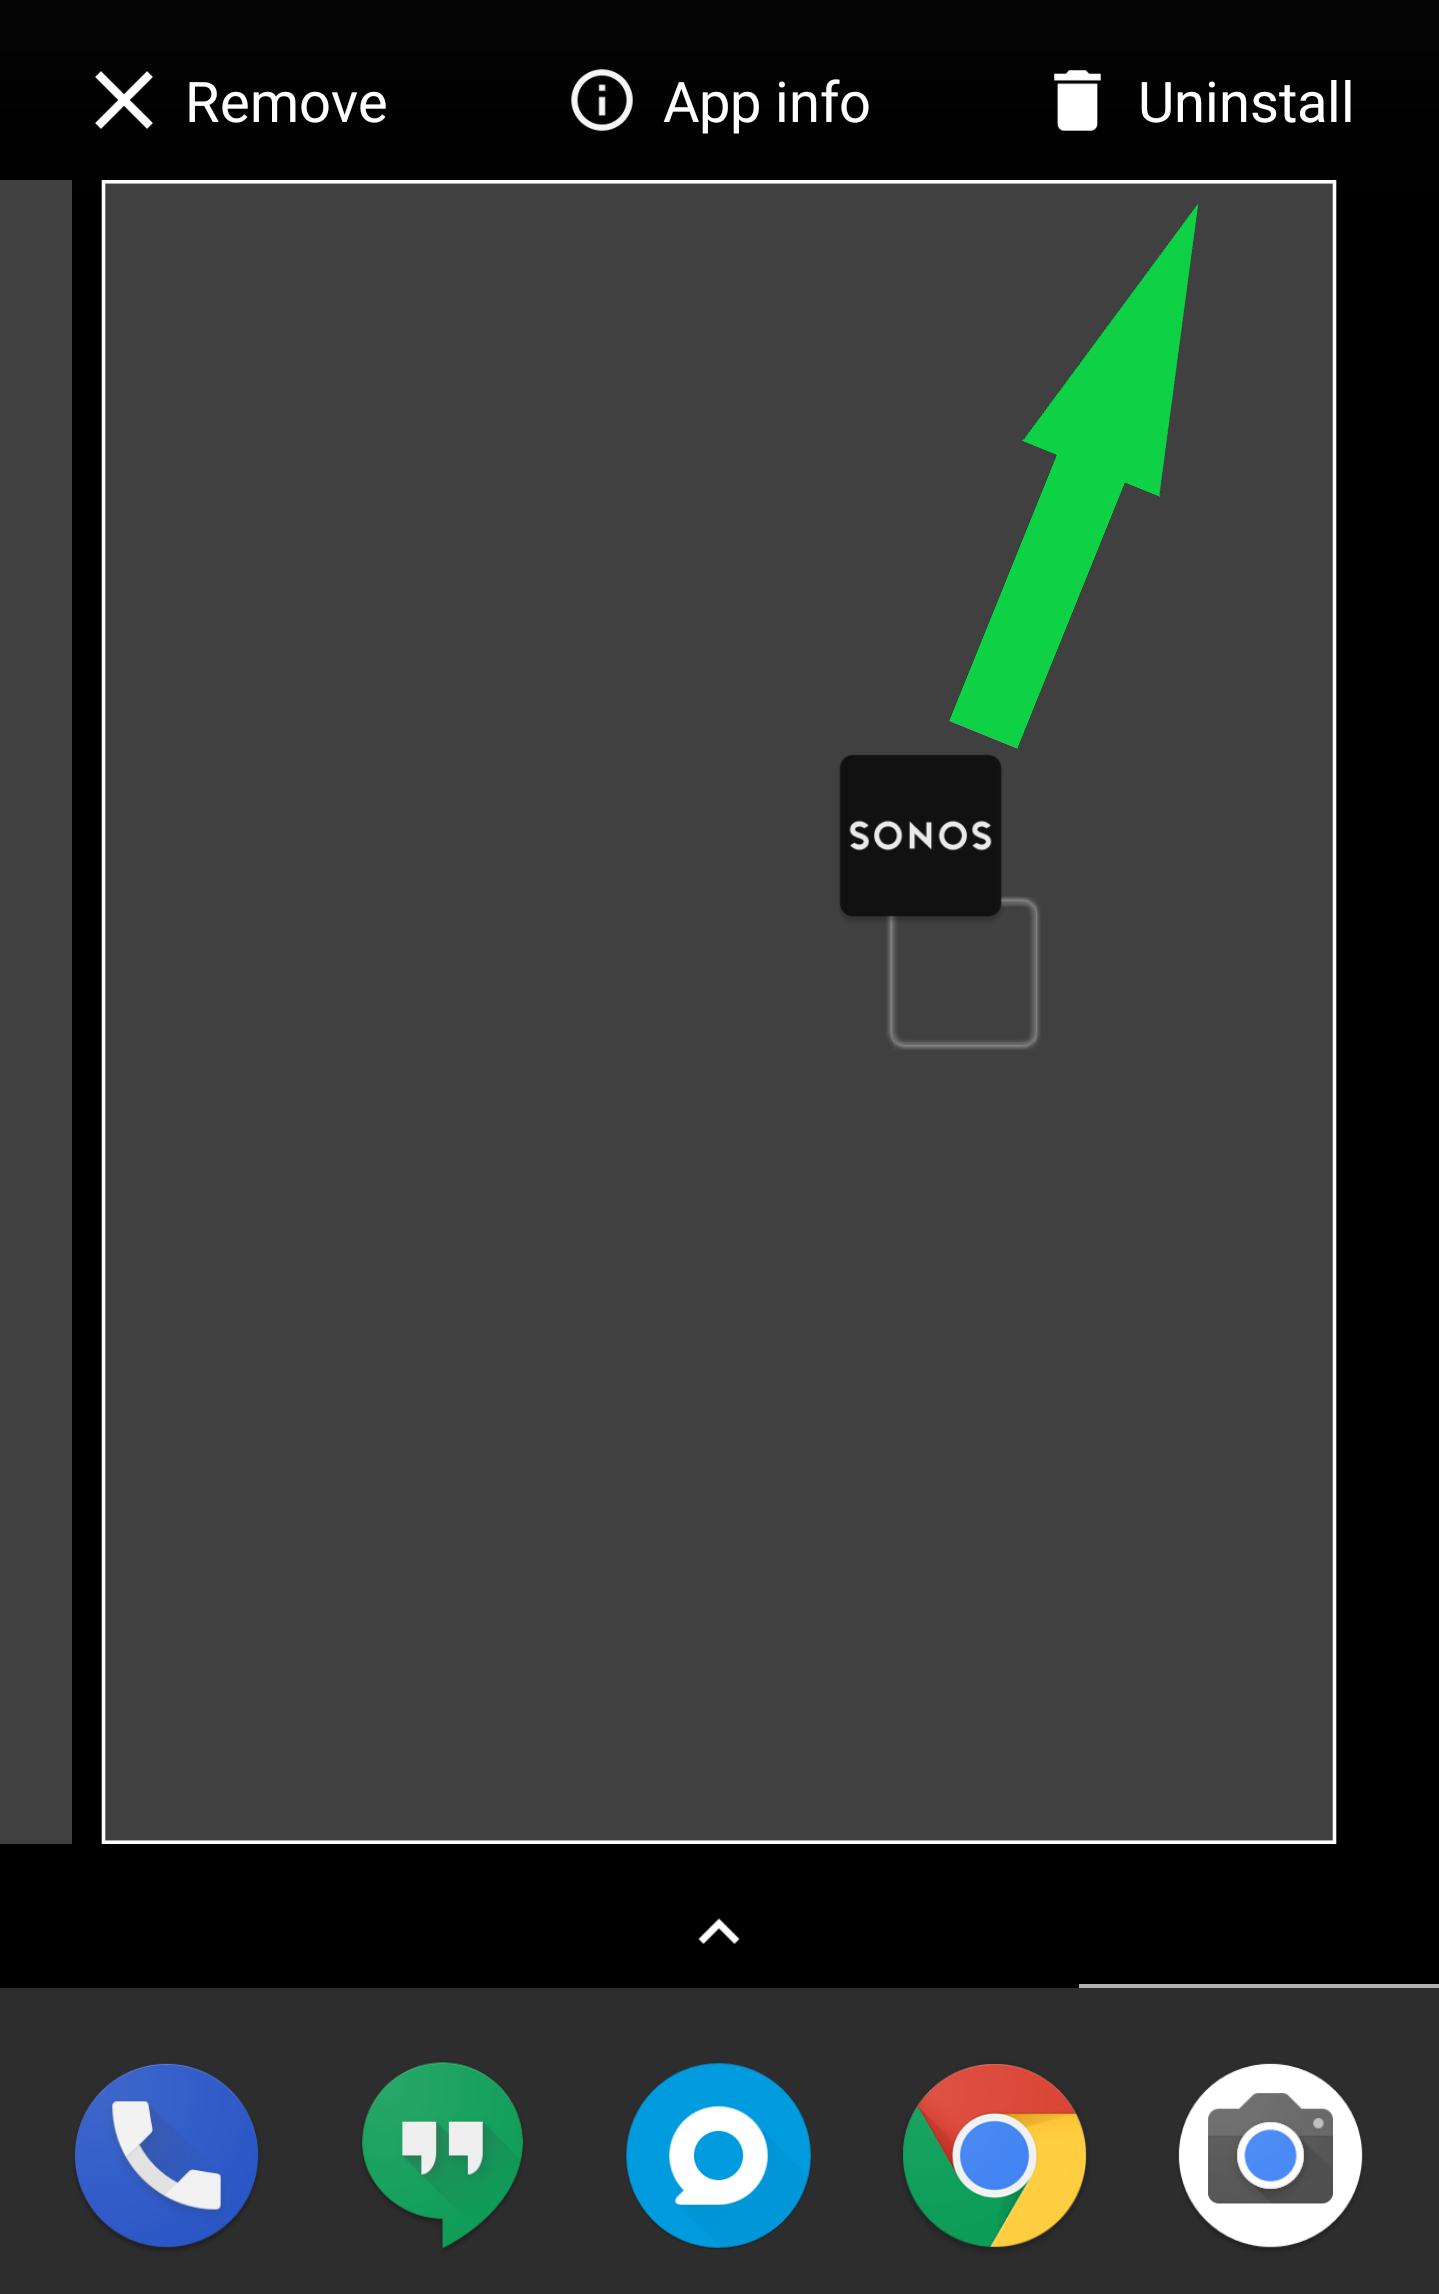
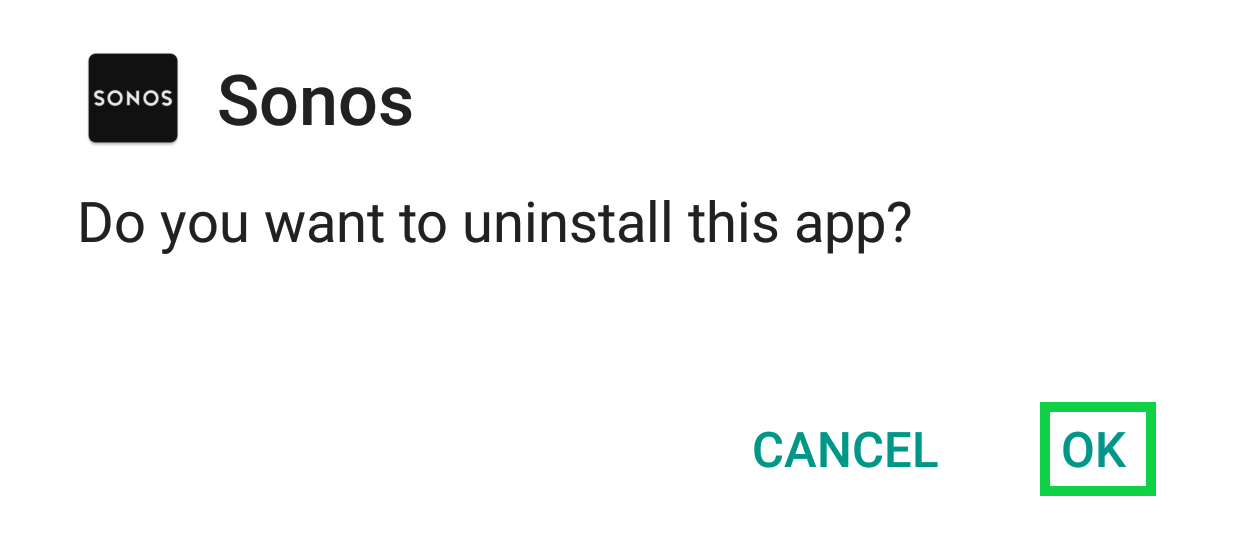
Tap and hold on Sonos Controller app and slide/drag to Uninstall.
Click OK.
6. Install Android App
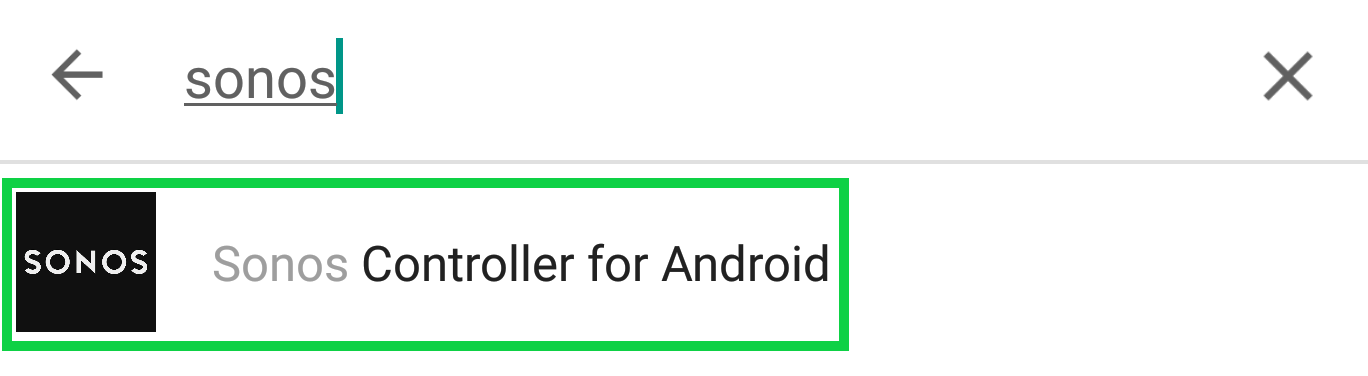
Open Play Store.
Search for "Sonos Controller for Android" and tap on the app.
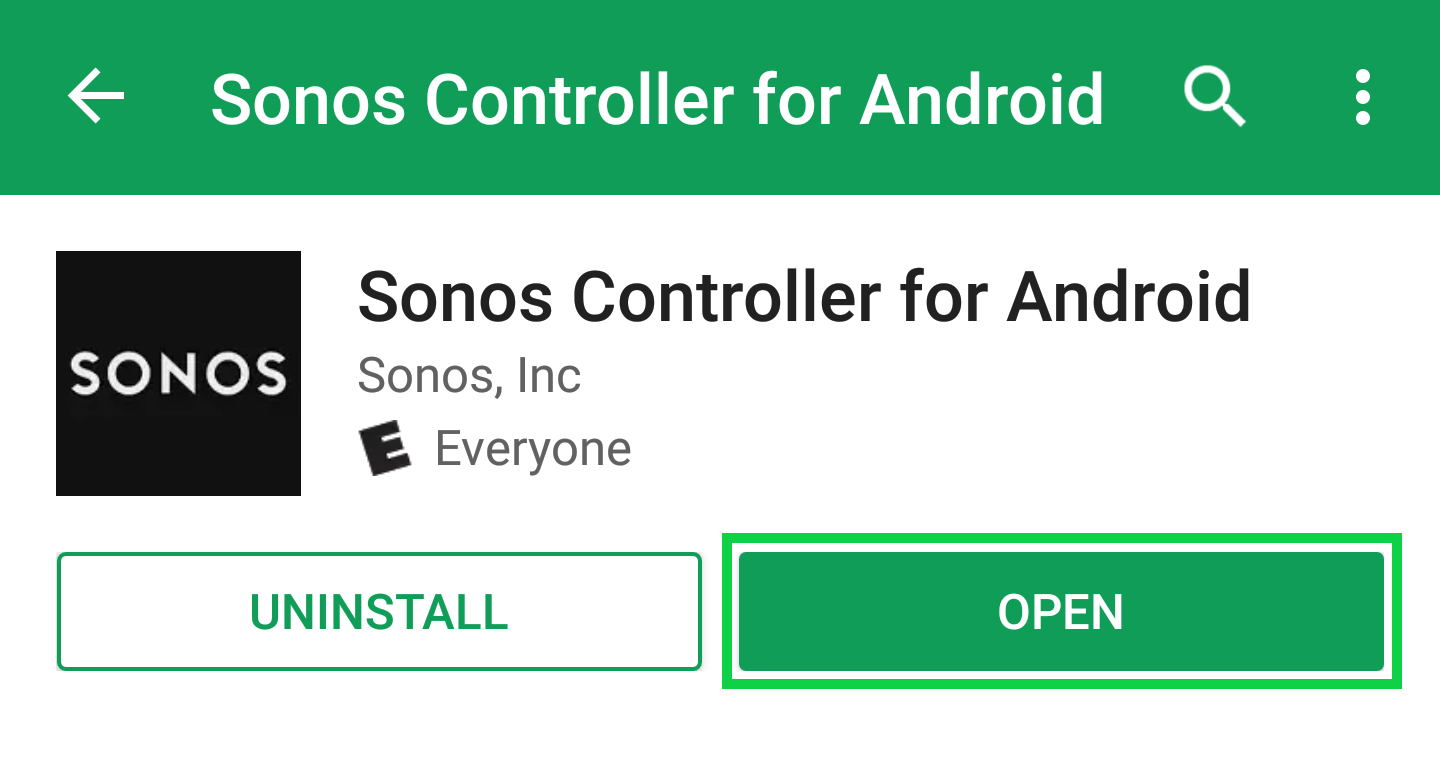
Tap Install to start downloading the app.
Once installed, tap Open.
7. Add Speaker/Sub
Follow the steps below to add a SUB to your home theater.
Launch the Sonos Controller app from your Home screen.
Tap on the Menu button.
Tap on Settings in the menu.
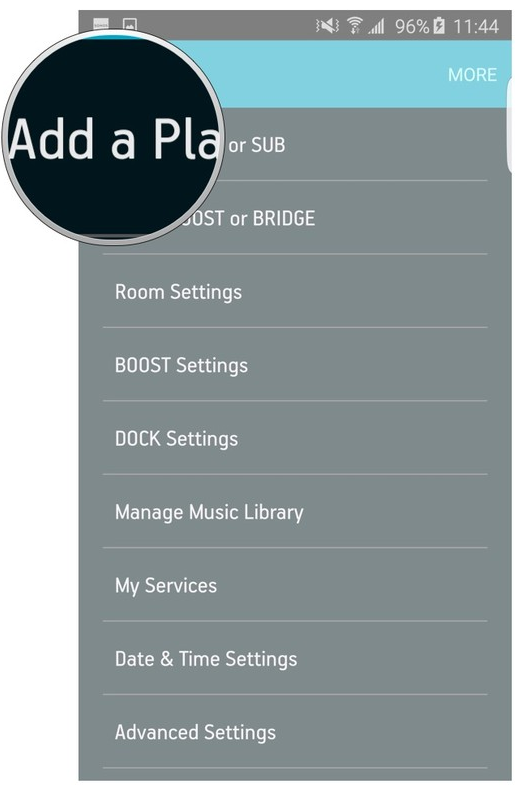
Tap on Add a Player or SUB button.
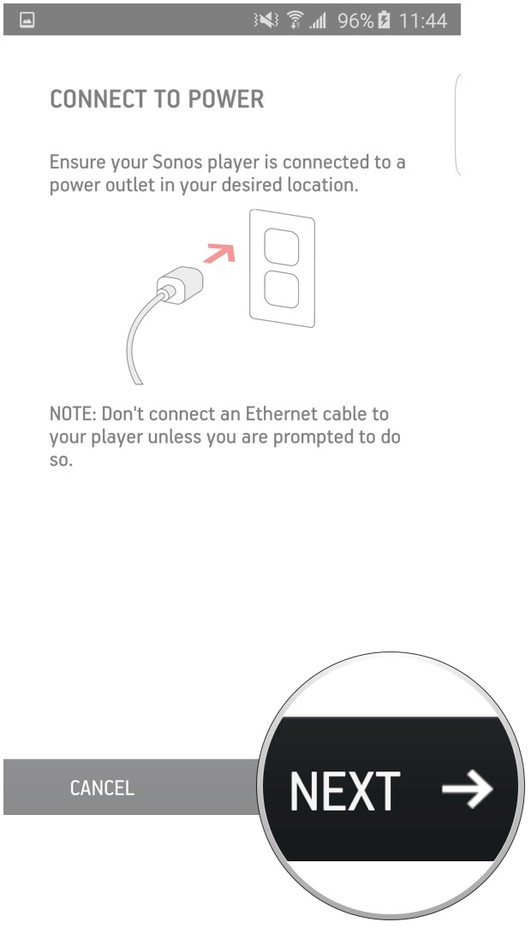
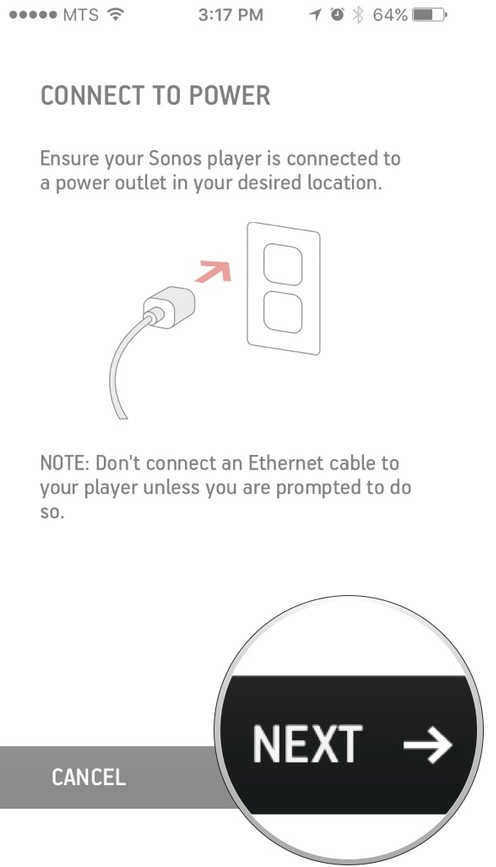
Tap Next on the Connect To Power screen. Make sure your Sonos is plugged in before you continue!
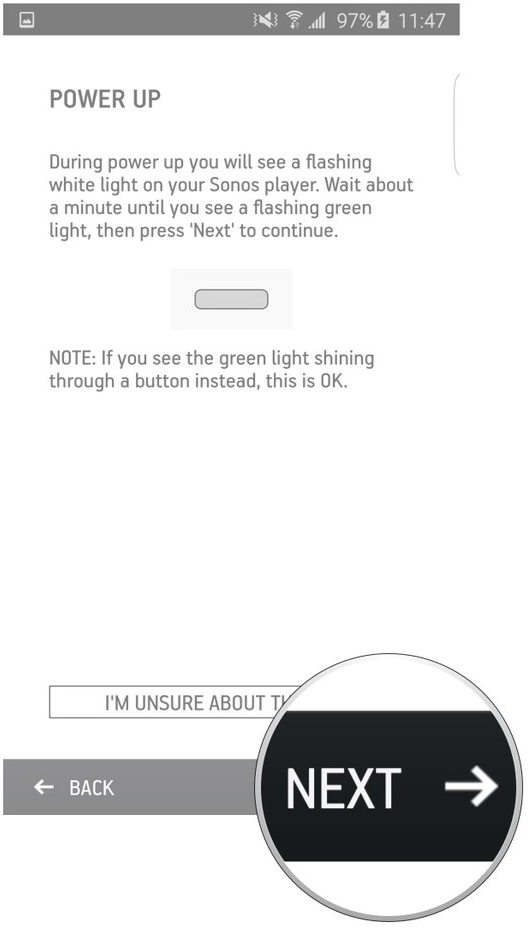
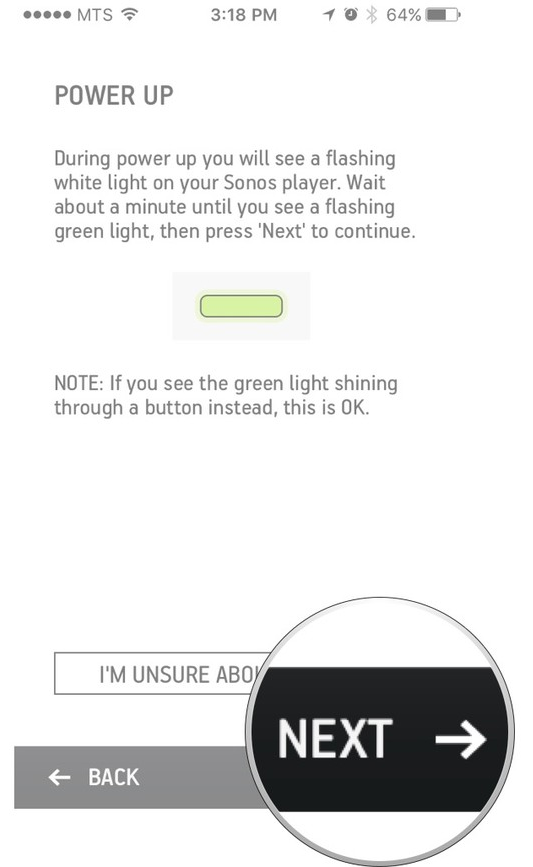
Tap Next on the bottom right of the screen, after you have seen the green light flashing on your Sonos speaker. The indicator or the mute/play/pause button may be flashing. If you don't see the green flashing light, tap I'm unsure about the light.
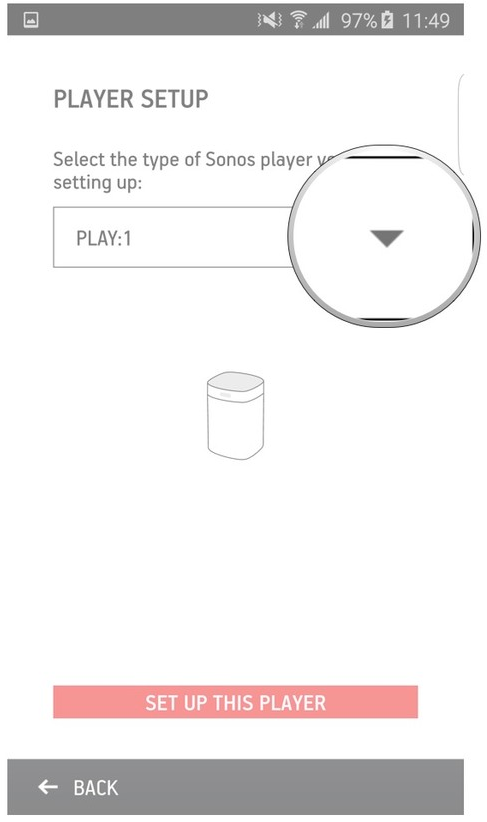
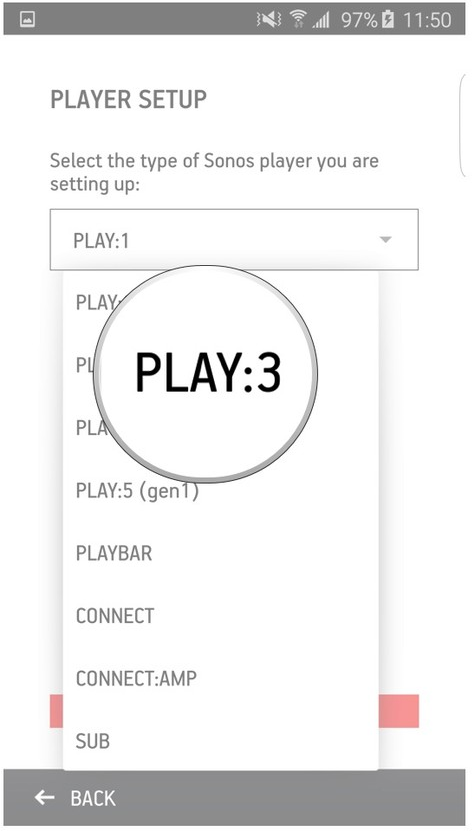
Tap the Dropdown menu on the Player Setup screen.
Tap your Player in the list.
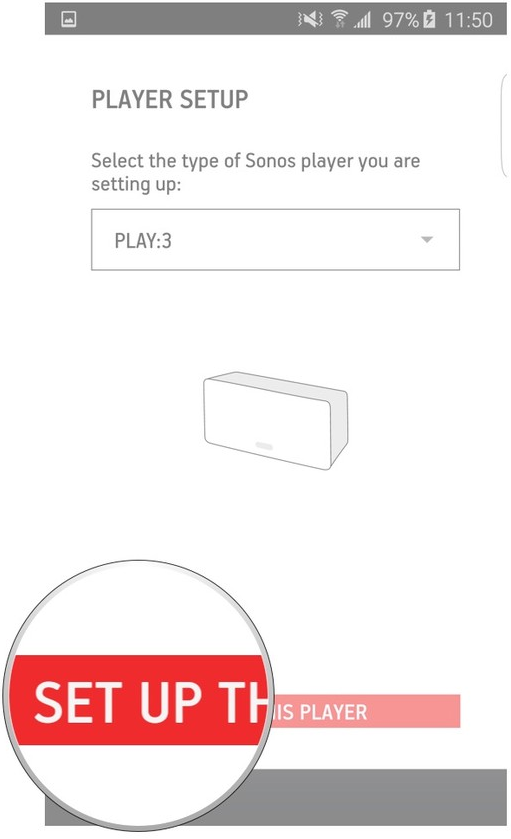
Tap Set up this player on the bottom of the screen.
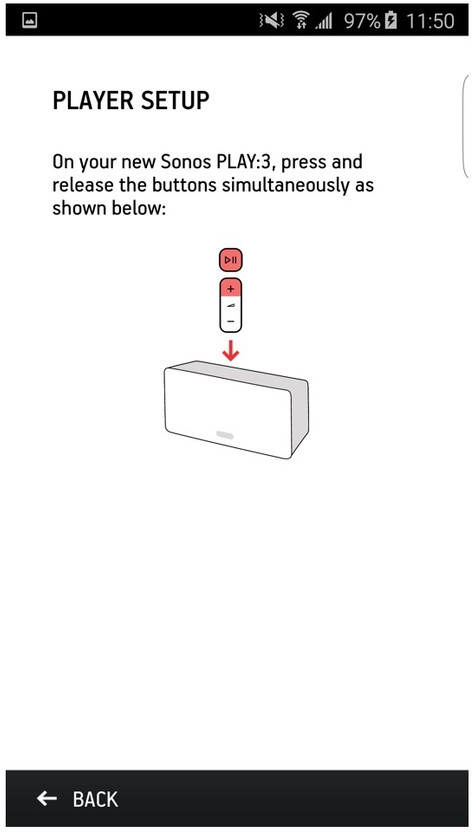
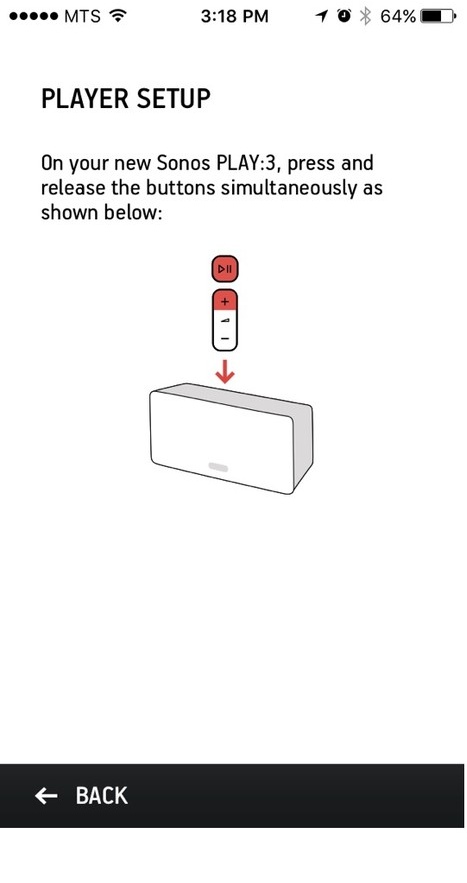
Press the Mute/Play/Pause button and the increase volume button on your Sonos simultaneously and you should hear a noise.
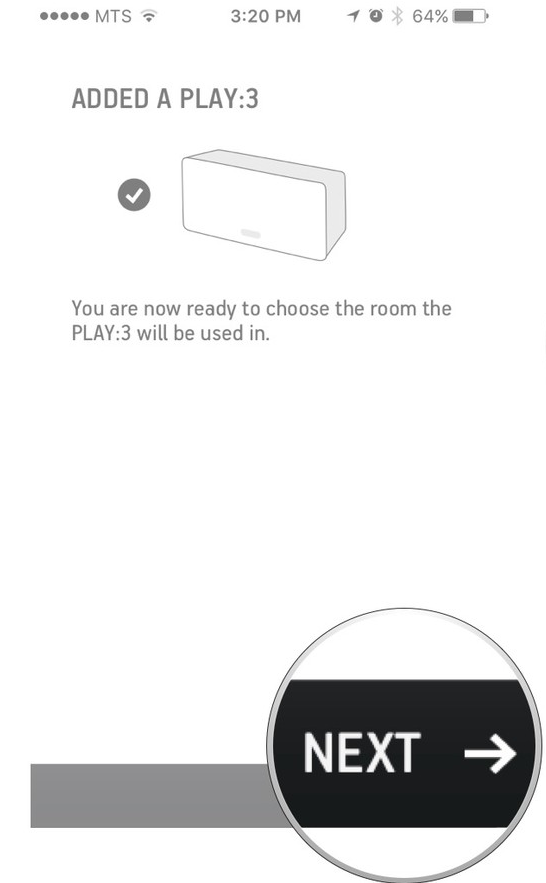
Tap Next once your player connects.
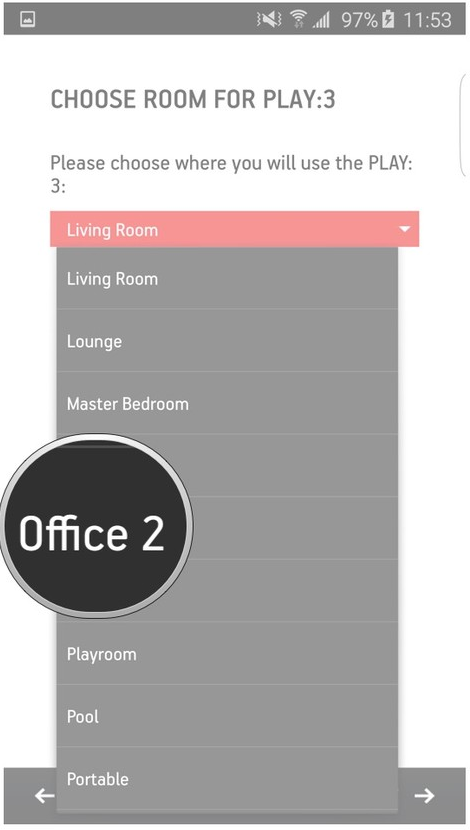
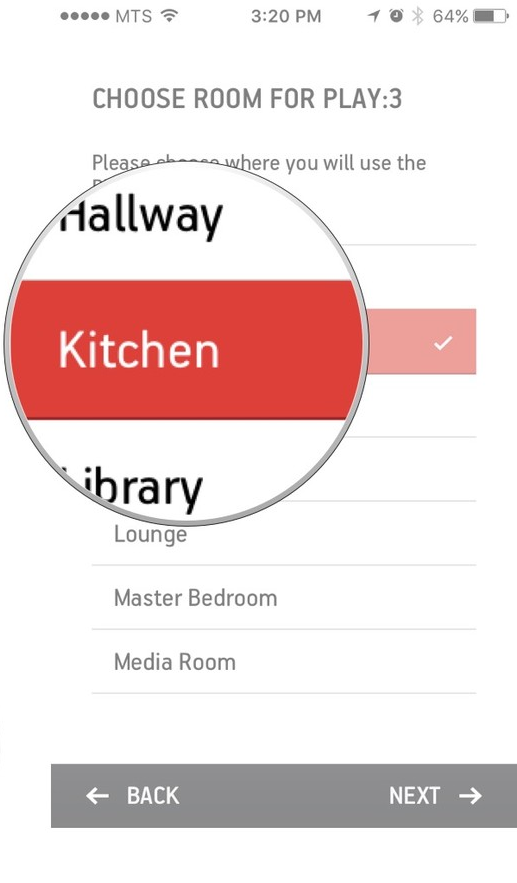
Tap the Dropdown menu.
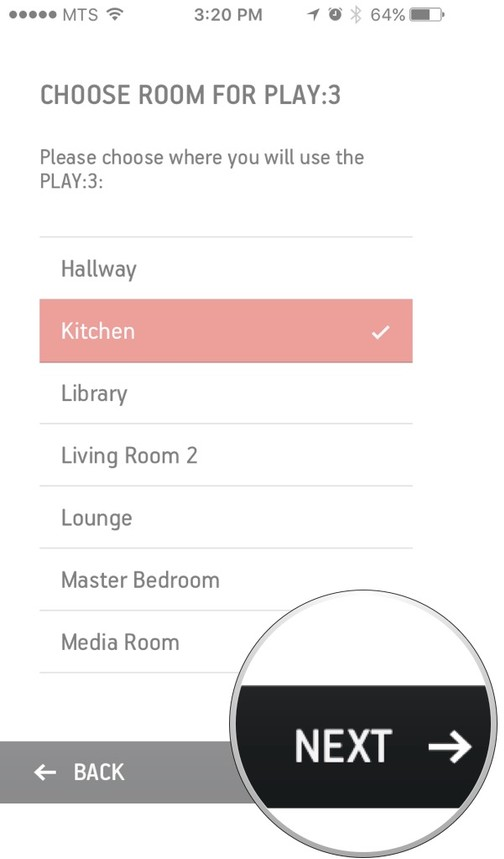
Choose a Room to label your Sonos.
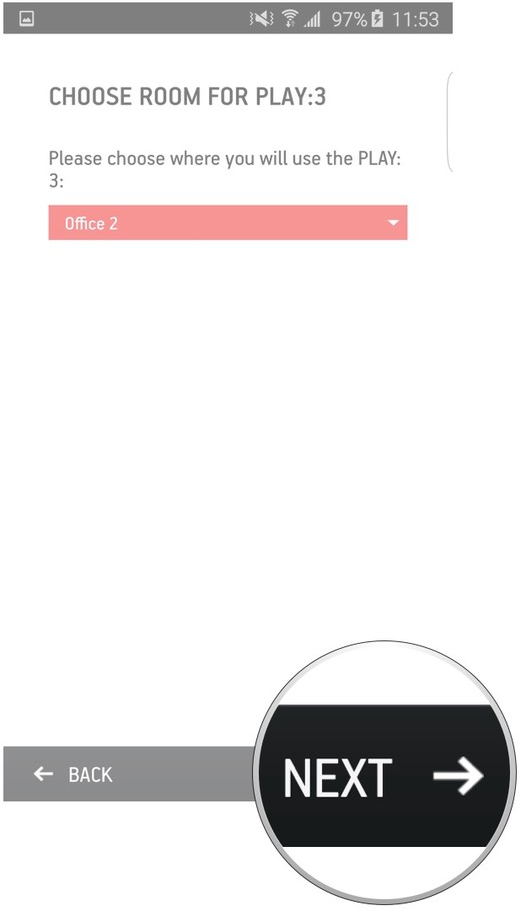
Tap Next after you choose a room.
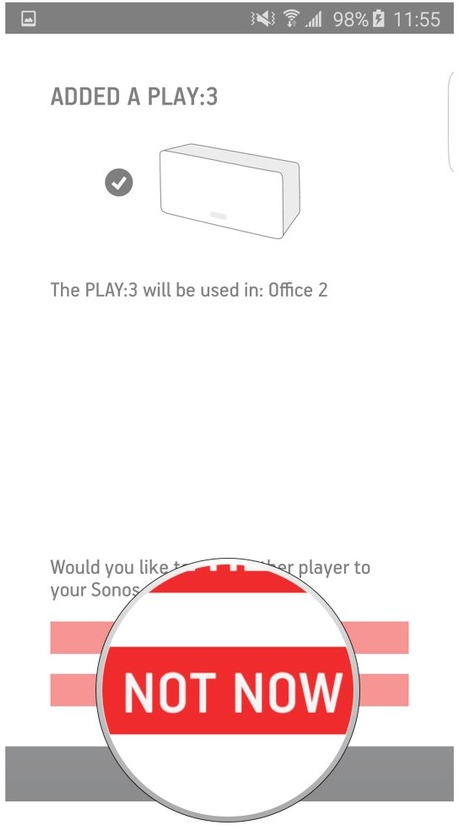
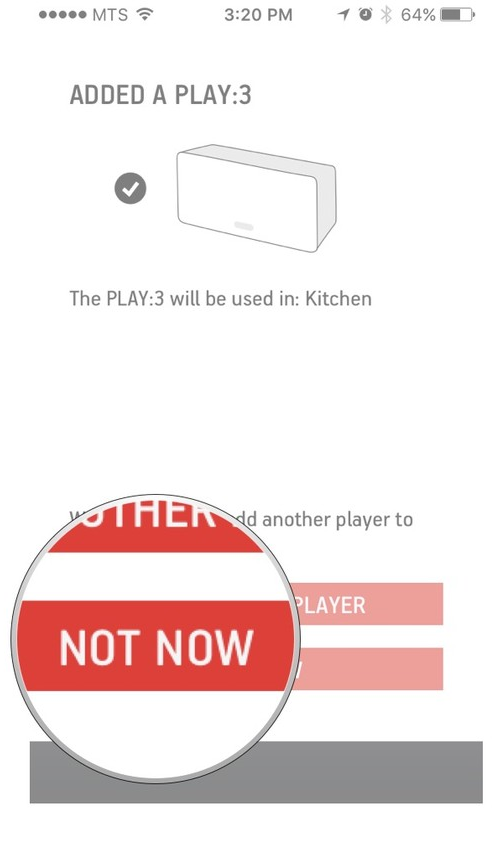
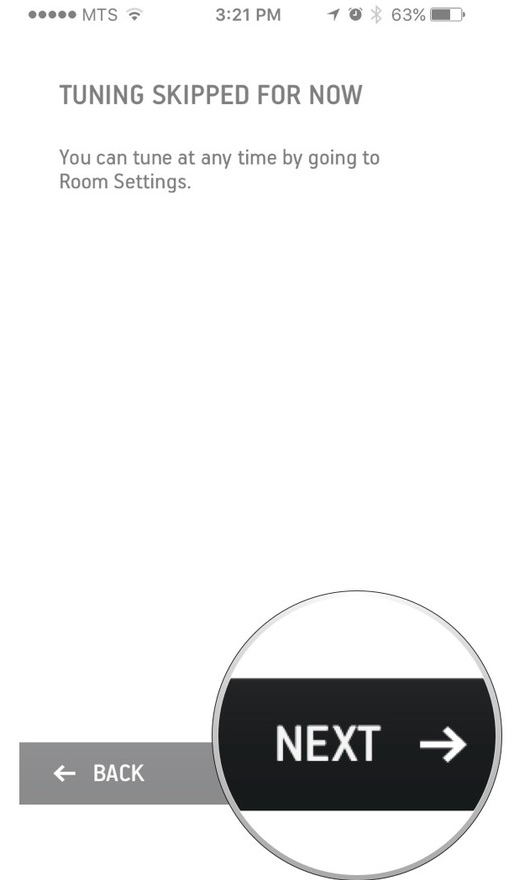
Tap Not Now in order to continue. If you wanted to add yet another speaker you could do so now by tapping Add Another Player.
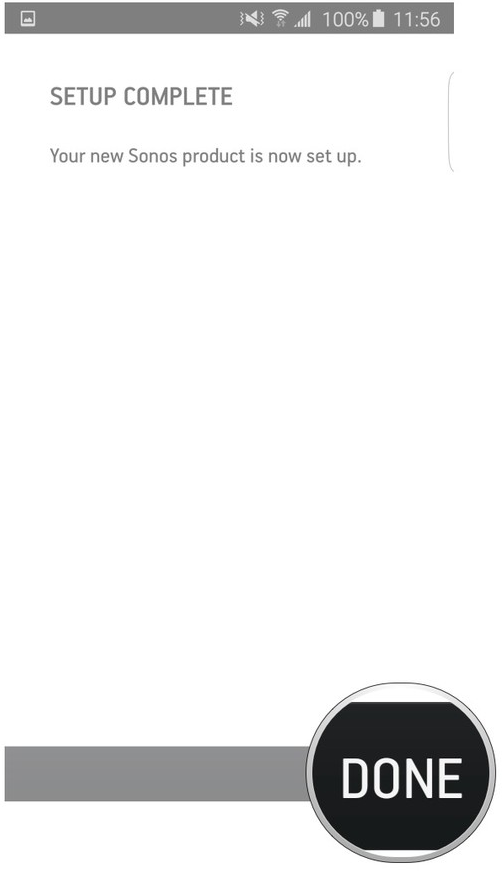
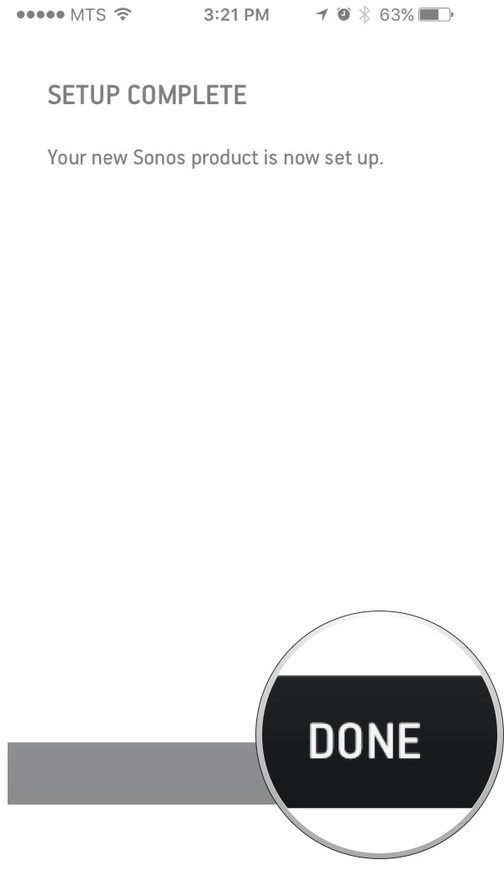
Tap Done on the Setup complete screen.
8. What's next?
9. Verify Network on iOS
Make sure your controller is connected to the correct WiFi network.
First, we'll check what network your iOS device is connected to.
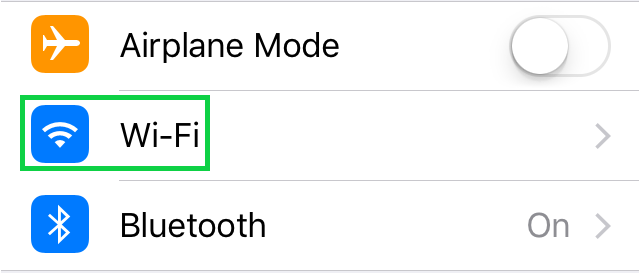
Open Settings.
Tap on Wi-Fi.
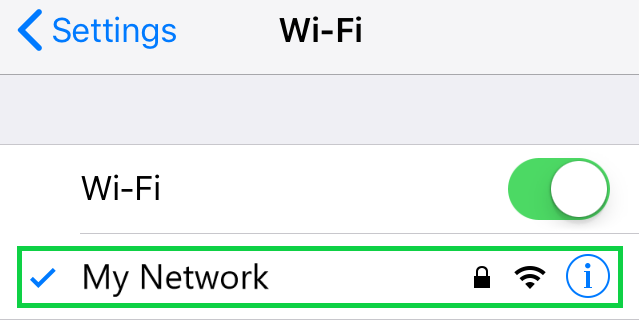
The network you are connected to will have a check next to it. Make sure this is not a "Guest" network.
Make sure you are not on a Guest Network. Most guest networks will not let you communicate with your other devices.
Next, we need to verify the network the Sonos products are connected to.
Connect one of your Sonos products to your router using an Ethernet cable, and then connect it to power. Use whichever product is most convenient to temporarily connect to your router.
After a few minutes you will start to see your Sonos Players appearing on your Sonos controller. Confirm that all of your Sonos players are showing up on your controller.
In the controller app, tap the Menu button and tap on Settings.
Tap on Advanced Settings.
Tap on Wireless Setup.
Type in the password (security key) to join your WiFi network and press continue.
Once your Sonos devices are on the same wireless network as your mobile device, you can disconnect the Ethernet cable.
10. Uninstall IOS App
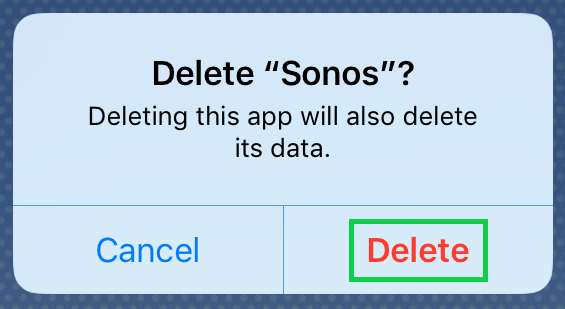
Tap and hold on the Sonos app until icons are shaking and tap the "X".
Tap Delete to Uninstall the app.
11. Install IOS App
Open the App Store.
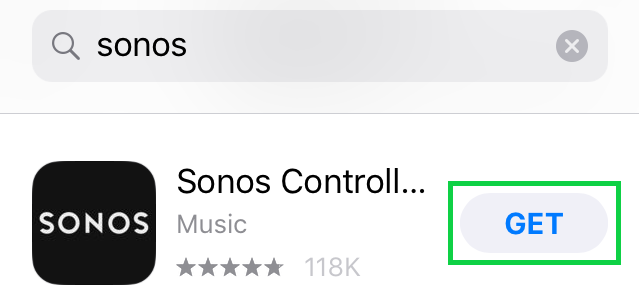
Type in "Sonos Controller" in the search bar.
Find Sonos Controller in the search results and tap on GET.
Tap on Install to start download.
12. Add Speaker/Sub
Follow the steps below to add a SUB to your home theater.
Launch the Sonos Controller app from your Home screen.
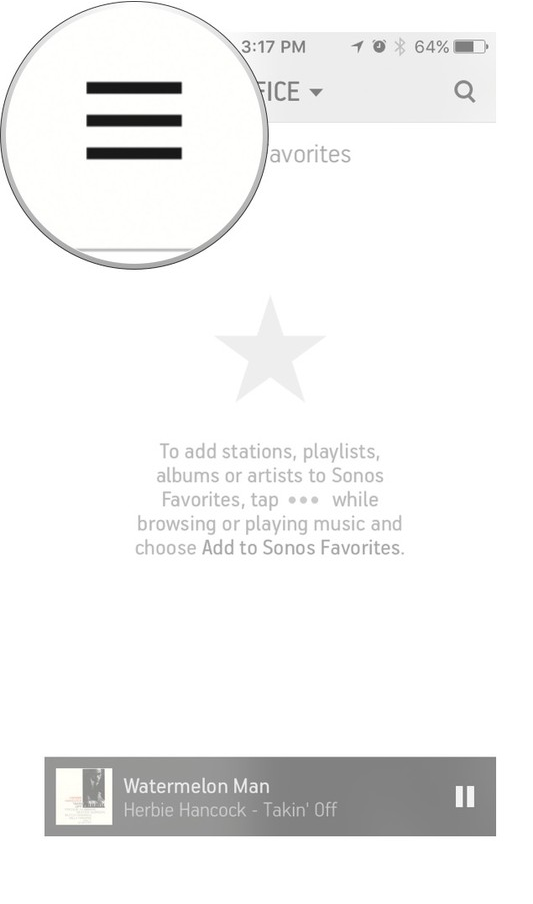
Tap on the menu button.
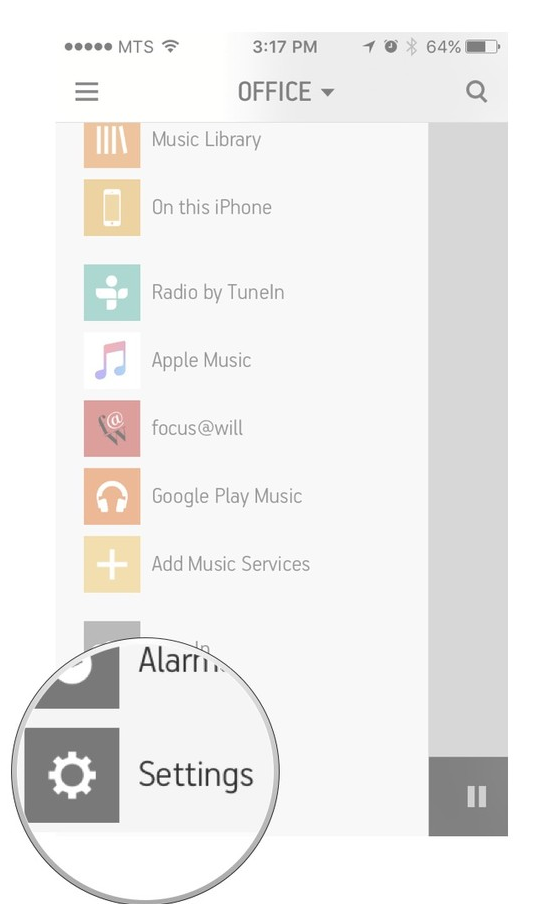
Tap on settings in the menu.
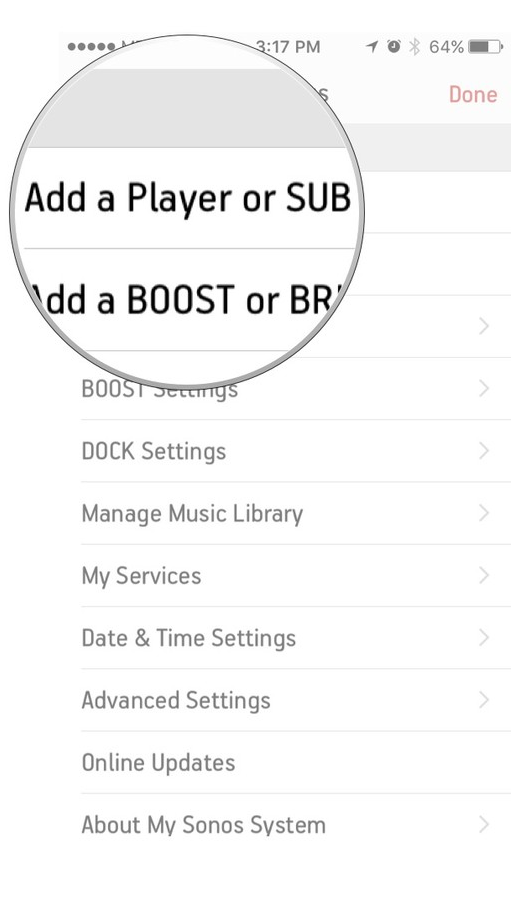
Tap on Add a Player or SUB button.
Tap Next on the Connect To Power screen. Make sure your Sonos is plugged in before you continue!
Tap Next on the bottom right of the screen, after you have seen the green light flashing on your Sonos speaker. The indicator or the mute/play/pause button may be flashing. If you don't see the green flashing light, tap I'm unsure about the light.
Press the Mute/Play/Pause button and the increase volume button on your Sonos simultaneously and you should hear a noise.
Tap Next once your player connects.
Choose a room to label your Sonos.
Tap Next after you choose a room.
Tap Not Now in order to continue. If you wanted to add yet another speaker you could do so now by tapping Add Another Player.
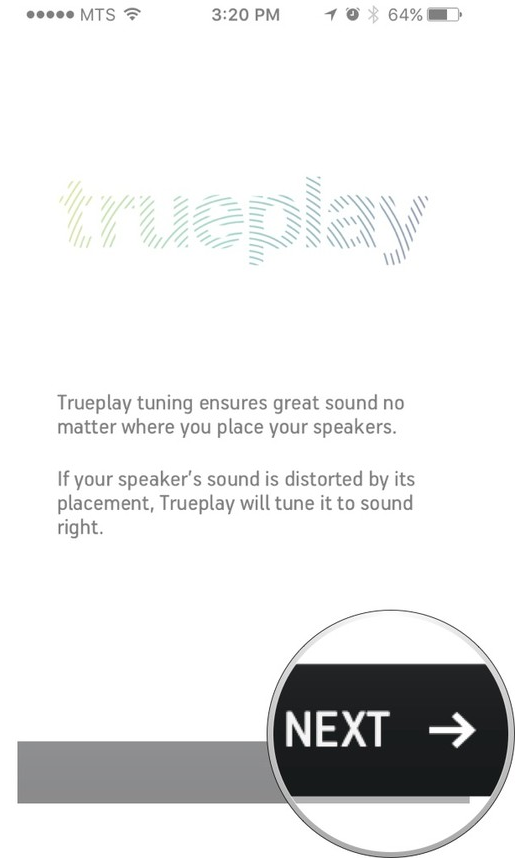
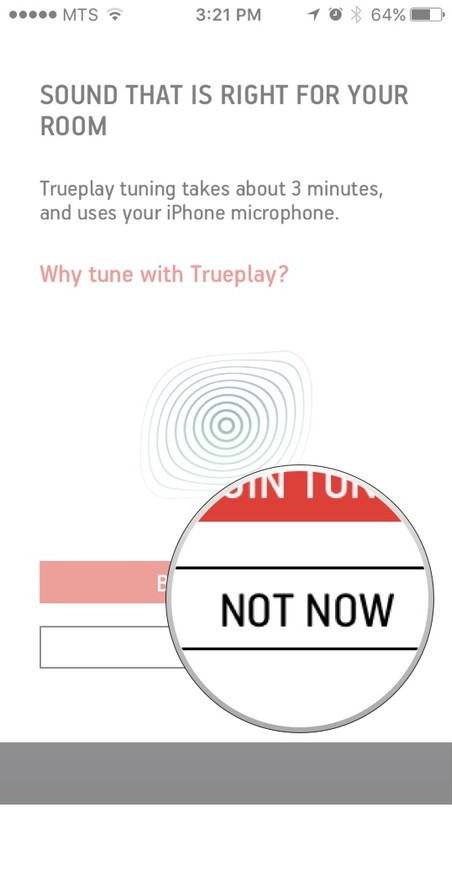
Tap Next on the Trueplay screen.
If you want to set up Trueplay you can do it now or at anytime later. Since it's not integral part of the setup process we will skip it for now. Press Not Now to continue setup.
.png)