How to Fix the Start Menu and Cortana in Windows 10
Authored by: Support.com Tech Pro Team
1. Introduction
Windows 10 does a fair job of correcting many problems it has on its own, but there are a couple faults that can still cause issues. At times, your Windows Start menu or the Cortana search system can stop functioning correctly.
This guide will walk you through correcting this problem.
2. Check for Updates
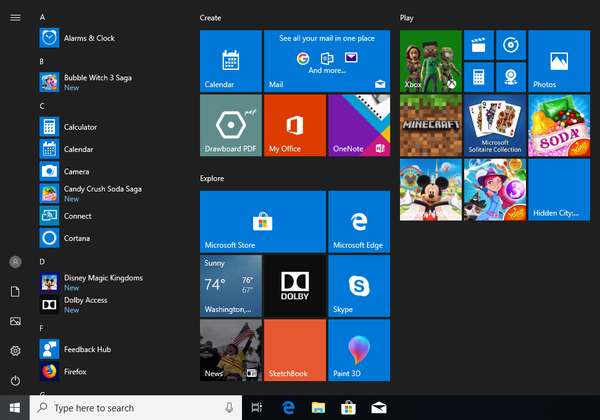
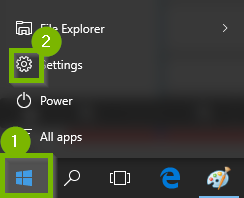
Select the Start menu.
Select the Settings button on the left side of the start menu.
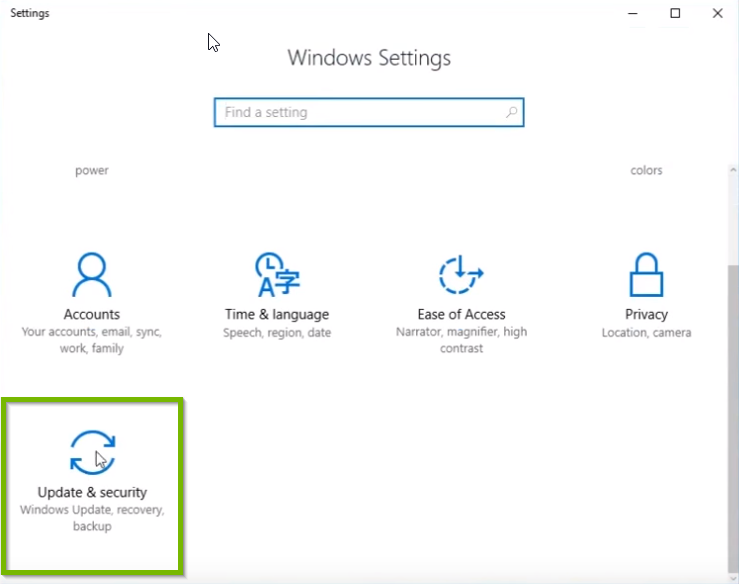
Select Update and Security.
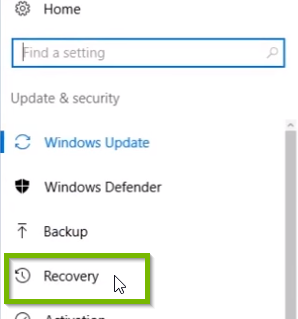
Select Windows Update on the left, then select Check for updates.
Once the system has finished checking for updates, it will automatically download and install the latest applicable updates.
The system also may prompt you to restart, if it does, please do so at your earliest convenience, otherwise the update process will not complete.If you system was already recently updated, chances are that no further updates are available and your Update status will indicate: Your device is up to date.
3. Restart Your PC
Before your restart or shut down your PC, make sure to save all necessary work to prevent data loss.
Using the Mouse
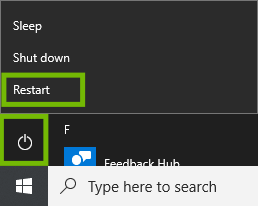
Select the Start menu.
By default it is in the lower left corner of your screen.
Select Power, then select Restart.
Using the Keyboard
Press the Windows and X keys at the same time. This minimizes any open windows you may have.
Press the Alt and F4 keys at the same time. This tells Windows to close the desktop.
Select Restart, then OK.
4. Test Start Menu
Test the Start Menu
Select the Start menu.
Make sure it opens properly, and you can launch an app and reach other menus.
Test Cortana
Select the search field next to the Start Menu.
Perform a search for a website, or a Windows app, and make sure results show up.
5. Update Video/Audio Drivers
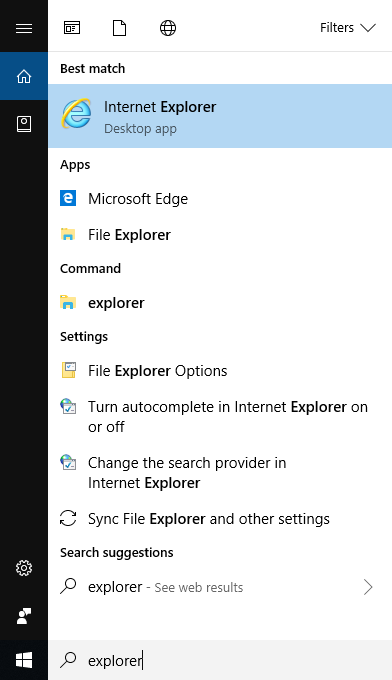
Search Device Manager.
Select Device Manager.
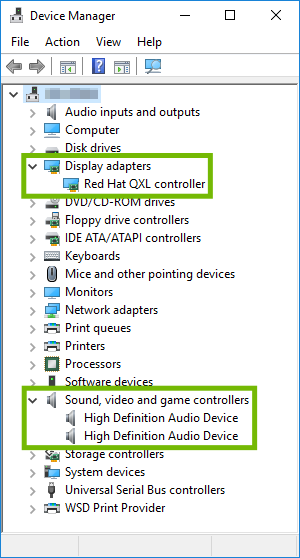
Select the small arrow next to Display adapters and Sound, video and game controllers to expand these sections, and see the devices in them.
Double click one of the devices under one of these headings to show its properties. Select Driver.
Select Update Driver.
Select Search automatically for updated driver software.
Windows will automatically locate any updated drivers available.
If any updated drivers are available, you'll be offered the chance to install them. Once installed, or if none are available, close the driver updater for this device.
Repeat these steps till you've made sure all Display adapter devices, and all Sound, video and game controller devices are up-to-date.
6. Restart Your PC
Before your restart or shut down your PC, make sure to save all necessary work to prevent data loss.
Using the Mouse
Select the Start menu.
By default it is in the lower left corner of your screen.
Select Power, then select Restart.
Using the Keyboard
Press the Windows and X keys at the same time. This minimizes any open windows you may have.
Press the Alt and F4 keys at the same time. This tells Windows to close the desktop.
Select Restart, then OK.
7. Create Test Profile
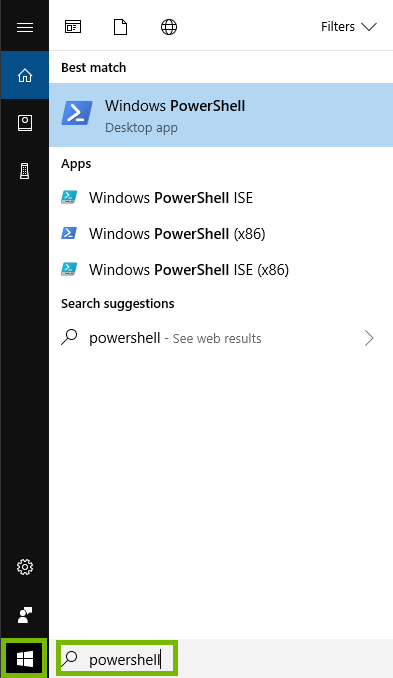
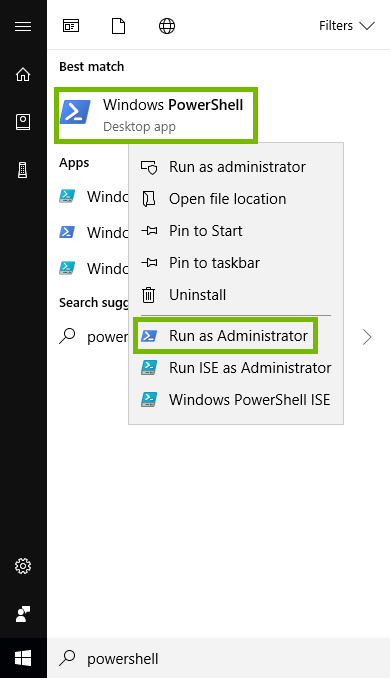
Choose the Start menu, and type PowerShell into the search.
Using your right mouse button, right click on PowerShell in the list above. A special menu will open. Choose Run as Administrator.
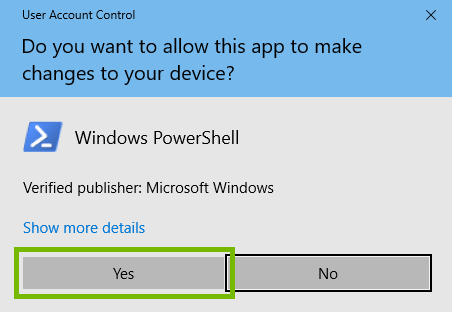
Windows may ask if PowerShell may make changes. If it does, click Yes.
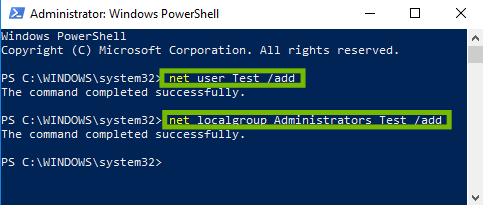
Enter the following 2 commands, push enter at the end of each: net user Test /add net localgroup Administrators Test /add
8. Restart Your PC
Before your restart or shut down your PC, make sure to save all necessary work to prevent data loss.
Using the Mouse
Select the Start menu.
By default it is in the lower left corner of your screen.
Select Power, then select Restart.
Using the Keyboard
Press the Windows and X keys at the same time. This minimizes any open windows you may have.
Press the Alt and F4 keys at the same time. This tells Windows to close the desktop.
Select Restart, then OK.
9. Log Into Test Profile
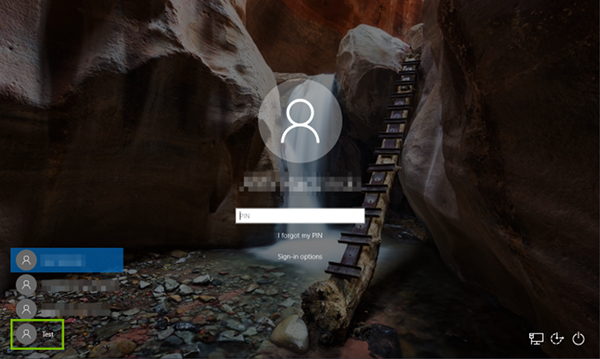
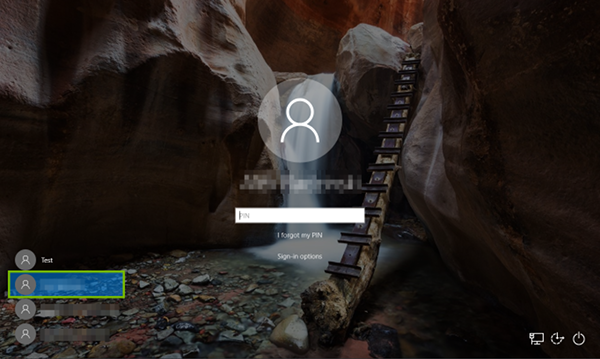
On the login screen, you'll be given options to choose which profile you'd like to log in with. Click on Test in the bottom-left corner.
10. Test Start Menu
Test the Start Menu
Select the Start menu.
Make sure it opens properly, and you can launch an app and reach other menus.
Test Cortana
Select the search field next to the Start Menu.
Perform a search for a website, or a Windows app, and make sure results show up.
11. Corrupt User Profile Repair Choice
The User Profile, how Windows stores your customization information, has become corrupt or broken.
Your programs, pictures, documents, videos, and any other data is safe.
There are 3 possible solutions to this problem:
Create a new profile, and continue using Windows
If you do not have pictures, documents, videos, bookmarks, or other information stored on your computer, it is perfectly acceptable to just abandon the old profile, and start using a new one.
Any and all data stored on the old profile will be kept, in case you change your mind in the future, but it will be difficult to access.
Create a new profile, and move your data to your new profile
If you have few customizations for Windows, but want to keep the data from your profile, it's usually best to just move the data from the old profile to a new profile, and use the new profile instead.
This is the most common solution.
Repair the old profile
While possible, this step requires detailed knowledge of how Windows works, and will require a technician with special knowledge to perform.
Some repair shops will not perform this service.
12. Create New Profile
Select the Start menu.
By default it is in the lower left corner of your screen.
Select the Settings button on the left side of the start menu
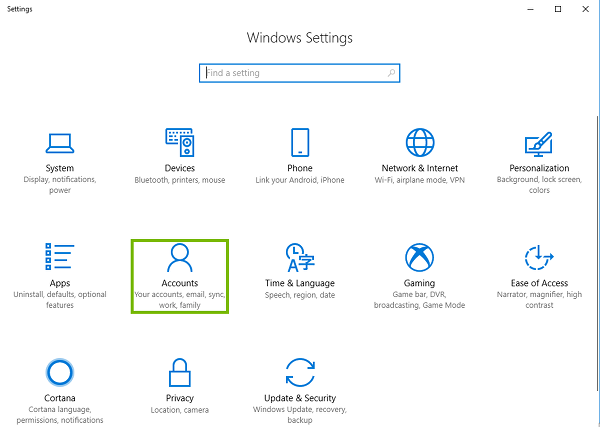
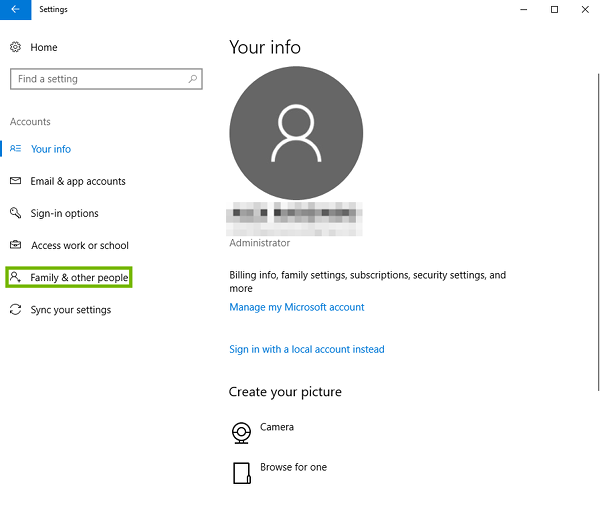
In Windows Settings, select Accounts.
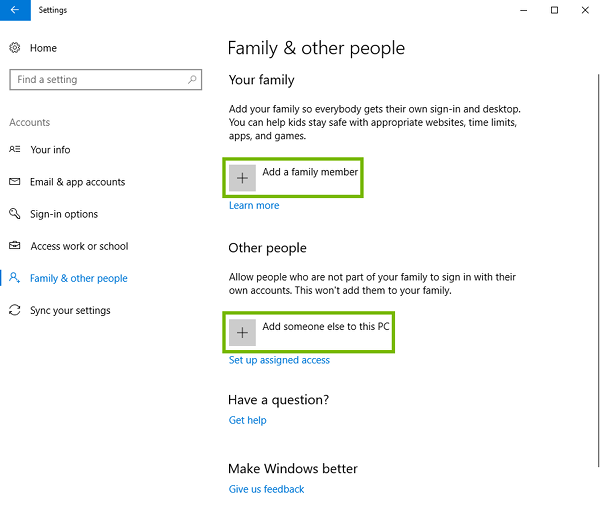
On the left, select Family & other people.
Choose to Add a family member, or Add someone else to this PC.
Follow the prompts until creation of the profile is complete.
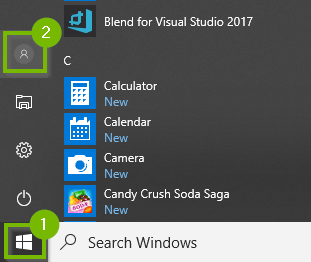
To begin logging into the new user profile, click Start then the User icon.
13. Restart Your PC
Before your restart or shut down your PC, make sure to save all necessary work to prevent data loss.
Using the Mouse
Select the Start menu.
By default it is in the lower left corner of your screen.
Select Power, then select Restart.
Using the Keyboard
Press the Windows and X keys at the same time. This minimizes any open windows you may have.
Press the Alt and F4 keys at the same time. This tells Windows to close the desktop.
Select Restart, then OK.
14. Delete Test Profile
Click the Start menu, choose Profiles, then choose Sign out.
Choose your normal profile from the list in the bottom-left, and sign in as you normally do.
Choose the Start menu, and type PowerShell into the search.
Using your right mouse button, right click on PowerShell in the list above. A special menu will open. Choose Run as Administrator.
Windows will ask if PowerShell may make changes, click Yes.
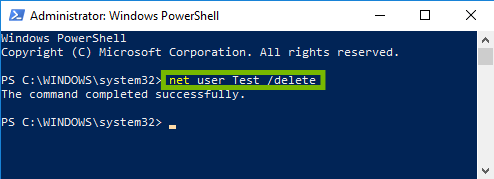
Type in the following command, then press enter: net user Test /delete
15. Create New Profile
Select the Start menu.
By default it is in the lower left corner of your screen.
Select the Settings button on the left side of the start menu
In Windows Settings, select Accounts.
On the left, select Family & other people.
Choose to Add a family member, or Add someone else to this PC.
Follow the prompts until creation of the profile is complete.
To begin logging into the new user profile, click Start then the User icon.
16. Restart Your PC
Before your restart or shut down your PC, make sure to save all necessary work to prevent data loss.
Using the Mouse
Select the Start menu.
By default it is in the lower left corner of your screen.
Select Power, then select Restart.
Using the Keyboard
Press the Windows and X keys at the same time. This minimizes any open windows you may have.
Press the Alt and F4 keys at the same time. This tells Windows to close the desktop.
Select Restart, then OK.
17. Copy Old Profile Files
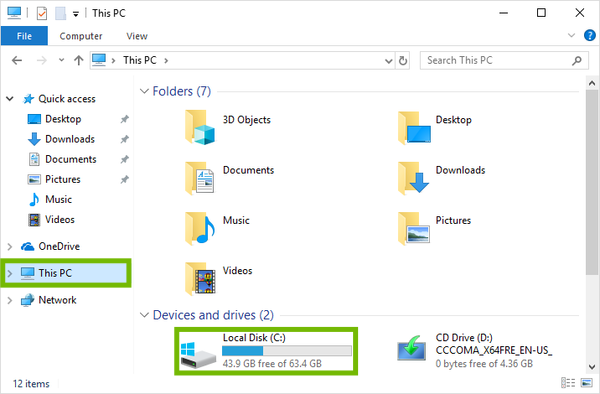
Select Explorer.
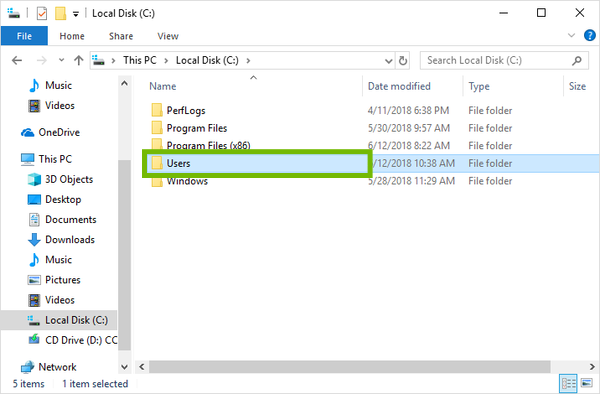
Select This PC on the left, then select Local Disk (C:) on the right.
Select Users.
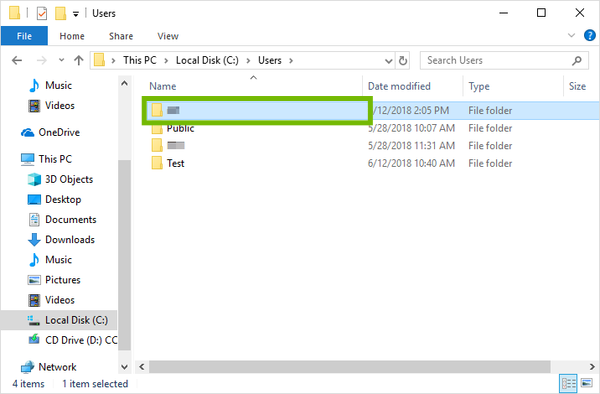
From the list, select your old profile name.
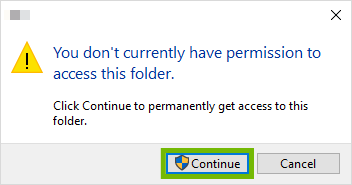
You'll be asked to grant permission to Windows to open the old profile. Select Continue.
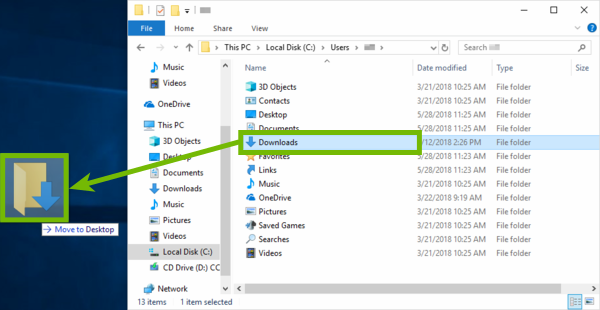
Here, you'll see folders for all your files. Simply select a folder and do not release the mouse button, drag it to your Desktop, and release the mouse button to move it.
Pay special attention to the Desktop, Documents, Downloads, Pictures, Videos, and if you use Edge browser, the Favorites folder. The vast majority of your data will be in those folders.
It is often a good idea to review these folders one by one before moving them, so you won't have to sort through an empty folder in the future.
You can now access these files from these folders on your Desktop, or move the contents to your new Documents, Downloads, Pictures, Video, etc folders.
18. Restart Your PC
Before your restart or shut down your PC, make sure to save all necessary work to prevent data loss.
Using the Mouse
Select the Start menu.
By default it is in the lower left corner of your screen.
Select Power, then select Restart.
Using the Keyboard
Press the Windows and X keys at the same time. This minimizes any open windows you may have.
Press the Alt and F4 keys at the same time. This tells Windows to close the desktop.
Select Restart, then OK.
19. Delete Test Profile
Click the Start menu, choose Profiles, then choose Sign out.
Choose your normal profile from the list in the bottom-left, and sign in as you normally do.
Choose the Start menu, and type PowerShell into the search.
Using your right mouse button, right click on PowerShell in the list above. A special menu will open. Choose Run as Administrator.
Windows will ask if PowerShell may make changes, click Yes.
Type in the following command, then press enter: net user Test /delete
20. What's next?
21. Delete Test Profile
Click the Start menu, choose Profiles, then choose Sign out.
Choose your normal profile from the list in the bottom-left, and sign in as you normally do.
Choose the Start menu, and type PowerShell into the search.
Using your right mouse button, right click on PowerShell in the list above. A special menu will open. Choose Run as Administrator.
Windows will ask if PowerShell may make changes, click Yes.
Type in the following command, then press enter: net user Test /delete
22. Restart Your PC
Before your restart or shut down your PC, make sure to save all necessary work to prevent data loss.
Using the Mouse
Select the Start menu.
By default it is in the lower left corner of your screen.
Select Power, then select Restart.
Using the Keyboard
Press the Windows and X keys at the same time. This minimizes any open windows you may have.
Press the Alt and F4 keys at the same time. This tells Windows to close the desktop.
Select Restart, then OK.
23. Reset Windows
Performing a Windows 10 Reset keeps your personal files, settings, and apps that came installed on your machine in-tact.
For portable devices: Before proceeding with a Reset, make sure the device is connected to a power outlet to avoid power loss during the reset process.
Open the Start Menu, and select the Settings icon.
Scroll down and select Update & Security.
Select Recovery.
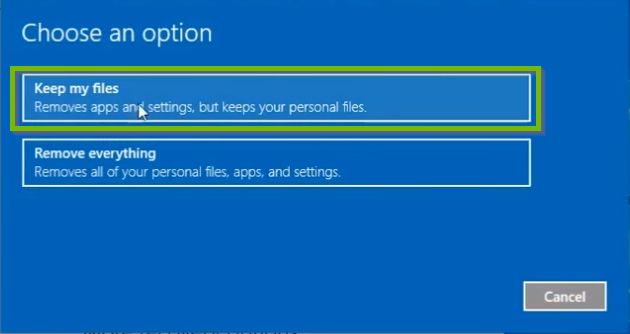
Click Get started under Reset this PC.
Select Keep my files.
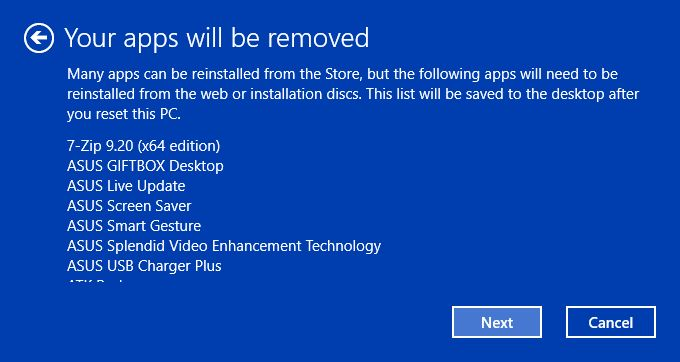
Take note of any apps that will need to be reinstalled. Click 'Next'.
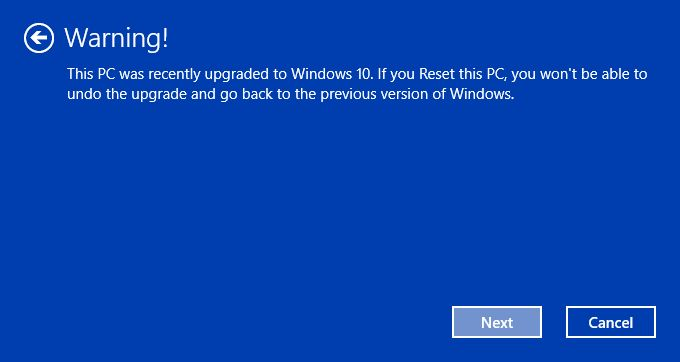
If prompted with a Warning, click 'Next'.
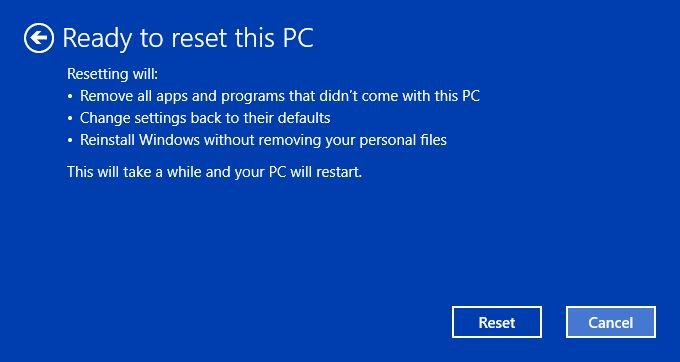
At this point, the system is ready to be reset. This process may take quite a while, and the system will automatically restart when needed. Click Reset when ready.
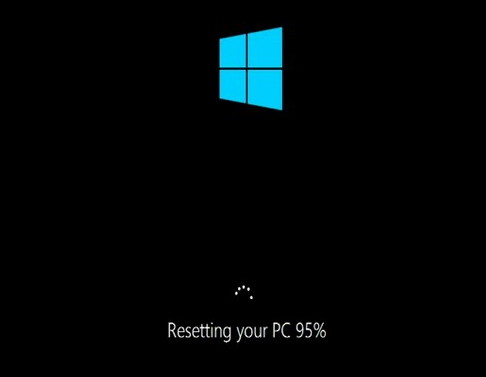
Windows 10 will start the reset process and may reboot several times while running. Follow any on-screen instructions that may require your attention.
Once the process is complete, you may use your system again.
24. Test Start Menu
Test the Start Menu
Select the Start menu.
Make sure it opens properly, and you can launch an app and reach other menus.
Test Cortana
Select the search field next to the Start Menu.
Perform a search for a website, or a Windows app, and make sure results show up.
.png)