You might be unable to update your iPhone, iPad, or iPod touch wirelessly - or over the air - for a number of reasons. This guide will go over common update issues you may experience and how to overcome them.
Make sure to re-try updating after performing each one of these steps. Any one of these steps may individually resolve your issue altogether. If a particular step has resolved your issue, feel free to skip to the end of this guide.
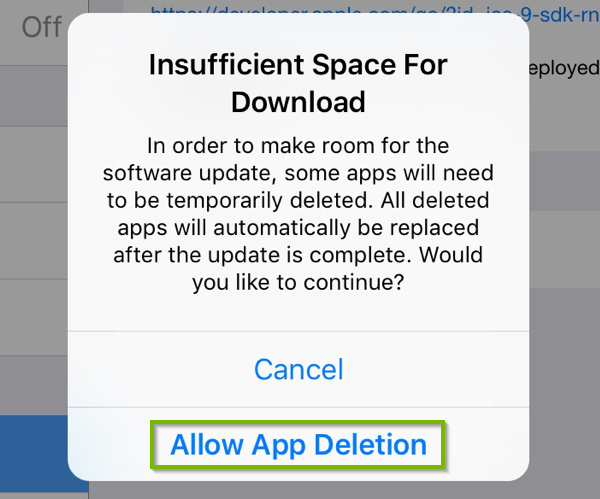
2. Not Enough Space
If there isn't enough space to download and install an update, iOS will try to make space. It will remove only app data that it can download again and doesn't remove or relocate any of your data.
Tap Allow App Deletion.
3. Introduction
As you use your device, files and apps will eventually accumulate, leaving you with less free space for new content. Once you know how much available storage you have, you can use various methods to free up space on your device.
4. Delete an App (From Storage)
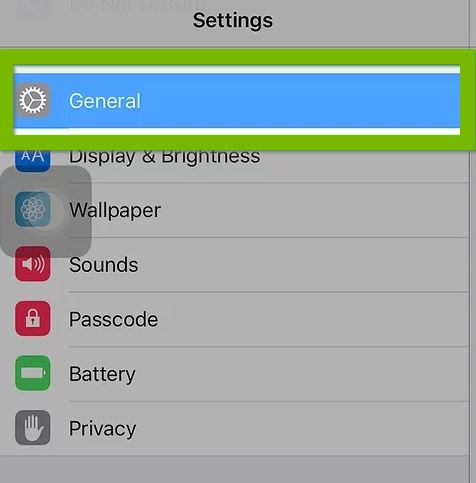
Go to Settings.
Select General.
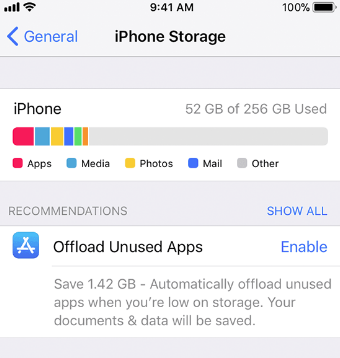
Tap on your device's Storage.
The amount of storage used will be shown near the top. Below that you may see a list of recommendations for optimizing your device's storage, followed by a list of installed apps and the amount of storage each one uses.
Tap on the app that you wish to remove.
Tap the Delete App button on the next screen. Accept any prompts.
Go back to the previous screen and repeat for as many apps you wish to remove.
5. Delete an App (Tap)
To remove an app:
From your main screen, locate the app you wish to remove.
Lightly touch and hold the app until it jiggles or vibrates.
Tap X in the upper-left corner of the app.
Tap Delete.
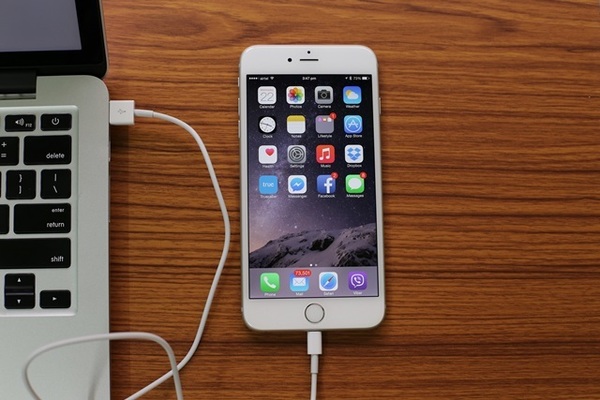
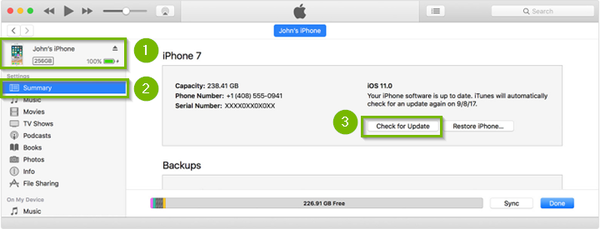
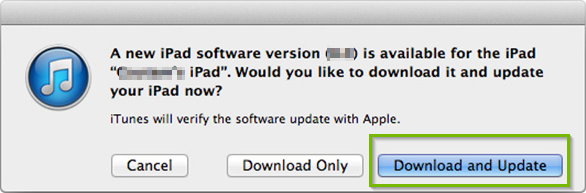
6. Update via iTunes
Install the latest version of iTunes on your computer from: https://www.apple.com/itunes/download/
Using the cable that came with your iOS device, connect your device to your computer.
Open iTunes and select your device.
Choose Summary then Check for Update.
Choose Download and Update.
If prompted, enter your passcode.
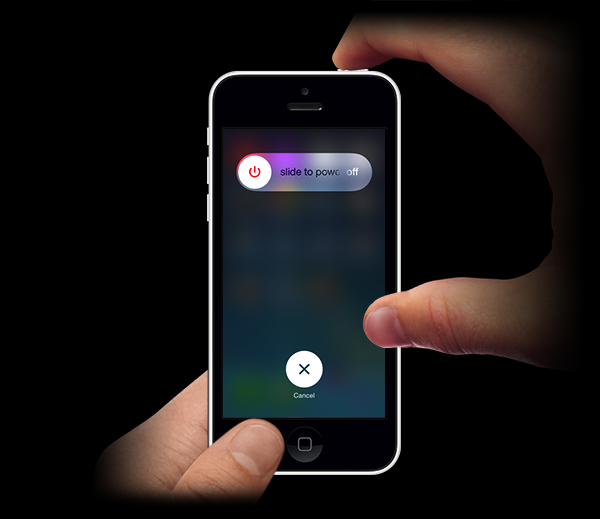
7. Restart
Hold down the lock/power button.
Slide to power off when prompted.
Wait until the phone is off.
Hold down the lock/power button until you see the Apple logo.
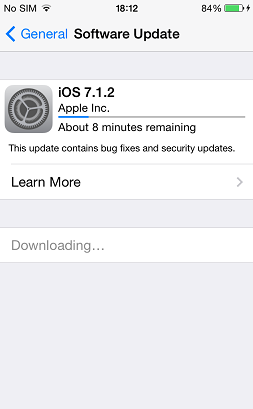
8. Check for Updates
To check and see if updates are available for your iOS device:
Open Settings on your phone or tablet.
Select General.
Select Software Update.
Your iOS device will perform a search for available iOS updates.
If no update is available, it will display your current version of iOS and inform you that your software is up to date.
If an update is available, it will be displayed.
Select Download and Install to begin the update process.
If prompted, enter your passcode to proceed.
9. What's next?
10. Long Download
An Internet connection is obviously necessary in order to update iOS. The time it takes to download the update will vary depending on the size of the update and your connection speeds. While downloading the iOS update, you can use your device normally and iOS will notify you when the download is finished and ready to install.
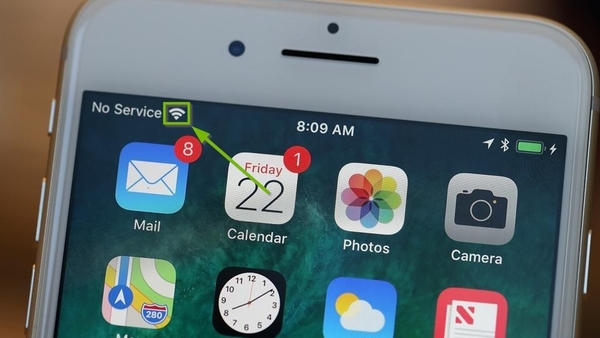
11. Wi-Fi Check
You can skip this step if your iPhone or iPad is already connected.
The simplest way to check to see if your iPhone or iPad is connected to Wi-Fi is to look across the top of your screen. The icon that is identified in the image below indicates that you are connected to a Wi-Fi network.
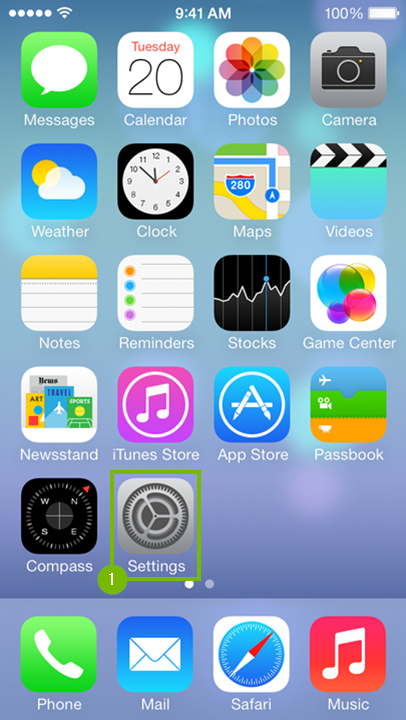
12. Connect to Wi-Fi
Depending on what device (iPhone, iPad or iPod Touch) and which generation you have, the menu theme and options might look slightly different on your screen. However, the steps should be the same across all iOS devices and generations.
From the main screen of your device, look for and open Settings.
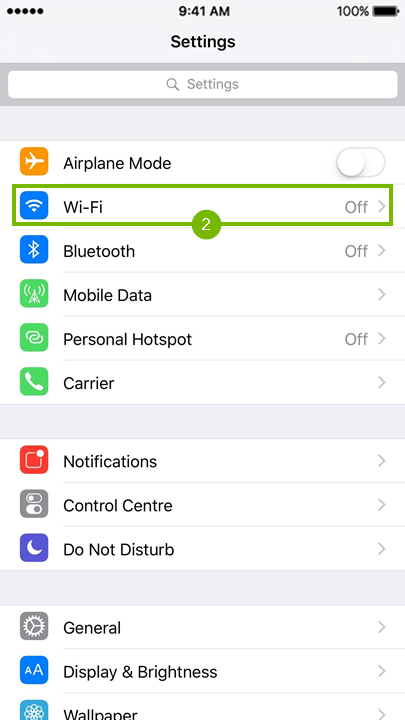
After that, go to Wi-Fi. You will see that this option also shows one of three statuses to the right:
Off - the Wi-Fi feature is disabled
Not Connected - there is no Wi-Fi connection establishe
the Wi-Fi connections name - there is a Wi-Fi connection already established.
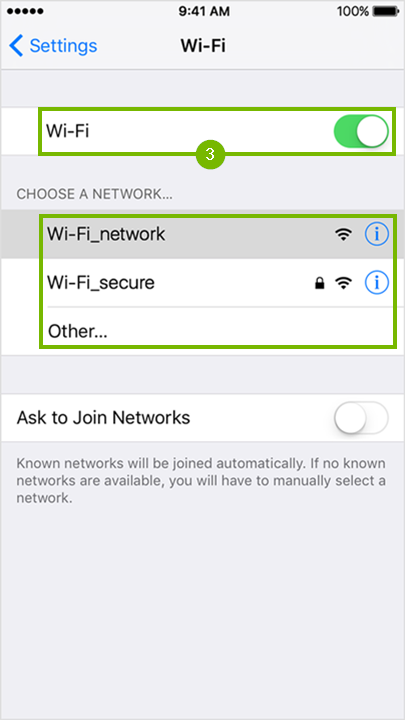
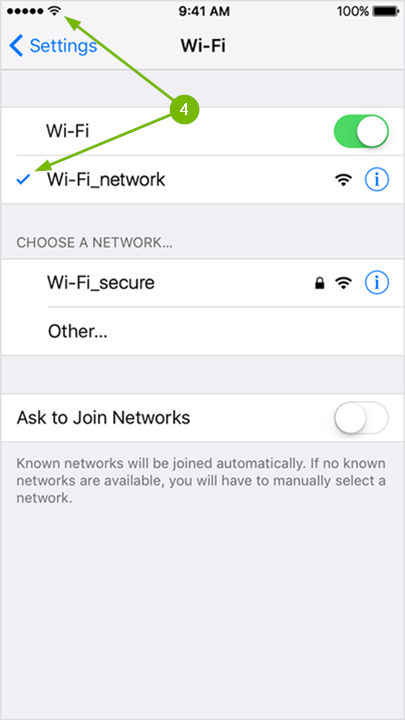
Make sure that the Wi-Fi feature is enabled by flipping the On/Off switch to the green position. Locate and tap the Wi-Fi networks name that you wish to connect to from the list.
Your iOS device will automatically connect to the network if there is no security enabled, or you have connected to it in the past. The checkmark and Wi-Fi symbol indicate you are connected.
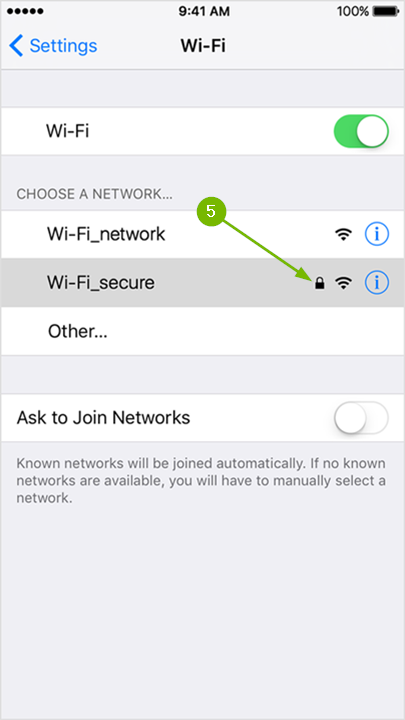
If the Wi-Fi network requires a password, then you will see a small padlock to the right of its name, which also means the connection is secure.
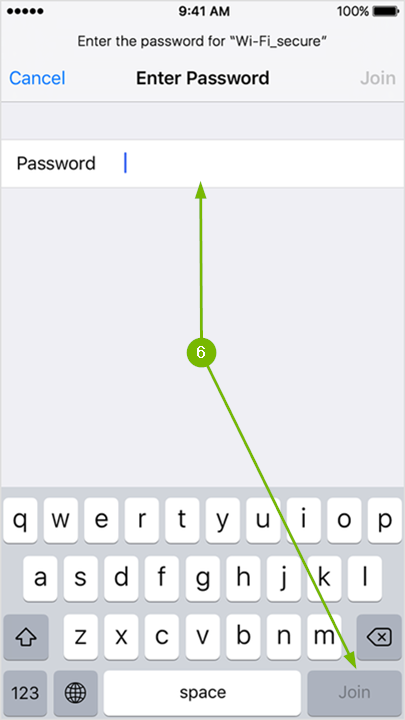
Tapping on a secured Wi-Fi networks name will prompt you to enter the password. Passwords are always case sensitive. Type it in using the on screen keyboard then tap Join on the bottom right corner. If tapping it does nothing, then it means the password you typed in is too short.
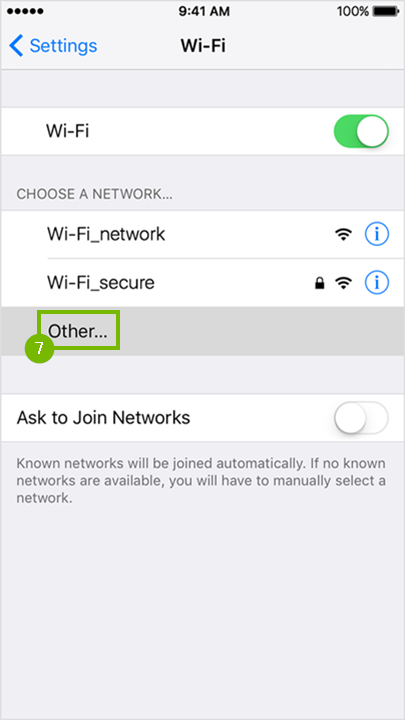
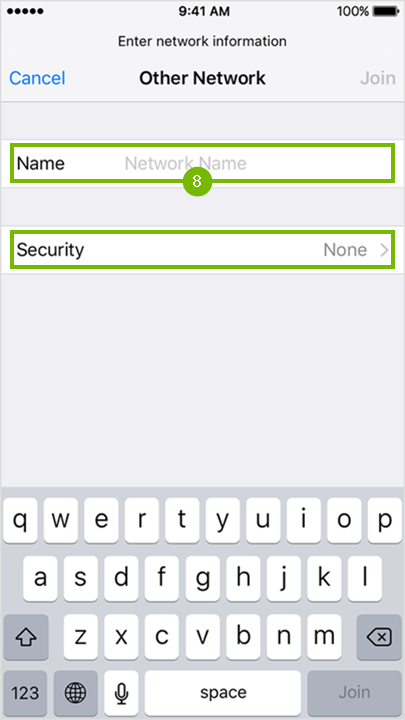
If the Wi-Fi network you are trying to connect to is hidden, then tap the Other... option.
Enter the Wi-Fi networks name using the on screen keyboard and tap Join at the bottom right if no password is required to connect. If a password is needed to connect to the Wi-Fi network then tap on Security.
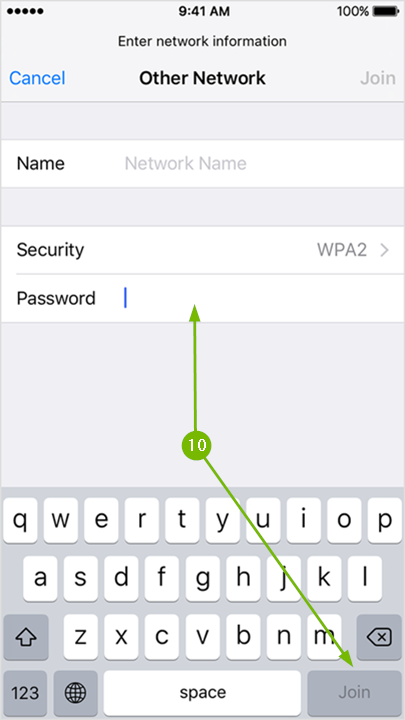
Choose the type of security the Wi-Fi network has by tapping on it.
Finally, type in the required Wi-Fi password and tap Join at the bottom right corner to connect.
At this point your iOS device should be connected to Wi-Fi.
13. Restart
Hold down the lock/power button.
Slide to power off when prompted.
Wait until the phone is off.
Hold down the lock/power button until you see the Apple logo.
14. Check for Updates
To check and see if updates are available for your iOS device:
Open Settings on your phone or tablet.
Select General.
Select Software Update.
Your iOS device will perform a search for available iOS updates.
If no update is available, it will display your current version of iOS and inform you that your software is up to date.
If an update is available, it will be displayed.
Select Download and Install to begin the update process.
If prompted, enter your passcode to proceed.
15. Update via iTunes
Install the latest version of iTunes on your computer from: https://www.apple.com/itunes/download/
Using the cable that came with your iOS device, connect your device to your computer.
Open iTunes and select your device.
Choose Summary then Check for Update.
Choose Download and Update.
If prompted, enter your passcode.
16. What's next?
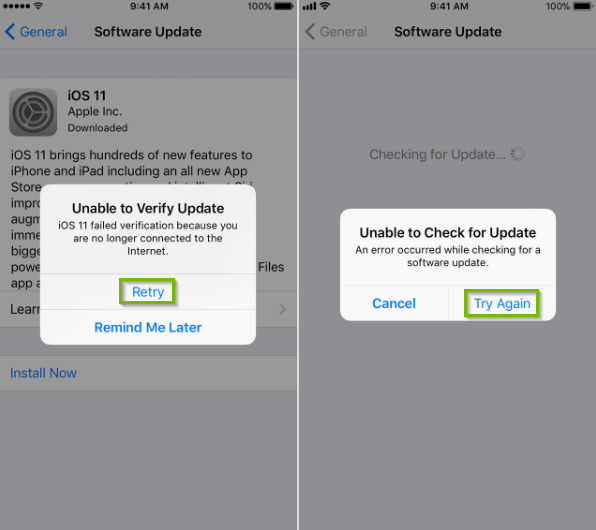
17. Can't Reach Server
If your device is running into issues reaching the update server, you may see one of these messages:
If you see either one of these messages, tap Retry or Try Again to attempt to apply the update again.
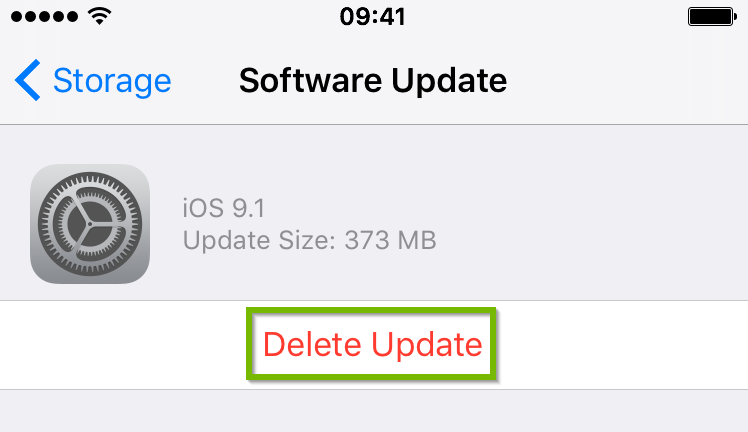
18. Remove Update
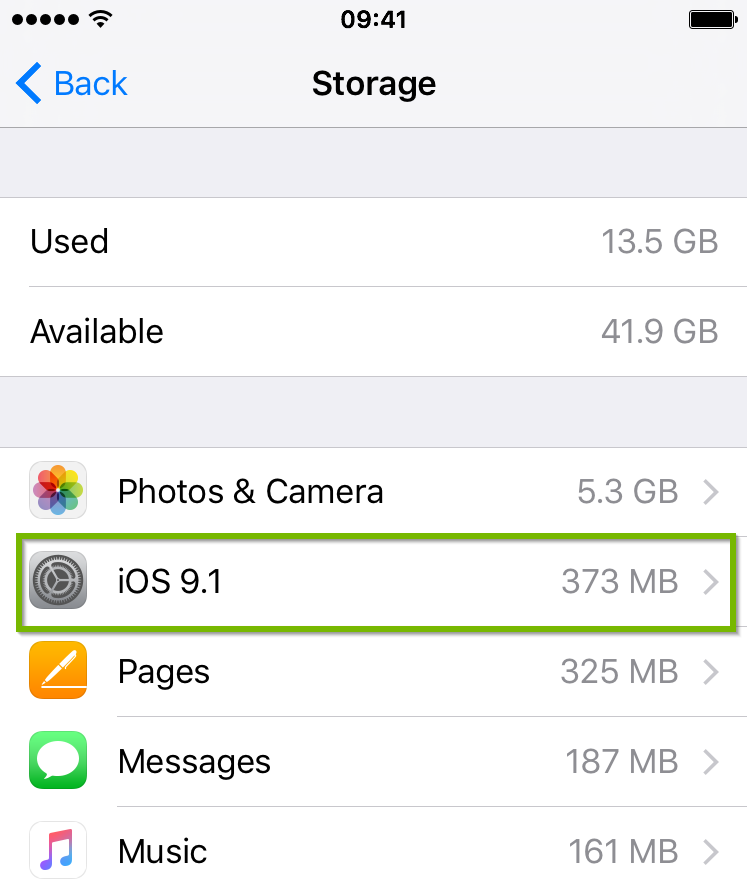
Go to Settings.
Select General.
Tap on your [Device] Storage.
Look for iOS update in the list of apps, and tap it. For example, iOS 9.1.
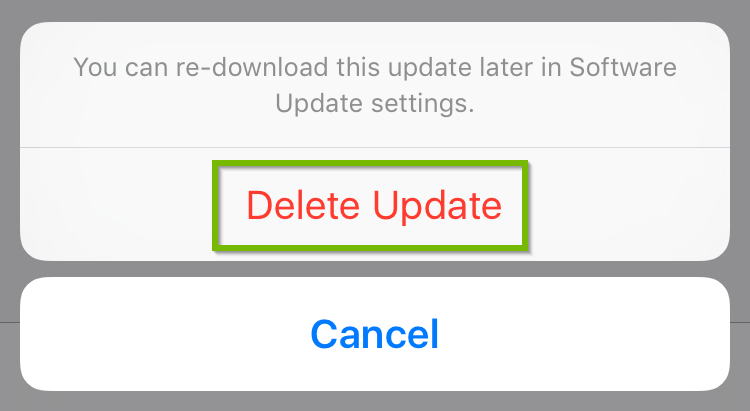
Tap Delete Update.
Tap Delete Update once more to confirm.
The update will now begin to uninstall.
19. Restart
Hold down the lock/power button.
Slide to power off when prompted.
Wait until the phone is off.
Hold down the lock/power button until you see the Apple logo.
20. Wi-Fi Check
You can skip this step if your iPhone or iPad is already connected.
The simplest way to check to see if your iPhone or iPad is connected to Wi-Fi is to look across the top of your screen. The icon that is identified in the image below indicates that you are connected to a Wi-Fi network.
21. Connect to Wi-Fi
Depending on what device (iPhone, iPad or iPod Touch) and which generation you have, the menu theme and options might look slightly different on your screen. However, the steps should be the same across all iOS devices and generations.
From the main screen of your device, look for and open Settings.
After that, go to Wi-Fi. You will see that this option also shows one of three statuses to the right:
Off - the Wi-Fi feature is disabled
Not Connected - there is no Wi-Fi connection establishe
the Wi-Fi connections name - there is a Wi-Fi connection already established.
Make sure that the Wi-Fi feature is enabled by flipping the On/Off switch to the green position. Locate and tap the Wi-Fi networks name that you wish to connect to from the list.
Your iOS device will automatically connect to the network if there is no security enabled, or you have connected to it in the past. The checkmark and Wi-Fi symbol indicate you are connected.
If the Wi-Fi network requires a password, then you will see a small padlock to the right of its name, which also means the connection is secure.
Tapping on a secured Wi-Fi networks name will prompt you to enter the password. Passwords are always case sensitive. Type it in using the on screen keyboard then tap Join on the bottom right corner. If tapping it does nothing, then it means the password you typed in is too short.
If the Wi-Fi network you are trying to connect to is hidden, then tap the Other... option.
Enter the Wi-Fi networks name using the on screen keyboard and tap Join at the bottom right if no password is required to connect. If a password is needed to connect to the Wi-Fi network then tap on Security.
Choose the type of security the Wi-Fi network has by tapping on it.
Finally, type in the required Wi-Fi password and tap Join at the bottom right corner to connect.
At this point your iOS device should be connected to Wi-Fi.
22. Update via iTunes
Install the latest version of iTunes on your computer from: https://www.apple.com/itunes/download/
Using the cable that came with your iOS device, connect your device to your computer.
Open iTunes and select your device.
Choose Summary then Check for Update.
Choose Download and Update.
If prompted, enter your passcode.
23. What's next?
24. Update Does Not Complete
When you're installing an update, the progress bar might appear to move very slowly. The time an update takes depends on the size of the update and the number of files on your device. If the bar is simply moving slowly, allow your device time to complete the update. Nothing is wrong.
There are steps that can be taken if your device gets stuck or frozen on the update screen.
While you're updating, always keep your device connected to a power source. If your device runs out of power, connect it to a power source and turn the device back on to allow the update to restore or complete.
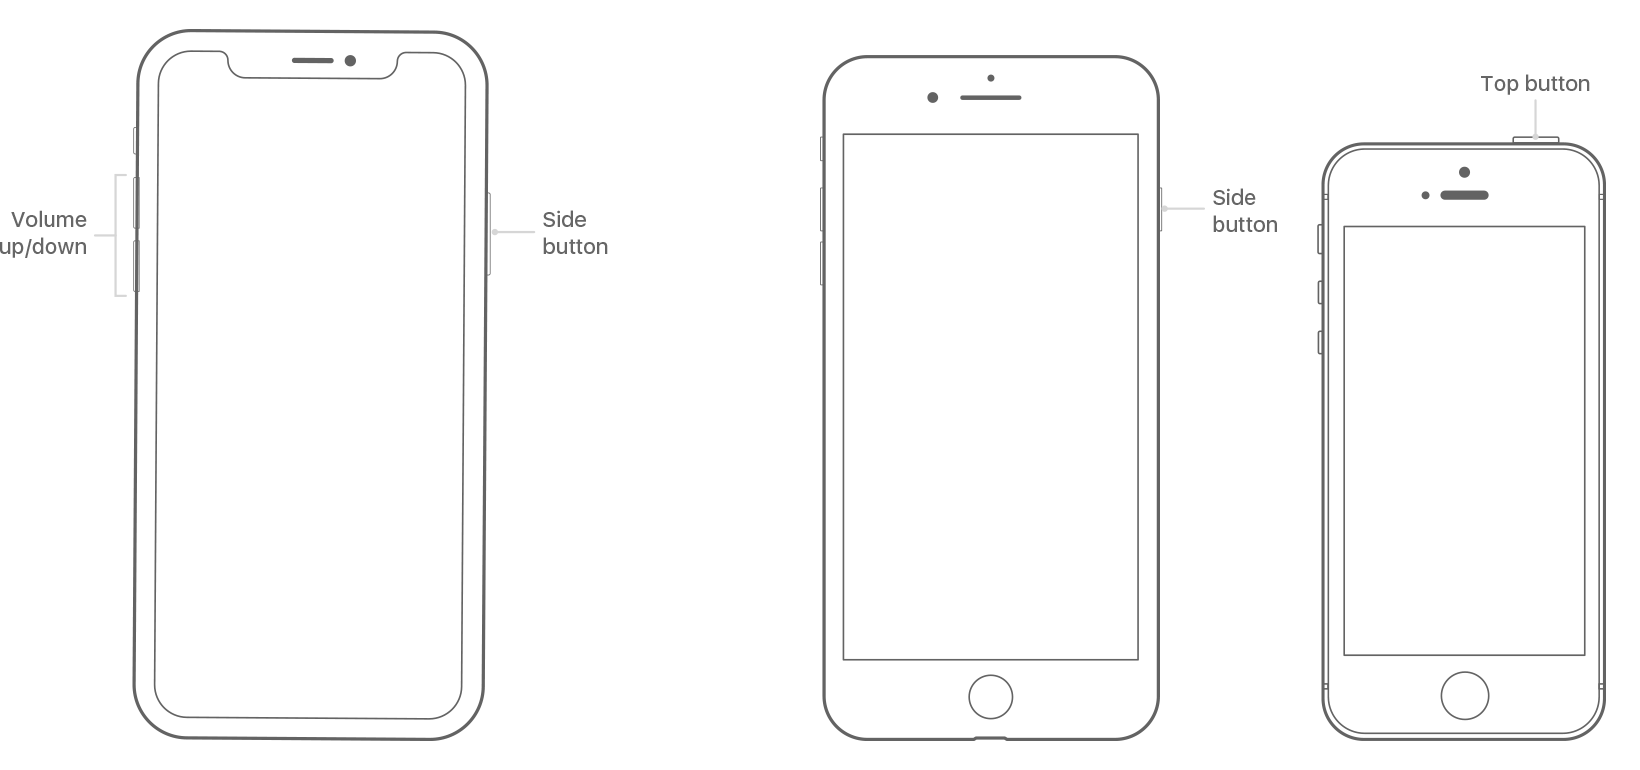
25. Soft Reset
Since the iPhone uses a non-removable battery, this process can be used to simulate a "battery pull" when the device is unresponsive, frozen or doesn't power on. Performing a soft reset will not remove any data or information from your device.
On an iPhone X, iPhone 8, or iPhone 8 Plus: Press and quickly release the Volume Up button. Press and quickly release the Volume Down button. Then, press and hold the Side button until you see the Apple logo.
On an iPhone 7 or iPhone 7 Plus: Press and hold both the Side and Volume Down buttons for at least 10 seconds, until you see the Apple logo.
On an iPhone 6s and earlier, iPad, or iPod touch: Press and hold both the Home and the Top (or Side) buttons for at least 10 seconds, until you see the Apple logo.
26. Update via iTunes
Install the latest version of iTunes on your computer from: https://www.apple.com/itunes/download/
Using the cable that came with your iOS device, connect your device to your computer.
.png)