.png)
Authored by: Support.com Tech Pro Team
Some Roku devices include a USB port to which you can connect an external USB drive for playing locally stored photo, audio, and video files. If you have a Roku TV, then you can also use a USB drive to pause live television.
This guide will help you determine why your Roku device cannot detect your USB drive.
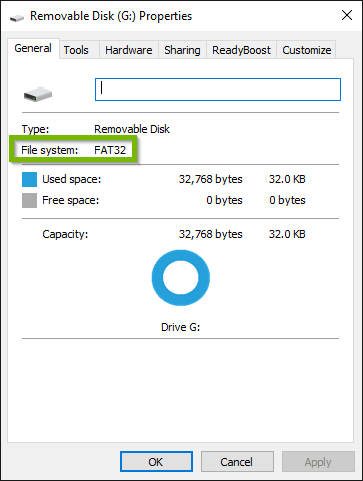
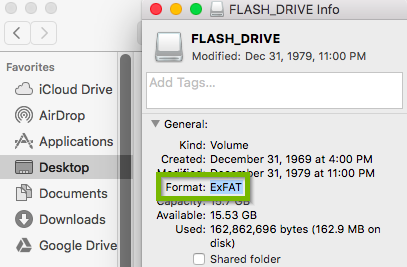
USB drives can be formatted with different file systems. Roku devices support USB drives that are formatted with the FAT16, FAT32, NTFS, EXT2, EXT3, and HFS+ file systems. Many new USB drives are pre-formatted with the exFAT file system, which is not supported.
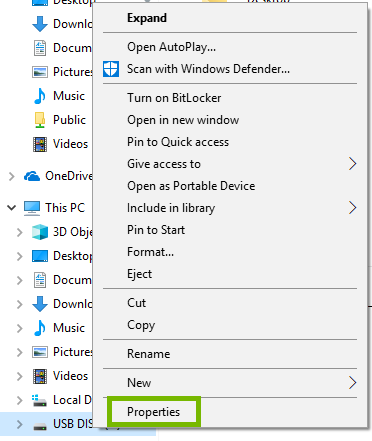
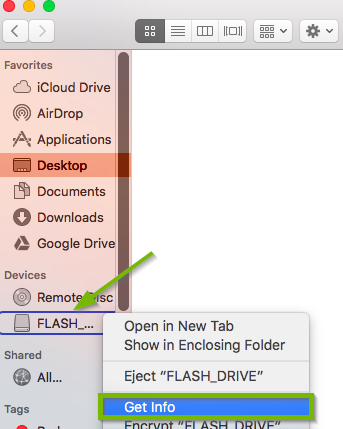
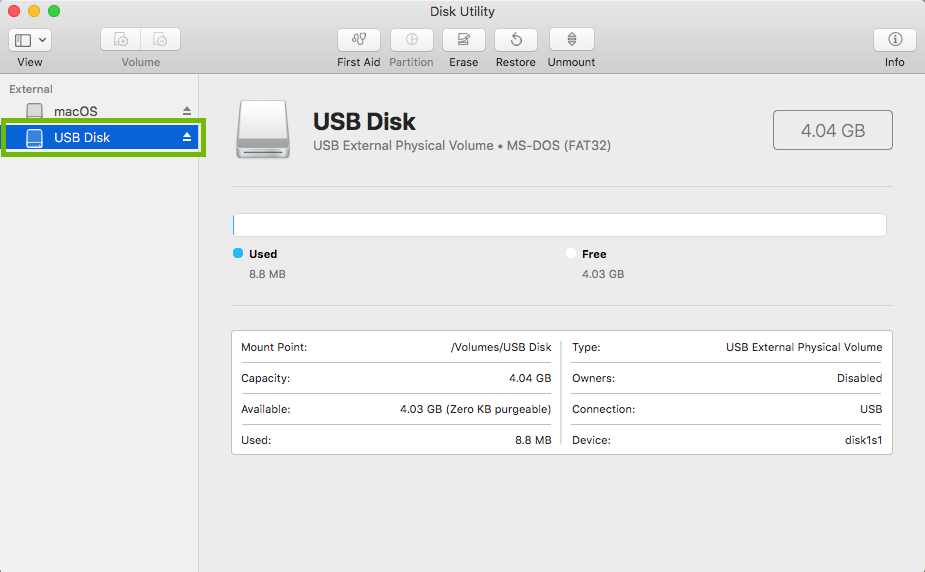
If you don’t know which file system is used, insert the USB drive into an available USB port on your computer. When the drive appears on the desktop, right click on the icon with your mouse and select Properties on your PC, or Get info on your Mac.
If you are using the USB drive to pause live television on a Roku TV, then the filesystem format does not matter as you will be prompted to reformat the drive.


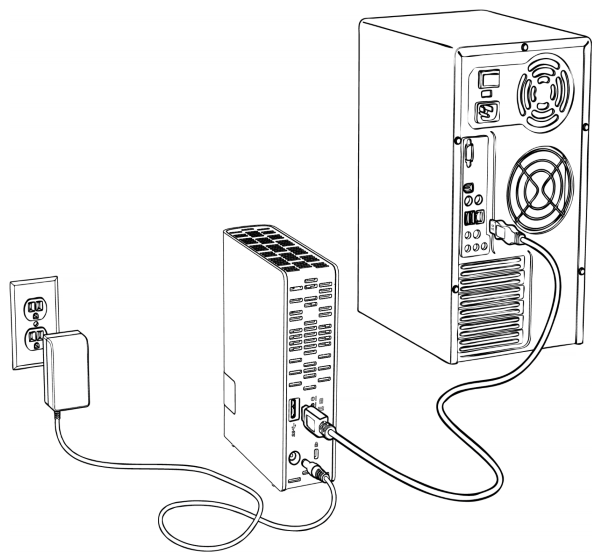
There are many types of USB drives, from large external hard drives to smaller thumb drives. It is important to note that different drives have different power requirements – for example, some USB hard drives have an external power adapter that must be connected to a power outlet.
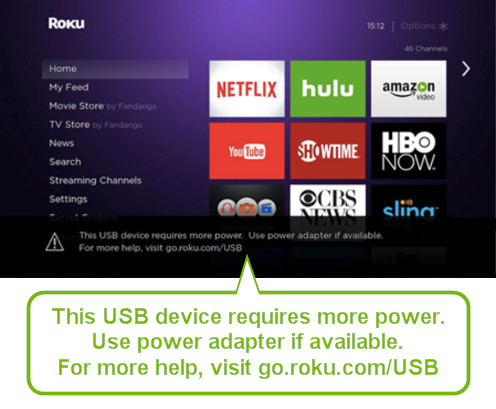
The most common reason the Roku device may fail to detect the USB drive is that USB drive requires more power than the Roku device can provide.
You may also see this message on your Roku screen:
To better assist you, please answer this question.
Remove the USB hub and connect the USB drive directly to your device.
To better assist you, please answer this question.
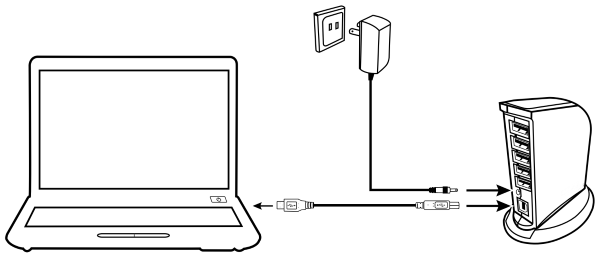
Some powered USB hubs require a specific “order of operation†to work correctly. If after following the instructions provided with your USB hub, the USB drive is still not recognized, we suggest trying the following methods:
If you have a non-powered USB hub connected to a USB port on your device, such as a computer, media player, gaming console or television, and your USB drive doesn't get enough power to function, then you can try the following:
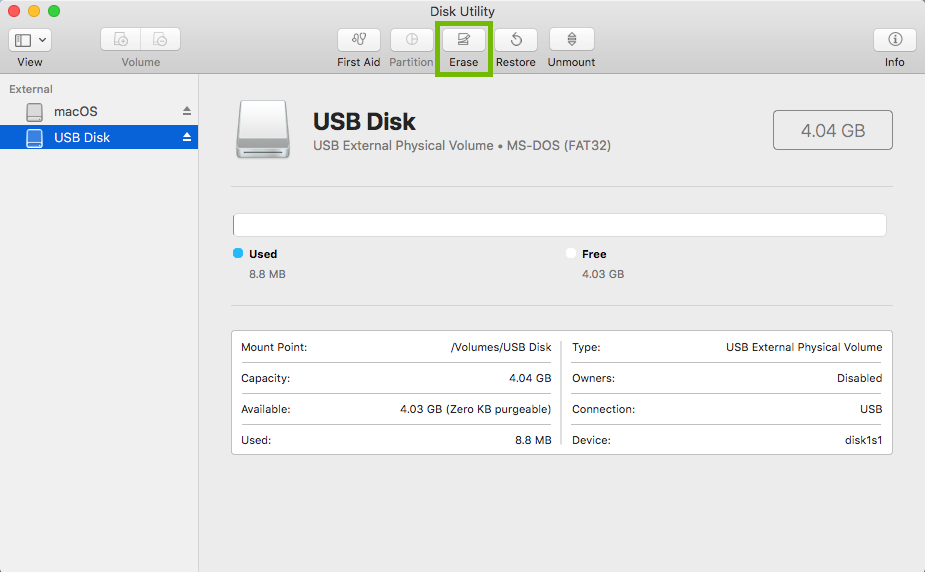
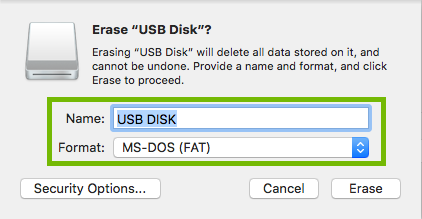
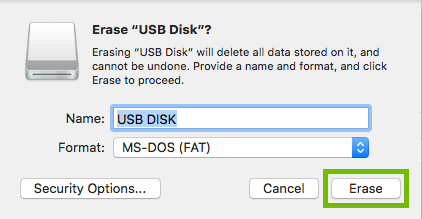
Any and all data on the USB drive will be destroyed during this process. Make sure the drive is blank, or copy the data to a safe place before proceeding.

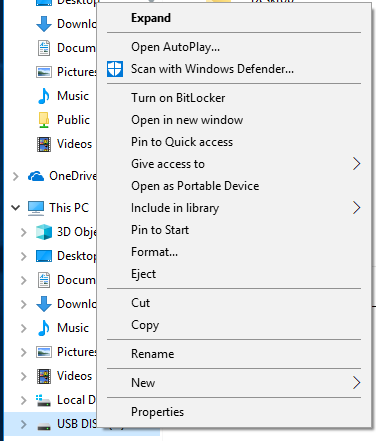
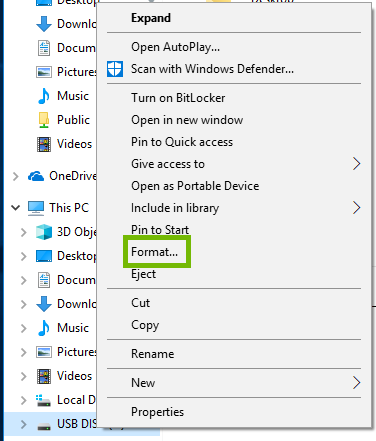
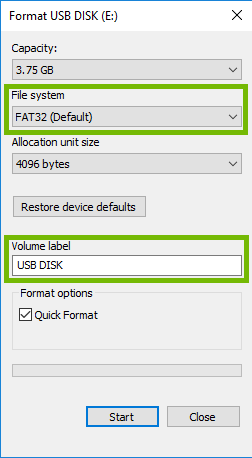
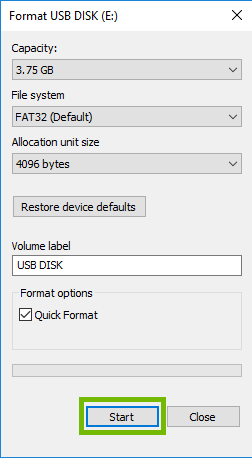


Any and all data on the USB drive will be destroyed during this process. Make sure the drive is blank, or copy the data to a safe place before proceeding.

Support.com is committed to your privacy
We do not share or sell your data to third parties. We do use cookies and other third-party technologies to improve our site and services. The California Consumer Privacy Act (CCPA) gives you the ability to opt out of the use of cookies, third-party technologies and/or the future sale of your data. Do not sell my personal information.

Support.com is committed to your privacy
Read our Privacy Policy for a clear explanation of how we collect, use, disclose and store your information
