If your Nintendo Wii U game console begins having video issues, this guide may be able to help you solve them! Here are a few things you can try to resolve common video issues with a Wii U console.
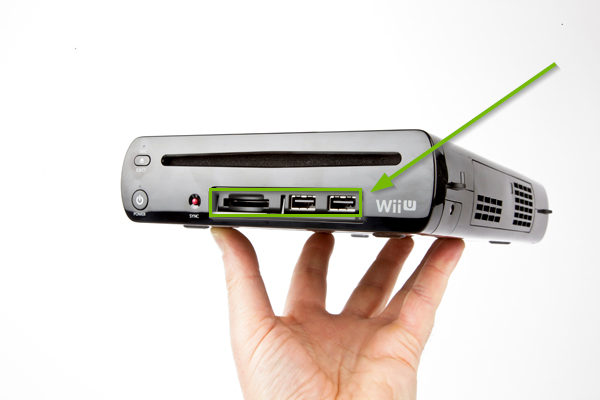
2. Remove Peripherals
Remove all peripherals from the Wii U's front-facing USB ports and SD card slot.
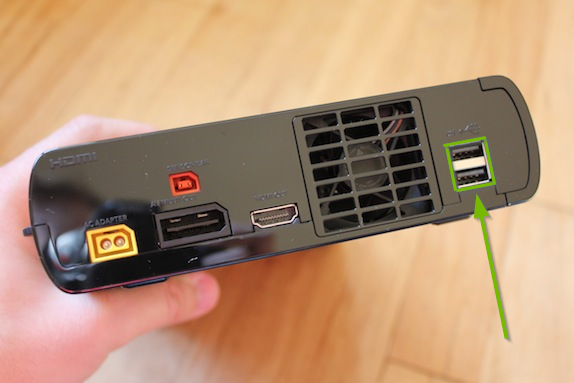
Remove all items from the rear-facing USB ports on the Wii U.
3. Restart
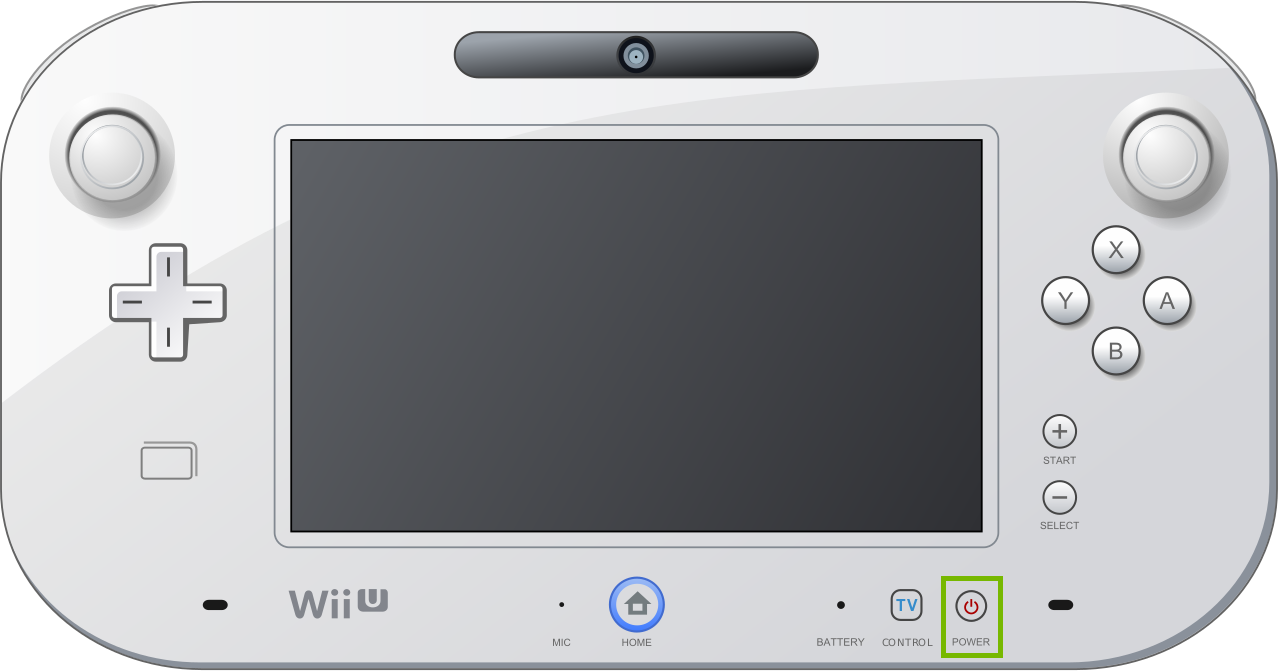
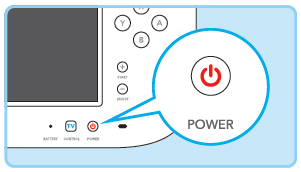
Press and hold the Power Button on the front of the device until the Wii U powers off.
If your Wii U does not power off, unplug the power cable from the wall outlet, wait 15 seconds, then plug it back in.
4. Introduction
Before checking cabling on your television or your Nintendo Wii U game console, make sure that all components are powered off.
Press and hold the POWER button for at least one second to turn off the power.
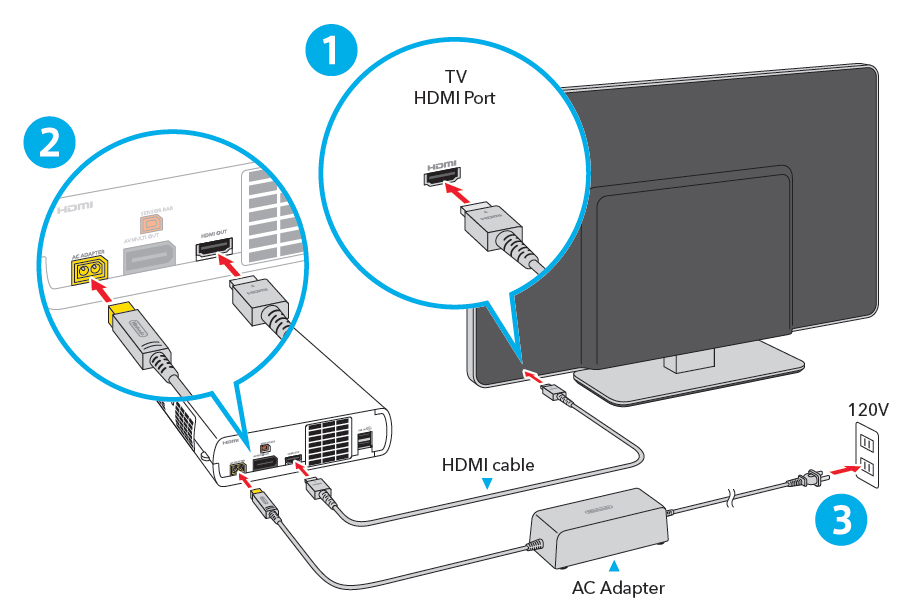
5. Connect Using HDMI Cable
Place the Wii U console at least 4" (10 cm) away from walls or other surfaces that may block ventilation.
Make sure that your television is turned off.
Connect the HDMI cable to an available HDMI port on your television.
Connect the other end of the HDMI cable to the Wii U console.
Turn your television on and select the correct input channel on your television.
6. Power On
Press the POWER button for at least one second to turn on your Nintendo Wii U console.
7. What's next?
8. Connect Using Component Video Cable
Place the Wii U console at least 4" (10 cm) away from walls or other surfaces that may block ventilation.
Make sure that your television is turned off.
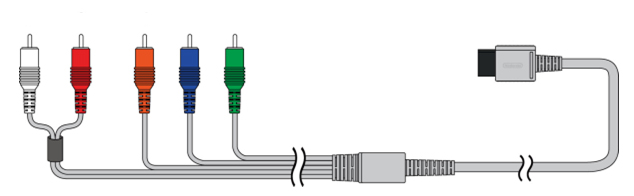
Insert the colored connectors on the Wii Component Video cable into the input connectors on the television:
White: Audio Input Left (or Mono)
Red: Audio Input Right
Red / Orange: Pr/Cr (Red)
Blue: Pb/Cb (Blue)
Green: Y (Green)
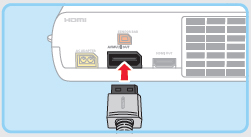
Insert the AV Multi Out plug on the Wii Component Video cable into the AV Multi Out connector on the back of the console.
Turn your television on and select the correct input channel on your television.
Set the Wii U's TV Connection Type to Non-HDMI.
9. Connect Using AV Cable
Place the Wii U console at least 4" (10 cm) away from walls or other surfaces that may block ventilation.
Make sure that your television is turned off.
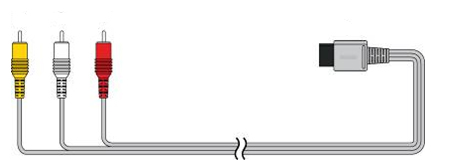
Insert the colored connectors on the Wii AV Cable into the input connectors on the television. Make sure you are plugging the connectors into the holes labeled "Input" or "In." Holes labeled "Output" or "Out" will not work. Plug the connectors into the following inputs
Yellow: Video Input
Audio Input Left (or Mono)
Audio Input Right
Insert the AV Multi Out plug on the Wii AV cable into the AV Multi Out connector on the back of the console.
Turn your television on and select the correct input channel on your television.
Set the Wii U's TV Connection Type to Non-HDMI.
10. Introduction
Before checking cabling on your television or your Nintendo Wii U game console, make sure that all components are powered off.
Press and hold the POWER button for at least one second to turn off the power.
11. Connect Using HDMI Cable
Place the Wii U console at least 4" (10 cm) away from walls or other surfaces that may block ventilation.
Make sure that your television is turned off.
Connect the HDMI cable to an available HDMI port on your television.
Connect the other end of the HDMI cable to the Wii U console.
Turn your television on and select the correct input channel on your television.
12. Check Compatibility
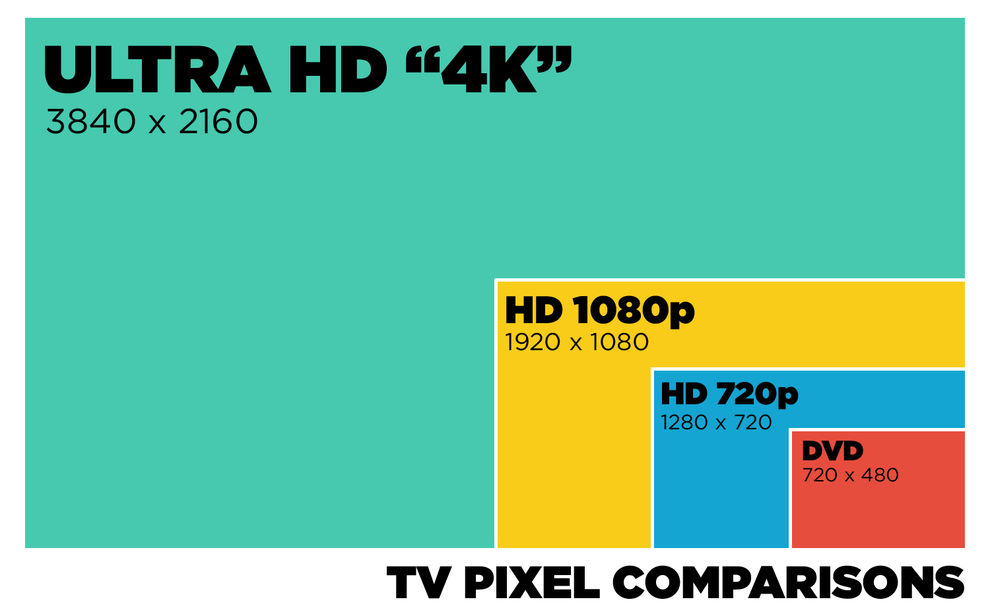
While your TV may be "HD" capable, there are different picture resolutions that qualify as "high definition." Making sure your television is able to display the best image quality possible can make a huge difference between the picture quality you're seeing and what you're expecting.
Check your TV's box. Specific resolutions are generally sought after when it comes to TV shopping, so if your TV is 1080p, for example - it will be prominently displayed on the packaging. Check the box for any reference to "high definition" or "HD," such as "1920x1080" or "1080p."
Check the manual. Your television's manual will also list all technical specifications, right down to the smallest detail. The resolution of the screen should be among them.
Check with your TV manufacturer. Looking up your TV's model number online can be a great way to easily find specifications. Your TV's model number should be on the rear of the TV itself. Go to the manufacturer's website, type in the model number and read the technical specifications. The website should state what maximum resolution your TV can handle.
13. Configure TV Resolution
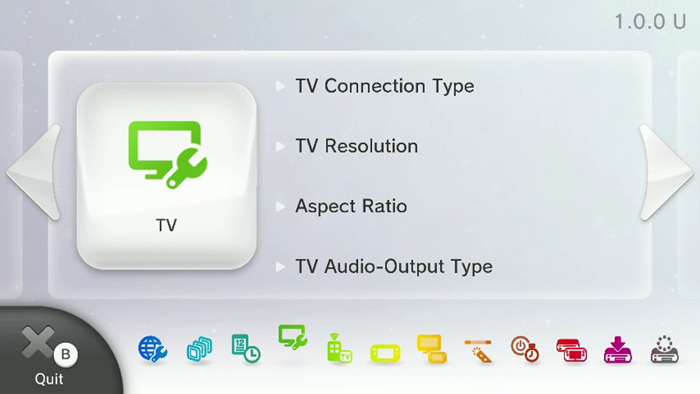
From the Wii U Menu, select System Settings.
Using the Left Stick, scroll to the TV icon and press the A Button.
Tap TV Resolution.
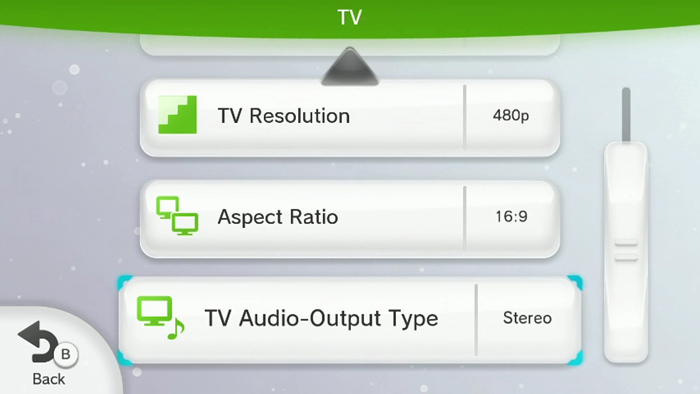
Choose the appropriate resolution for your TV.
You can find information about your TV's max resolution in its user guide. If you choose 480i or 480p you will need to choose your aspect ratio setting. If you are using a non-HDMI cable to connect the console to the TV and have selected the 4:3 aspect ratio, some parts of the display may be cut off.
Tap OK to confirm or Back to change to a different resolution. It may take a few seconds for these settings to take affect.
Tap OK to confirm the resolution setting.
14. Alternate Cable
Try a different cable if one is available.
If the issue persists, the Wii U console and the cable will need to come in for repair.
15. What's next?
16. Connect Using Component Video Cable
Place the Wii U console at least 4" (10 cm) away from walls or other surfaces that may block ventilation.
Make sure that your television is turned off.
Insert the colored connectors on the Wii Component Video cable into the input connectors on the television:
White: Audio Input Left (or Mono)
Red: Audio Input Right
Red / Orange: Pr/Cr (Red)
Blue: Pb/Cb (Blue)
Green: Y (Green)
Insert the AV Multi Out plug on the Wii Component Video cable into the AV Multi Out connector on the back of the console.
Turn your television on and select the correct input channel on your television.
Set the Wii U's TV Connection Type to Non-HDMI.
17. Connect Using AV Cable
Place the Wii U console at least 4" (10 cm) away from walls or other surfaces that may block ventilation.
Make sure that your television is turned off.
Insert the colored connectors on the Wii AV Cable into the input connectors on the television. Make sure you are plugging the connectors into the holes labeled "Input" or "In." Holes labeled "Output" or "Out" will not work. Plug the connectors into the following inputs
Yellow: Video Input
Audio Input Left (or Mono)
Audio Input Right
Insert the AV Multi Out plug on the Wii AV cable into the AV Multi Out connector on the back of the console.
Turn your television on and select the correct input channel on your television.
.png)