.png)
Authored by: Support.com Tech Pro Team
When browsing the internet, encountering the "Website is Not Secure" error in Google Chrome can be alarming. This error indicates that your connection to the website is not secure, potentially putting your data at risk. Fortunately, there are several ways to troubleshoot and fix this error. This comprehensive guide will explain why this error occurs and how you can resolve it.
The "Website is Not Secure" error typically appears when Chrome detects that the website you're trying to visit is not using HTTPS (Hypertext Transfer Protocol Secure). HTTPS ensures that the data exchanged between your browser and the website is encrypted, protecting it from interception and tampering.
Common reasons for this error include:
Here are several methods to resolve the "Website is Not Secure" error in Google Chrome:
Ensure that the website URL begins with "https://". If it starts with "http://", the connection is not secure. Whenever possible, manually change "http://" to "https://". If the website doesn't support HTTPS, proceed with caution.
Sometimes, the error might be temporary. Try reloading the page by clicking the refresh button or pressing Ctrl + R (Windows) or Cmd + R (Mac).
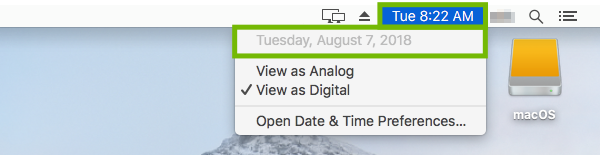
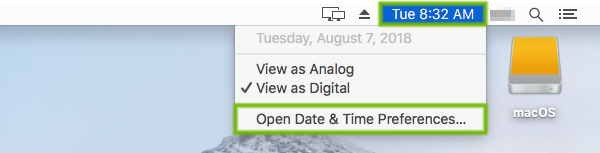
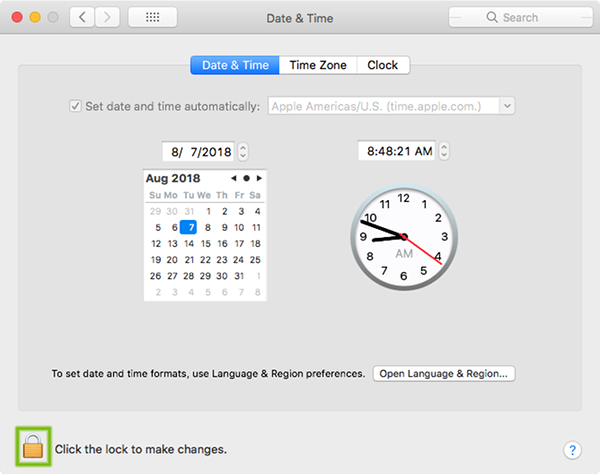
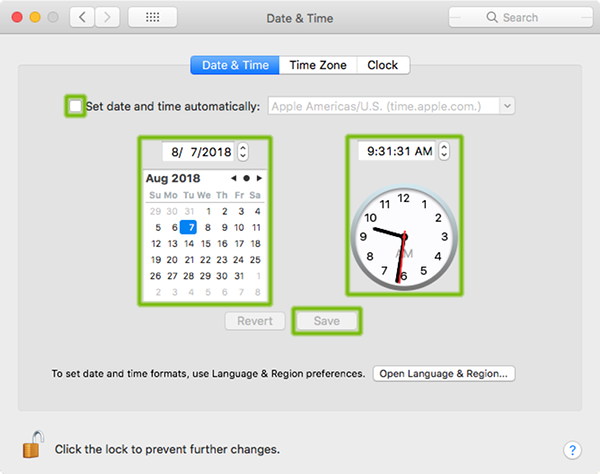
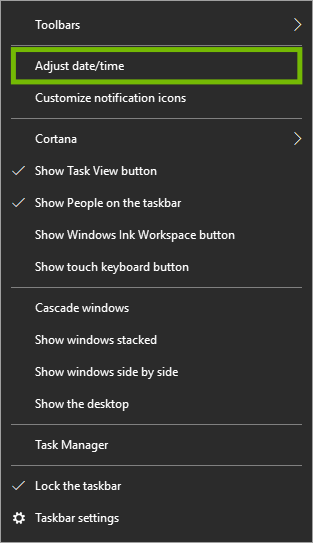
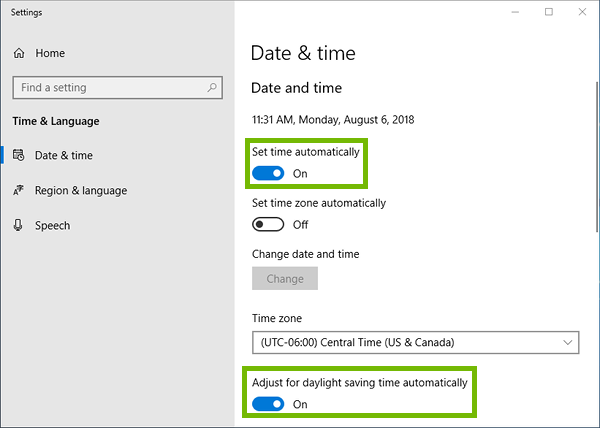
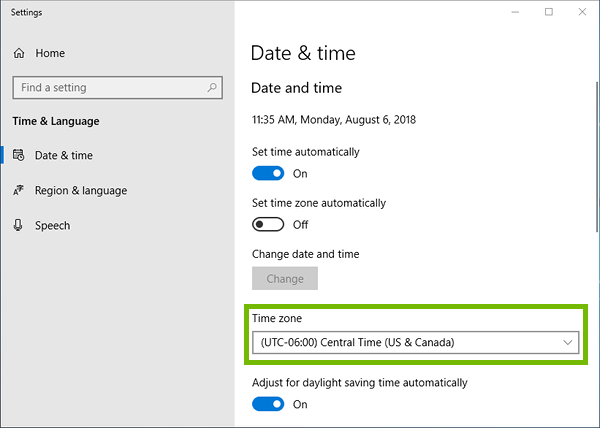
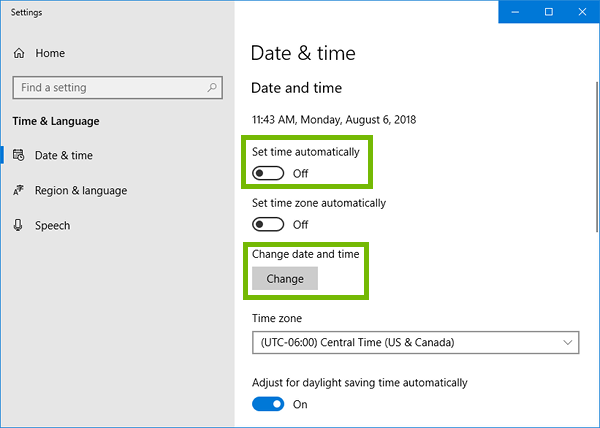
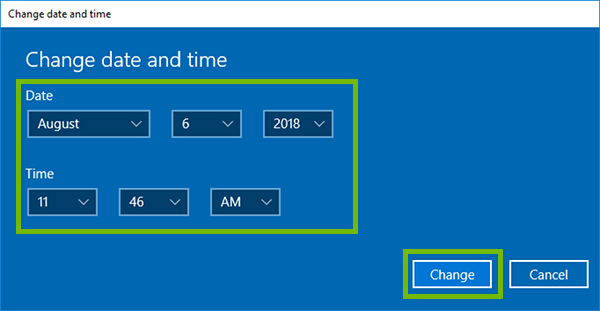
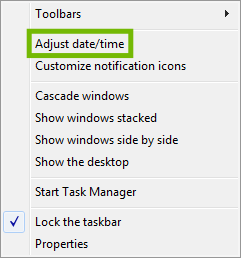
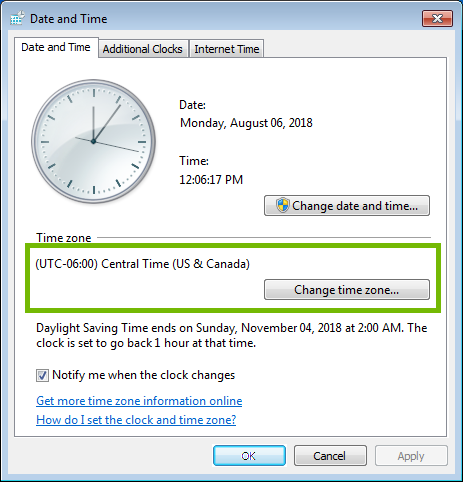
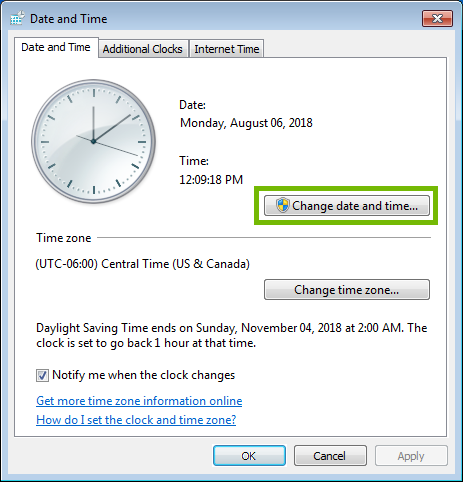
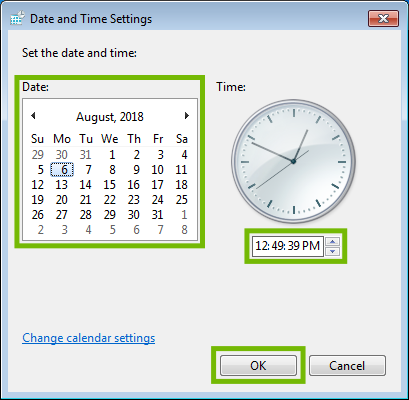
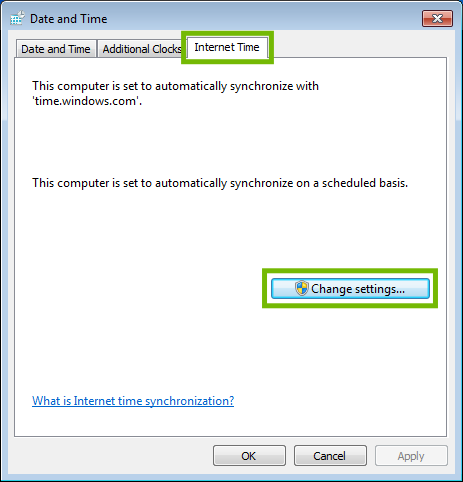
An incorrect date and time on your device can cause SSL/TLS certificate validation issues. Ensure your system clock is set correctly:
Clearing your browser's cache and cookies can resolve issues related to stored data:
Some extensions can interfere with secure connections. Disable all extensions to see if the error persists:
If the website loads correctly, re-enable extensions one by one to identify the problematic one.
Running an outdated version of Chrome can cause compatibility issues with secure websites. Ensure you are using the latest version:
If you trust the website and need to access it, you can proceed with caution by clicking "Advanced" on the error page and then "Proceed to [site] (unsafe)". However, be aware that this bypasses security warnings and may expose you to risks.
If the issue persists, it might be on the website's end. Contact the website administrator to inform them of the error. They may need to renew their SSL/TLS certificate or fix other security issues.
The "Website is Not Secure" error in Google Chrome is an important warning to protect your data from potential risks. By following the steps outlined in this guide, you can troubleshoot and resolve this error, ensuring a secure browsing experience. Always prioritize your online security and exercise caution when encountering such warnings.
If you are still having trouble, refer to the Step-By-Step Guide below, or Contact Support.Com for Personalized Assistance.
While you're surfing the web, your browser does many things behind the scenes to make sure the websites you're accessing aren't putting you at risk. Granted, while there is only so much your browser can do to keep you safe, it's a good idea to pay attention to any warnings it sends your way.
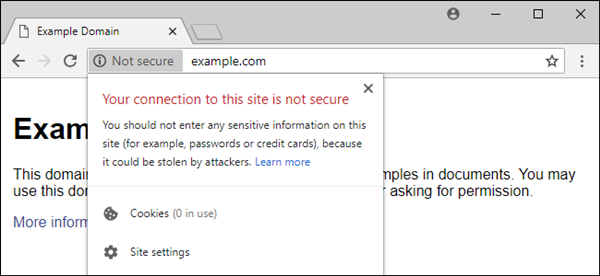
One of the errors you may encounter while using Google Chrome on a Windows PC or a Mac is a "Your connection to this site is not secure" warning. Initially, this may seem concerning as its wording implies that your security is at risk. However, this error can appear even on websites we know to be 100% secure and are confident in. This is due to an issue with security certificates, and many times is not the fault of your computer or your web browser at all. These certificates are what websites use to prove they are who they say they are on the internet, and if your browser detects an issue with a certificate, it will issue a warning.
This guide will help you determine whether this warning is being triggered by incorrect settings on your computer or web browser, or if the issue is with the website itself.
Tools You'll Need:
-->
Supplies You'll Need:
-->
Before You Begin:
You must have this thing before you whatever.
-->
Windows runs on computers produced by multiple companies, such as Lenovo, Asus, Dell, Toshiba, Hewlett Packard, Acer, and Sony.

Apple is the only company that makes macOS computers.

-->
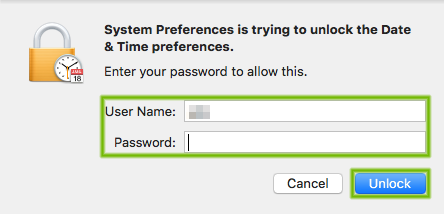
Security certificates are used by our web browsers and computers to make sure a particular site is safe. Think of it as a form of ID. A website having a valid security certificate lets your browser know that the website claiming to be your bank is actually your bank, and so on. Just like our own government issued IDs have expiration dates, so do security certificates. If your computer has the wrong date and time set, this can cause certificates to appear invalid & your web browser will begin to issue security warnings.
If you notice that the Date and Time is continually incorrect even after manual adjustment, your machine may need to be serviced to replace its CMOS battery.


After verifying that the date and time on your device is correct, test things again. If you're still having issues with security warnings on a particular website, your browser could be holding onto some outdated or bad data in the form of an old cookie, cached version of the website, etc. Clearing this data allows your browser to load the website freshly as if it had never been there before.
With your browser's website data removed, try to visit the website again. If you still receive security warnings, the issue is with the website itself, and not your device or its web browser. In this case, there is nothing you can do to resolve the error. Once the website owner/manager resolves the issue, you will stop receiving security warnings when you visit the website.

Support.com is committed to your privacy
We do not share or sell your data to third parties. We do use cookies and other third-party technologies to improve our site and services. The California Consumer Privacy Act (CCPA) gives you the ability to opt out of the use of cookies, third-party technologies and/or the future sale of your data. Do not sell my personal information.

Support.com is committed to your privacy
Read our Privacy Policy for a clear explanation of how we collect, use, disclose and store your information
