How to Fix WiFi Connection on Android Phone Tablet
Authored by: Support.com Tech Pro Team
1. Introduction
You may be unable to go online with your Android phone or tablet using the WiFi connection and troubleshooting the Internet connection may be difficult for you.
This guide will help you with that and take you through the basic steps to get your wireless connection fixed. These steps are listed in order, so start with the first one, see if that helps, and then continue with the next one if it doesn't.
What You'll Need:
No extra tools or supplies are needed.
-->
Before You Begin:
Extra instructions.
hyperlink
-->
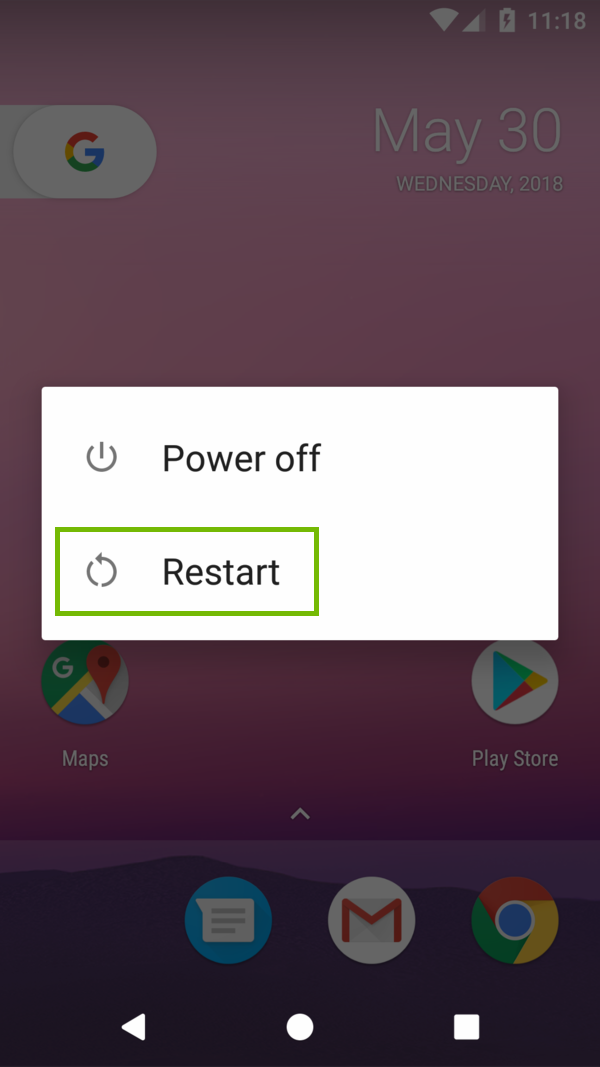
2. Restart the Android Device
Hold down the power button on your Android device. Depending on the manufacturer and model of Android device you have, the location of the power button will vary.
A prompt will appear on-screen. Select Restart.
If the menu does not pop up, continue to hold the power button, and your Android device will shut off.
If you had to shut down your Android device, wait 30 seconds before turning your device back on.
3. Make Sure the Android Device is in Range
The device needs to be within a reasonable range of the router in order to connect and have the best connection speeds.
In general, in most homes, you can be up to 30 feet from your router for a decent connection.
From 30' to 50' away, the speeds will be slower, and may drop occasionally, but it should be usable.
Greater than 50' away, and the signal will most likely be too weak to overcome interference. The speeds will be slow, and the connection may be sporadic.
The above numbers are approximates only. Optimal range may vary based on router make and model.
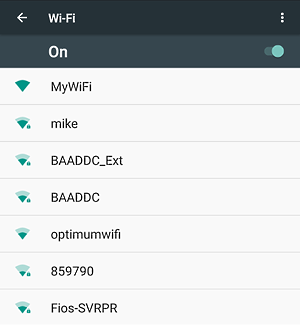
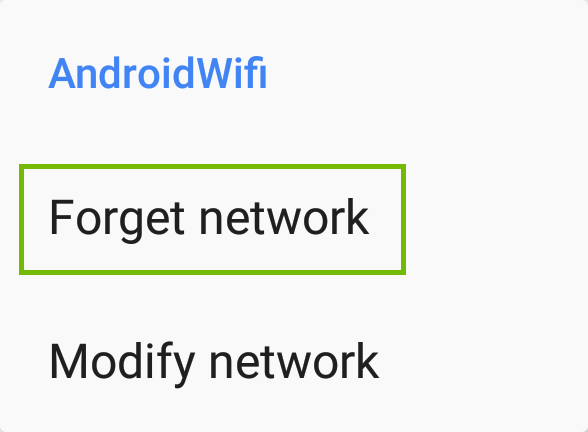
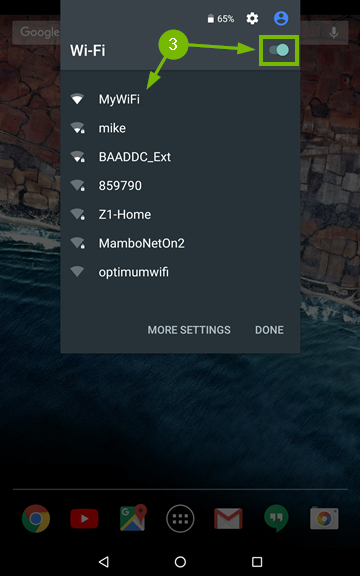
4. Delete the WiFi Network
Open Settings on your phone or tablet.
Select Wi-Fi.
Look in the list for your Wi-Fi network. Tap and hold your Wi-Fi network name till a menu comes up.
Select Forget network.
5. Reconnect the Android Device to the WiFi
Depending on what device (Smartphone or Tablet) and which generation you have, the menu theme and options might look slightly different on your screen. However, the steps should be similar across all Android devices and generations.
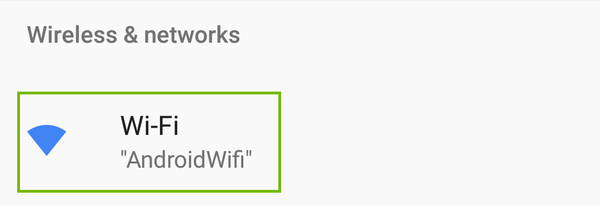
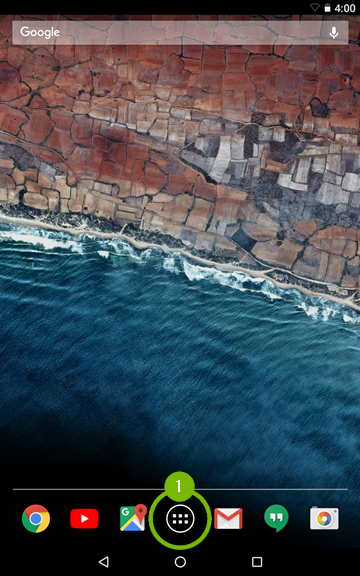
From the main screen of your Android device, tap on the Apps button.
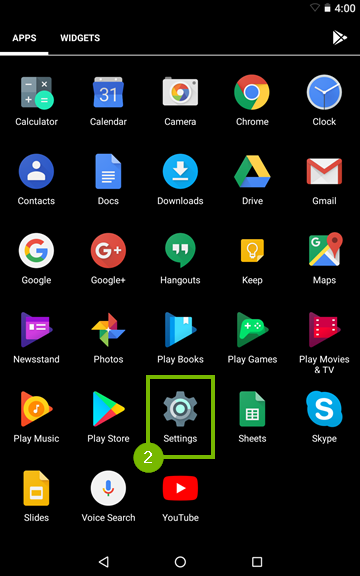
Then look for and tap on Settings.
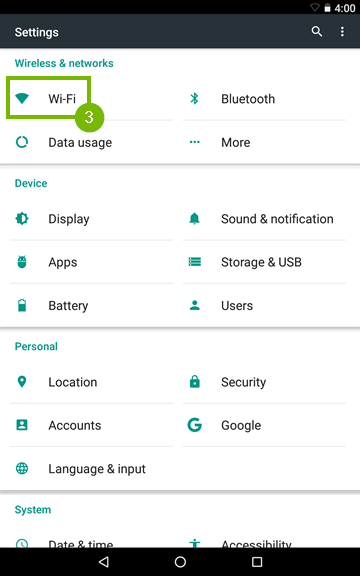
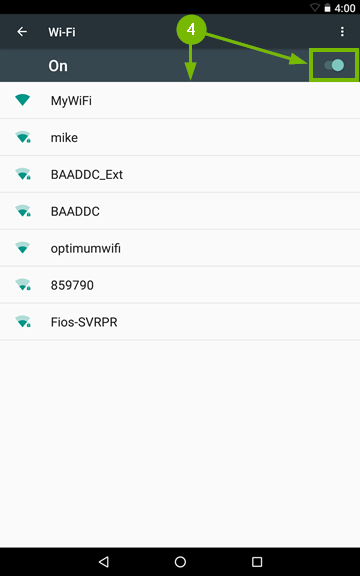
Go to Wi-Fi.
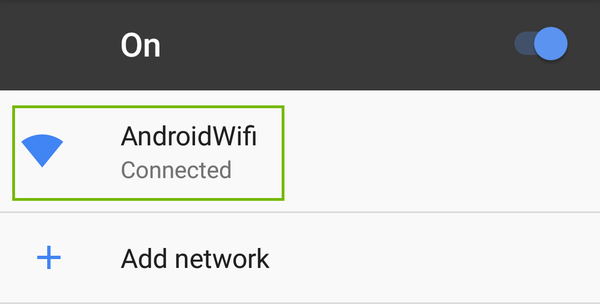
Make sure the Wi-Fi feature is enabled by flipping the On / Off switch to the On position then wait for the network list to populate and tap on the Wi-Fi network that you want to connect to.
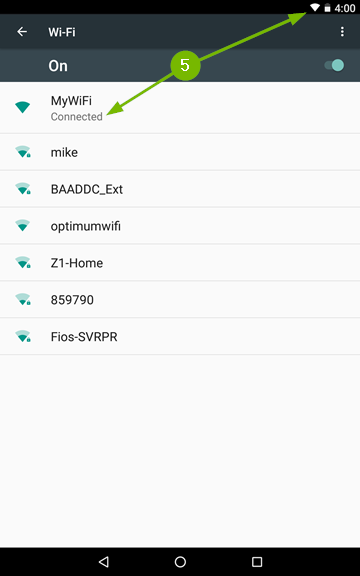
Your Android device will automatically connect to the network if there is no security enabled, or you have connected to it in the past. The Wi-Fi network name will show Connected underneath and the Wi-Fi symbol will fill up in the top right corner of the screen.
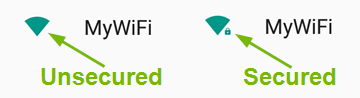
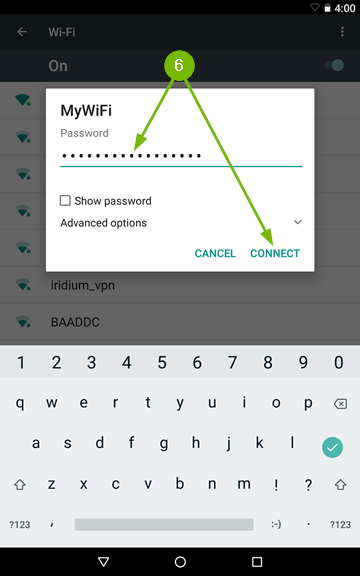
If the Wi-Fi network requires a password, then you will see a small padlock next to the Wi-Fi symbol, which also means the connection is secure. Tapping on a secured Wi-Fi networks name will prompt you to enter the password. Passwords are always case sensitive. Type it in using the on screen keyboard then tap Connect.
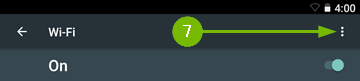
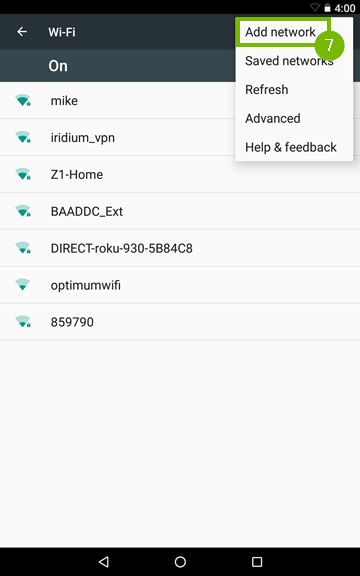
If the Wi-Fi network you are trying to connect to is hidden, then tap the More option which looks like three dots positioned vertically, on the top right corner of the screen, then tap Add network.
Enter the Wi-Fi networks name using the on screen keyboard and tap Save if no password is required to connect. If a password is needed to connect to the Wi-Fi network then tap on Security and select the security type. Type in the password, then tap Save.
At this point your Android device should be connected to Wi-Fi.
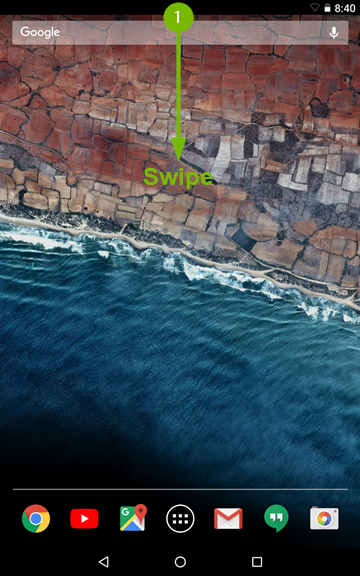
As an alternate way you can also try the following method:
Swipe downwards from the top side of the screen.
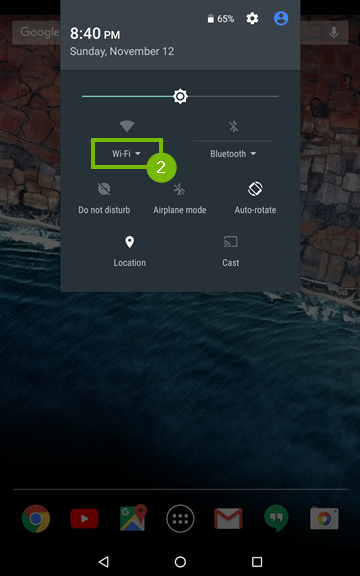
Look for the Wi-Fi symbol in the drop down menu and tap on the word below it. If you're not connected to any network, it will say Wi-Fi. If you're already connected to a network, it will show its name.
Make sure the Wi-Fi feature is enabled by flipping the On / Off switch to the On position then wait for the network list to populate and tap on the Wi-Fi network that you want to connect to.
6. Restart the Modem and Router
Many times a connection issue can be resolved quickly and easily by restarting the Internet equipment:
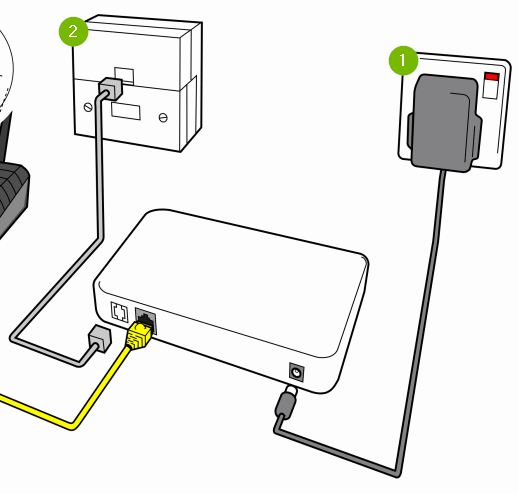
Disconnect the power cable from the back of your modem. The power cable is usually near the bottom, and tends to be a thin black cord. It usually does not have any clips on it.
Some modems may have a battery backup to keep the telephone service working in case of a power outage. If the lights on your modem do not turn off when you disconnect the power cable, make sure you also remove the battery as well, then put it back in place before you reconnect the power cable.
Disconnect the power cable from the back of your router, or if your router has one, push the power button to turn it off. Some Internet Service Providers now provide "Wireless Gateways", which contain both a modem and router in one simple device. Some users prefer separate devices. Both are perfectly acceptable. If you are using an all-in-one Wireless Gateway, you can safely continue without this step.
Wait 30 seconds.
Reconnect the power cables back into your modem and router.
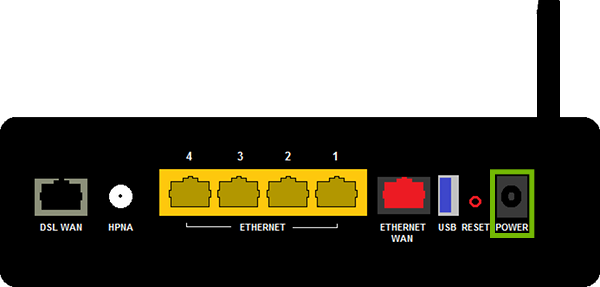
Make sure the power light comes on for each device. This is usually labeled by the symbol below.
Please allow 3 to 6 minutes for the modem and router to start up fully.
7. Check the Cables to the Modem and Router
Whether you have a wired or wireless connection, your Internet equipment such as your router, modem or wireless gateway requires to be wired to the Internet signal source and a power source.
Check the Connections to the Modem
Make sure the power cable is connected firmly to the back of the modem and the electrical outlet, and the power light is on. The power light usually has the symbol below next to it.
Make sure the connection to your service provider is proper. This could be a cable line if you have cable Internet, a phone line if you have DSL, or a Fiber cable for fiber Internet.
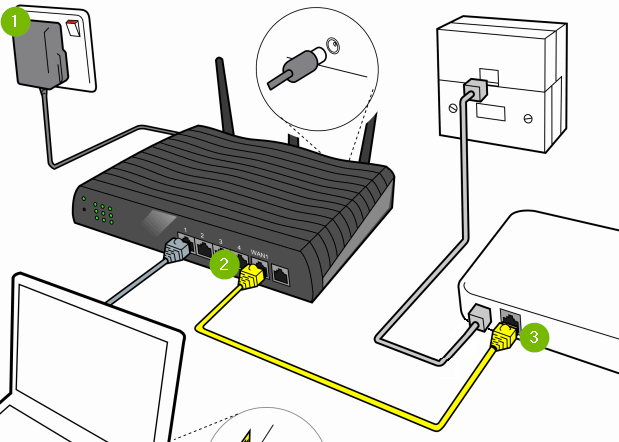
Check the Connections to the Router
If you have a "Wireless Gateway", or combination modem and router, you can skip these checks.
Make sure the power cable is connected firmly to the back of the device and the wall, and the power light is on. The power light usually has the symbol below next to it.
Make sure the Ethernet cable going to your modem is connected securely, and into the "Uplink" or "Internet" port.
Make sure the other end of the Ethernet cable is connected securely to your Modem.
8. Check the Internet Light on Modem and Router
There's a light representing the Internet connection. It will usually be labeled "Internet", or have one of the common symbols below.
Make sure the light next to this symbol is on and solid (or flickering very briefly) on both your modem and router. This means you should have a good connection to the Internet and your devices should be able to go online.
.png)