.png)
Authored by: Support.com Tech Pro Team

In this guide, you will learn how to Identify and Fix Windows 11 installation problems and Errors.
If you're encountering problems installing Windows 11 via Windows 10's update tool, don't panic. Windows 10 has a built-in troubleshooter that can help identify any problems. This can also reset the Windows Update app, which can help kickstart the installation.
To do this,
1. Click the Start menu

2. Click the cog icon on the left, which will open up the Settings window

3. Click ‘Update & Security
4. Click on ‘Troubleshoot’

5. Click on Additional Troubleshooters

4. Click on ‘Windows Update’ then ‘Run the troubleshooter’ and follow the instructions
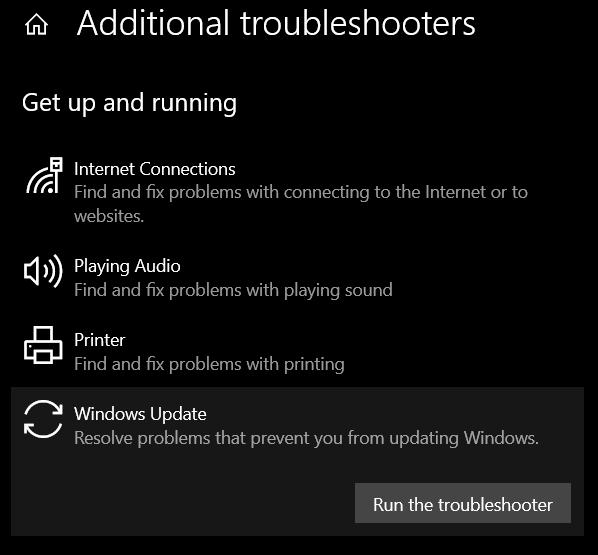
5. Click Apply this fix if the troubleshooter finds a solution
To install Windows 11, or to ensure that it runs correctly, you'll need to make sure that your PC matches the following Windows 11 minimum system requirements:
For a complete list of additional, non-essential requirements, check out Microsoft's Windows 11 specification page.
These are the minimum specs required for running Windows 11, but for the best Windows 11 experience, we recommend you install it on a device that's more powerful. The 4GB RAM requirement is especially low – we wouldn't recommend trying to run Windows 11 on anything with less than 8GB of RAM.
In case your system meets the above-mentioned criteria, you need to run a health check to keep your system ready to install Windows 11
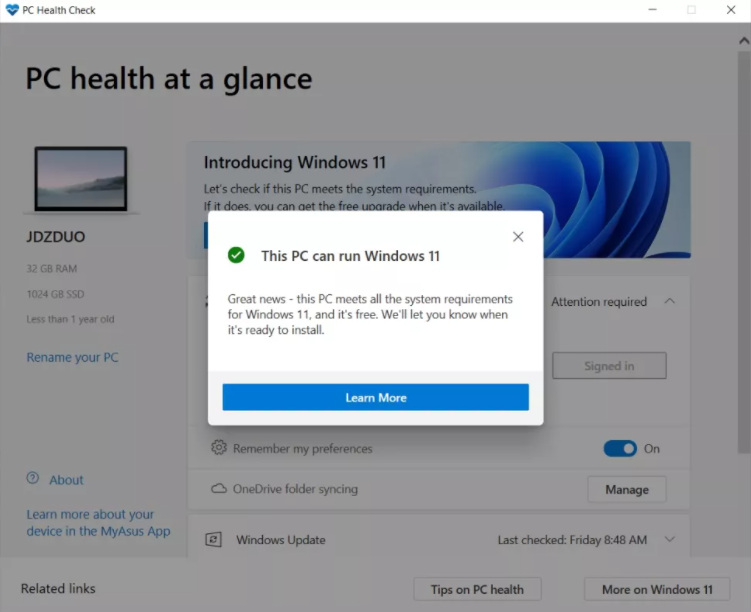
In case Microsoft's Windows 11 upgrade checker tells you that your PC isn't supported but it meets all the other requirements then you need to check your BIOS to enable TPM
Almost every modern CPU comes with TPM support. In case you have an Intel CPU then you need to switch to TPM and for AMD you need to check PSP fTPM in the BIOS. Once done, you can run Microsoft's health checker app to confirm the status. This should allow Windows 11 to install
You can check the status of TPM support in your PC by doing the following:
1. Press Windows key + R
2. When the box appears, type tpm.msc to open the Trusted Platform Module Management window
3. Look for a sub-window titled TPM Manufacturer Information and check under Specification Version to see what TPM version your device has

If you're experiencing issues after upgrading to Windows 11 and your device does not meet the minimum system requirements, we recommend you go back to Windows 10

Support.com is committed to your privacy
We do not share or sell your data to third parties. We do use cookies and other third-party technologies to improve our site and services. The California Consumer Privacy Act (CCPA) gives you the ability to opt out of the use of cookies, third-party technologies and/or the future sale of your data. Do not sell my personal information.

Support.com is committed to your privacy
Read our Privacy Policy for a clear explanation of how we collect, use, disclose and store your information
