How to Fix Your Connection is Not Secure in Firefox
Authored by: Support.com Tech Pro Team
1. Introduction
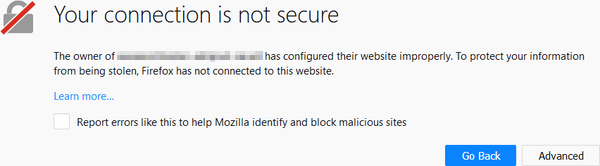
Mozilla likes secure websites. Websites that start with https:// have purchased a certificate and are specially encrypted to protect you. Websites that do not have that encryption are seen as unsafe by Firefox and you'll receive this warning.
Not being able to access your regular sites while browsing can be frustrating. In many cases, they are caused by a website that's not configured properly, but you can double check your date and time and clear your Firefox history to make sure it isn't on your end.
This guide will take you through the basic settings to ensure your computer and Firefox aren't the cause of these security errors. We will check:
Computer date and time
Firefox cache and cookies
Tools You'll Need:
A paperclip
iPhone charging cable
Access to a computer with iTunes installed
Any other non-consumable tools needed
Comment out tools section if no tools are necessary
-->
Supplies You'll Need:
Zip ties
Any other consumable supplies
Comment out supplies section if no supplies are necessary
-->
Before You Begin:
You must have access to a computer with iTunes installed.
You must have that thing for the other thing so you can do the thing.
Each individual prereq should have its own box like this. Not all will contain multiple links.
Comment out prerequisites section if no prereqs are necessary
-->
Windows
Windows runs on computers produced by multiple companies, such as Lenovo, Asus, Dell, Toshiba, Hewlett Packard, Acer, and Sony.
macOS
Apple is the only company that makes macOS computers.
-->
2. Make Sure Date and Time are Correct
Security certificates are used by our web browsers and computers to make sure a particular site is safe. If the date and time are wrong, certain web pages may give security warnings and secure programs such as work VPNs, banking apps, and most social network apps will not function. Since iOS devices (iPhones and iPads) and Android set their time automatically, you don't usually need to check those.
If you notice that your Date and Time keeps becoming unsynced, you should speak to the manufacturer about replacing your CMOS battery.
How to Verify the Date and Time on a Mac
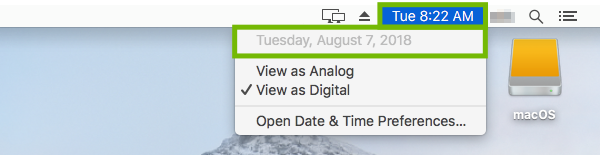
Select the time display in the top-right corner of your screen.
Make sure both the date and time are correct.
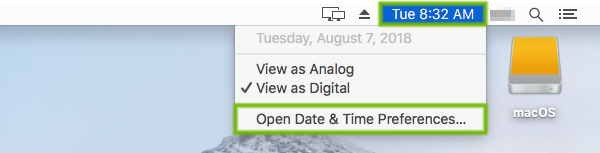
If the time is incorrect, select the time display in the top-right corner of your screen, then select Open Date & Time Preferences.
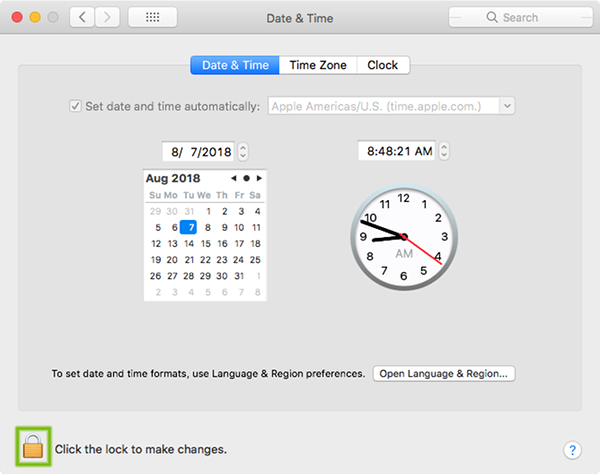
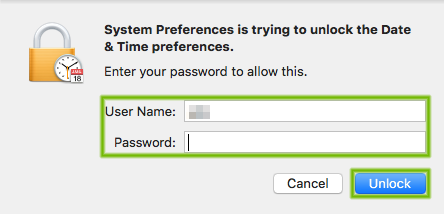
Select the lock in the bottom-left corner to make changes.
Enter your username and password, then select Unlock.
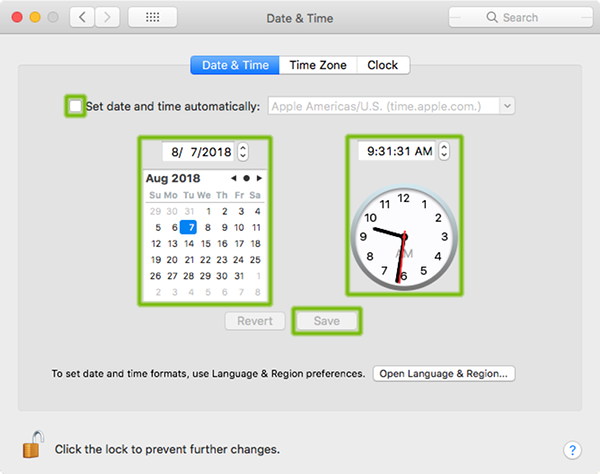
In most cases, letting your Mac take care of setting the time is the best choice. Make sure there is a check for Set date and time automatically, and make sure a time server close to you is chosen.
If you want, you can set the time manually. Remove the check for Set date and time automatically, then enter the correct date and time. Press Save when done.
Select Time Zone, then select your closest region on the map, and refine it by choosing the city you are in, or the city closest to you, from the list below.
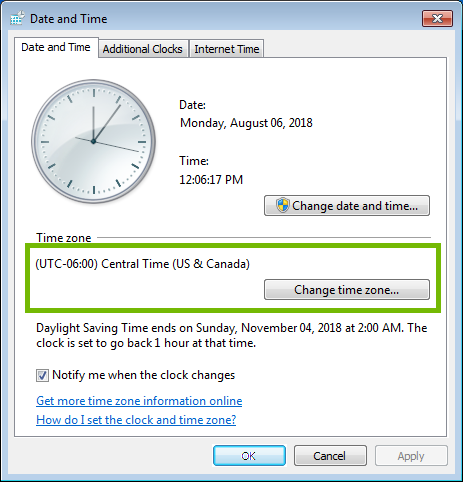
How to Verify the Date and Time in Windows
Look at the date and time shown in the system tray. This is usually in the bottom right corner of the screen.
If the date or time are wrong, it can cause issues. To fix:
Windows 10
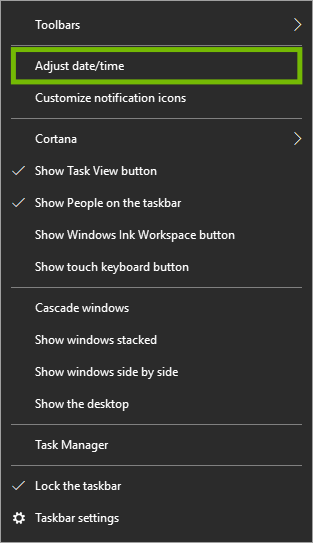
Right-click on the date and time.
Select Adjust date/time.
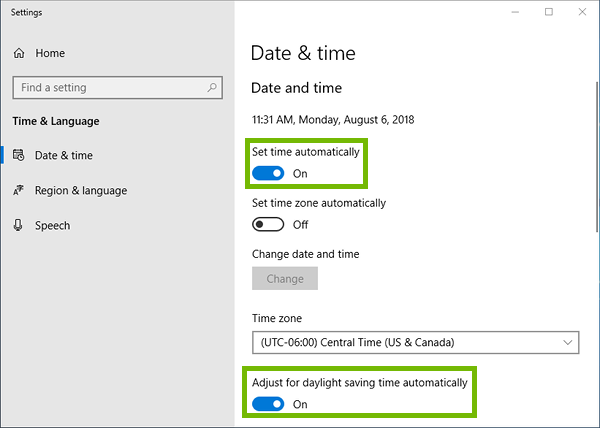
For most, letting Windows manage the date and time, as well as automatically setting it is the best choice.
Make sure Set time automatically and Adjust for daylight saving time automatically are both turned On.
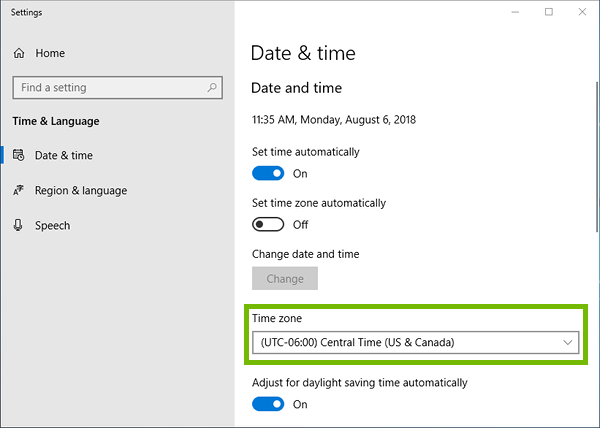
Make sure your time zone is selected for Time zone.
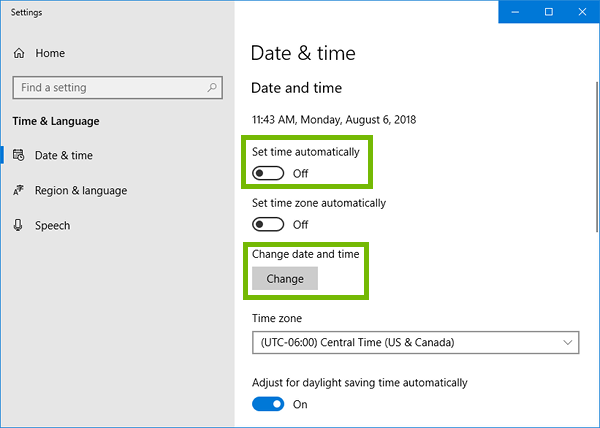
If you want, you can manually set the Date and time.
Make sure Set time automatically is set to Off, then select Change for Change date and time.
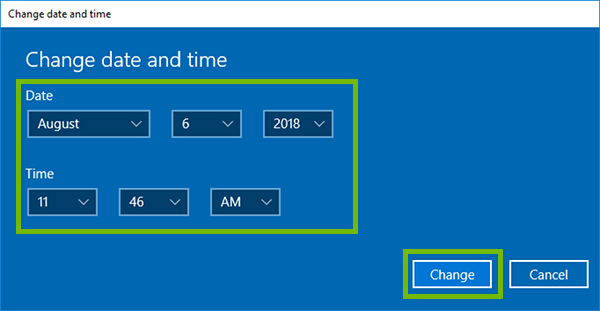
Set the Date and Time correctly, then select Change.
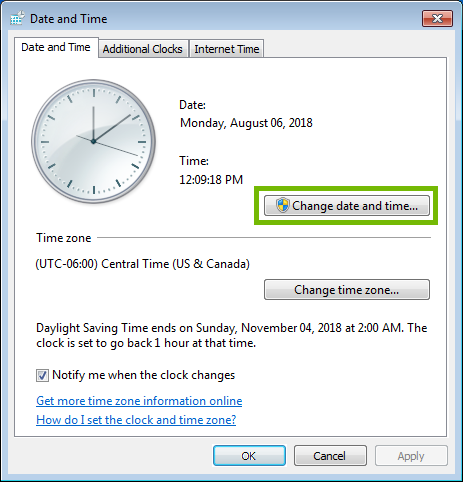
Other Windows Versions
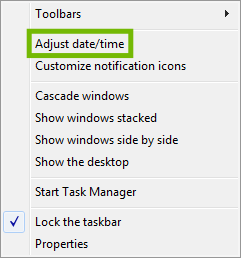
Right-click on the date and time.
Select Adjust date/time.
Make sure the proper Time zone is selected.
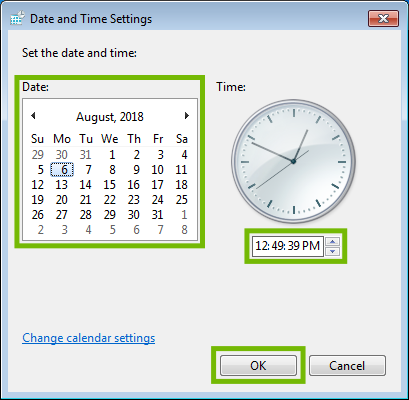
Select Change date and time.
Correct the Date and Time, then select OK.
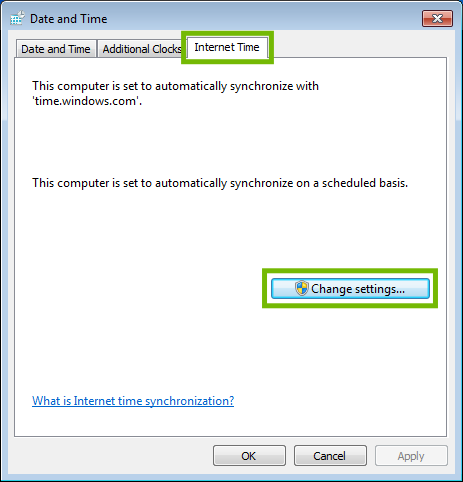
You may wish to have Windows set the date and time for you in the future.
Select the Internet Time tab at the top, then select Change settings.
Make sure Synchronize with an Internet time server is checked, then select OK.
3. Clearing the Browser History and Cache
If you're still having issues with the website, you may have a corrupt cookie or your browser history could be saving the wrong version of the site. Clearing the browsing data will fix this.
Clear the Browser Data on a Mac
Open Mozilla Firefox.
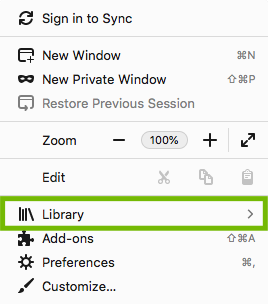
Select the Menu button located in the top right corner of the window.
Select Library.
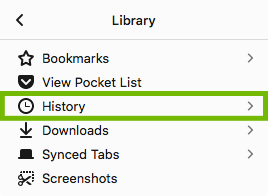
Select History.
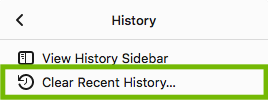
Select Clear Recent History.
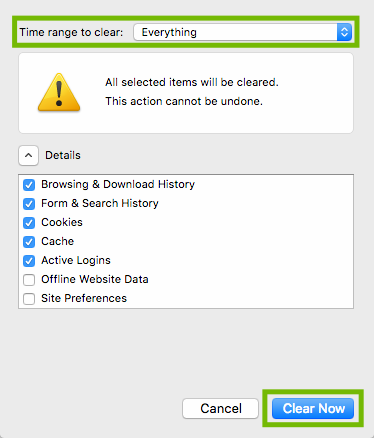
For Time range to clear, select Everything. Then select Clear Now.
Clear the Browser Data in Windows
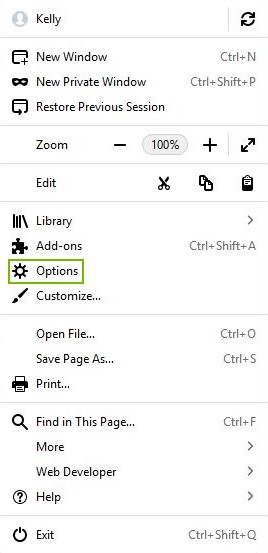
Open Mozilla Firefox.
Click the Menu button in the top right of the screen.
Click on Options.
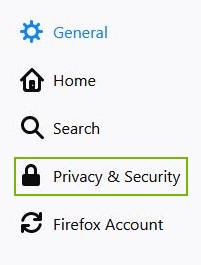
Click on Privacy & Security.
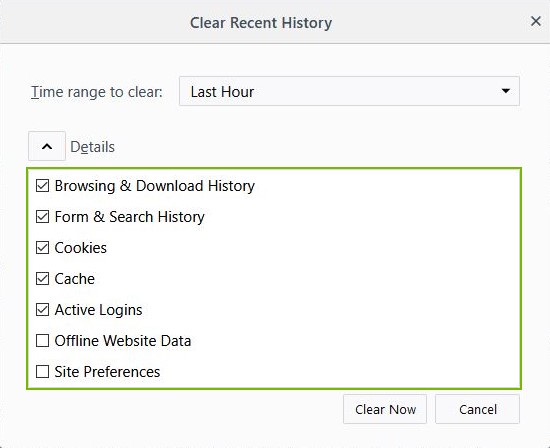
Click the Clear History button located under the History category.
Select the Everything to clear all your Firefox browser history.
Click the Details button to expand them.
Choose the item categories you wish to clear. We recommend selecting everything to make sure the issue is fixed. Keep in mind you will have to re-login into websites if you do this.
Click the Clear Now button.
4. Try the Webpage Again
Once cleaned up, try the website again. If you're still having issues it is most likely caused by the site itself. To resolve this, you'll need to get in contact with the webmaster and let them know. If that's not possible you'll just have to wait.
Remove Hidden Spyware In Minutes For Free
Detect and remove spyware, keyloggers, tracking cookies, and other
threats that slow down your PC or steal your data.
65+ Million Downloads
Spyware scanner with AI-powered detection engine + database
.png)