.png)
Authored by: Support.com Tech Pro Team
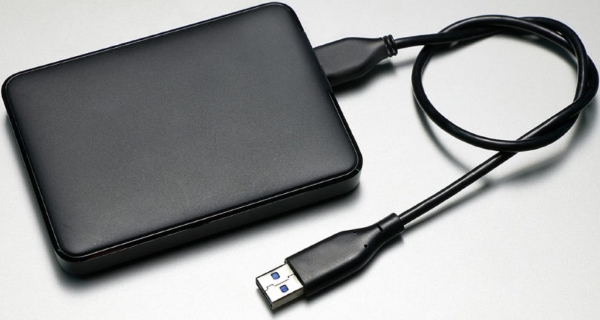
USB drives are great for carrying or backing up data. Formatting is the process that erases all existing data on a USB drive and sets up the file system it will use. The file system is what tells the drive how to store the data that is to be written to, read or deleted from it. The type of file system that is needed on a USB drive varies depending on the type of device it will be used with.
While most devices will alert you if you connect a USB drive with an incompatible file system that needs to be formatted, refer to your device's documentation to find out what file systems are compatible with your device.
This guide will show you how to format a USB drive using a Windows PC.
What You'll Need:
-->
Before You Begin:
Extra instructions.
-->

While the process to format USB drives is the same, they may come in different physical forms:

Any and all data on the USB drive will be destroyed during this process. Make sure the drive is blank, or copy the data to a safe place before proceeding.
If you cannot find success with the above guide, please refer to the additional steps below:
Formatting a USB or external hard drive for a Mac computer is a common task that can be crucial for various reasons. This blog post will delve into the reasons for formatting these devices for Mac and provide a step-by-step guide on how to do it.
Why Format a USB or External Hard Drive for Mac?
Compatibility: The most common reason to format a USB or external hard drive for a Mac is to ensure compatibility with macOS. Mac computers use a different file system compared to Windows, and formatting the drive ensures it can be read and written on a Mac without issues.
Performance Improvement: Formatting can also improve the performance of your device. Over time, drives can become cluttered with unnecessary data, leading to slower performance.
Data Security: When you're giving away or selling your external drive, formatting is essential to prevent the next user from accessing your personal data.
Error Fixing: If your drive has errors or has become corrupt, formatting can often be a simple solution to fix these issues.
Switching File Systems: You might need to switch between file systems (like from FAT32 to exFAT or HFS+) to meet specific requirements, such as file size limits or compatibility with other operating systems.
How to Format a USB or External Hard Drive for Mac
Before You Begin
Backup Data: Ensure you have backed up any important data from the USB or external hard drive, as formatting will erase all data on the drive.
Power Supply: If you're formatting an external hard drive, ensure it's connected to a power source if required.
Step-by-Step Guide
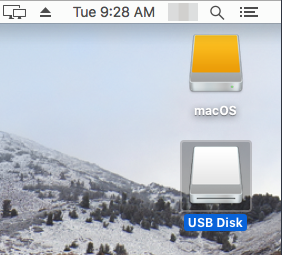
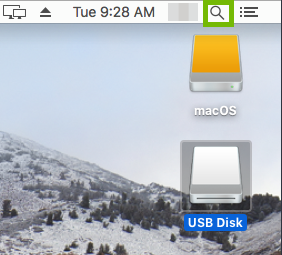
Connect the Drive: Plug your USB or external hard drive into your Mac.
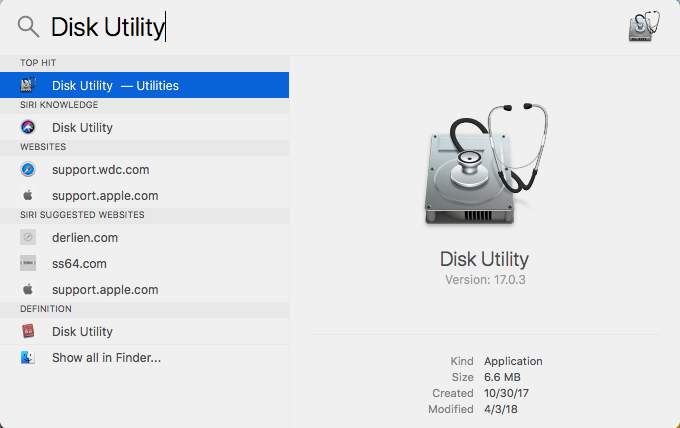
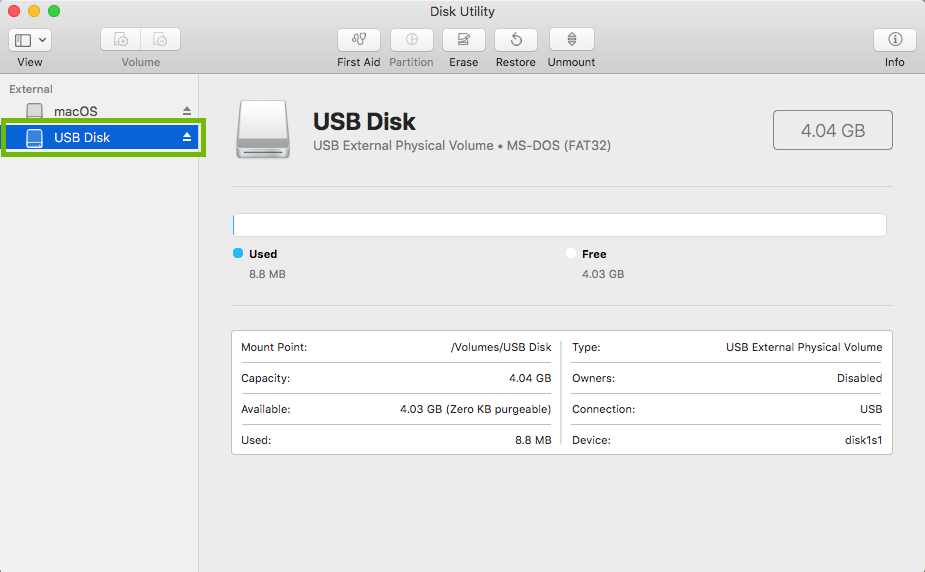
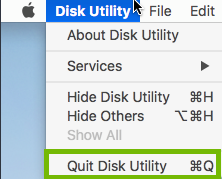
Open Disk Utility: You can find Disk Utility by searching in Spotlight or navigating through Finder > Applications > Utilities.
Select the Drive: In Disk Utility, you'll see a list of drives. Select the USB or external hard drive you want to format.
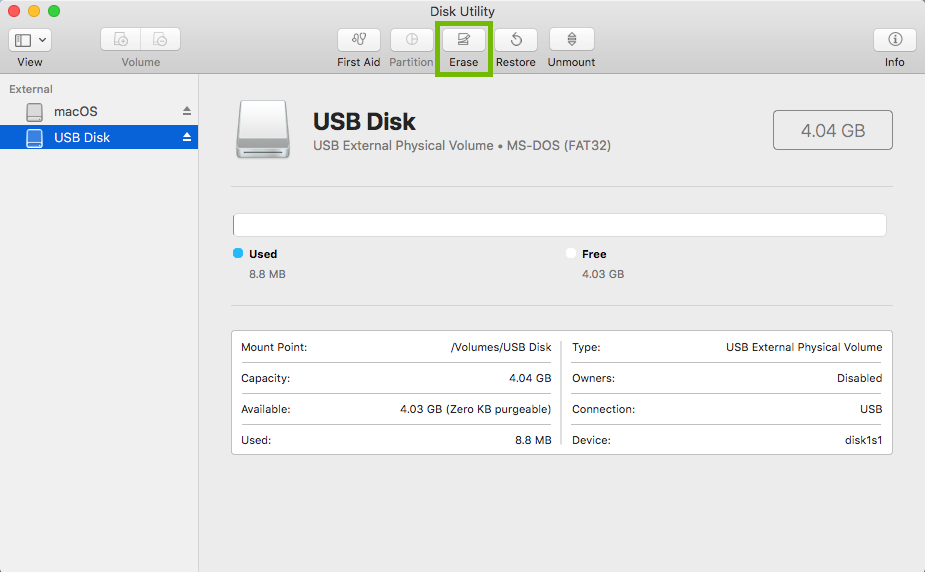
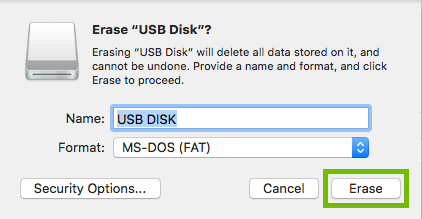
Choose ‘Erase’: Click on the ‘Erase’ button at the top of the Disk Utility window.
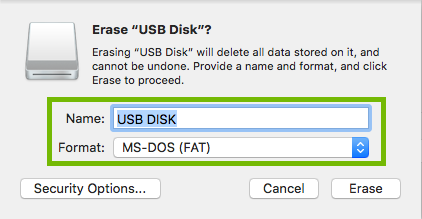
Set Format and Scheme:
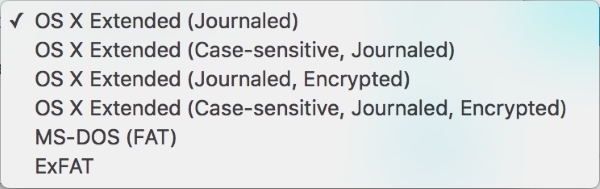
Format: Choose a file system format.
For Mac-only use, select ‘Mac OS Extended (Journaled)’.
For cross-platform use, select ‘exFAT’ (for larger file sizes) or ‘FAT32’ (for smaller file sizes but with a 4GB file size limit).
Scheme: Select ‘GUID Partition Map’ for newer Macs or ‘Master Boot Record’ for older ones.
Name Your Drive: Enter a name for your formatted drive.
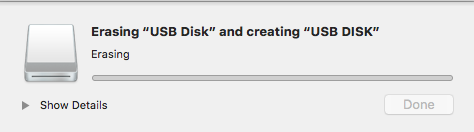
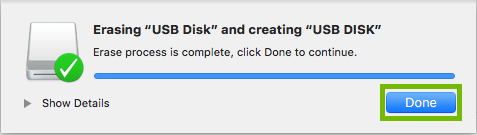
Erase and Format: Click ‘Erase’ to begin the formatting process. This may take a few minutes depending on the size and type of the drive.
Eject the Drive: Once the process is complete, eject the drive properly by right-clicking on its icon on the desktop and selecting ‘Eject’.
After Formatting
Time Machine Backup: If you're planning to use the drive for Time Machine backups, you can set it up in System Preferences > Time Machine.
Data Transfer: Transfer any data back onto the drive if needed.
Conclusion
Formatting a USB or external hard drive for your Mac ensures compatibility, optimizes performance, and helps in data management. By following the steps outlined above, you can easily format your drive for optimal use with your Mac computer. Always remember to backup important data before proceeding with formatting to avoid any data loss.

Support.com is committed to your privacy
We do not share or sell your data to third parties. We do use cookies and other third-party technologies to improve our site and services. The California Consumer Privacy Act (CCPA) gives you the ability to opt out of the use of cookies, third-party technologies and/or the future sale of your data. Do not sell my personal information.

Support.com is committed to your privacy
Read our Privacy Policy for a clear explanation of how we collect, use, disclose and store your information
