As you use your iPhone, iPad or iPod Touch, files and apps will eventually accumulate, leaving you with less free space for new content. Once you know how much available storage you have, you can use various methods to free up space on your device such as deleting data, uploading to cloud storage or adding external storage.
What You'll Need:
No extra tools or supplies are needed.
-->
Before You Begin:
Extra instructions.
hyperlink
-->
How Is Data Stored?
Before you begin freeing up space on your iOS device, it's important to understand how data is stored on it. The amount of space that data takes up on your device, is measured and represented in bytes (B). Bytes however, are a very small amount of data and nowadays data size and storage space are more commonly represented in multiples of bytes. Each multiple is approximately a thousand times its submultiple. The most common multiples are:
Kilobytes (KB) which are approximately a thousand bytes,
Megabytes (MB) which are approximately a thousand kilobytes,
Gigabytes (GB) which are approximately a thousand megabytes,
Terabytes (TB) which are approximately a thousand gigabytes.
To better understand how you can practically use this information, on average, you can think of a song or picture taking up about 2-5 MB and a short one minute video clip taking up about 5-10 MB. Quality makes a considerable difference in the amount of space a file uses.
2. Review and Free Up Storage Space on the Device
For the most part, your iOS device frees up storage space automatically when you install or update apps, update the system, download music, take photos, record videos, etc. Your device only removes files that can be downloaded again or aren't needed anymore. If the automatic optimization doesn't free up enough space, you can also do it manually.
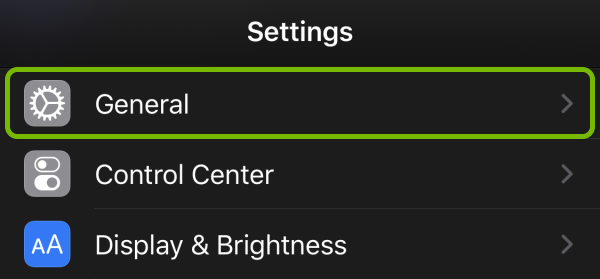
Open Settings on your device.
Select General.
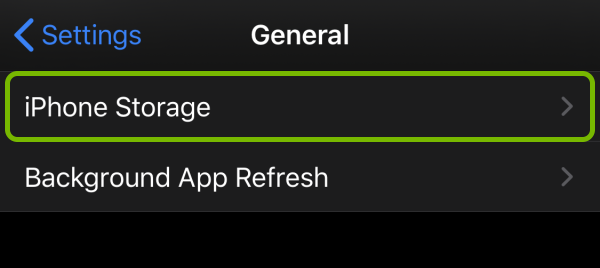
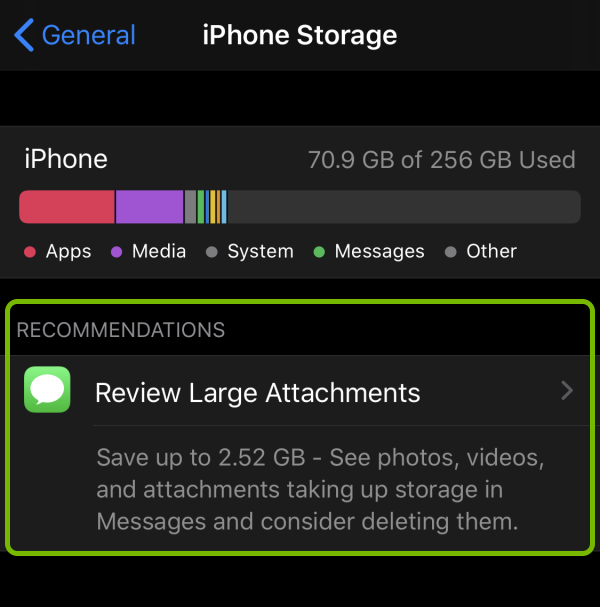
Then select [Device] Storage. For example, if on an iPad this will say 'iPad Storage'
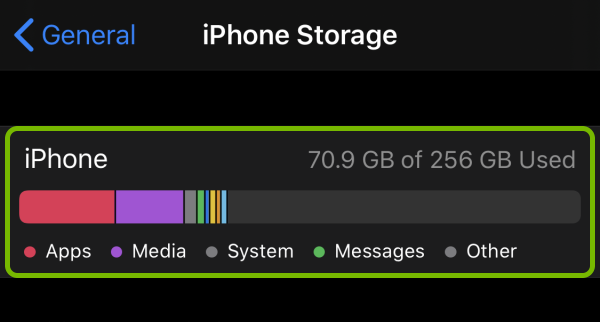
At the top you'll see an overview of the used and available space on your device. It will show you how much space is used up out of the whole total and how it is divided between the different types of data. This can give you an estimate of how much space you can free up and what type of data you need to review.
Below the overview you'll see Recommendations on how to free up space. These recommendations show up based on how you use your device, more specifically the preferences set on it and the type of data taking up the storage space. Go through these recommendations and apply the ones you think would help you the most.
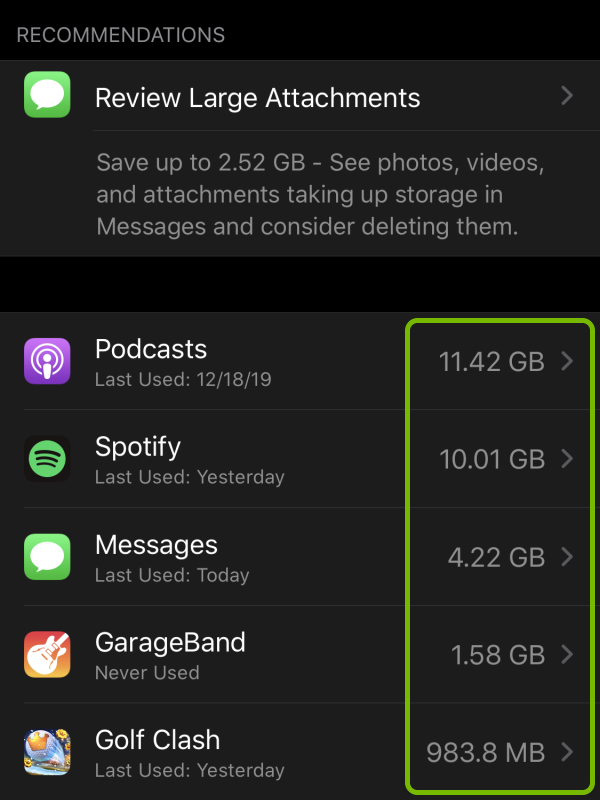
Below the Recommendations you'll see a list of all the apps installed on your device and the amount of space each one uses. The list is sorted in descending order with the apps taking up the most space at the top. Each app stores different types of data and offers different ways to free up storage.
Most apps you select in this list will show you the amount of space the app itself uses and the amount of space your personal preferences and downloaded or created files use.
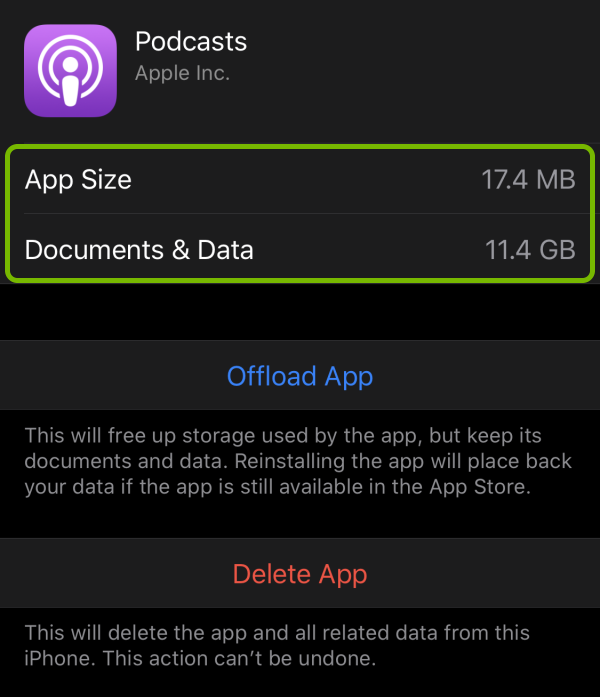
Most apps, will also give you two options to remove them:
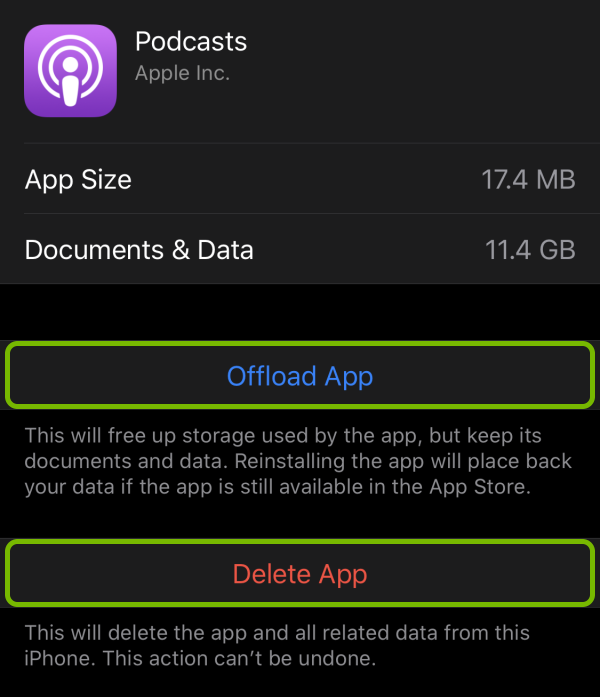
Offload App – This option removes only the app and keeps your personal preferences and files.
Delete App – This option removes the app and your personal preferences and files with it.
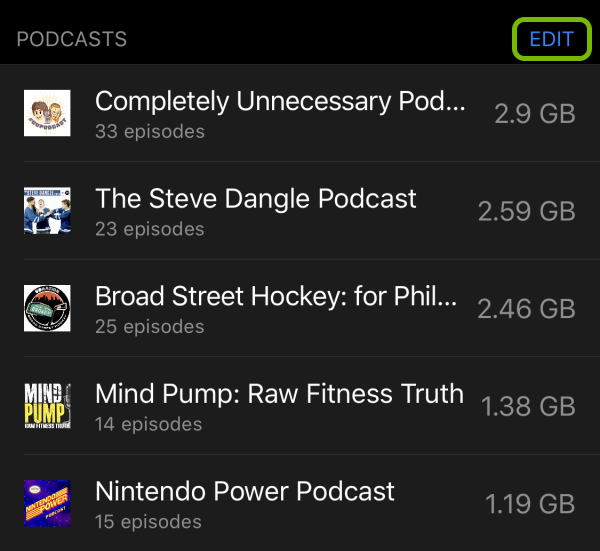
If you scroll down, you may see a list of series of files that you can delete, like the Podcasts app shows below. Tap Edit in the top left of the list if you want to delete any.
To delete files one by one instead of deleting them in batches, you may need to open the app itself from the main screen of your device and delete them from there. Each app offers different ways of managing its related files.
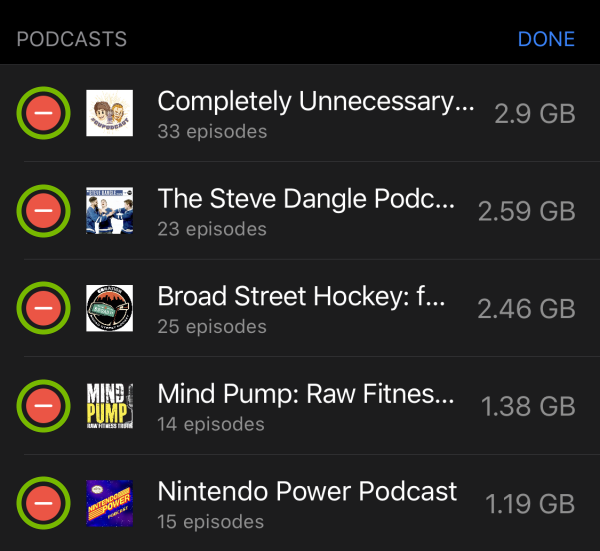
Tap the red minus sign to the left of a series of files you want to delete.
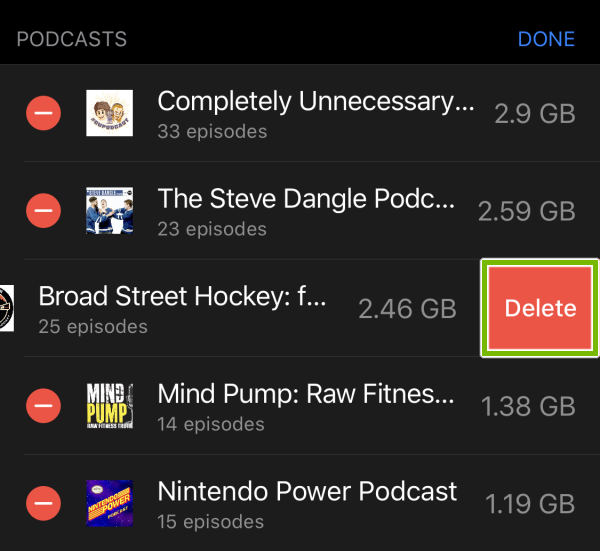
Then tap Delete.
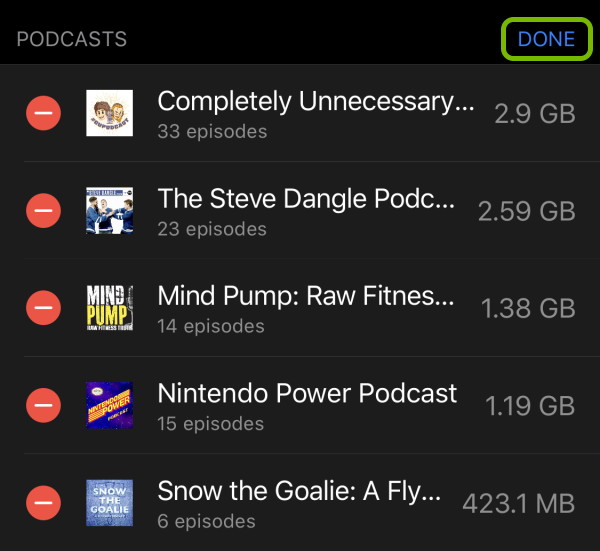
Once you're done deleting files from this app, tap Done in the top left of the list.
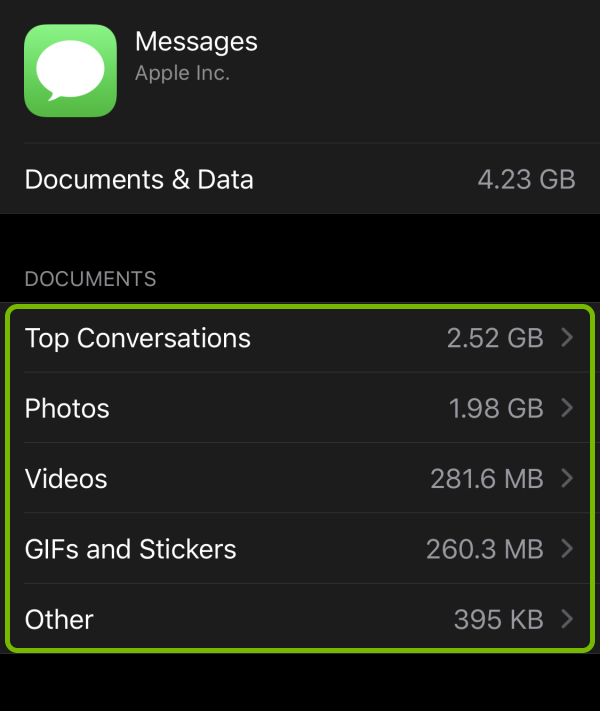
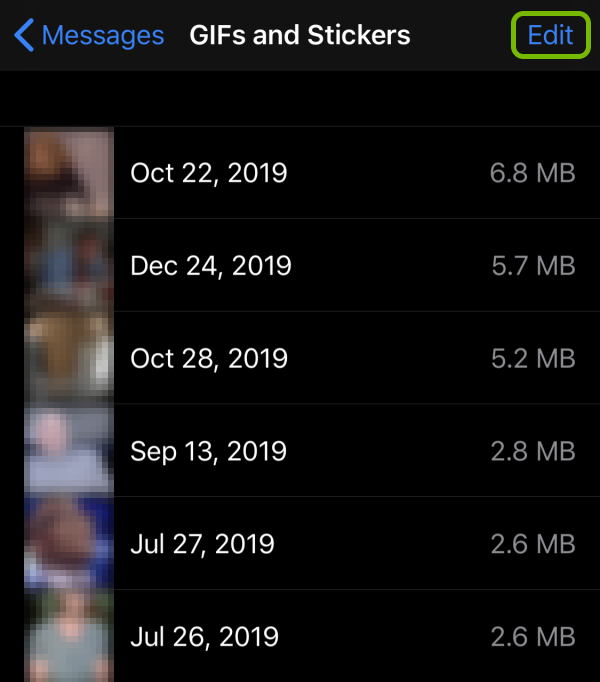
Other apps, like the Messages app, will list the types of files you can delete from them directly from here, the storage options of the device. Tap each of these categories to explore the files.
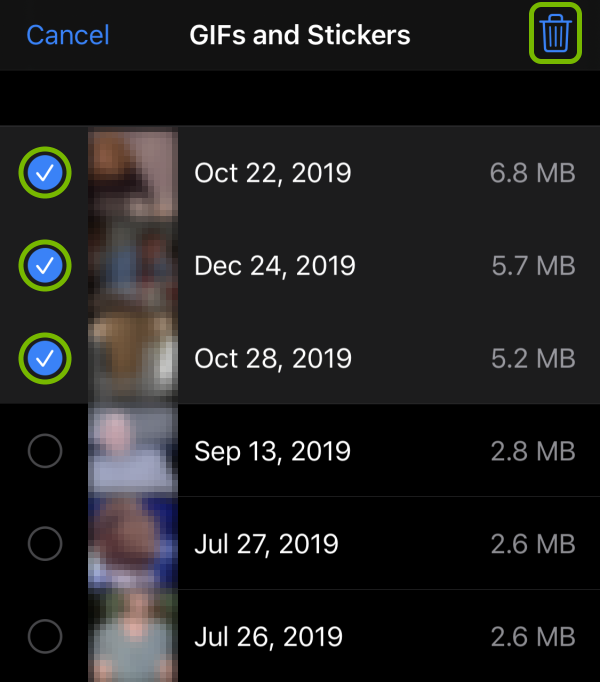
Tap Edit in the top left of the list if you want to delete any files.
Put a checkmark next to each file you want to delete then tap the trash can in the top right to delete them.
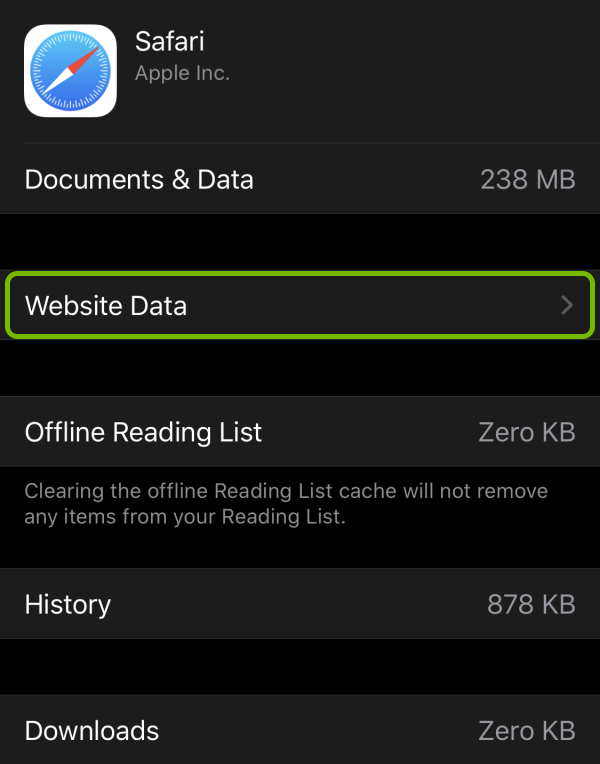
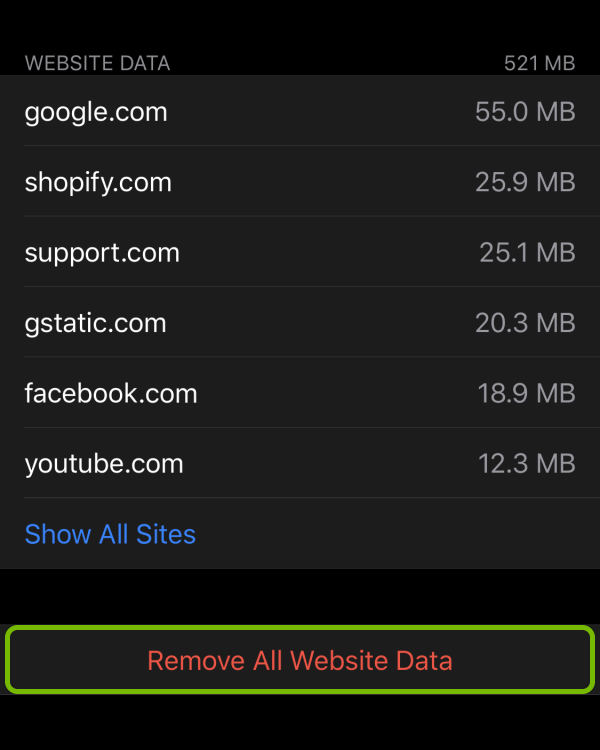
For the Safari browser, you can clean the temporary files if you tap Website Data.
Tap Remove All Website Data at the bottom of the list.
3. Review and Free Up Storage Space in iCloud
iCloud is an online storage service that allows you to safely and securely store or back up your personal files. Choose the content you want to store online and it will upload the files automatically and synchronize them later on whenever you make changes on your iPhone, iPad or iPod Touch.
You have up to 5 GB of free storage in iCloud and you can upgrade to a larger storage plan for a premium.
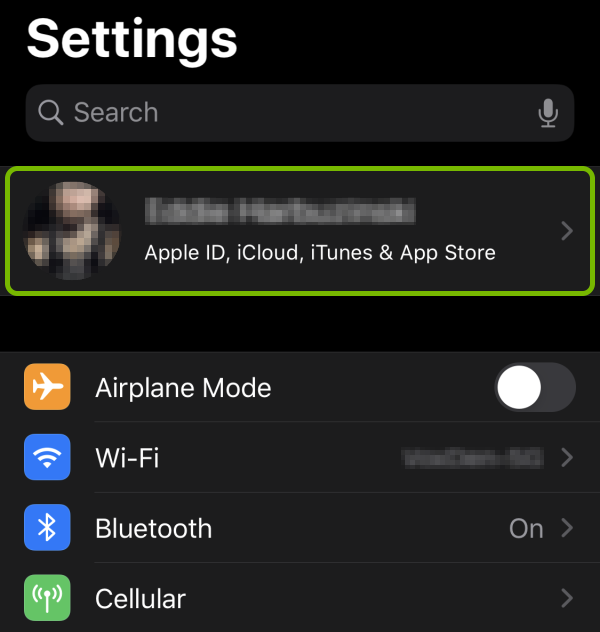
Open Settings on your device.
Select your Apple ID.
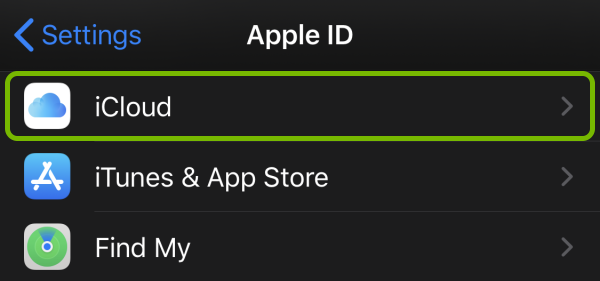
Then select iCloud.
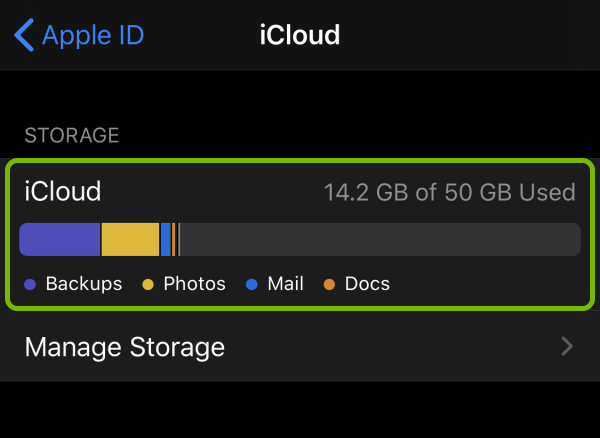
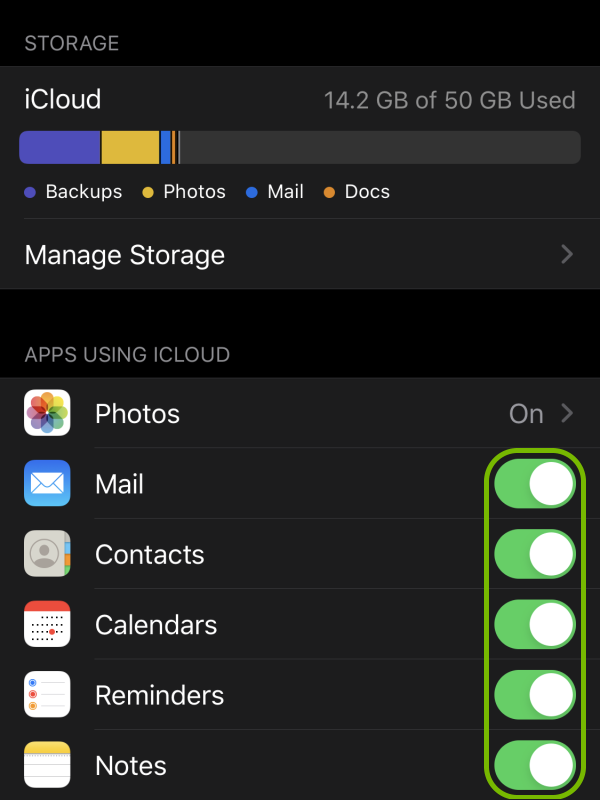
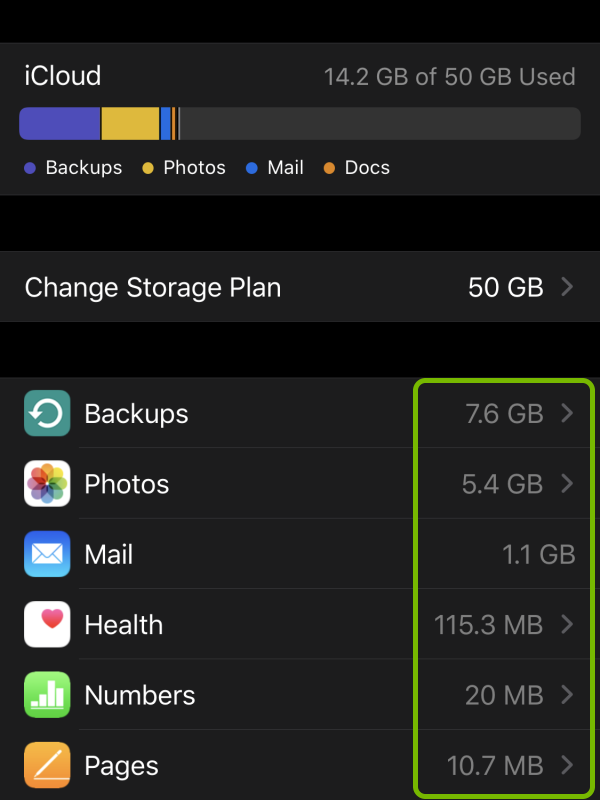
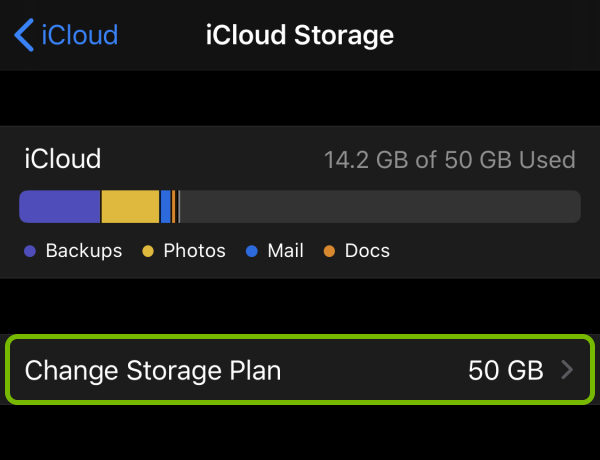
At the top you'll see an overview of the used and available space in your iCloud online storage. It will show you how much space is used up out of the whole total and how it is divided between the different types of data. This can give you an estimate of how much space you have available to upload data from your iOS devices to iCloud or how much space you can free up in your iCloud and what type of data you need to review.
Below you will see a list of apps that are uploading your data to iCloud. You can turn them on or off with the toggle switches next to their names. When it comes to saving up space in iCloud, you can turn some features off to leave more space for others.
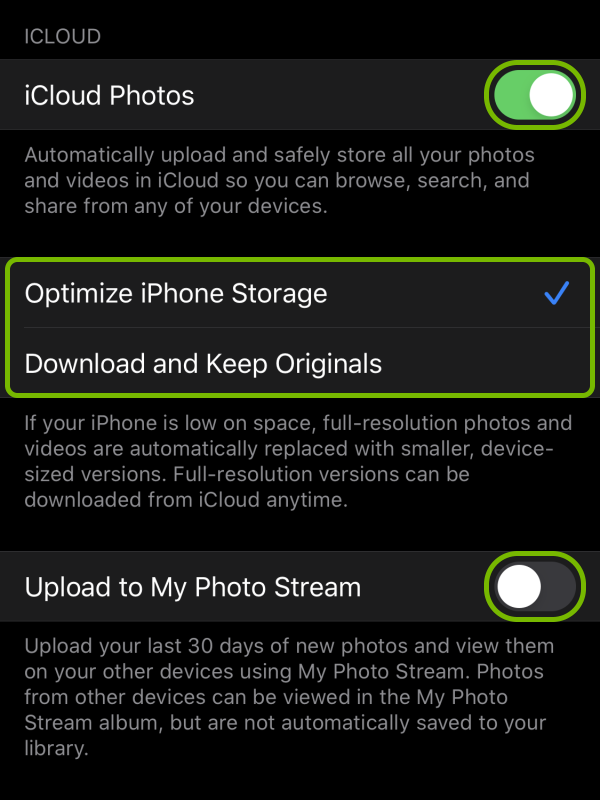
The Photos app has more configuration options then other apps when it comes to how it uploads data to iCloud:
First, choose whether you want to upload your photos and videos to iCloud. Turn the feature on or off with the toggle switch next to iCloud Photos.
Then select Optimize [Device] Storage to free up storage space on your iOS device by only keeping low quality copies of your photos and videos on your device and uploading the originals to your iCloud. This frees up space on your device and increases space usage in your iCloud.
You can also choose whether you want to upload your last 30 day photos to My Photo Stream to view them on your other devices. This doesn't free up space on your device but increases the space usage in your iCloud.
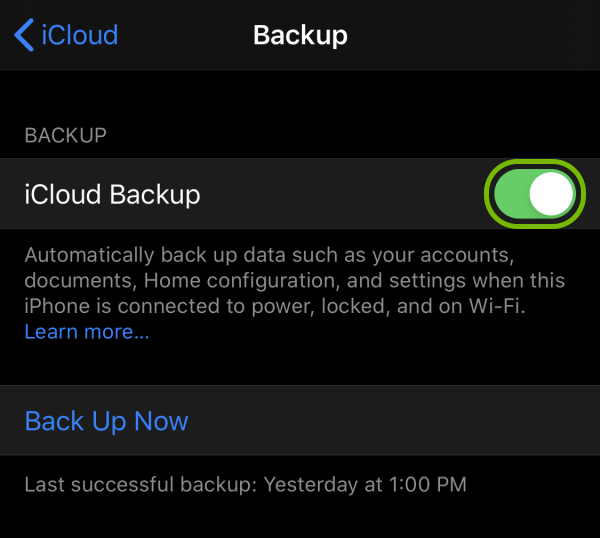
The iCloud Backup feature is also different than the rest as you have to go into it first, then use the toggle switch to turn it on or off. Once again, to save space in iCloud for other data, you can turn off iCloud Backup.
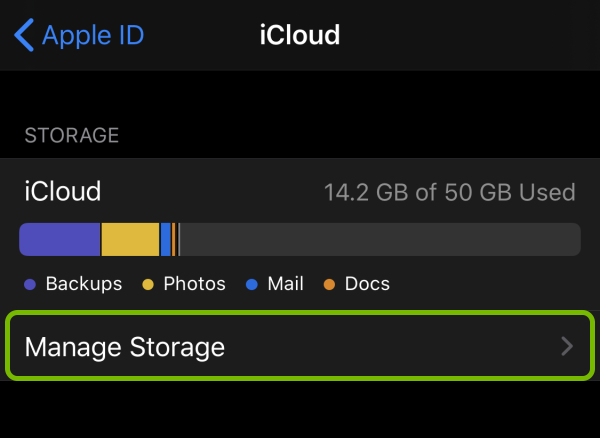
To further free up space in iCloud, select Manage Storage.
At the top you'll see the same overview of your iCloud online storage. Below it you'll see a list of all the apps that are storing data in iCloud and the amount of space each one uses. The list is sorted in descending order with the apps taking up the most space at the top. Each app stores different types of data and offers different ways to free up storage.
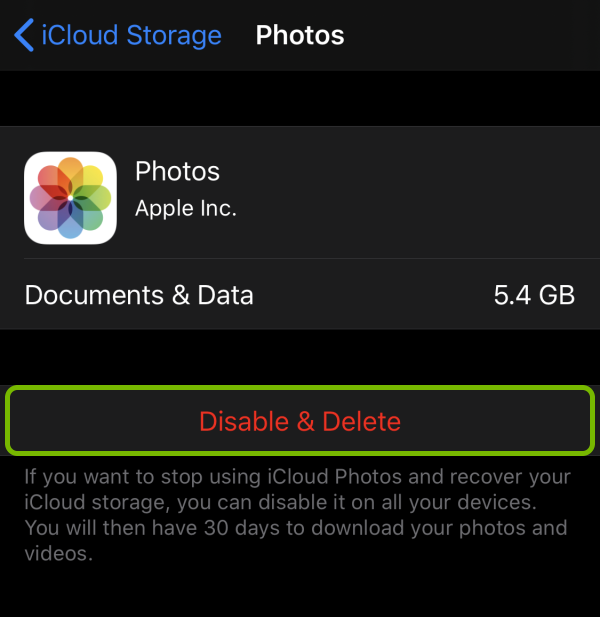
Most apps give you the option to turn on or off uploading data to iCloud. If you turn the feature off from here it will also delete all uploaded data and free up space in your iCloud storage. Tap Disable & Delete or Turn Off and Delete if you want to free up the space used by the particular app in iCloud.
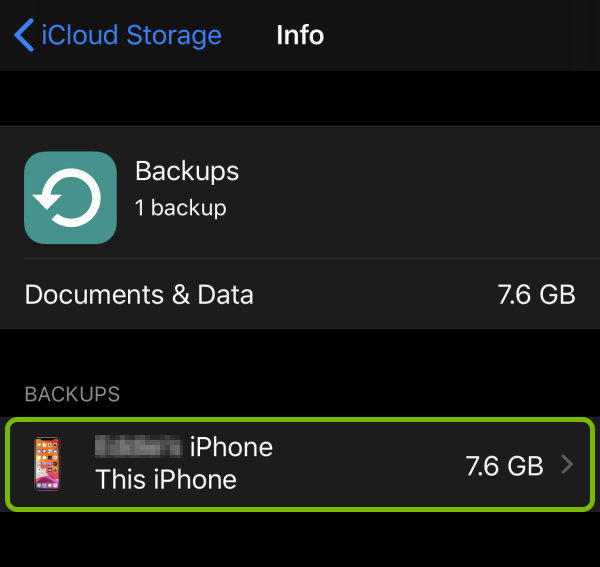
The Backups app has more configuration options then other apps. Select your device to manage the type of data is being backed up to iCloud.
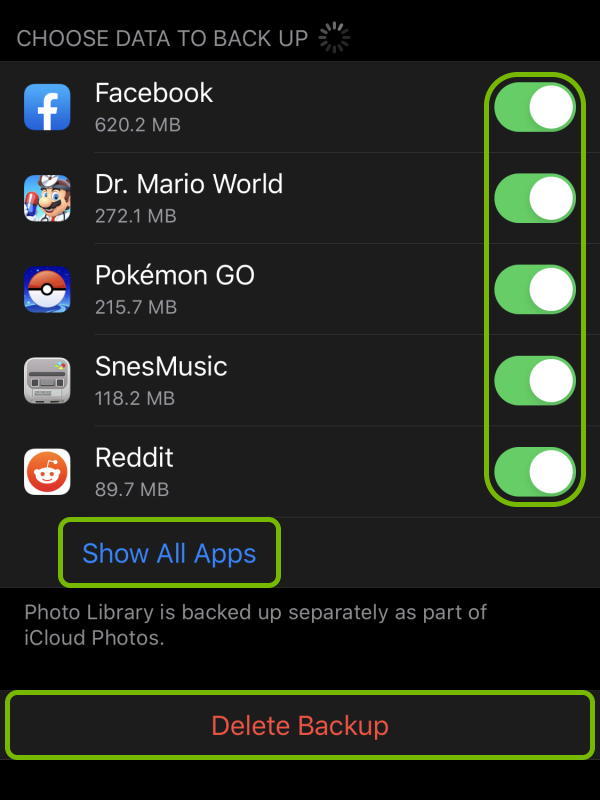
Configure what type of data you want to back up to iCloud:
You can turn on or off which apps should be backed up in iCloud with the toggle switches next to their names. When it comes to saving up space in iCloud, you can turn some apps off to leave more space for others.
Tap Show All Apps to show the entire list of apps that can be backed up into iCloud.
Tap Delete Backup if you want to free up all the space the backups are taking up in iCloud.
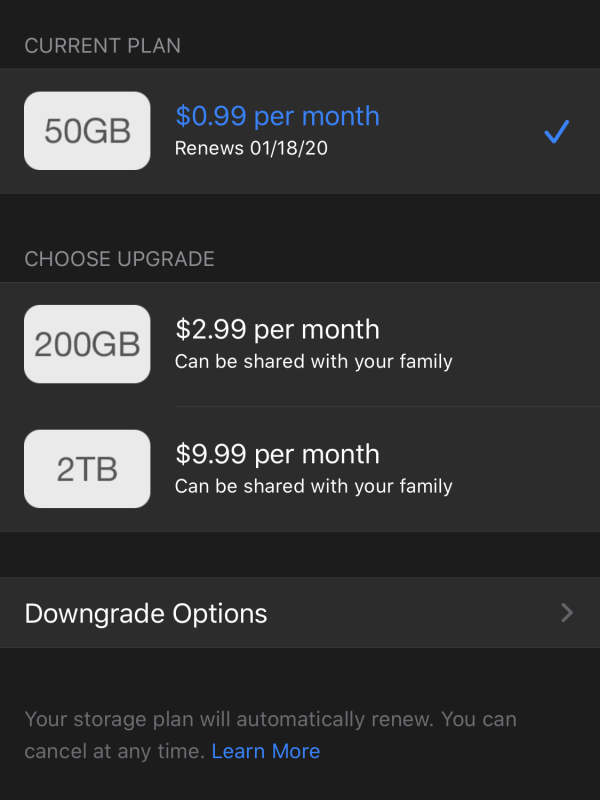
Select Change Storage Plan to explore what options you have to increase or decrease your iCloud storage space limit.
Select a storage plan that works best for you and your devices. If you choose to switch plans, you can make the purchase directly from your device and it will immediately update iCloud's storage space limit.
4. Use Other Cloud Storage Services
If you're running out of free space on your Apple device and you've used up all your free iCloud storage or you simply want to try an alternative, there are other cloud storage services you can sign up for.
Dropbox
Cloud storage, file synchronization, personal cloud, and client software.
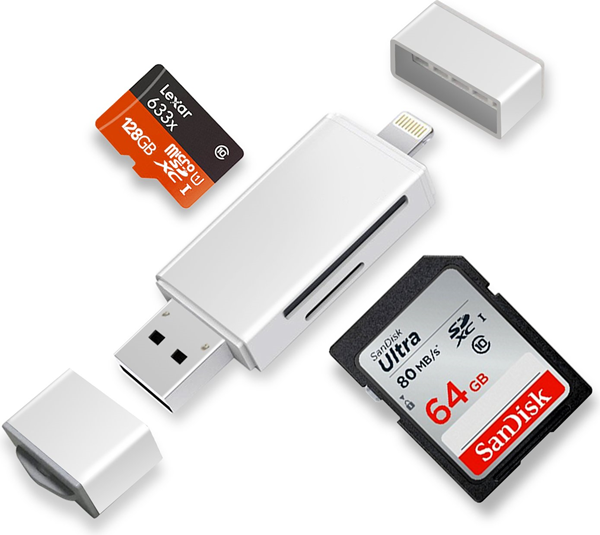
At first, iOS devices like iPhones and iPads couldn't connect to any external devices. Now, providers have managed to create storage options that utilize your Lightning Port. Keep in mind while the storage device is connected to the Lightning Port, you cannot use that port.
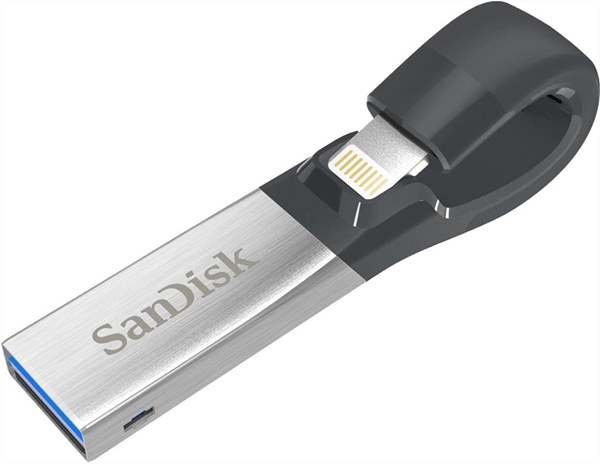
Lightning Flash Drives
A Lightning flash drive normally has one side for the Lightning port and the other for a USB port to connect to your computer.
To use your Lightning flash drive, connect it to your iOS device's Lightning (charge) port.
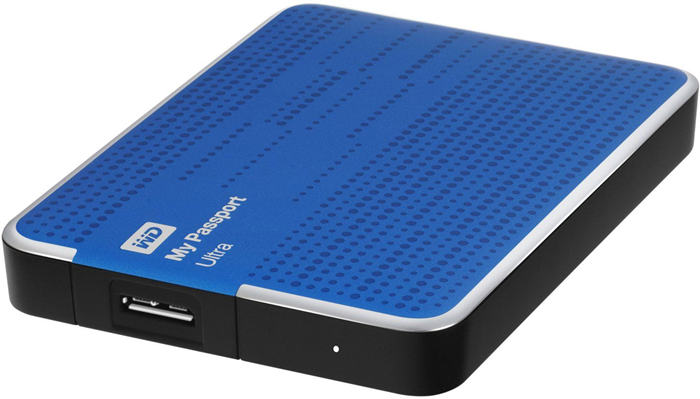
External Hard Drive
External hard drives typically offer the largest amount of storage space for the money, and easily connect to your device via a USB to Lightning port adapter.
There are both portable and larger form factor external drives on the market. The difference is not only in their size, but larger external hard drives usually require external power, while portable drives only require a USB connection. Keep this in mind if you would like your external drive to be portable.
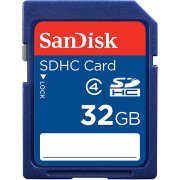
SD or Micro SD Card
Your iOS device will need an adapter in order to access a SD or Micro SD card slot. While this type of storage does not typically afford the same amount of space as the other options listed, its ultra-compact form factor can still be very desirable for removable storage.
To use this type of storage, simply insert the SD card into the available slot.
The card itself can only be inserted into the slot in one way. These card slots are typically spring-loaded, and the card should click into and out of place.
.png)