There comes a time in every computer user's life that they want to get more speed or space from their PC. Using built in Windows 10 tools you can free resources such as RAM and hard drive space. Adjusting various settings can improve battery life and performance without buying any extra tools or software.
Tools You'll Need:
A working Windows 10 computer
-->
Supplies You'll Need:
Zip ties
Any other consumable supplies
Comment out supplies section if no supplies are necessary
-->
Before You Begin:
You must have access to a computer with iTunes installed.
You must have that thing for the other thing so you can do the thing.
Each individual prereq should have its own box like this. Not all will contain multiple links.
Comment out prerequisites section if no prereqs are necessary
-->
2. Improve PC Performance by Saving Space
Check Your Available Storage and Clean Your Temporary Files
Select the Start menu.
Select the Settings button on the left side of the start menu.
Select System.
Select Storage on the left, then your Drive on the right.
Make note of the free space available. Windows usually needs about 2 GB to function, and 5-10 GB available to apply updates properly.
Select Temporary files.
Windows will scan your drive, and locate any obvious temporary files. Select all items in the list, then select Remove files.
These files are all safe to delete; they are temporary files and will be safely re-created only if needed.
Clean Up Your Programs By Removing Those You Don't Need
You may need to remove an app because you need the space or simply don't need it anymore. The following steps show you how to easily remove an app.
Select the Start menu.
Select the Settings button on the left side of the start menu.
Select Apps.
Select Apps & features on the left.
Select an app you want to uninstall, then select Uninstall.
Carefully read any prompts in case there are special instructions. Proceed until the application is removed.
Some applications may require that you reboot.
Disk Cleanup
Click the Start menu, and search for Disk Cleanup. Click Disk Cleanup from the list above.
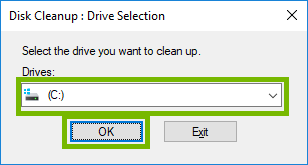
Select the drive you would like to cleanup, the default is (C:).
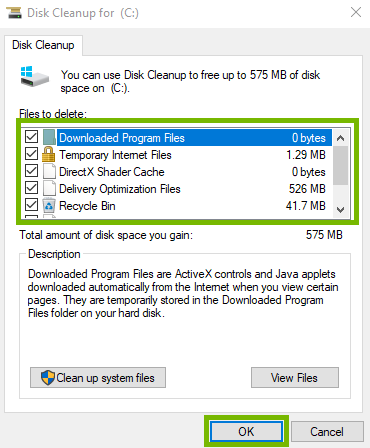
Select the items you'd like to clean up from the list at top, then click OK at the the bottom.
You will be reminded that the files will be permanently deleted. If you are sure, click Delete Files.
3. Free Resources on Your PC
Close Unused ProgramsClosing Unused programs will give your computer more resources to use elsewhere.
Press the CTRL + ALT + DEL keys on your keyboard at the same time.
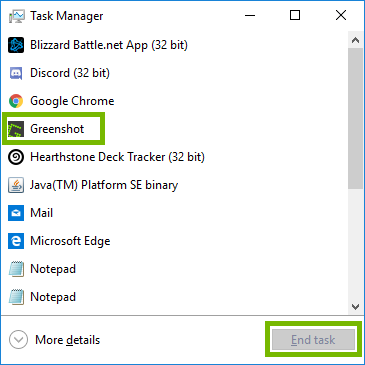
Choose Task Manager from the screen that comes up.
You will see a list of programs that are open. Choose a program you are not using, and click on End Task. Repeat as needed.
Close Browser Tabs
Closing excess tabs in your browser can free up system resources.
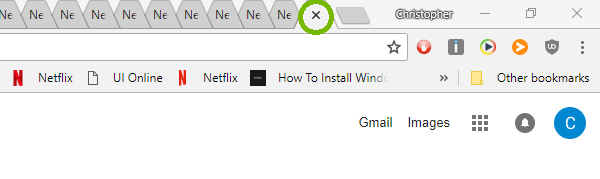
On each tab there is an "X" to click on. Doing so will close the current tab.
Adjust Your Visual Settings
Adjusting your visual settings can free up a great deal of resources. These settings use RAM and your system's graphical capability to make your desktop and windows more pleasant to look at. Changing them may make them ugly or boring, but don't worry you can change them back at any time.
Select the Start menu, search for Performance. Then, select Adjust the appearance and performance of Windows from the menu.
Select Adjust for best performance at the top, then click OK at the bottom.
4. Battery Life Tips for Laptops
Operating your PC in low temperatures can cause a shorter battery life for that use. Doing so does not cause damage.
Operating, charging, or storing your PC in high temperatures, such as in your car in a parking lot, can cause damage to your PC's battery, decreasing the charge it will hold long-term. This damage is not reversible, and would require the battery to be replaced.
Here are a few tips to help extend the life of your battery of your laptop.
When not in use, unplug unused peripherals(ie thumb drives, external disc drives)
Keep the computer cool when in use.
Keep the computer out of extreme heat/cold when not in use.
Temperature When Using Your PC
Like most electronic equipment and most batteries, your PC and its battery does not function well in extreme heat or extreme cold.
It is generally recommended that an ideal operating temperature between 50°F and 105°F (10°C and 40°C).
If your PC is too hot, the battery will generally not charge to full; it will charge to around 80% and stop, to avoid damaging the battery.
If possible, avoid leaving your PC in direct sunlight on warmer days. The combination of the warm ambient temperature and direct sunlight can bring your PC's temperature up well beyond the recommended range very quickly.
Temperature When Storing Your PC
Again, as with most electronics and batteries, the way your PC is stored can affect its battery life.
It is generally recommended that an ideal storing temperature between -4°F and 113°F (-20°C and 45°C).
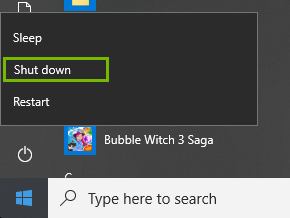
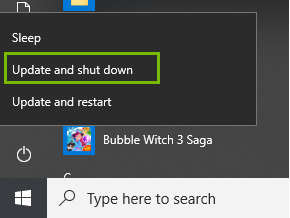
If you're storing your PC for more than 12 hours, it is recommended to Shut Down your PC, rather than leave it in Stand By (just closing the lid).
To Shut Down your PC, select the Start Menu, then select the Power Symbol, then select Shutdown or Update and shut down.
If you intend to store your PC for longer than a week, it's best to bring the battery to between 40% and 60% charge before turning it off for storage. Do not fully charge, or discharge, the battery before you store your PC.
5. Prevent Overheating and Clean Your PC
HeatCPU's produce a lot of heat. They normally have a heat sink or fan over them to keep the heat from growing too high. If your CPU is overtaxed it may grow too hot for even a fan to dissipate the heat.
There are programs and utilities that let you monitor the heat of your CPU. If your CPU is overheating it can lead to sluggishness, a high usage of the CPU in task manager, or your system could shut down completely.
Cleaning
While laptops are pretty compact and difficult to clean, desktops will gather dust, cat hair, and any other particulates you may have in your house.
The dirtier your computer, the worse it performs. Dust traps heat inside your components, ultimately damaging them if they are never cleaned.
If you have a desktop you can open it and spray the dust out using compressed air.
6. Toggle Fast Start Up
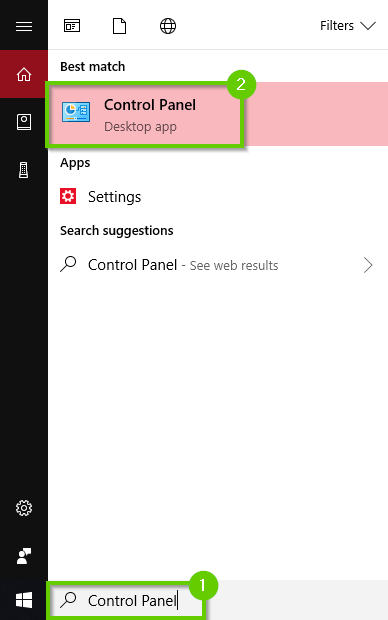
In the search bar, type "Control Panel" and select it.
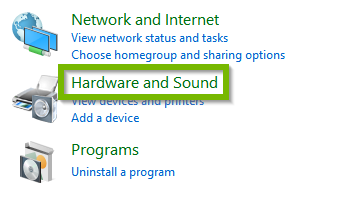
Select Hardware and Sound.
Select Power Options.
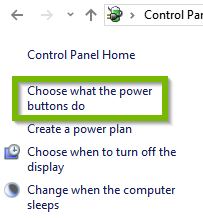
Select Choose What the Power Buttons Do.
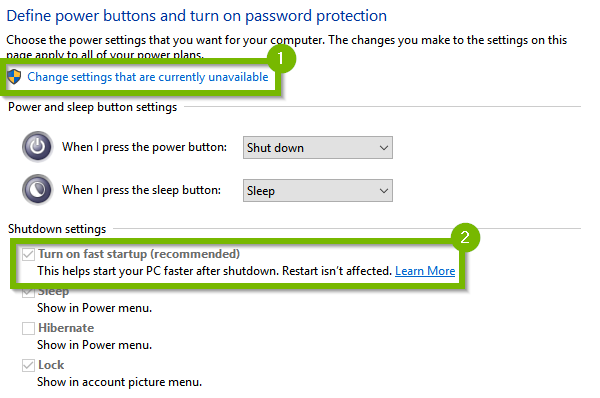
If prompted, click "Change settings that are currently unavailable", then under Shutdown settings, find Turn on fast startup (recommended). If this setting is turned off, select the check box. If it’s turned on, clear the check box.
7. Disable Unneeded Startup Programs
After checking on what your computer is doing during normal use, you may have spotted some things actively running that you don't use or need running 100% of the time. Most times, programs are set to be launched and run as soon as your machine boots up. This process will help you disable unnecessary programs from starting up with your computer.
Press the CTRL + ALT + DEL keys on your keyboard at the same time.
Select Task Manager.
Select More Details at the bottom.
Select the Startup tab at the top.
Look carefully through this list. If you see an item you do not want to startup whenever you turn on your computer, highlight it, and choose Disable at the bottom.
8. Check Memory Usage?
Your computer's performance can suffer if it is facing limitations caused by system memory (or RAM). Checking how much memory your computer has physically installed, and how much of that memory your system is using will help diagnose a potential memory issue that is affecting your system's performance.
In general, Windows 10 requires 2 GB of memory to work, but performance and stability will be limited. Windows 10 runs better with 4 GB. If you use a lot of programs at the same time, or very large programs (such as games), you may require more memory, such as 6 GB or 8 GB or more.
You can choose to use fewer programs, or add more memory to your computer if you find yourself regularly using up all available memory.
Press the CTRL + ALT + DEL keys on your keyboard at the same time.
Select Task Manager.
Select More Details at the bottom.
Select the Performance tab at the top, then select Memory on the left.
Look at the amount of memory you have on your computer, and how much is in use.
Total Memory
In the top-right corner, you'll see how much memory is physically installed in your computer.
Memory In Use
In the list at the bottom, you'll see how much is in use by Windows, and the programs you have open.
In general, you want 1GB to 2GB available while you have most of your regular programs open.
You can check this information when you have your normal programs open. Open a few programs you usually use, and return to this window. See if you're using more memory than you have; this indicates Windows is using some of your hard drive space as memory, which is very slow.
This is a physical part of your computer, not something you can download or modify through software. If you want to add more memory to your computer, contact the company you purchased your computer from, or a local technical support service.
Virtual Memory or Your Paging File
The paging file is a hidden file on your computer's hard drive that Windows 10 uses as memory, and acts as an overflow of the system memory that holds the data needed for applications currently running on your computer. Increasing the size of your paging file can help with speed issues.
In the search bar, type "Control Panel" and select it.
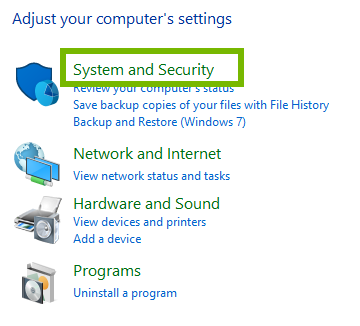
Select System and Security.
Select System.
Select AdvancedSystemSettings.
Under the Advanced panel select Settings within Performance.
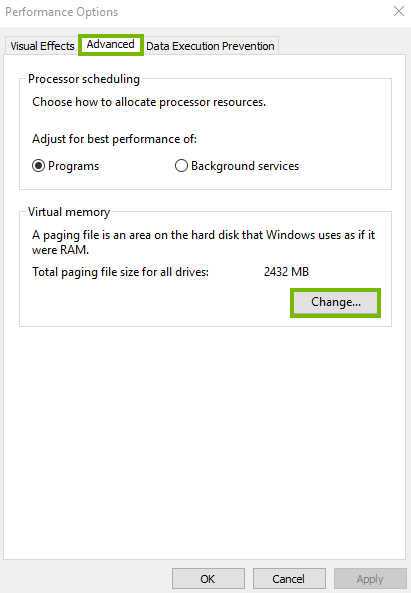
Select the Advanced tab and under Virtual Memory select Change.
To set your own Paging File size, clear the automatically manage paging file size for all drives selection.
Select Custom Size to set your own Virtual Memory limits. Click Set to finalize your sizes.
The minimum size of the Page file can be up to 1.5 times the amount of physical memory (RAM) you have installed. The maximum size can be 4 times the amount of the physical memory. For example, if your computer has 1GB of RAM, the minimum Page file size can be 1.5GB, and the maximum size of the file can be 4GB.
9. System Restore
Turning the system off while System Restore is running can cause corruption. If your device is battery-operated, connect it to a power outlet first as System Restore may take time and should not be interrupted.
System restore will remove any programs installed and settings made after the selected date.
Select the Start Menu, and type in rstrui. Select rstrui from the list.
System Restore will open. Select Next.
Select a date before the issue started, you may see more than 1 restore point. Select Next afterwards.
Confirm your restore point by selecting Finish.
A message warning you that once started, the system restore can't be stopped or undone. Select Yes to proceed.
Your system will take a few moments to ready the system restore.
Your screen will turn blue, and the system restore will begin.
It can take a long time, over an hour in some cases, for System Restore to complete.
Do not turn off or power down your computer during a System Restore. If you are using a laptop, make sure it is plugged into power so the battery does not run out during this process.
Your computer will reboot on its own when complete.
After returning to your Desktop, a message letting you the System Restore was successful is displayed. Select Close.
10. Repair Windows Image (DISM)
Make sure you are connected to the Internet before beginning these steps.
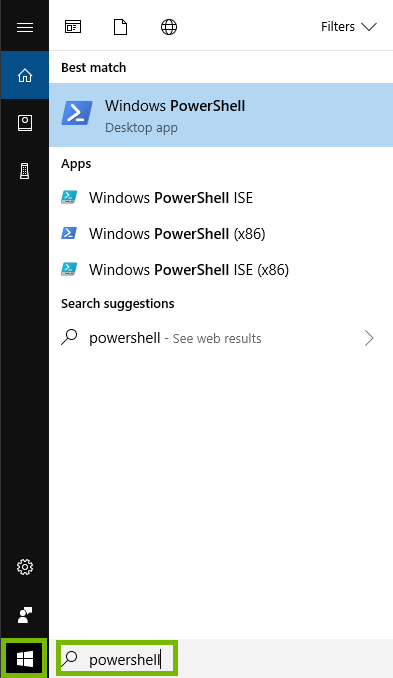
Choose the Start menu, and type PowerShell into the search.
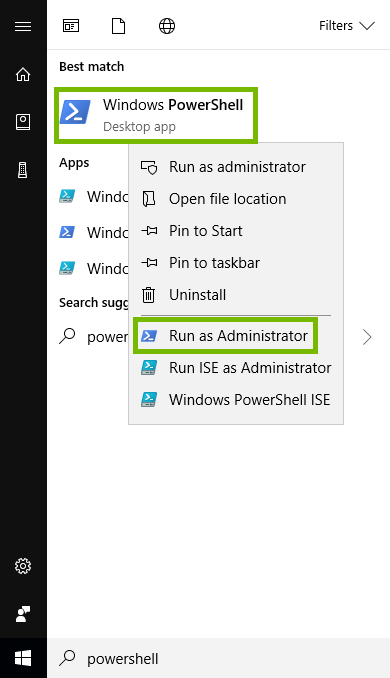
Using your right mouse button, right click on PowerShell in the list above. A special menu will open. Choose Run as Administrator.
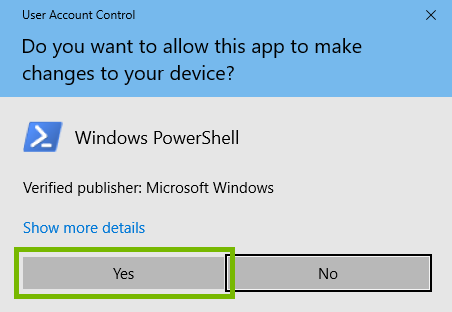
Windows will ask if PowerShell may make changes, click Yes.
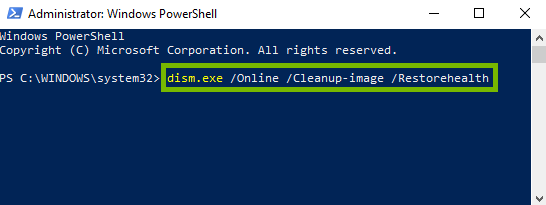
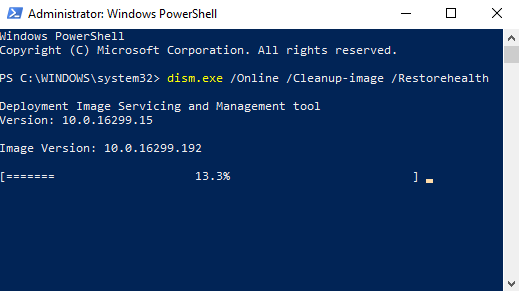
At the prompt, enter the following command, then press enter on your keyboard:
dism.exe /Online /Cleanup-image /Restorehealth
Windows will automatically go through every system file, make sure they are valid, and replace any corrupted files.
.png)