.png)
Authored by: Support.com Tech Pro Team
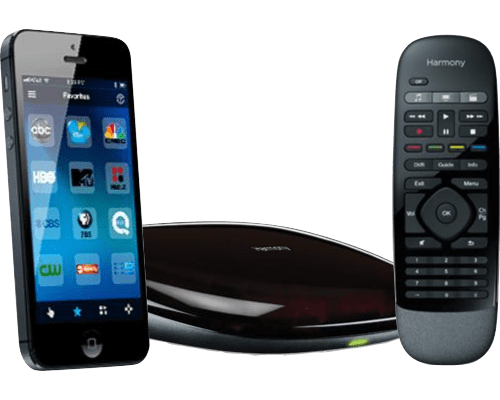
This guide will help you choose and install the appropriate software for your Logitech Harmony remote to program it to control your whole home entertainment system and beyond.
Tools You'll Need:

Logitech has made Harmony remotes for a very long time. Because of this, determining exactly what software you need can be daunting for some.
If you aren't sure which Harmony Remote you have, look at the back for the model number, and make sure it looks like the images shown.

The Harmony app is supported on most recently-released Harmony remotes. In many cases, if your Harmony remote has a separate hub, it will be supported by the Harmony app. Expand the list below to double check yours is listed.
Remotes supported by the Harmony App
Companion

You can use both the Harmony app on your smartphone or tablet, or the MyHarmony program on your desktop or laptop computer to program and control this remote.
Elite

You can use both the Harmony app on your smartphone or tablet, or the MyHarmony program on your desktop or laptop computer to program and control this remote.
Home Control
You can use both the Harmony app on your smartphone or tablet, or the MyHarmony program on your desktop or laptop computer to program and control this remote.
Home Hub

You can use both the Harmony app on your smartphone or tablet, or the MyHarmony program on your desktop or laptop computer to program and control this remote.
Hub
You can use both the Harmony app on your smartphone or tablet, or the MyHarmony program on your desktop or laptop computer to program and control this remote.
Pro

You can use both the Harmony app on your smartphone or tablet, or the MyHarmony program on your desktop or laptop computer to program and control this remote.
Pro 2400

You can use both the Harmony app on your smartphone or tablet, or the MyHarmony program on your desktop or laptop computer to program and control this remote.
Smart Control
You can use both the Harmony app on your smartphone or tablet, or the MyHarmony program on your desktop or laptop computer to program and control this remote.
Ultimate

You can use both the Harmony app on your smartphone or tablet, or the MyHarmony program on your desktop or laptop computer to program and control this remote.
Ultimate Hub
You can use both the Harmony app on your smartphone or tablet, or the MyHarmony program on your desktop or laptop computer to program and control this remote.

Harmony Express is a newer smartphone or tablet app that currently only supports a single remote, the Harmony Express.
Remotes supported by the Harmony Express App
Logitech also offers the Harmony Express, which uses a special app and is only controllable through your Android or iOS Tablet.
Express

The MyHarmony Desktop program allows you to setup and control supported Harmony remotes from your computer, making it easier to search, pick, and customize how your remote behaves from the comfort of your desktop or laptop.
Remotes supported by the MyHarmony Desktop Program
The following remotes aren't supported by the mobile app, but you can still control and program these remotes using the MyHarmony desktop application on your Windows or Mac computer.
Companion
You can use both the Harmony app on your smartphone or tablet, or the MyHarmony program on your desktop or laptop computer to program and control this remote.
Elite
You can use both the Harmony app on your smartphone or tablet, or the MyHarmony program on your desktop or laptop computer to program and control this remote.
Home Control
You can use both the Harmony app on your smartphone or tablet, or the MyHarmony program on your desktop or laptop computer to program and control this remote.
Home Hub
You can use both the Harmony app on your smartphone or tablet, or the MyHarmony program on your desktop or laptop computer to program and control this remote.
Hub
You can use both the Harmony app on your smartphone or tablet, or the MyHarmony program on your desktop or laptop computer to program and control this remote.
Pro
You can use both the Harmony app on your smartphone or tablet, or the MyHarmony program on your desktop or laptop computer to program and control this remote.
Pro 2400
You can use both the Harmony app on your smartphone or tablet, or the MyHarmony program on your desktop or laptop computer to program and control this remote.
Smart Control
You can use both the Harmony app on your smartphone or tablet, or the MyHarmony program on your desktop or laptop computer to program and control this remote.
Ultimate
You can use both the Harmony app on your smartphone or tablet, or the MyHarmony program on your desktop or laptop computer to program and control this remote.
Ultimate Hub
You can use both the Harmony app on your smartphone or tablet, or the MyHarmony program on your desktop or laptop computer to program and control this remote.
200

300

350

600

650

665

700

950

One

Touch

Ultimate One

Because Harmony remotes have been made for such a long time, the Logitech Remote Software 7 is still offered and updated for use with older Harmony Remotes.
Remotes supported by the Logitech Remote Software 7 Program
The following remotes use an older desktop app for programming, called Remote Software v7, and can only be programmed using your Windows or Mac computer.
510

520

525

550

555

610

620

628

659

670

680

688

720

880

885
890

890 Pro

900

1000

1100

1100i
For XBox 360

Bluetooth is a short-range wireless communication method, and can be turned on and off easily because it does take battery power.
Select your Operating System below to find the quick way to enable Bluetooth on your device.

Windows


Apple macOS


Android
Every Android device is slightly different because of manufacturer and carrier customizations and launchers. While the icons and exact layout shown may be slightly different, they will be extremely similar.


Apple iOS


You will need a Wired or WiFi connection for your device setup to complete the next steps.
Select your Operating System below to find the quick way to make sure your device is online and ready.
Windows
Many Windows computers can connect using a Wired or WiFi connection, both will work.
Wired Connection

If you are using a wired connection, the icon will show on your toolbar that looks like a small screen next to an Ethernet cable, and pointing at it will show the name of the connection and the words "Internet access" indicating you are online.

WiFi Connection

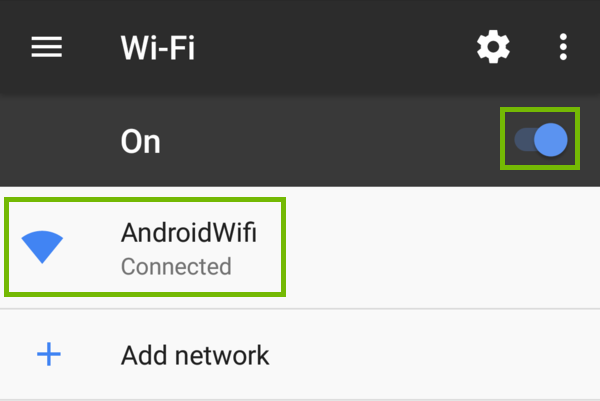
If you are using a WiFi connection, the icon will show on your toolbar that looks like arcs coming from a point, and pointing at it will show the name of the connection and the word "Internet access" indicating you are online.

Apple macOS
Many Apple Mac computers can connect using a Wired or WiFi connection, though some MacBooks do not have an Ethernet port and rely on WiFi. Both will work.


Android
Depending on what device (Smartphone or Tablet) and which generation you have, the menu theme and options might look slightly different on your screen. However, the steps should be similar across all Android devices and generations.


Apple iOS
Depending on your exact device (Smartphone or Tablet), and which generation you have, the menu theme and options might look slightly different on your screen. However, the steps should be similar across all Apple iOS devices and generations.


The Harmony app to program and control your Logitech Harmony remote system is available on most devices.
Select your device below for details on setting up the app on your Operating System.
Android


Apple iOS


You will need a Wired or WiFi connection for your device setup to complete the next steps.
Select your Operating System below to find the quick way to make sure your device is online and ready.
Windows
Many Windows computers can connect using a Wired or WiFi connection, both will work.
Wired Connection
If you are using a wired connection, the icon will show on your toolbar that looks like a small screen next to an Ethernet cable, and pointing at it will show the name of the connection and the words "Internet access" indicating you are online.
WiFi Connection
If you are using a WiFi connection, the icon will show on your toolbar that looks like arcs coming from a point, and pointing at it will show the name of the connection and the word "Internet access" indicating you are online.
Apple macOS
Many Apple Mac computers can connect using a Wired or WiFi connection, though some MacBooks do not have an Ethernet port and rely on WiFi. Both will work.
Android
Depending on what device (Smartphone or Tablet) and which generation you have, the menu theme and options might look slightly different on your screen. However, the steps should be similar across all Android devices and generations.
Apple iOS
Depending on your exact device (Smartphone or Tablet), and which generation you have, the menu theme and options might look slightly different on your screen. However, the steps should be similar across all Apple iOS devices and generations.
The MyHarmony Desktop program allows you to control your Logitech Harmony remote system is available on most computers.
Select your device below for details on setting up the app on your Operating System.
Windows


Apple macOS


Bluetooth is a short-range wireless communication method, and can be turned on and off easily because it does take battery power.
Select your Operating System below to find the quick way to enable Bluetooth on your device.
Windows
Apple macOS
Android
Every Android device is slightly different because of manufacturer and carrier customizations and launchers. While the icons and exact layout shown may be slightly different, they will be extremely similar.
Apple iOS
You will need a Wired or WiFi connection for your device setup to complete the next steps.
Select your Operating System below to find the quick way to make sure your device is online and ready.
Windows
Many Windows computers can connect using a Wired or WiFi connection, both will work.
Wired Connection
If you are using a wired connection, the icon will show on your toolbar that looks like a small screen next to an Ethernet cable, and pointing at it will show the name of the connection and the words "Internet access" indicating you are online.
WiFi Connection
If you are using a WiFi connection, the icon will show on your toolbar that looks like arcs coming from a point, and pointing at it will show the name of the connection and the word "Internet access" indicating you are online.
Apple macOS
Many Apple Mac computers can connect using a Wired or WiFi connection, though some MacBooks do not have an Ethernet port and rely on WiFi. Both will work.
Android
Depending on what device (Smartphone or Tablet) and which generation you have, the menu theme and options might look slightly different on your screen. However, the steps should be similar across all Android devices and generations.
Apple iOS
Depending on your exact device (Smartphone or Tablet), and which generation you have, the menu theme and options might look slightly different on your screen. However, the steps should be similar across all Apple iOS devices and generations.
The Harmony Express app to program and control your Logitech Harmony Express remote system is available on most mobile devices.
Select your device below for details on setting up the app on your Operating System.
Android

Apple iOS


You will need a Wired or WiFi connection for your device setup to complete the next steps.
Select your Operating System below to find the quick way to make sure your device is online and ready.
Windows
Many Windows computers can connect using a Wired or WiFi connection, both will work.
Wired Connection
If you are using a wired connection, the icon will show on your toolbar that looks like a small screen next to an Ethernet cable, and pointing at it will show the name of the connection and the words "Internet access" indicating you are online.
WiFi Connection
If you are using a WiFi connection, the icon will show on your toolbar that looks like arcs coming from a point, and pointing at it will show the name of the connection and the word "Internet access" indicating you are online.
Apple macOS
Many Apple Mac computers can connect using a Wired or WiFi connection, though some MacBooks do not have an Ethernet port and rely on WiFi. Both will work.
Android
Depending on what device (Smartphone or Tablet) and which generation you have, the menu theme and options might look slightly different on your screen. However, the steps should be similar across all Android devices and generations.
Apple iOS
Depending on your exact device (Smartphone or Tablet), and which generation you have, the menu theme and options might look slightly different on your screen. However, the steps should be similar across all Apple iOS devices and generations.
The Logitech Remote Software 7 program allows you to control your Logitech Harmony remote system is available on most computers.
Select your device below for details on setting up the app on your Operating System.
Windows


Apple macOS


Support.com is committed to your privacy
We do not share or sell your data to third parties. We do use cookies and other third-party technologies to improve our site and services. The California Consumer Privacy Act (CCPA) gives you the ability to opt out of the use of cookies, third-party technologies and/or the future sale of your data. Do not sell my personal information.

Support.com is committed to your privacy
Read our Privacy Policy for a clear explanation of how we collect, use, disclose and store your information
