.png)
Authored by: Support.com Tech Pro Team
There's been a lot of work at Apple in the last one year. Apple has again updated its product list. MacOS 10.15 (Catalina) was released on 7 October 2019. The newly released update, macOS Catalina, is available to users who are running OS X 10.9 (Mavericks) or later on their Mac.
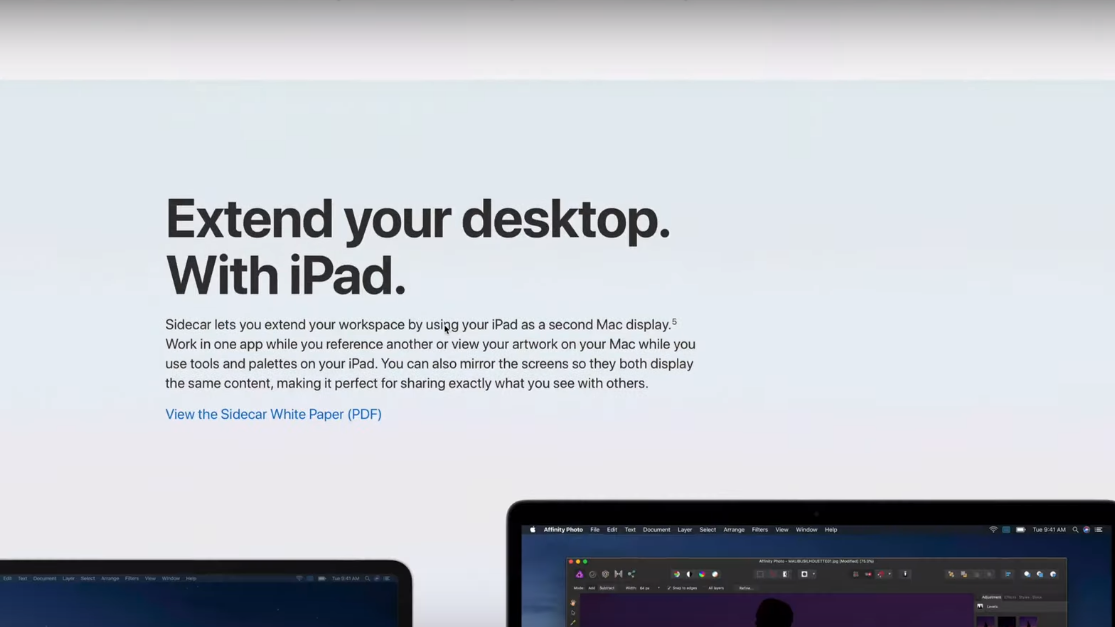
With this latest iteration, Apple replaces macOS Mojave sporting newly updated features. Users can now run custom iPad applications available on the app store (mac store) and the iPad as a secondary display.
Also, the new OS, Catalina, features Apple Arcade, improved security, and privacy, better accessibility for the disabled, more applications, Find My Mac feature, and many more.
However, one problem users tend to face often with new Operating System releases is how to download and install them. Updating and installing new Operating Systems could prove to be a daunting task. In this guide we'll be going through how to install macOS Catalina step by step.
Not all Macs can run Catalina, so you must check if yours is eligible. Luckily, Catalina's hardware requirements are the same as Mojave, so if your Mac is already running Mojave, then you can Catalina without any issues. Macs running macOS Mavericks (or newer) can successfully run Catalina so long as it meets the hardware requirements. Below is the list of Macs that meet Catalina's hardware requirements:


Before you download macOS Catalina, we recommended the following to ensure the upgrade process goes as smoothly as possible:
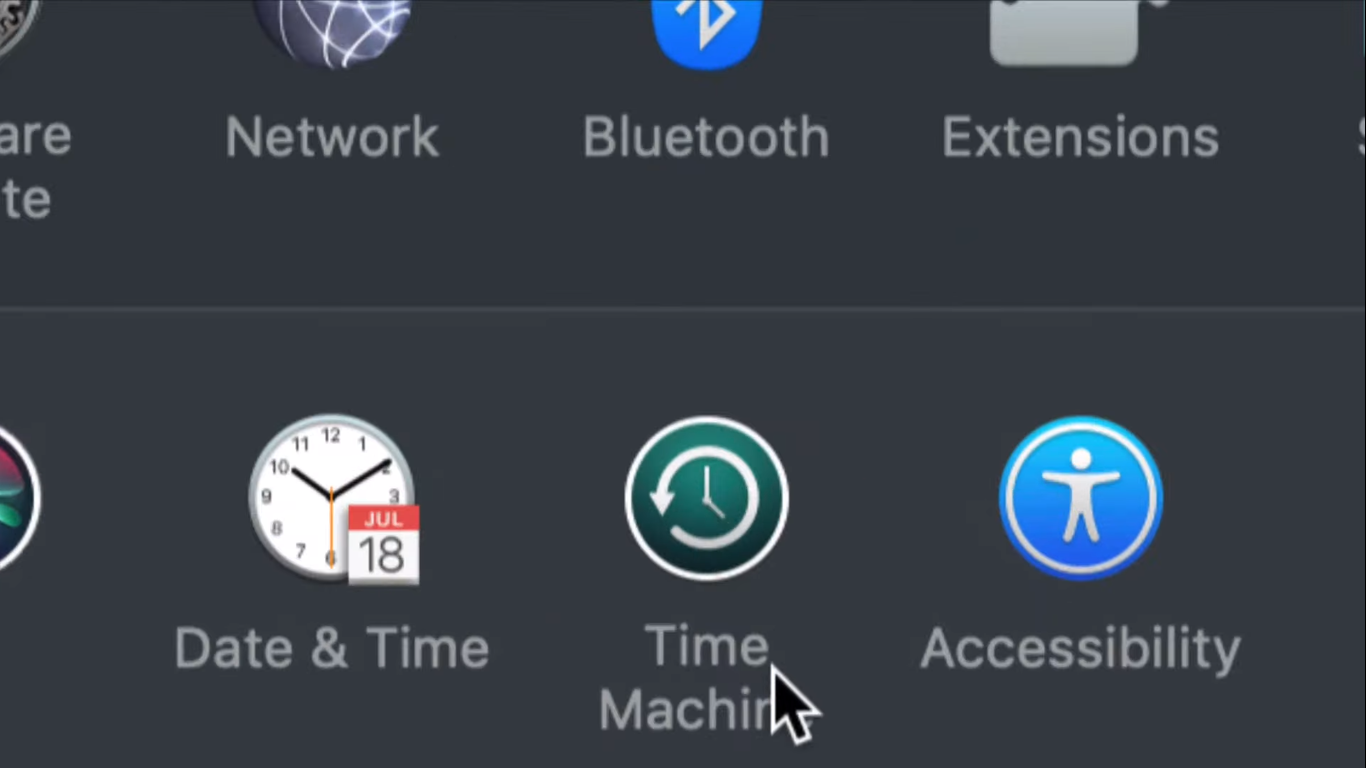
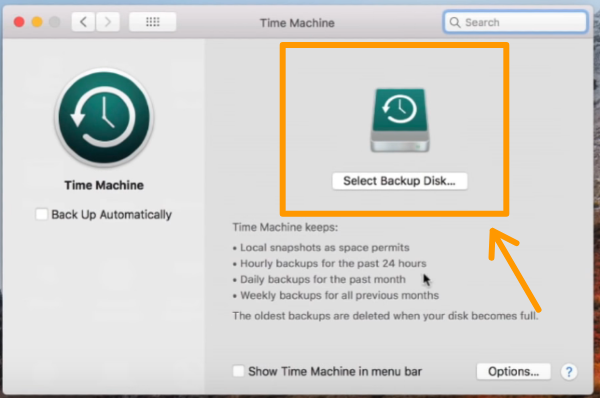
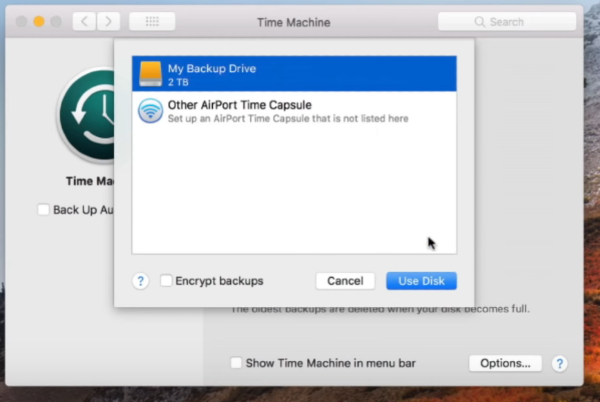
Make a backup of your Mac's drive, which you can restore if anything goes wrong. To do this backup, you'll need to access the built-in Time Machine backup utility on your Mac. To do this connect the external drive to your Mac and;

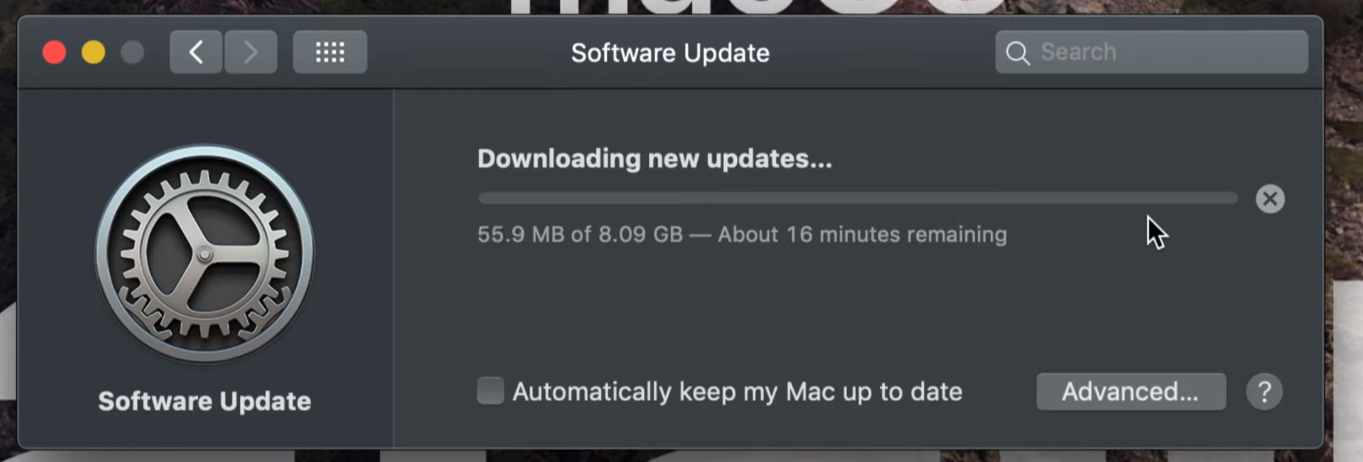
The update itself is a large file, so it will take some time to fully download and additional time will be required to complete the upgrade process. As such, make sure your Mac is able to be connected to the internet and remain connected. Do not perform this upgrade while connected to a public WiFi network. Also, ensure your Mac is connected to AC power to make sure it is able to stay on throughout the download and installation process.
Your Apple ID is the account that's used to access Apple services like the App Store, Apple Music, iCloud, iMessage, FaceTime, and more. All these Apple services can be accessed with a single Apple ID and password. Because you may be prompted to log in with your Apple ID to access many of these services, it's important that you have those credentials handy if need be.
If you need to create a new Apple ID:

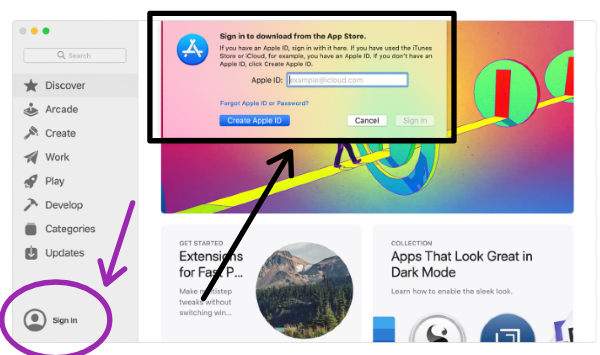
If you're not presented with the options above, it means your Mac is already signed into iCloud.
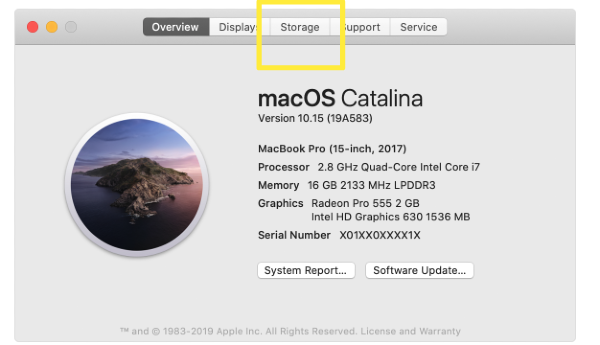
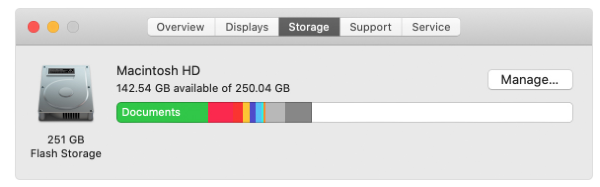
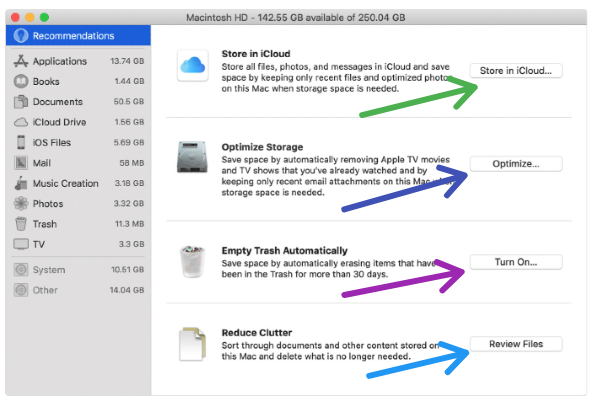
In certain cases, your Mac may not have the available hard drive space to accommodate the files needed to perform the upgrade. The files are around 6.5GB in total, and Apple recommends having 20gb of free storage space on your drive if you want to install the OS. You can do this by getting rid of files your computer no longer needs. To know how much space you have left on your Mac:
Finally, make sure all the apps on your Mac are up-to-date to avoid any compatibility issues post-upgrade.
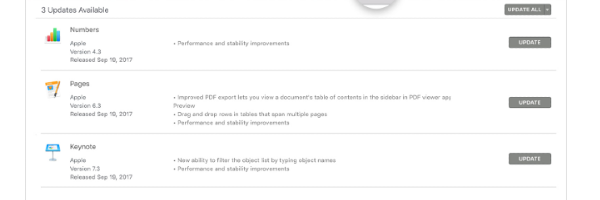
Each update is installed automatically after download.
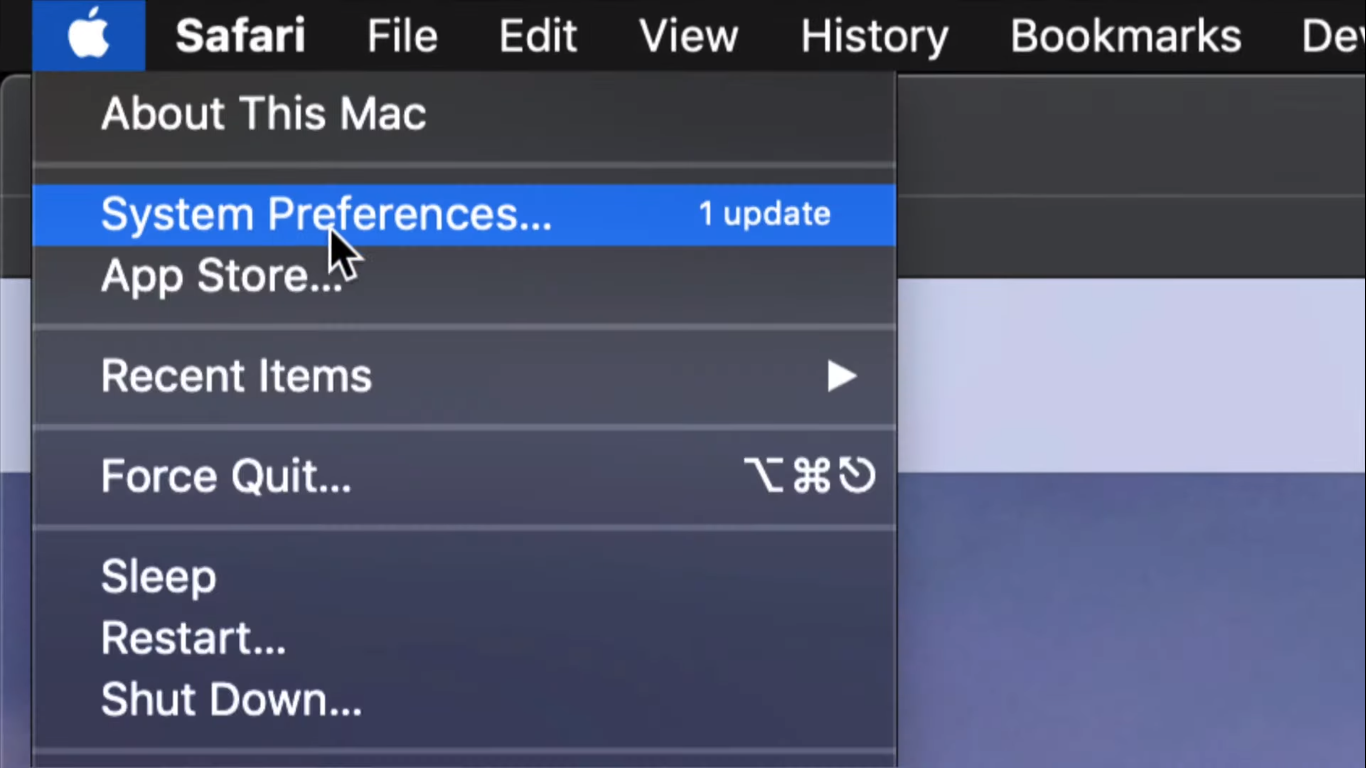
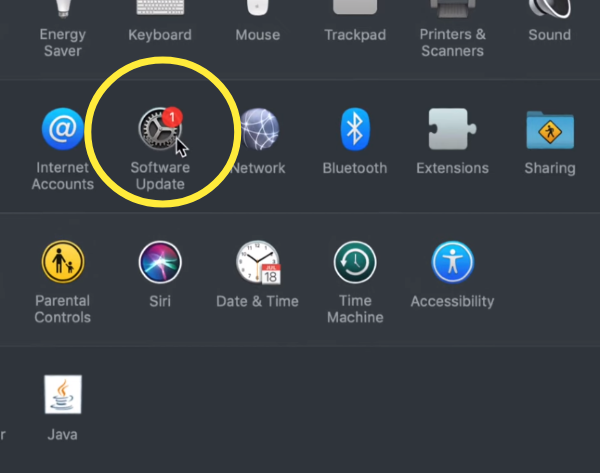
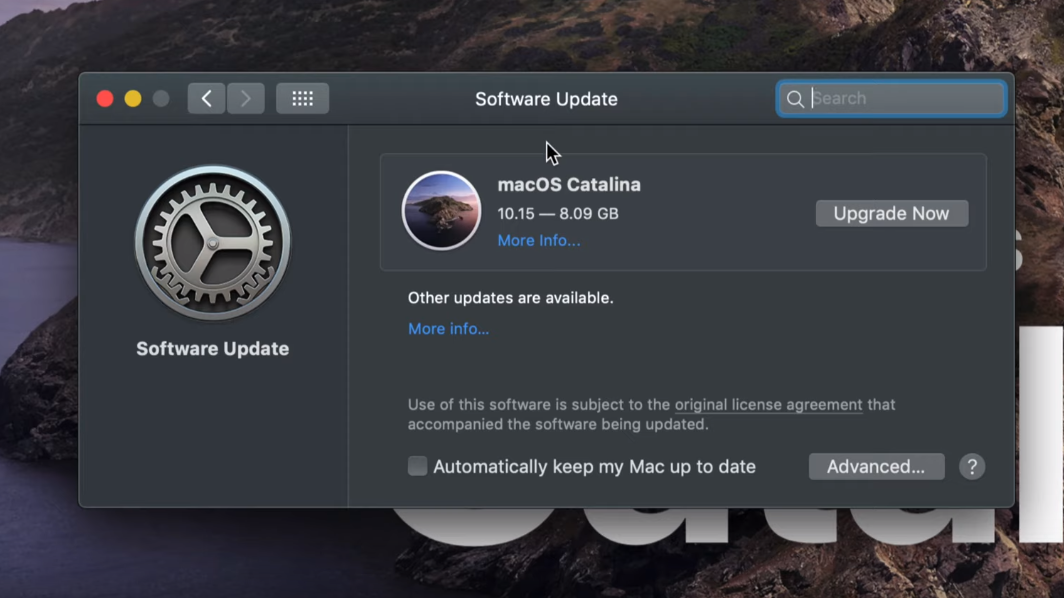
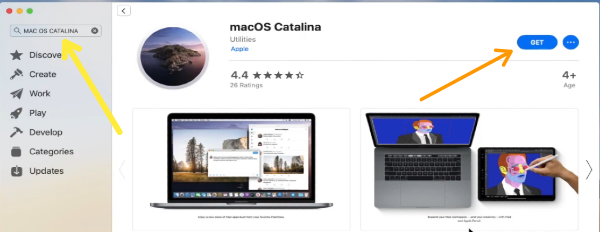
For Macs that meet the hardware requirements and are running at least macOS Mavericks (or newer), the upgrade process begins on the Mac App Store:


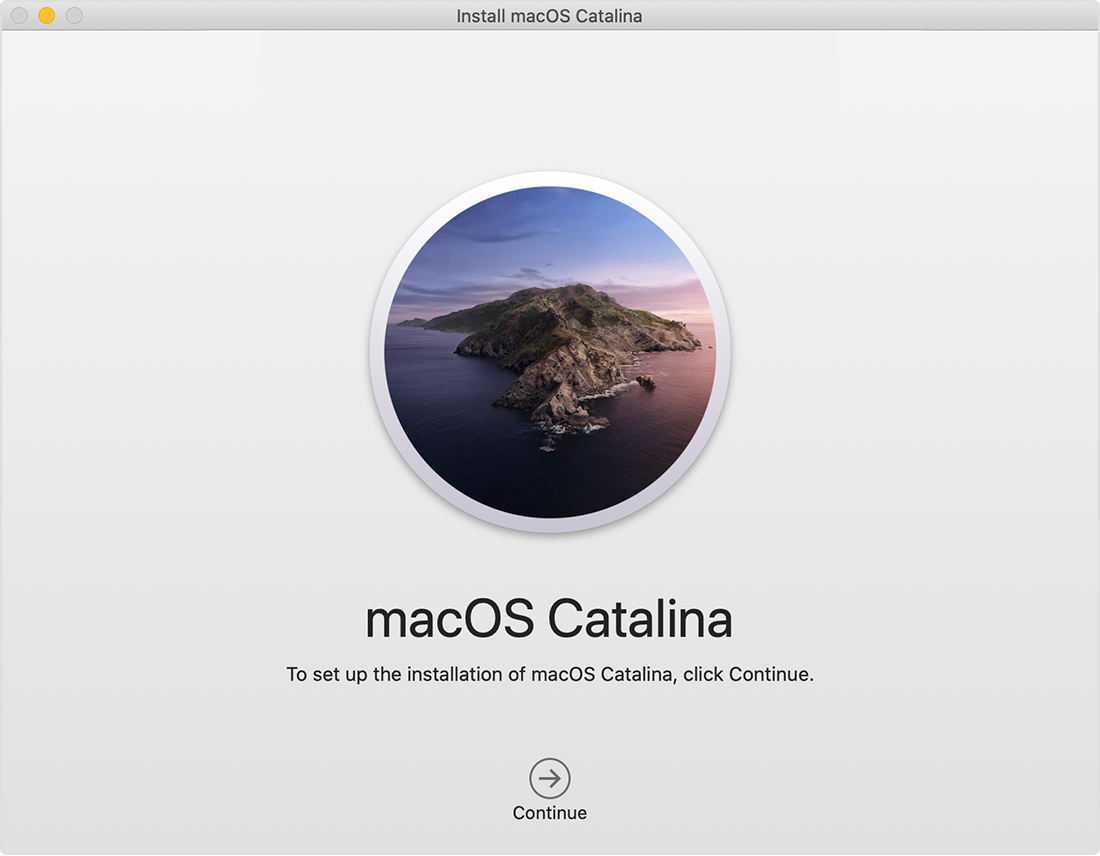
Once the download is complete, the installer will open immediately. Click Continue and follow the prompts to complete the upgrade process to macOS Catalina.

Support.com is committed to your privacy
We do not share or sell your data to third parties. We do use cookies and other third-party technologies to improve our site and services. The California Consumer Privacy Act (CCPA) gives you the ability to opt out of the use of cookies, third-party technologies and/or the future sale of your data. Do not sell my personal information.

Support.com is committed to your privacy
Read our Privacy Policy for a clear explanation of how we collect, use, disclose and store your information
