Printers need care and should be taken care of to get consistent print quality, paper feed, and longer print life. This guide will go over maintenance steps to help keep your printer performing at it's very best.
The following steps are generalized and will vary depending on what model printer you have and how old it is. Be sure to refer to your printer's user manual for specific instructions for your individual model printer.
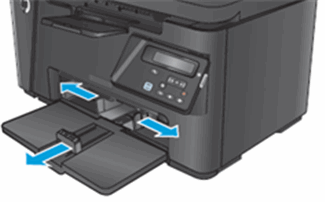
2. Check Paper
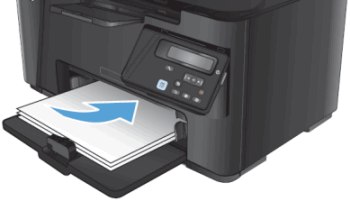
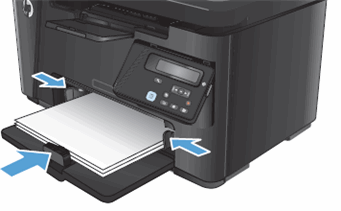
The following illustrations are a general representation of what your printer's paper tray may look like. Your actual paper tray will vary depending on the manufacturer and model printer you have. However, most paper trays are made in a similar fashion.
Slide the paper guides to their outermost positions.
Load a stack of plain paper with the print-side facing up into the input tray, and then slide the stack forward until it stops.
Slide the paper length and width guides so that they are resting against the stack of paper.
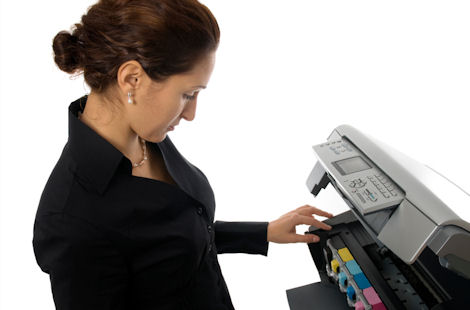
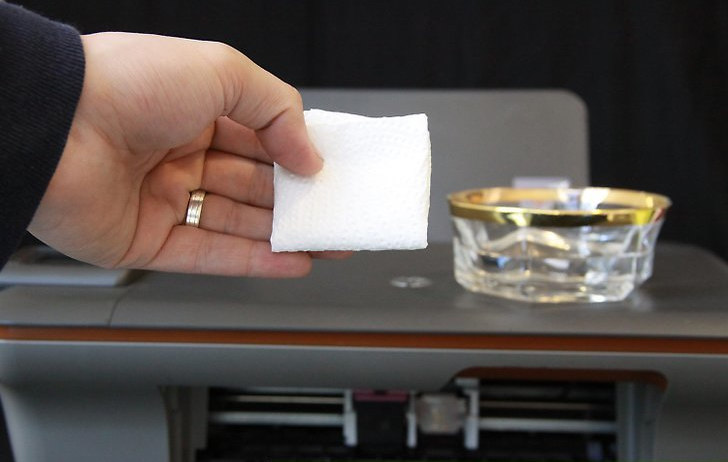
3. Remove Dust & Debris
Be sure to always check with your manufacturer's printer documentation when it comes to cleaning. Certain cleaning solutions may not be safe to use, and they may recommend against cleaning certain components of the unit, as it could actually damage the unit's ability to function normally.
A build-up of dust, ink/toner and other debris inside your printer can cause jams as well as streaks of ink that appear on paper where you don’t want them. Depending on your model of printer, most manufacturers will provide specific cleaning instructions that will help ensure that your printer is able to perform optimally at all times.
4. Check Ink/Toner
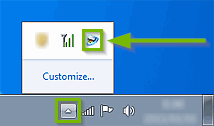
On a Windows-based computer:The following steps may not work if you have not installed the software that was included with your printer. It's also important to note that every printer is different. These steps are meant as a general guideline.
Locate the printer settings, often found by right-clicking the printer icon in the Windows Notification Area, located in the bottom right-hand corner of your screen.
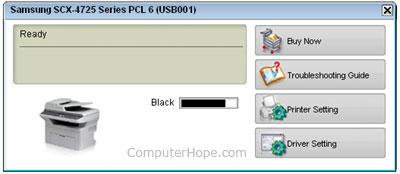
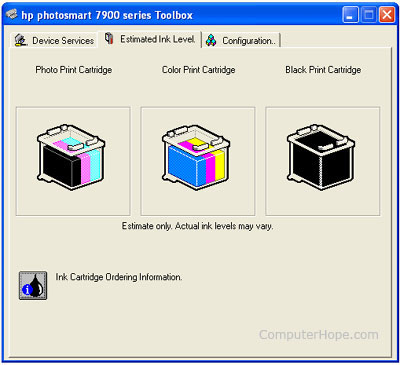
Within the printer settings software, you should see the toner levels for the currently installed cartridge(s). Below are a few different examples of how the ink level screens may look.
Samsung Laser printer available toner example:
HP Photosmart 7900 available ink example:
Replace any cartridges that are flagged as being low or in a precautionary state.
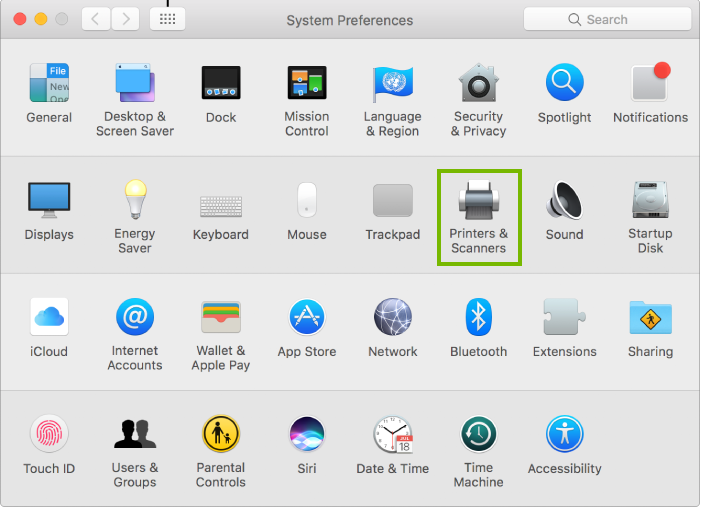
On an Apple Mac computer:
Click on the Apple Menu and click on System Preferences.
Click Printers and Scanners.
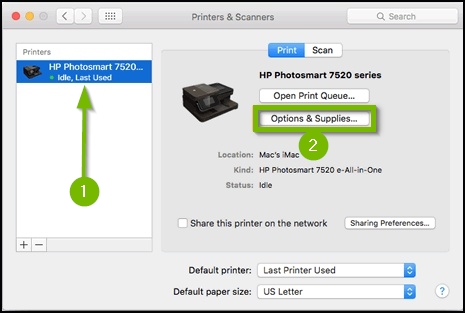
Select the name of your printer in the printers list, click Options & Supplies.
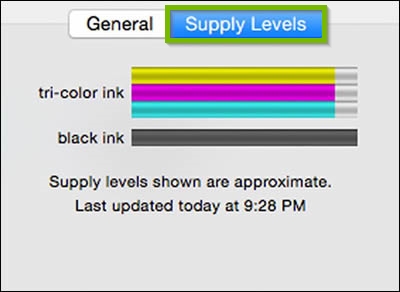
Click the Supply Levels tab.
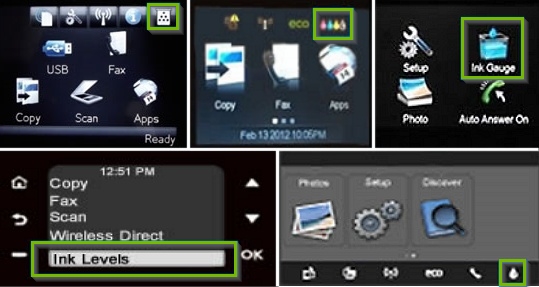
Through the Printer Menu:
Every printer is different and the following steps are generalized. For explicit instructions on checking ink levels, consult your printer's documentation.
Locate the Menu button of your printer and use the appropriate navigation keys to find a Status or Reports section.
Print a Printer Information or Status page to see current toner levels.
If it has one, your printer's screen may display ink/toner levels regularly.
Replace any cartridges that are flagged as being low or in a precautionary state.
5. Replace Cartridge(s)
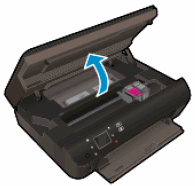
Open the cartridge access door.
Wait until the printer is idle and silent.
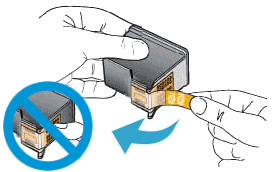
Remove a new cartridge from its packing.
Pull the orange tab to remove the plastic tape. Do not touch the copper colored contacts or the ink nozzles as touching these part can mean clogs, ink failure, and bad electrical connections.
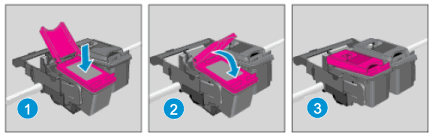
Hold the cartridge by its sides with the nozzles toward the printer.
Insert the cartridge into its proper slot.
Push the cartridge forward into its slot until it snaps into place.
Repeat to install another cartridge
Close the cartridge access door.
6. Alignment
Wait 30 seconds after installing cartridges for the alignment page to print automatically.
Remember that an alignment page prints automatically with installation of a new cartridge only.
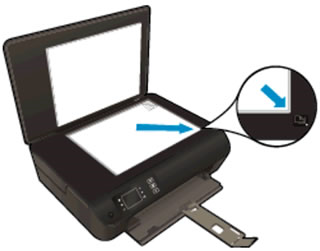
Place the alignment page with the print side down on the right front corner of the glass.
Close the scanner lid.
Press OK on the front panel of the printer.
The scanner starts and the printer will align.
You are now about to install printing software, and you should not try to connect the printer to a computer until instructed to do so in the printing software.
7. Clean Print Head
Every printer is different and the following steps are generalized. Your printer may require that the print head be physically removed, while others cannot be physically removed at all. For explicit instructions on how to properly clean the print head on your printer, consult your device's documentation.
Load plain white paper into your printer's paper tray.
Press the Setup button.
Press the Down Arrow button to highlight Tools, and then press OK.
Press the Down Arrow button to highlight Clean Print head, and then press OK. The printer cleans the print head, and a test page prints once the printer is done cleaning the print head.
Examine the test sheet for print quality. Consider repeating the cleaning if there is improvement. If the print head is badly clogged, you may need to clean the print head several times in order to restore normal print quality.
Recycle or discard the test sheet.
When the cleaning process completes, press any button on the control panel to return to the Tools menu.
Remove Hidden Spyware In Minutes For Free
Detect and remove spyware, keyloggers, tracking cookies, and other
threats that slow down your PC or steal your data.
65+ Million Downloads
Spyware scanner with AI-powered detection engine + database
.png)