.png)
Authored by: Support.com Tech Pro Team
Creating professional-level videos using a drone involves a combination of technical skills, creativity, and attention to detail. Whether you're a beginner or an experienced drone pilot, this comprehensive guide will walk you through the steps to create stunning videos that capture the beauty of your surroundings from a unique aerial perspective.
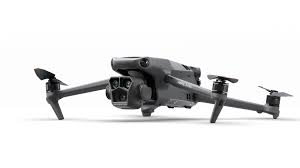
Choose a drone that meets your filmmaking needs. Consider factors such as camera quality, flight time, stability, and ease of use. Popular options for professional-level video include the DJI Mavic Air 2, DJI Phantom 4 Pro, and DJI Inspire 2.
Before you start flying, familiarize yourself with local drone regulations and airspace restrictions. Obtain any necessary permits or licenses for commercial drone operations if applicable.
Location Scouting:
Choose visually appealing locations that suit your video's theme. Consider landscapes, landmarks, and architecture that will enhance your shots.
Weather and Lighting:
Shoot during the golden hours (sunrise and sunset) for soft, warm lighting. Avoid harsh midday sunlight that can create harsh shadows.
Shot List:
Plan your shots in advance. Create a shot list detailing the types of shots you want, such as establishing shots, tracking shots, and aerial panoramas.
Safety Precautions:
Ensure a safe flying environment. Avoid crowded areas, power lines, and obstacles. Always have a visual line of sight with your drone.
Resolution and Frame Rate:
Use the highest resolution available on your drone's camera (e.g., 4K) for maximum detail. Choose a frame rate (24 or 30 fps) that suits the cinematic look you want to achieve.
Manual Mode:
Adjust camera settings manually to have control over exposure, ISO, shutter speed, and white balance.
Color Profiles:
Use a flat or log color profile for post-production flexibility. This preserves more dynamic range for color grading.
Smooth Movements:
Use gentle stick inputs to ensure smooth and cinematic movements. Avoid sudden jerks or rapid changes in direction.
Cinematic Shots:
Experiment with various cinematic shots like orbits, reveals, and flyovers. These add depth and dimension to your video.
Use ND Filters:
Neutral Density (ND) filters reduce light entering the lens, allowing you to maintain a slower shutter speed for smoother motion blur.
Rule of Thirds:
Apply the rule of thirds to compose your shots. Place key elements of interest along the lines or at their intersections.
Leading Lines:
Utilize natural lines, like roads or rivers, to guide the viewer's eye through the frame.
Foreground and Background:
Incorporate foreground elements to add depth and scale to your shots.
Import Footage:
Transfer your drone footage to your editing software.
Color Grading:
Enhance the visual appeal by adjusting color, contrast, and saturation. Match shots to create a consistent look.
Stabilization:
Apply stabilization tools if your shots aren't as smooth as desired.
Transitions and Effects:
Use transitions, effects, and graphics to enhance your storytelling.
Music and Sound:
Add music and ambient sound effects to enhance the mood of your video.
Resolution and Format:
Export your video in the highest resolution and quality possible. Use formats compatible with your chosen platform.
Platform Consideration:
Choose the appropriate platform for sharing your video, such as YouTube, Vimeo, or social media.
Continuous Learning and Improvement:
Keep refining your skills by studying the work of other drone videographers, experimenting with new techniques, and learning from your own experiences. As you gain more practice, your ability to capture professional-level drone videos will improve.
Remember that creating professional-level drone videos takes time and dedication. Don't be afraid to experiment, learn from mistakes, and continuously push your creative boundaries to create truly captivating aerial footage. Should you find that you are having any Hardware/Software related issues, reach out to Support.com for the best remote support available.

Support.com is committed to your privacy
We do not share or sell your data to third parties. We do use cookies and other third-party technologies to improve our site and services. The California Consumer Privacy Act (CCPA) gives you the ability to opt out of the use of cookies, third-party technologies and/or the future sale of your data. Do not sell my personal information.

Support.com is committed to your privacy
Read our Privacy Policy for a clear explanation of how we collect, use, disclose and store your information
