How to Manage a Support.com TechSolutions Account
Authored by: Support.com Tech Pro Team
1. TechSolutions Account Management
How to Update Customer Billing Information
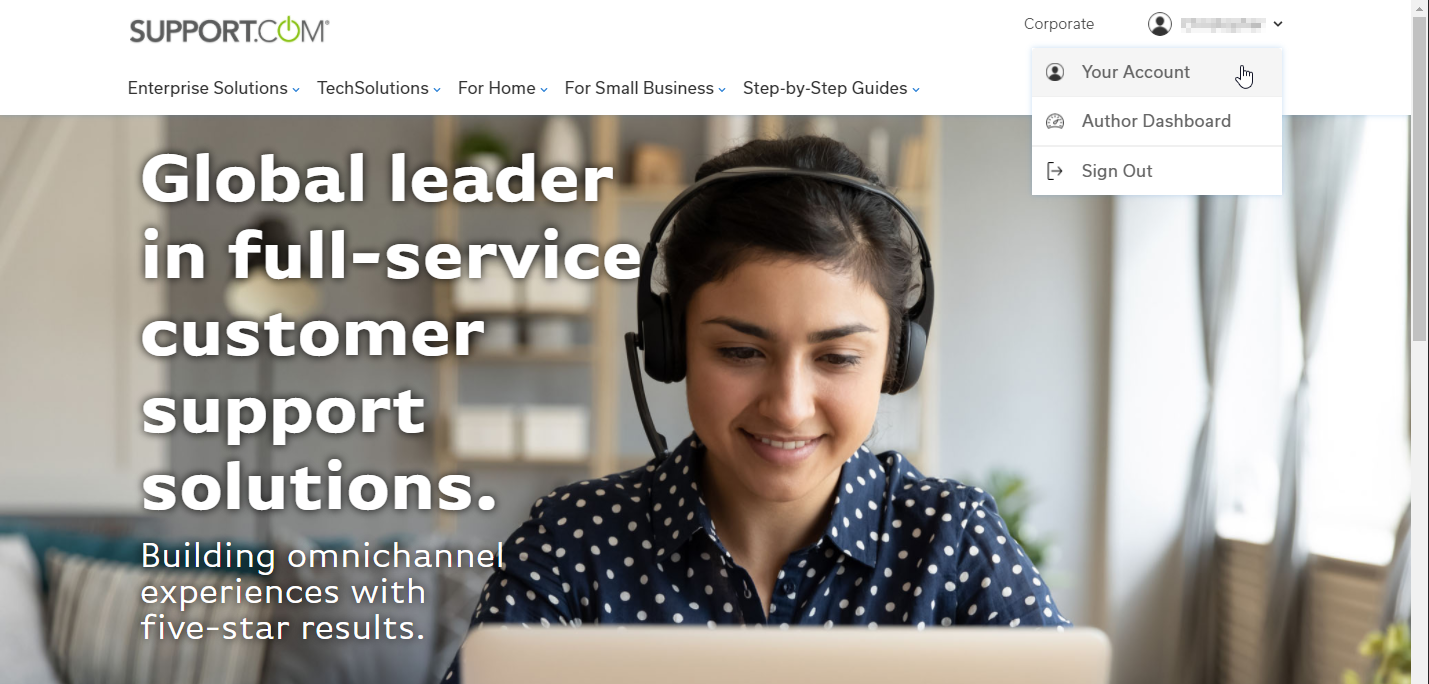
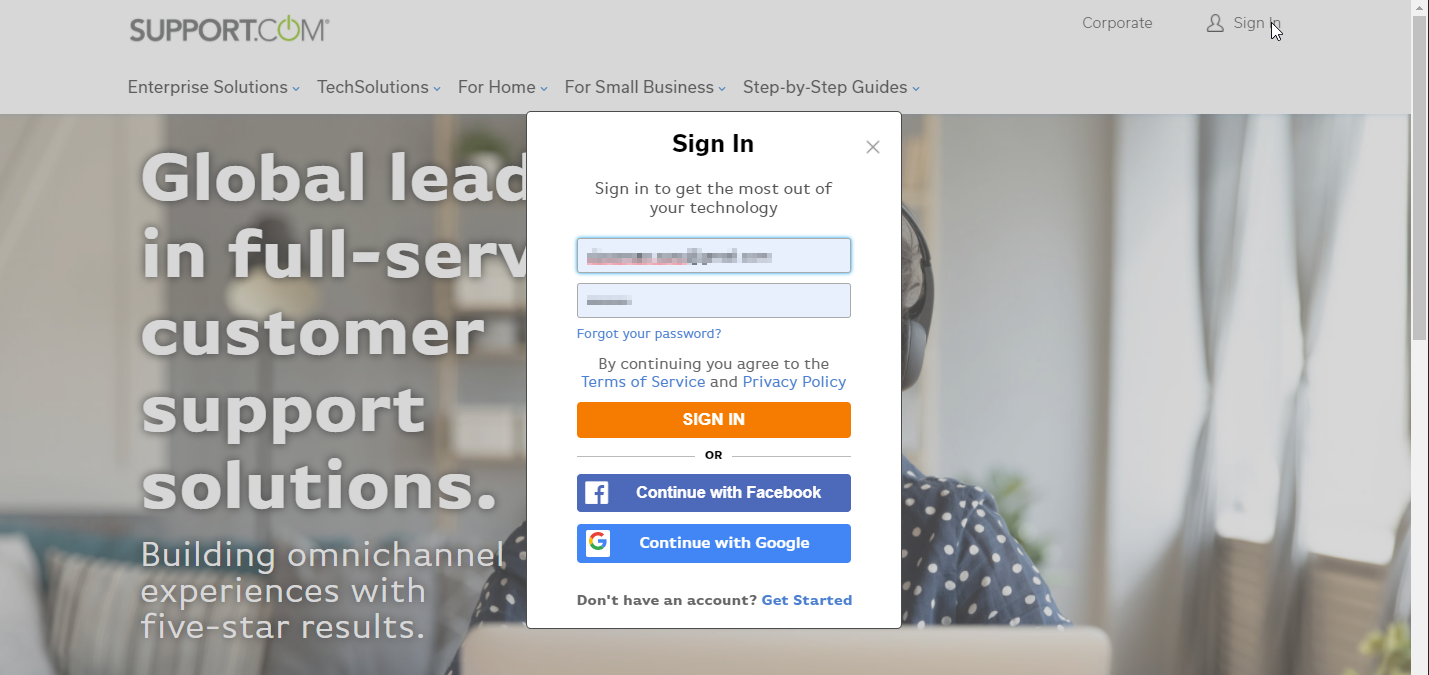
- Confirm that the customer is signed into their account by checking the account dropdown on the upper right corner. Have them sign in if they are not.
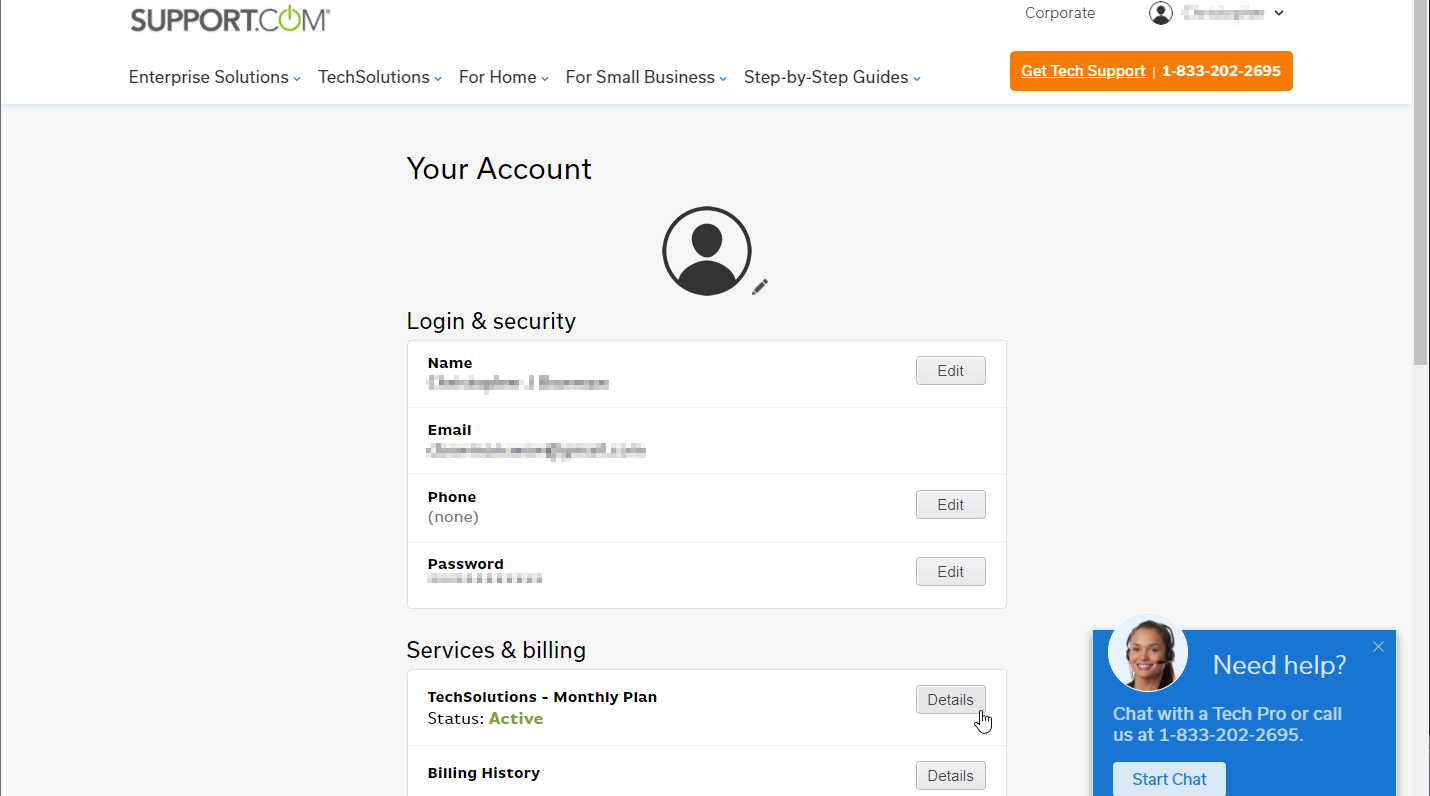
- Under Services and Billing, billing history will be listed. Click on Details.
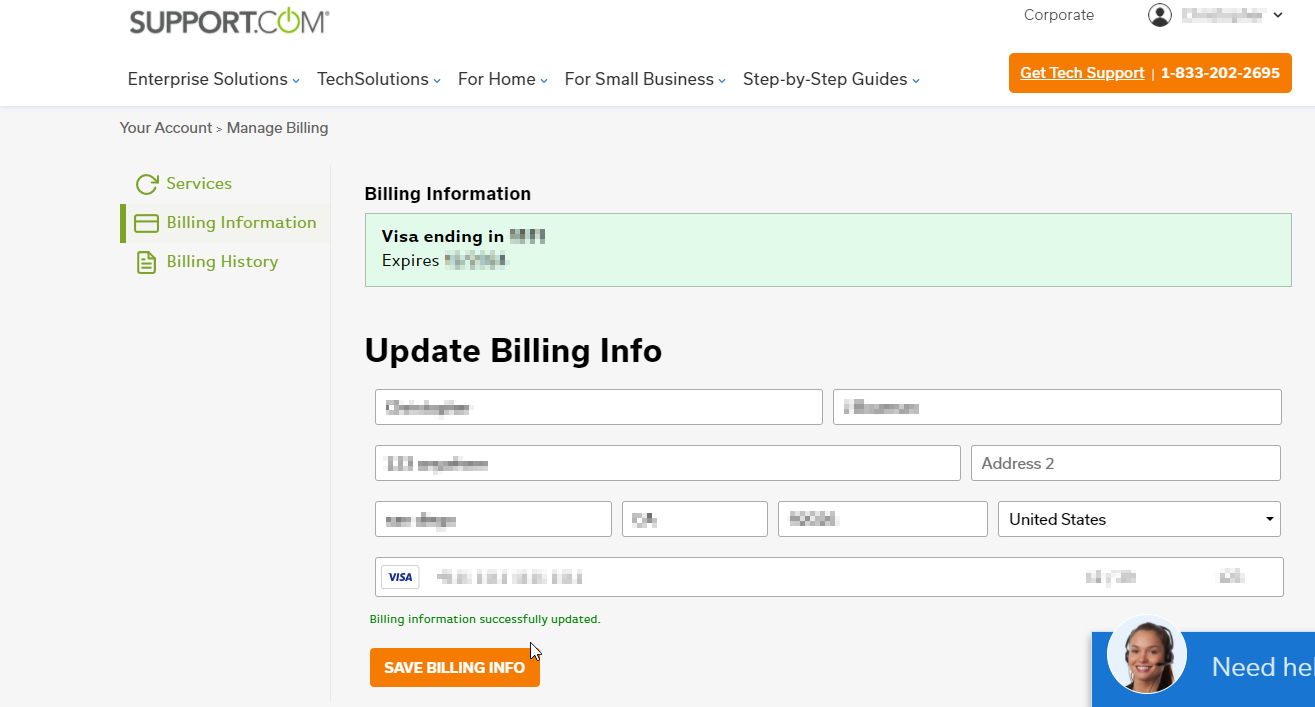
- The customer's subscription information is displayed. Credit card information can be changed here. Click on Save Billing Info to commit changes.
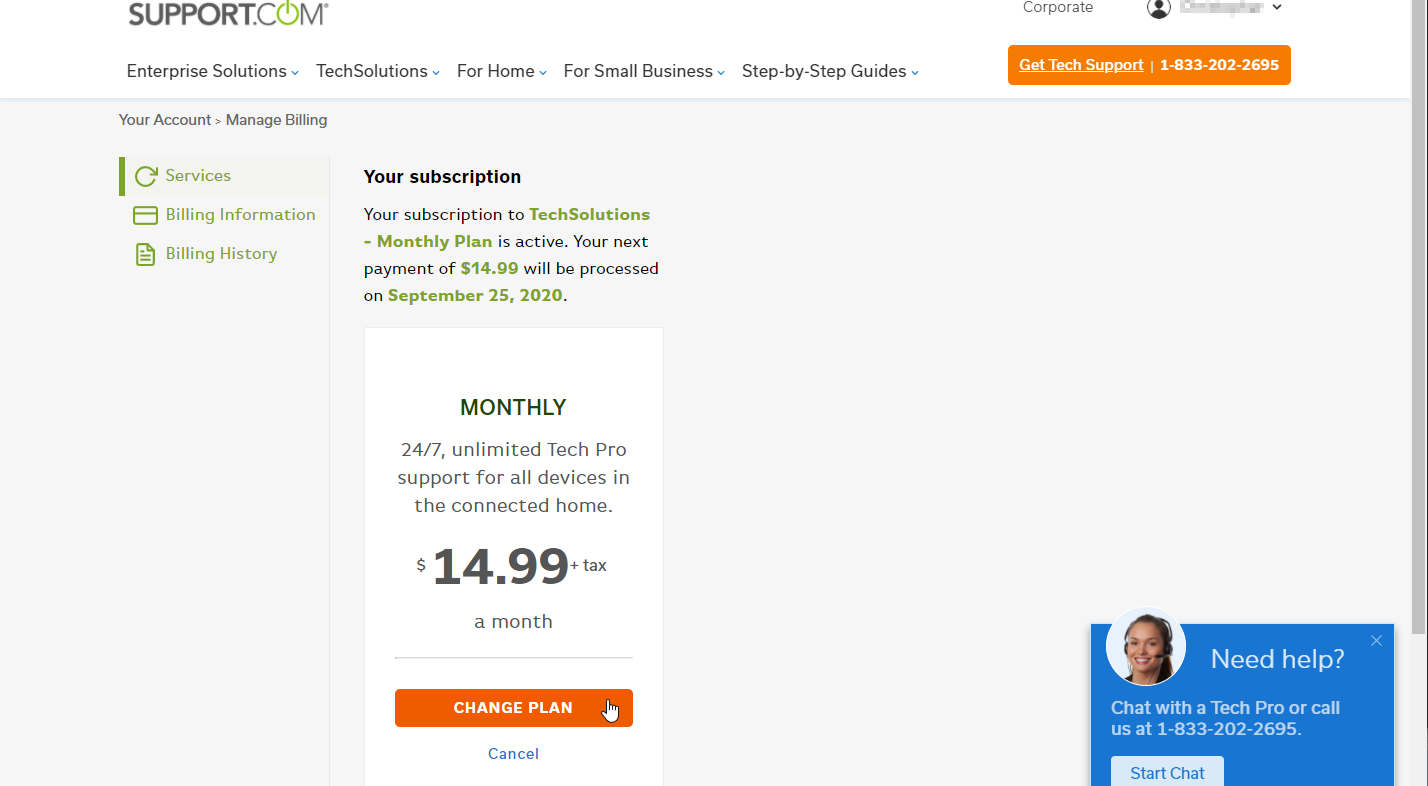
How to Change Customer's Subscription Type
- Confirm that the customer is signed into their account by checking the account dropdown on the upper right corner. Have them sign in if they are not.
- Under Services and Billing, the subscription type will be listed. Click on Details.
- The customer's current plan is displayed. To change between an annual or monthly plan, click on Change Plan.
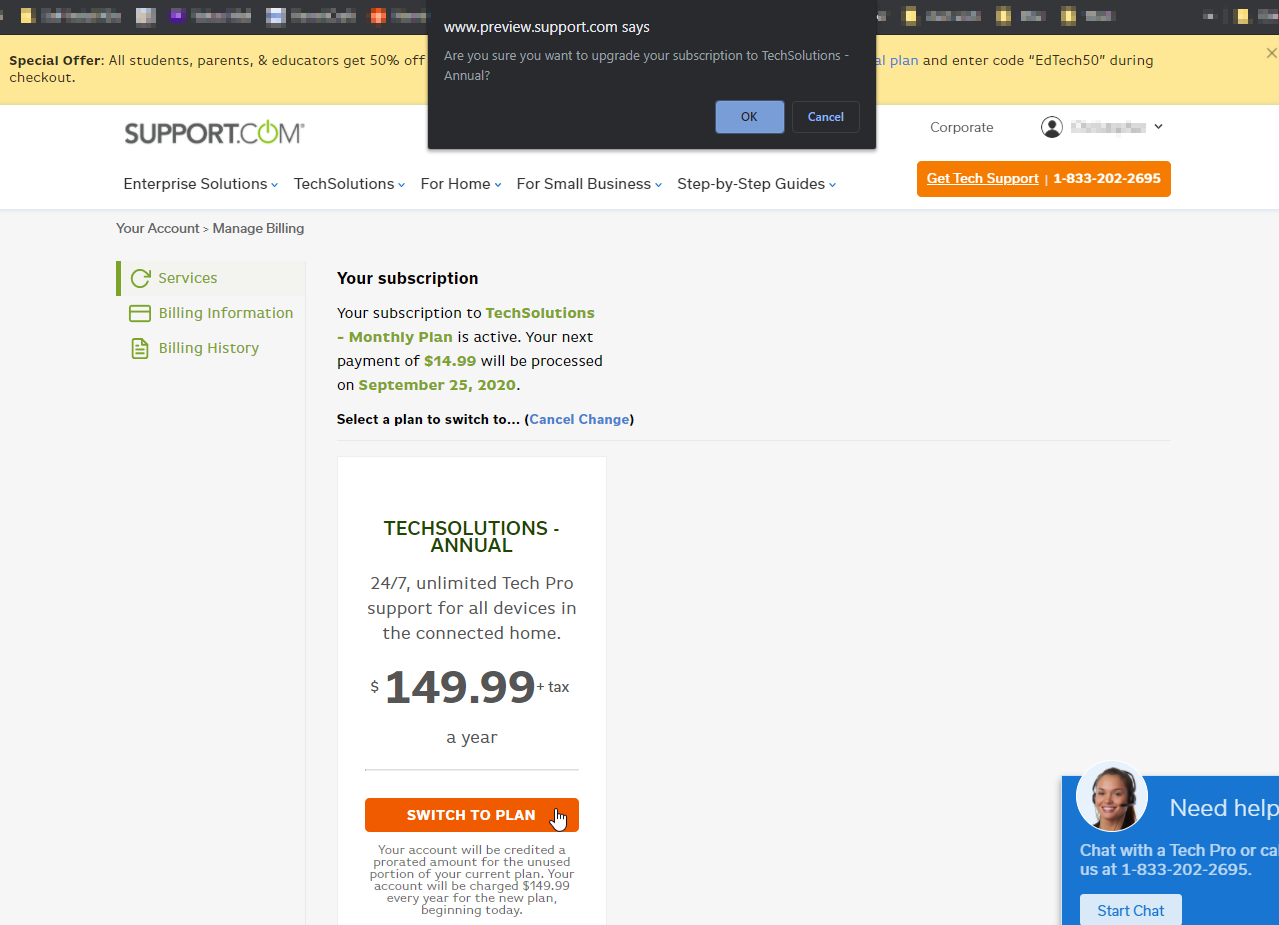
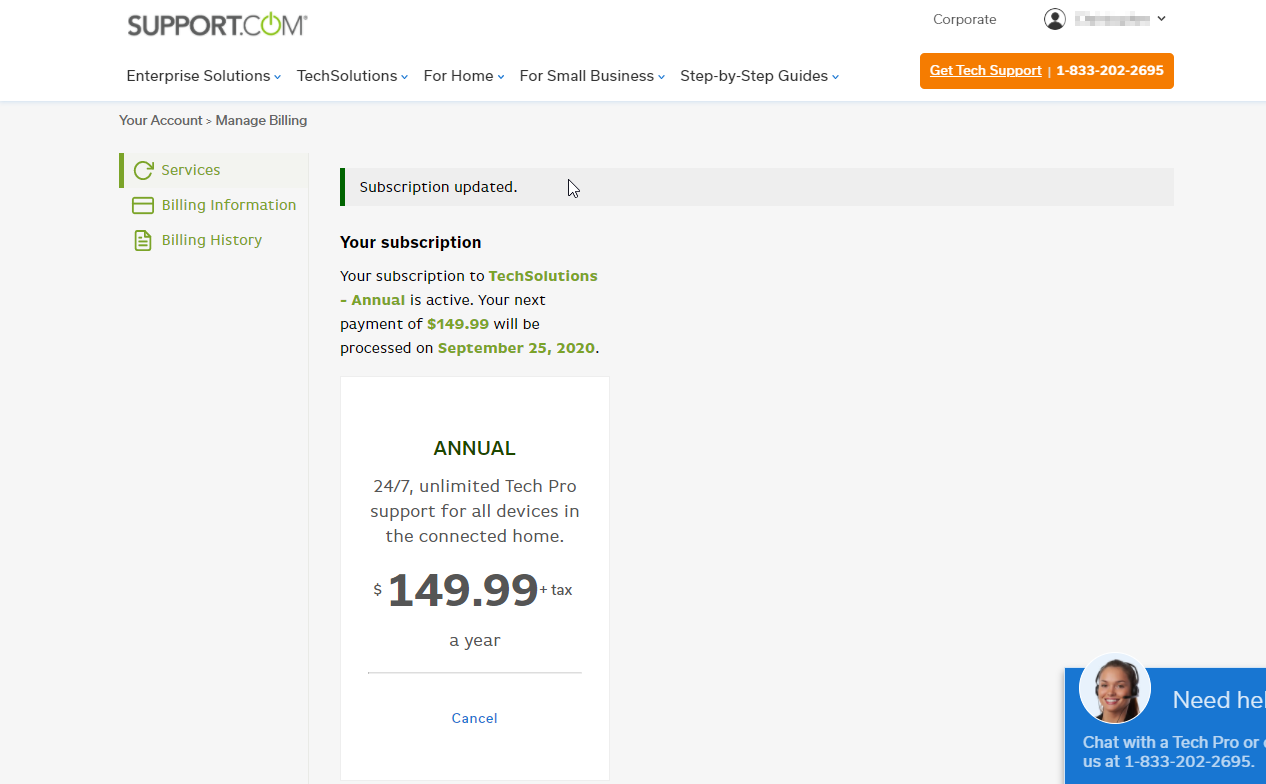
- Information for the Annual Plan is displayed. Click on Switch to Plan to continue. The site will pop a confirmation window. Click on OK to confirm.
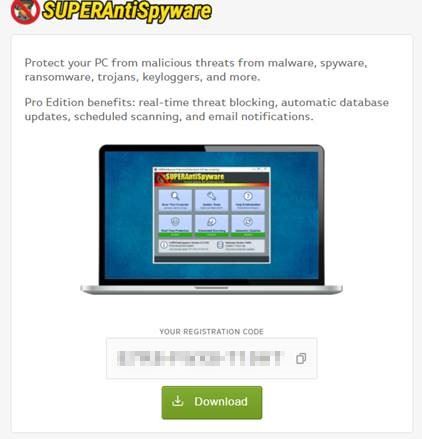
How to Generate/Find an SAS Key
- Confirm that the customer is signed into their account by checking the account dropdown on the upper right corner. Have them sign in if they are not.
- Under Bundled Software, you'll find SUPERAntiSpyware. Click on Details and then Generate (for a new subscriber), or, Find Code to retrieve a code.
How to Cancel a Subscription (Turn Off Auto-Renewal)
- Confirm that the customer is signed into their account by checking the account dropdown on the upper right corner. Have them sign in if they are not.
- Under Services and Billing, the subscription type will be listed. Click on Details.
- The customer's current plan is displayed. To change between an annual or monthly plan, click on Cancel.
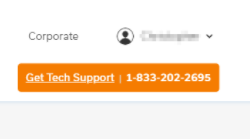
How to Schedule a Call Back
- Confirm that the customer is signed into their account by checking the account dropdown on the upper right corner. Have them sign in if they are not.
- Click on Get Tech Support | 1-833-2020-2695
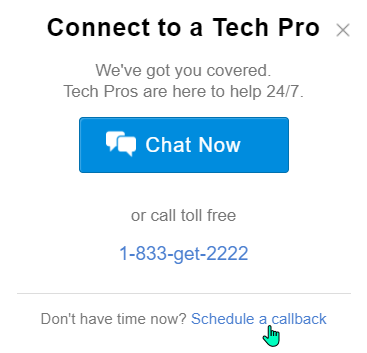
- Click Schedule a callback
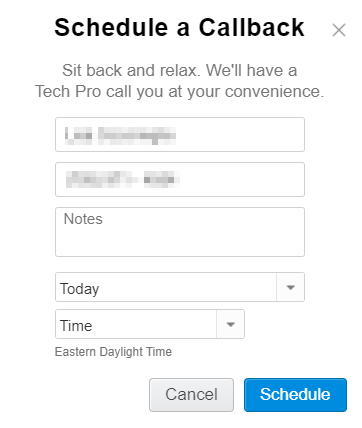
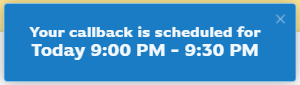
- Fill out the required info and click Schedule. The customer will get a confirmation of their callback.
.png)