Combining partitions in Windows 10 can help manage your disk space more effectively. Here’s a detailed guide:
Open Disk Management:
Press Win + X and select “Disk Management” from the menu.
Delete Partition:
Right-click the partition you want to merge with another and select “Delete Volume.”
Confirm the deletion, which will create unallocated space.
Extend Volume:
Right-click the partition you want to extend into the unallocated space and select “Extend Volume.”
Follow the wizard to complete the process.
Complete the Merge:
The two partitions will now be combined into a single larger partition.
Check the Disk:
Verify the merged partition by checking the available space in Disk Management.
Reformat if Necessary:
If required, reformat the new partition to ensure it's ready for use.
Contact Support.Com
If you are still having trouble, refer to the Step-By-Step Guide below, or Contact Support.Com for Personalized Assistance.
1. Introduction
Partition merging is a means of combining two disk partitions into becoming a much larger one. People merge partitions for various reasons, the typical ones include decluttering and space-saving. When you buy a new PC, you'd likely find that the drive comes in a single partition.
But it could be the case that you're suddenly faced with a PC that is partitioned, perhaps you're a student who just purchased a pre-owned PC and can't deal with the complexity and chances for errors you'd be faced with when running a partitioned drive ( which could easily become unwieldy to manage). Some of these partitions are necessary to have, others are just needless and serve no useful purpose.
This article addresses how to merge two partitions on PCs running Windows 10.
Facts About Partition Merging via Disk Management
Disk Management utility is an inbuilt component of all Windows operating system
It is capable of performing certain basic tasks like delete, format, and create volume found applicable in handling the storage structure of a PC.
Naturally, there are partitions that are default to your PC and as such should not be touched such as all partitions before and including your C drive, others can be deleted.
Shrink Volume function is used to decrease a partition’s size.
Extend Volumeis used to increase a partition’s size if there is an unallocated space adjacent space to the right.
There exist no Merge Volume functionality in Disk Management; partition merging is achieved indirectly only by using shrinking one volume to make space to extend an adjacent one.
If you're not exactly sure about a feature, do not attempt to make any changes to it.
If you're an average user and you don't demand much from your PC you probably won't miss having your PC partitioned.
Merging partitions on your PC can lead to loss offiles. Before attempting it, ensure you create a backup ofyour files on an external drive.
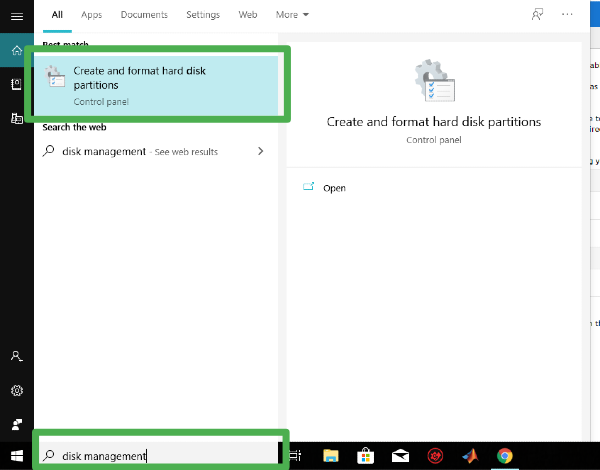
2. Check If Your PC Is Partitioned
Use the shortcut Windows + S to open the search bar. Type Disk Management in the windows search bar and click disk management.
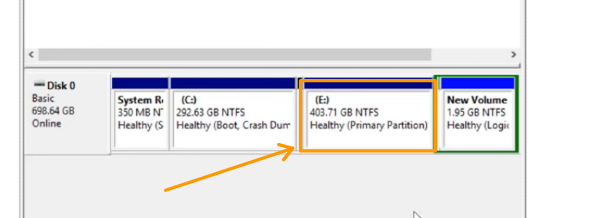
The disk management dashboard displays an array of labelled storage (C,D,E etc.) present on your PC. All of these are contained in the hard disk of your PC each housing distinct content (boot files, backup files etc.)
Look out for the drives with partition written in the status bar of each drive. For instance a PC with drive E will have 'Partition' written next to it.
With this simple method you can confirm if your system is partitioned or not.
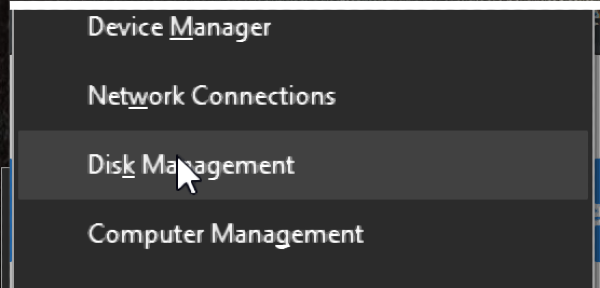
3. Open Disk Management
Use the shortcut Windows+ X and click Disk Management from the menu, or input DiskManagement in the search bar shown below.
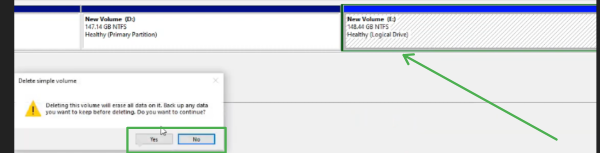
4. Create Unallocated Space
Merging partitions on your PC can lead to loss offiles. Before attempting it, ensure you create a backup ofyour files on an external drive.
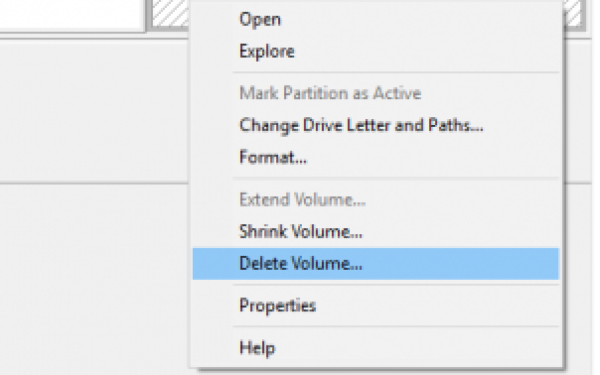
Right-click the drive you want to delete (say Drive E) and click DeleteVolume, the disk space of Drive E will be changed to Unallocated. Note that if the Delete Volume option is greyed out, you're not allowed to delete that particular partition.
5. Merge Partitions
Merging partitions on your PC can lead to loss files. Before attempting it, ensure you Create a backup of your files on an external drive.
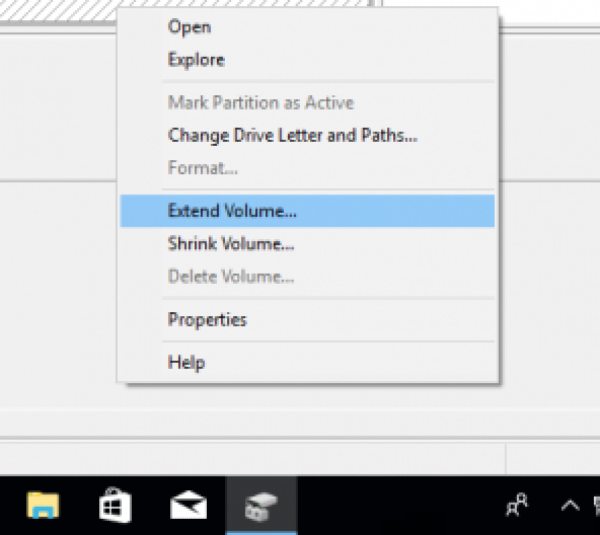
Right-click on the drive you want to extend (say Drive D) and pick Extend Volume.If the Extend Volume... option is greyed out, you cannot extend that partition.
6. Validate Your Computer's Merged Partition
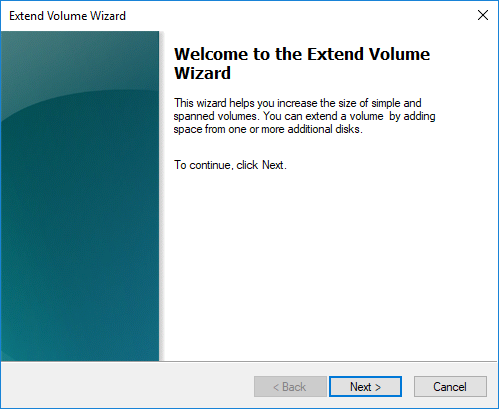
Click on Next in the ensuing pop-up window.
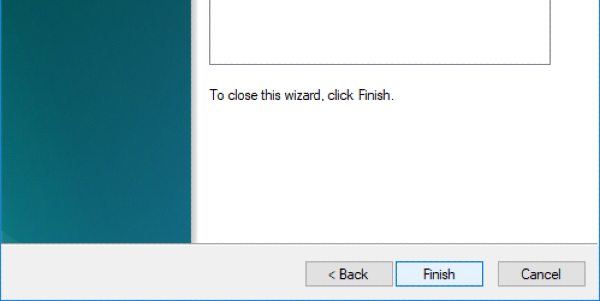
Click Finish to execute the process.
The partitioned drive E is then combined into drive D.
After successfully merging the drives, open Drive D using Files Explorer (Ctrl + E). You'll find a folder named as 'E to D (with date and time of merging in front)' which contains the file formerly in D Drive.
.png)