How to Pair Bluetooth Devices to JBL Charge 3: A Comprehensive Guide
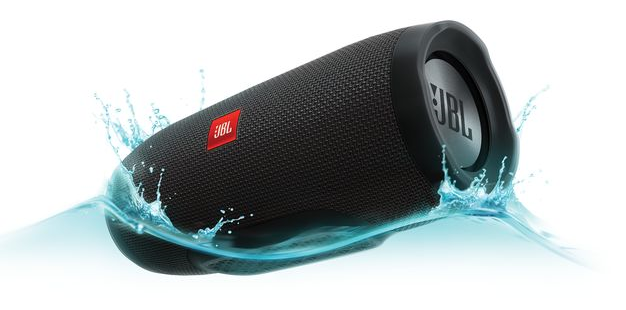
The JBL Charge 3 is a popular portable Bluetooth speaker known for its powerful sound and waterproof design. Whether you're looking to stream music from your smartphone, tablet, or another Bluetooth-enabled device, pairing it with the JBL Charge 3 is a straightforward process. This comprehensive guide will walk you through the steps to successfully pair your Bluetooth devices with the JBL Charge 3 and provide troubleshooting tips for common issues.
Step-by-Step Guide to Pairing Bluetooth Devices with JBL Charge 3
Step 1: Power On Your JBL Charge 3
Turn On the Speaker:
Press the power button on the top of the JBL Charge 3. The power button will light up, and you should hear a power-on sound indicating the speaker is on.
Step 2: Enable Bluetooth Pairing Mode
Activate Bluetooth Pairing:
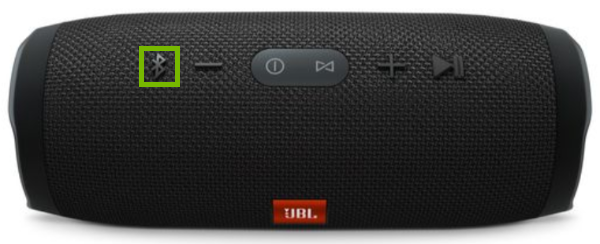
Press the Bluetooth button next to the power button. The Bluetooth button will start blinking, indicating that the JBL Charge 3 is in pairing mode and ready to connect to a device.
Step 3: Pair with Your Device
For Smartphones and Tablets (iOS and Android)
Open Bluetooth Settings:
On your iOS device, go to Settings > Bluetooth and toggle Bluetooth on.
On your Android device, go to Settings > Connections or Bluetooth and toggle Bluetooth on.
Find the JBL Charge 3:
In the list of available devices, look for "JBL Charge 3."
Connect to the Speaker:
Tap on "JBL Charge 3" to initiate the pairing process. You may hear a chime or see the Bluetooth button stop blinking, indicating a successful connection.
For Laptops and Desktops
Open Bluetooth Settings:
On a Windows PC, go to Settings > Devices > Bluetooth & other devices and turn Bluetooth on.
On a Mac, go to System Preferences > Bluetooth and turn Bluetooth on.
Find the JBL Charge 3:
In the list of available devices, select "JBL Charge 3."
Connect to the Speaker:
Click "Pair" or "Connect" next to "JBL Charge 3" to complete the pairing process. You may hear a chime or see the Bluetooth button stop blinking, indicating a successful connection.
Troubleshooting Common Issues
If you encounter issues while trying to pair your Bluetooth device with the JBL Charge 3, try these troubleshooting tips:
Issue 1: Device Not Discoverable
Check Bluetooth Status:
Ensure that Bluetooth is enabled on both the JBL Charge 3 and your device.
Reset the Speaker:
Turn off the JBL Charge 3 and then turn it back on. Press the Bluetooth button again to re-enter pairing mode.
Move Closer:
Ensure your device is within 3 feet (1 meter) of the speaker during the pairing process.
Issue 2: Pairing Unsuccessful
Remove Previous Pairings:
On your device, remove the JBL Charge 3 from the list of paired devices. Go to Bluetooth settings, find "JBL Charge 3," and select "Forget" or "Unpair." Then, try pairing again.
Restart Your Device:
Restart your smartphone, tablet, or computer to refresh the Bluetooth connection.
Update Firmware:
Ensure both your JBL Charge 3 and your device have the latest firmware updates.
Issue 3: Intermittent Connection or Poor Sound Quality
Reduce Interference:
Move away from other wireless devices that may cause interference, such as Wi-Fi routers or microwaves.
Charge the Speaker:
Ensure the JBL Charge 3 has sufficient battery power. Low battery can affect performance.
Re-Pair the Devices:
Try disconnecting and re-pairing the devices to resolve any connection issues.
Pairing your Bluetooth devices with the JBL Charge 3 is a simple process that enhances your listening experience by allowing you to stream music wirelessly. By following the steps outlined in this guide, you can easily connect your smartphone, tablet, laptop, or other Bluetooth-enabled devices to the JBL Charge 3. If you encounter any issues, the troubleshooting tips provided should help you resolve common problems.
Contact Support.Com
If you are still having trouble, refer to the Step-By-Step Guide below, or Contact Support.Com for Personalized Assistance.
1. Introduction
By pairing your JBL Charge 3 with a Bluetooth enabled device, you will be able to play audio wirelessly from your mobile device, computer, or other Bluetooth media player.
Bluetooth Technology
In order to use Bluetooth, the device you're playing music from must have Bluetooth on it. This is common for most mobile devices, but a lot of computers do not have Bluetooth without purchasing a separate adapter.
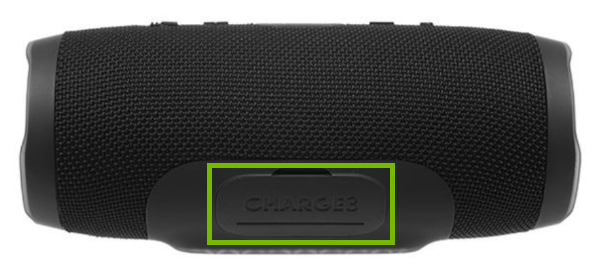
2. Charge
First, make sure your speaker is adequately charged before powering on.
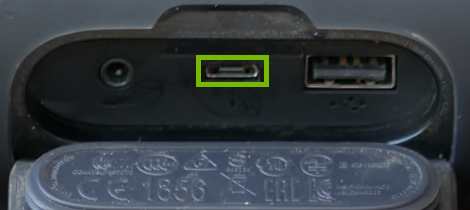
Lift the rubber flap to expose the audio, charging, and USB ports of your speaker.
Always remember to firmly replace the rubber flap on your Charge 3 when the ports beneath are not in use. This flap is part of what allows your Charge 3 to achieve its IPX7 water resistance rating.
Connect the included plug into the charging port of your speaker.
Depending on the method being used to charge your speaker, charging times will vary. Charging your speaker to full takes approximately 4.5 hours.
3. Pairing Mode
Ensure your speaker is turned on.
To place the JBL Charge 3 in pairing mode press the Bluetooth button. The Power button will start flashing blue and you will hear an audible noise.
You are now ready to pair the speaker to your Bluetooth device.
4. Pair Bluetooth Device
On The Bluetooth Device
Set the Bluetooth device in pairing/discovery mode.
This process varies depending on the type of device you have. Some devices require a PIN or a passkey to be entered to be able to pair them. Refer to your device's documentation for these details.
On The Android Device
Depending on what device (Smartphone or Tablet) and which generation you have, the menu theme and options might look slightly different on your screen. However, the steps should be similar across all Android devices and generations.
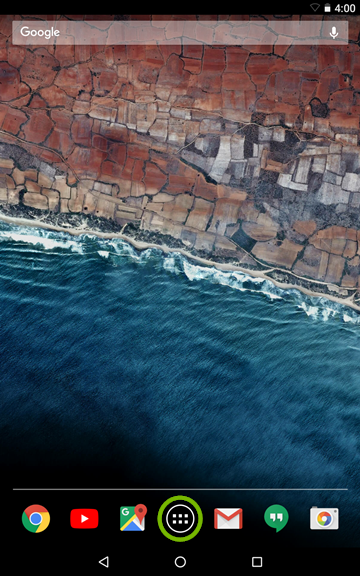
From the main screen of your Android device, tap on the Apps button.
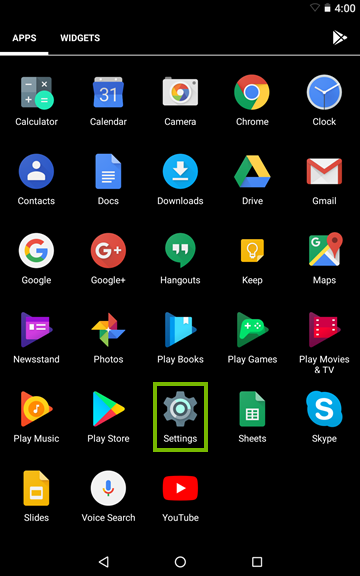
Then look for and tap on Settings.
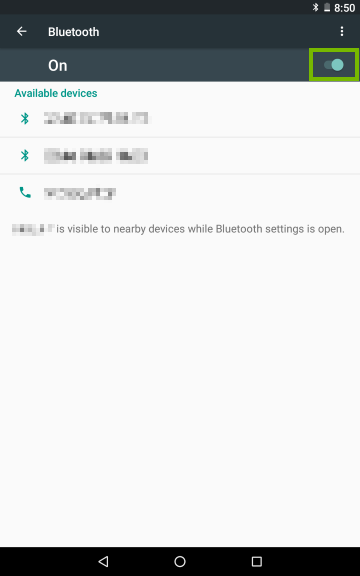
Then go to Bluetooth.
Make sure the Bluetooth feature is enabled by flipping the On / Off switch to the On position then wait for the Bluetooth device to show up in the list.
Tap on the Bluetooth device in the list to pair with it.
5. Pair Bluetooth Device
On The Bluetooth Device
Set the Bluetooth device in pairing/discovery mode.
This process varies depending on the type of device you have. Some devices require a PIN or a passkey to be entered to be able to pair them. Refer to your device's documentation for these details.
On The iOS Device
Depending on what device (iPhone, iPad or iPod Touch) and which generation you have, the menu theme and options might look slightly different on your screen. However, the steps should be the same across all iOS devices and generations.
From the main screen of your device, look for and open Settings.
After that go to Bluetooth.
Make sure that the Bluetooth feature is enabled by flipping the On / Off switch to the green position then wait for the Bluetooth device to show up in the list.
Tap on the Bluetooth device in the list to pair with it.
6. Pair Bluetooth Device
Some Bluetooth devices are configured with a PIN or a passkey that is often listed in its information manual. Check your Bluetooth device documentation for the correct PIN or passkey.
Set the Bluetooth accessory in pairing/discovery mode. This process will vary depending on what kind of device you have. Refer to your device's documentation for specifics on how to accomplish this.
Click the Action Center icon in the bottom right corner of the screen.
Tap on the All Settings tile after that.
Then go to Devices.
Select Bluetooth from the left-hand column and ensure the Bluetooth switch is in the On position to the right. Your Windows 10 device will become discoverable and start searching for devices.
Once you see the device you want to pair the system with, select it then tap on Pair.
If asked to compare the passcode showing up on both devices, do so.
After the pairing was successful the device will show the Paired status under its name.
7. Choose Playback Device
To set your default playback device:
Right click on your speaker icon in the Notification Area and then click on Playback devices.
Click on your device you wish to set as the default audio device and click Set Default.
Click OK to save the changes.
To set your default recording device:
Right click on your speaker icon in the Notification Area and then click on Recording devices.
Click on your device you wish to set as the default audio device and click Set Default.
Click OK to save the changes.
8. Pair Bluetooth Device
Set your device to pairing mode. The way you do this may be differ from device to device. In many cases, you can place your device in pairing mode by having the device off, then pressing and holding the power button to start it up. Usually, after a few moments, it will indicate it is in paring mode (flashing its indicator light, for example), and you can release the power button.
On the menu bar, click the Apple menu (1), then System Preferences (2).
Select Bluetooth.
Ensure that it says Bluetooth: On. Turn it on with the button if it isn't.
Your computer will search for any Bluetooth devices in range.
Once your device is located, click Pair.
Once the pairing process is complete, your Mac will automatically connect to the device whenever it is in range.
9. Choose Playback Device
To set your default audio playback device:
Click on the speaker icon and click on the device you wish to be your default playback device.
To set your default audio recording device:
Click on the speaker icon and click on Sound Preferences.
Click on the Input tab and then select the device you wish to be your default recording device.
.png)