How to Perform a System Restore Using Command Prompt
Authored by: Support.com Tech Pro Team
Performing a System Restore Using Command Prompt
System Restore is a valuable Windows feature that allows you to revert your computer's system files and settings to a previous state, effectively undoing system changes without affecting your personal files. While you can perform System Restore through the graphical interface, you can also use Command Prompt for this task. In this comprehensive guide, we'll walk you through the steps to perform a System Restore using Command Prompt in Windows.
Note: You will need to have administrative privileges to perform a System Restore via Command Prompt.
Part 1: Opening Command Prompt with Administrator Rights
Open the Start Menu: Click on the Windows icon in the lower-left corner of your screen.
Search for Command Prompt: Type "cmd" or "Command Prompt" into the search bar.
Right-Click Command Prompt: In the search results, right-click on "Command Prompt" and select "Run as administrator." This action opens Command Prompt with administrative privileges.
Part 2: Performing the System Restore
Checking Available Restore Points:
Before performing a System Restore, it's helpful to check the available restore points to choose the appropriate one:
In the Command Prompt window with administrative privileges, type the following command and press Enter:
wmic /namespace:\\root\default path SystemRestore get * /value
This command will display a list of available restore points with their descriptions, dates, and other details. Note down the "RestorePointID" for the desired restore point.
Executing the System Restore
In the same Command Prompt window, type the following command and press Enter, replacing RestorePointID with the ID of the desired restore point:
For example, if the restore point you want to use has the ID "5," the command would be:
rstrui.exe /offline:C:\Windows /restorepoint:5
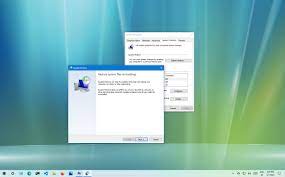
After pressing Enter, the System Restore wizard will open, allowing you to initiate the restoration process.
Follow the on-screen instructions in the wizard to complete the System Restore. You may need to confirm your choice and wait while the system restores to the selected point.
Your computer will restart automatically during the restoration process. After the restart, Windows should be reverted to the state of the selected restore point.
Part 3: Verification
After the System Restore is complete, you can verify that your computer has been restored to the desired state:
Log in to your computer.
Check if the issue you were experiencing has been resolved or if your system is back to the desired state.
Review any installed software or updates that may have been removed during the restoration. You may need to reinstall them.
Part 4: Troubleshooting
If the System Restore did not resolve your issue or caused additional problems, you can undo the restoration using the same Command Prompt window:
Open Command Prompt as an administrator as described in Part 1.
Type the following command and press Enter:
rstrui.exe
Follow the on-screen instructions to open the System Restore wizard.
Select "Undo my last restoration" and follow the prompts to undo the System Restore.
By following this comprehensive guide, you can effectively perform a System Restore using Command Prompt in Windows, allowing you to revert your computer's system files and settings to a previous state when encountering issues or unwanted changes.
Contact Support.Com:
If you are still having trouble consider seeking personalized assistance from Support.Com.
Remove Hidden Spyware In Minutes For Free
Detect and remove spyware, keyloggers, tracking cookies, and other
threats that slow down your PC or steal your data.
65+ Million Downloads
Spyware scanner with AI-powered detection engine + database
.png)