.png)
Authored by: Support.com Tech Pro Team
If you have ever wanted to save a recording of your phone screen or share it with someone, you can learn how with this tutorial! Apple's screen record feature also captures sound too! This guide will walk you through enabling the feature and show you how to record and save the video, quickly and easily.
Before you get started, make sure your Apple device is updated with at least iOS 11 or an iPad iOS 12 or more.
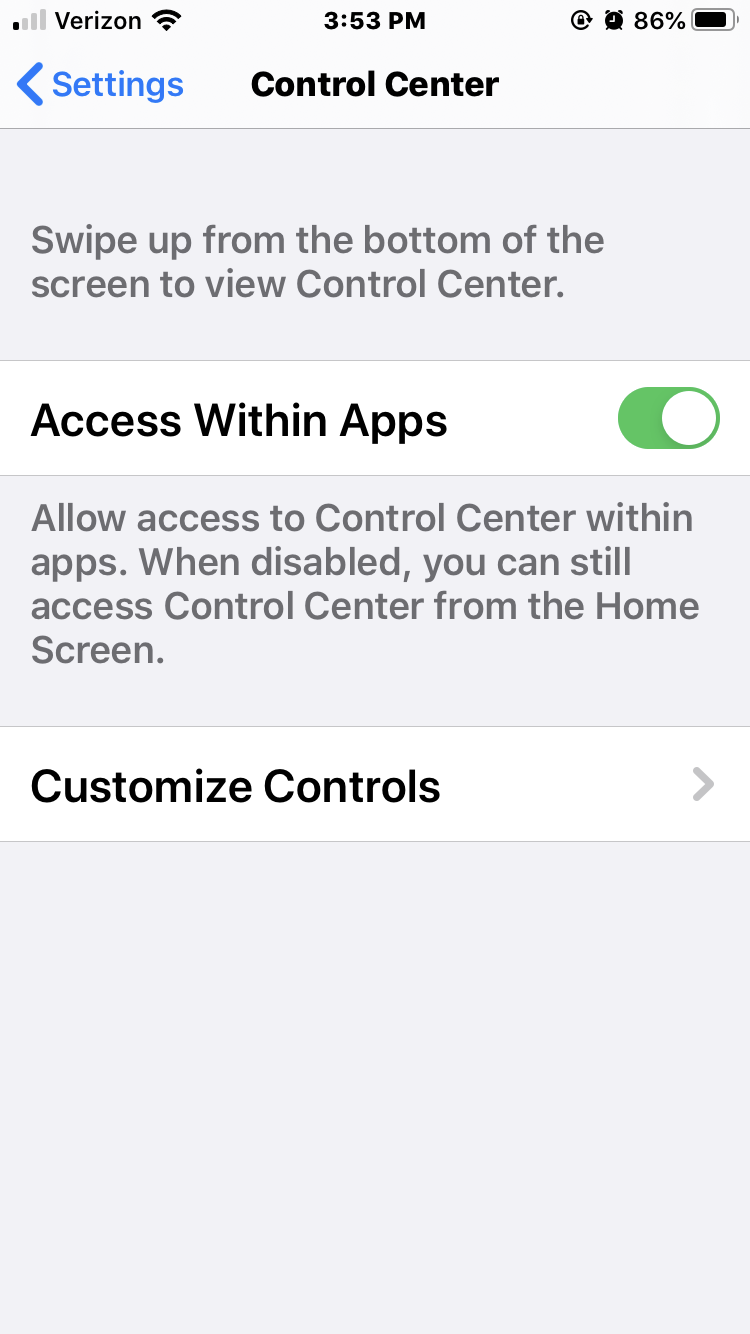
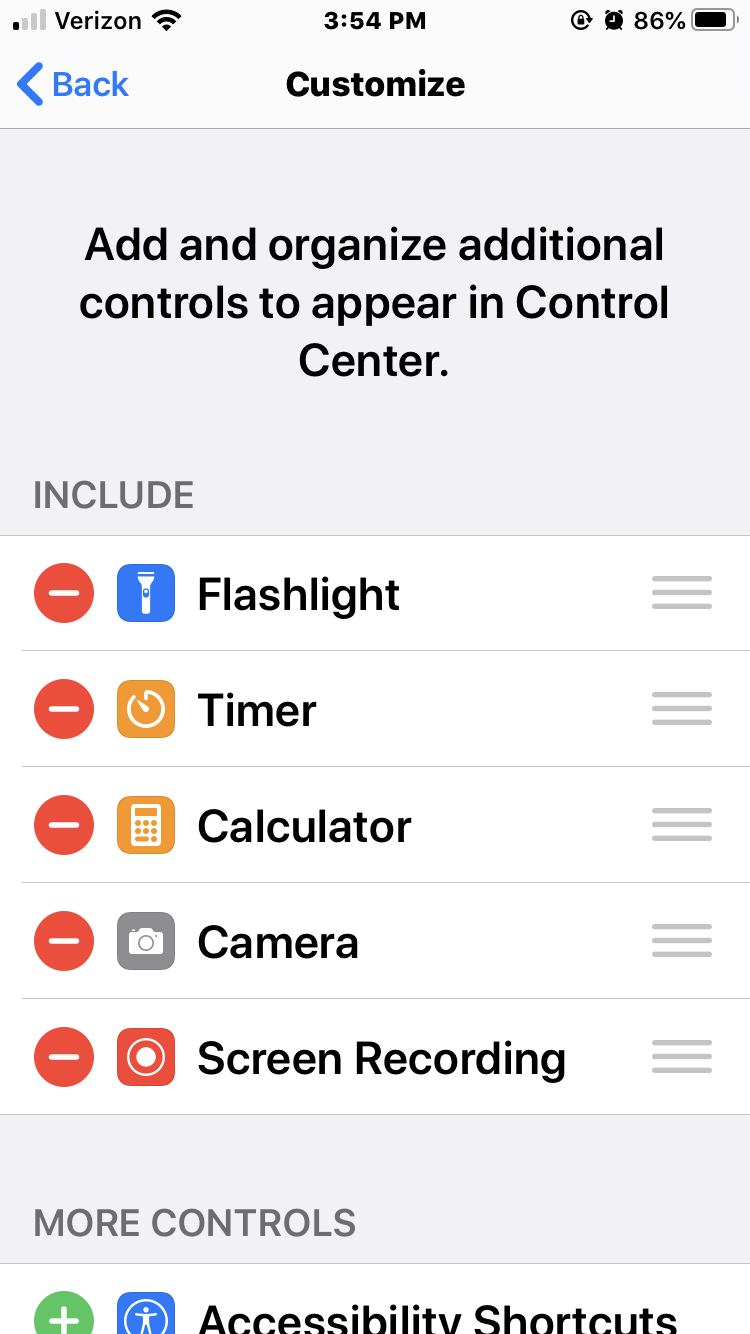
To access & make use of the recording feature, it must be added to the Control Center first.


Support.com is committed to your privacy
We do not share or sell your data to third parties. We do use cookies and other third-party technologies to improve our site and services. The California Consumer Privacy Act (CCPA) gives you the ability to opt out of the use of cookies, third-party technologies and/or the future sale of your data. Do not sell my personal information.

Support.com is committed to your privacy
Read our Privacy Policy for a clear explanation of how we collect, use, disclose and store your information
