.png)
Authored by: Support.com Tech Pro Team

How to Remove the Back Cover of Blink Indoor and Outdoor Cameras
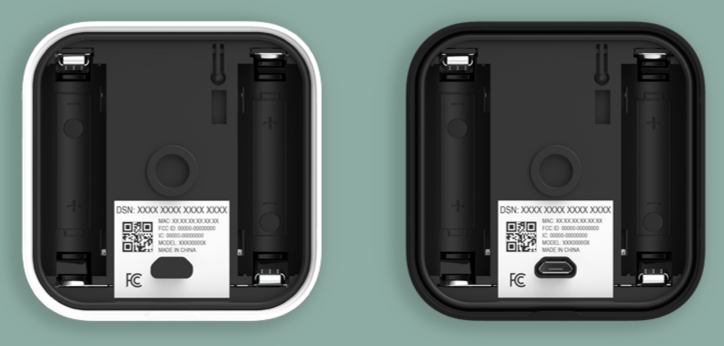
For Outdoor and Indoor (gen 2) cameras, the batteries and Device Serial Number (DSN) sticker are found inside the back cover. The serial number is needed to add a device to a system. For automated convenience, we have added a QR code version of the serial number to scan with the Blink mobile app
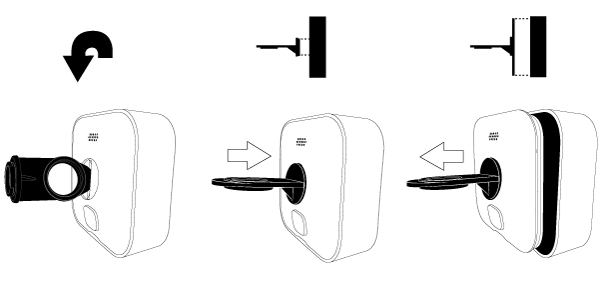
Before trying to remove the back cover, you must remove the camera from any mounts or accessories. This includes any third-party products.
Your camera shipped with a silicone disc covering the screw that secures the back cover
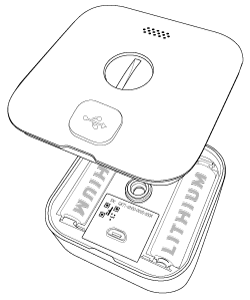
The screw slot allows you to use the included opening tool/mount adapter unscrew the camera back. You can also use a coin, or flathead screwdriver
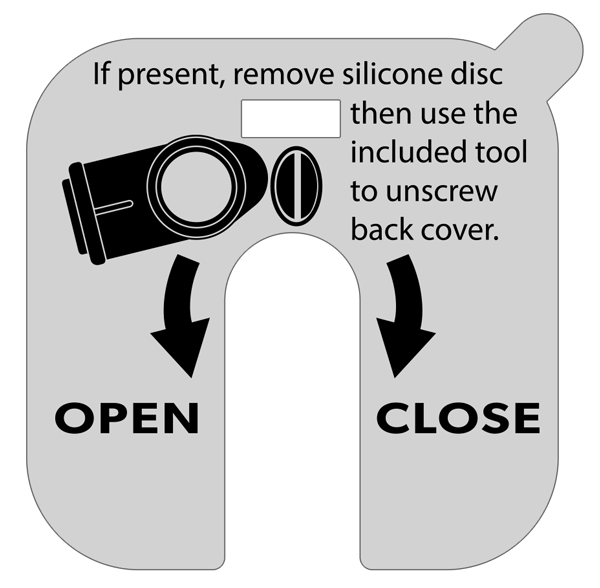
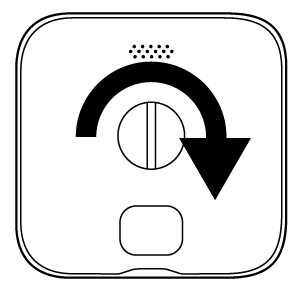
A plastic sticker on the back of the camera shows the direction to turn. Turn left (counter clockwise) to open, and right (clockwise) to close
Remove the film before camera use
1. If it is present, remove the silicone protective cover from the fastening screw, and keep it for future use.
2. Use the included opening tool, to turn the screw counter-clockwise (turning to the left) until the screw spins freely

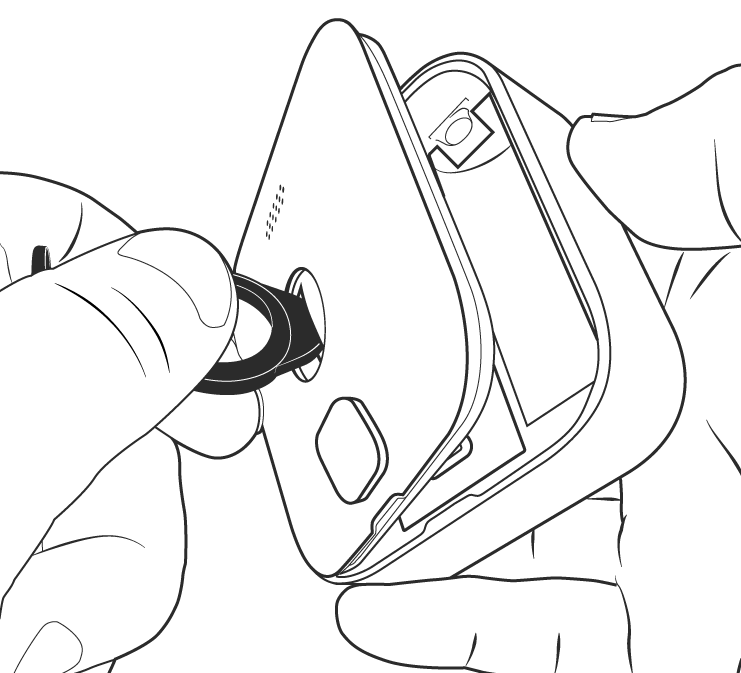
3. Apply side pressure on the opening tool to gently pry the cover loose. As shown in the illustration, be careful to hold the camera on its side, to allow the cover to come off
3.a. (Accessibility) Another way to remove the back cover after it is unscrewed completely, is to turn the opening tool around and insert the mounting end into the camera's back cover. Then, if you pull the opening tool gently, the camera's back cover comes off because the two are now attached
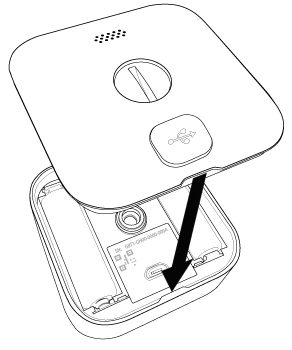
1. Align the guide notches as shown, and gently hold the cover in place against the camera body
2. Turn the screw clockwise (turning to the right) approximately three turns, or until snug. Take care to prevent over-tightening. The cover should be flush with the camera body when you are done

Support.com is committed to your privacy
We do not share or sell your data to third parties. We do use cookies and other third-party technologies to improve our site and services. The California Consumer Privacy Act (CCPA) gives you the ability to opt out of the use of cookies, third-party technologies and/or the future sale of your data. Do not sell my personal information.

Support.com is committed to your privacy
Read our Privacy Policy for a clear explanation of how we collect, use, disclose and store your information
