Resetting your Nest x Yale Lock can help resolve issues and restore default settings. Here’s how to do it:
Remove the Battery Cover:
Slide the battery cover up and off the lock to access the batteries and reset button.
Remove a Battery:
Remove one battery from the lock to power it down.
Press and Hold the Reset Button:
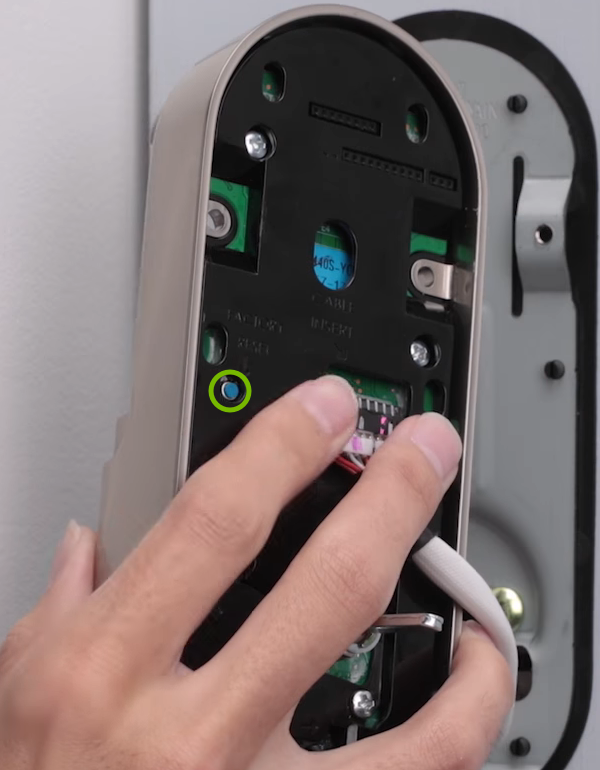
Locate the reset button inside the battery compartment.
Press and hold the reset button.
Reinsert the Battery:
While holding the reset button, reinsert the battery to power the lock back on.
Wait for the Lock to Reset:
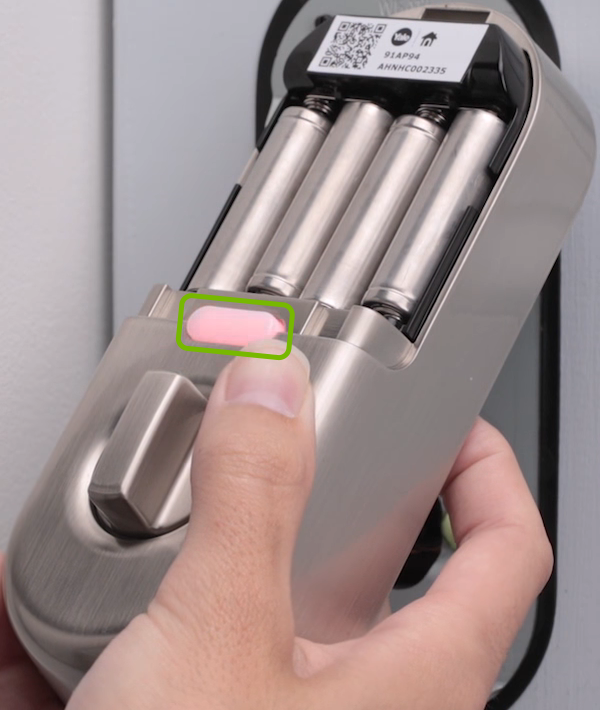
Continue holding the reset button until the lock plays a musical tone and the light ring flashes red, indicating a successful reset.
Release the Reset Button:
Release the reset button and wait for the lock to complete the reset process.
Reconfigure the Lock:
Open the Nest app on your smartphone.
Follow the prompts to set up the lock again, including connecting to Wi-Fi and configuring settings.
Test the Lock:
After setup, test the lock by locking and unlocking it using the app and the keypad.
Reconnect with Smart Home Systems:
If you had the lock integrated with other smart home systems (e.g., Google Home, Amazon Alexa), you will need to reconnect these integrations.
Contact Support.Com
If you are still having trouble, refer to the Step-By-Step Guide below, or Contact Support.Com for Personalized Assistance.
1. Introduction
Resetting your Nest x Yale Lock will restore its default settings. You may need to do this to resolve some issues like an unresponsive keypad, connectivity issues, or a forgotten master passcode.
2. Factory Reset
This process will erase all user passcodes including the master passcode and return all programming features to original default settings.
Insert the battery cover key or a similar tool with one hand into the small hole at the top of the door lock then press it downward and hold it to unlock (1) the battery cover while you remove (2) it with your other hand.
Remove all batteries and unscrew the two bolts holding the mounting plate.
Remove the mounting plate then press and hold the reset button on the back.
Insert the batteries into place while holding the reset button. Only release it when you hear "Erasing all settings" and the front light turns red.
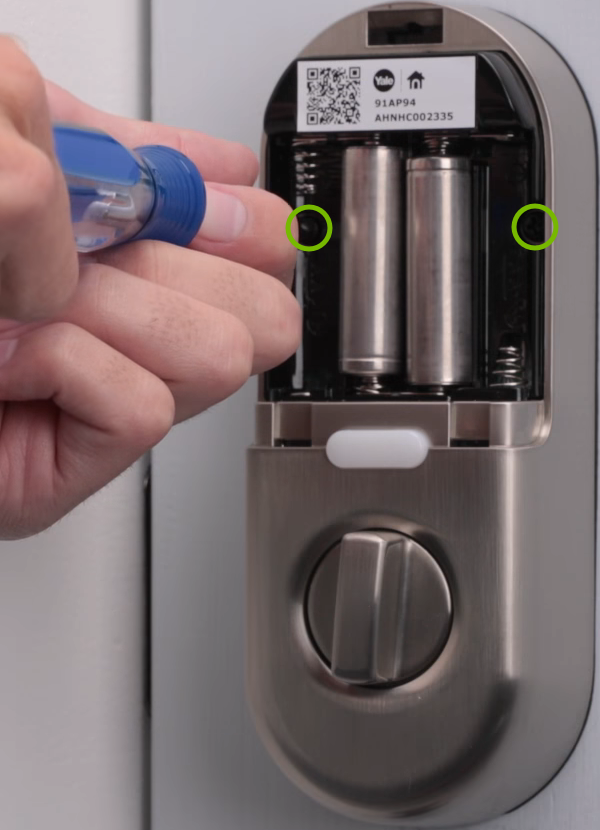
Remove the left side and right side batteries then screw the two bolts back into holes to secure the mounting plate back onto the door.
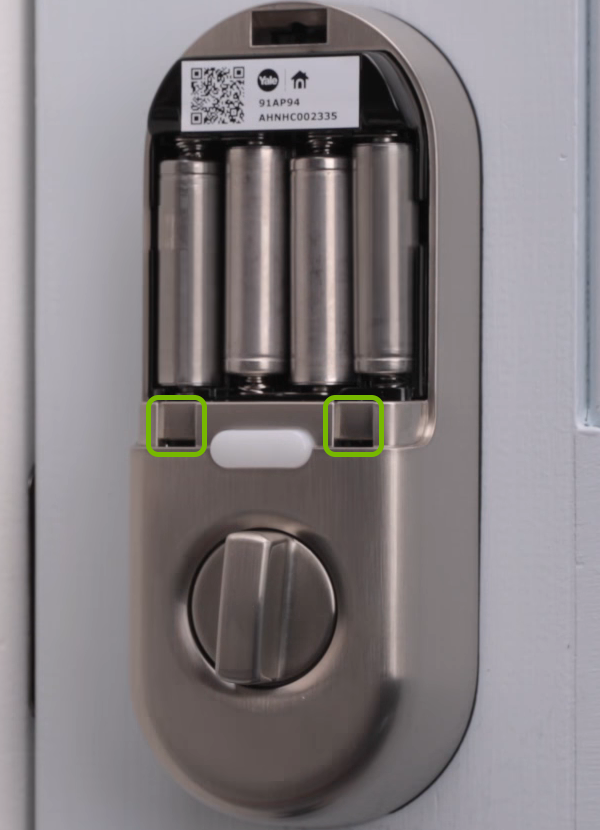
Replace the batteries back into place and replace the battery cover by inserting the two tabs into the two holes by each side of the front light.
Press the top of the battery cover until it snaps into place and locks onto the mounting plate.
After resetting the lock, you must create a Master Passcode on the lock before you set it up with the Nest app.
.png)