.png)
Authored by: Support.com Tech Pro Team
In this modern connected age, more and more of our personal and professional lives are interwoven into our smart phones and tablets. Taking good measures to keep these devices secure should be of paramount importance.
To keep your iOS device secure you can set up specialized passwords using your face or fingerprints, enable find my device, disable lock screen notifications, enable 2-factor authentication, and keep your device backed up in case of problems.
Tools You'll Need:
-->
Supplies You'll Need:
-->
Before You Begin:
Make sure your iOS device has the latest updates
Built-in security measures can only keep your device so safe. The best way to keep your device(s) secure is to always exercise caution.
The following steps are based on iOS devices running iOS 11 and later. For earlier versions, options may be similar, but may not exactly match the instructions provided.

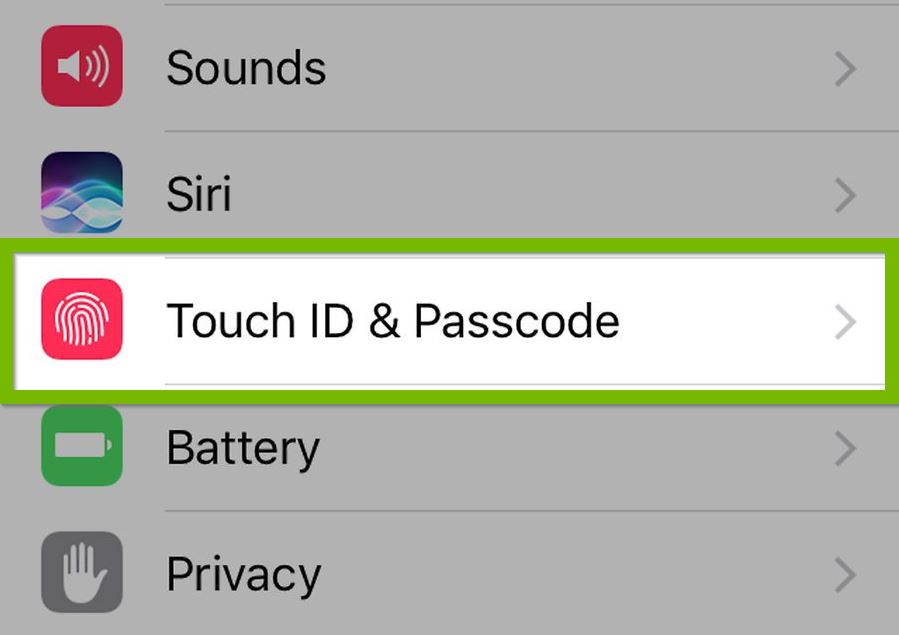
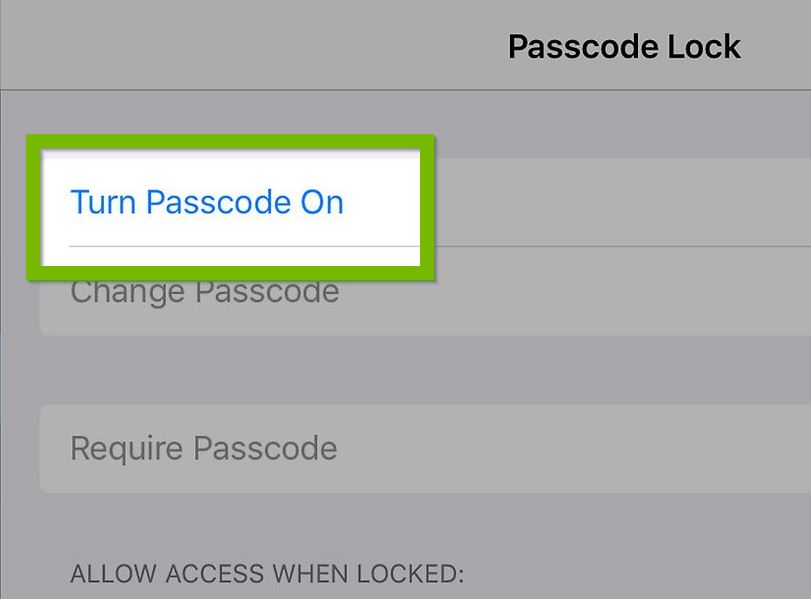
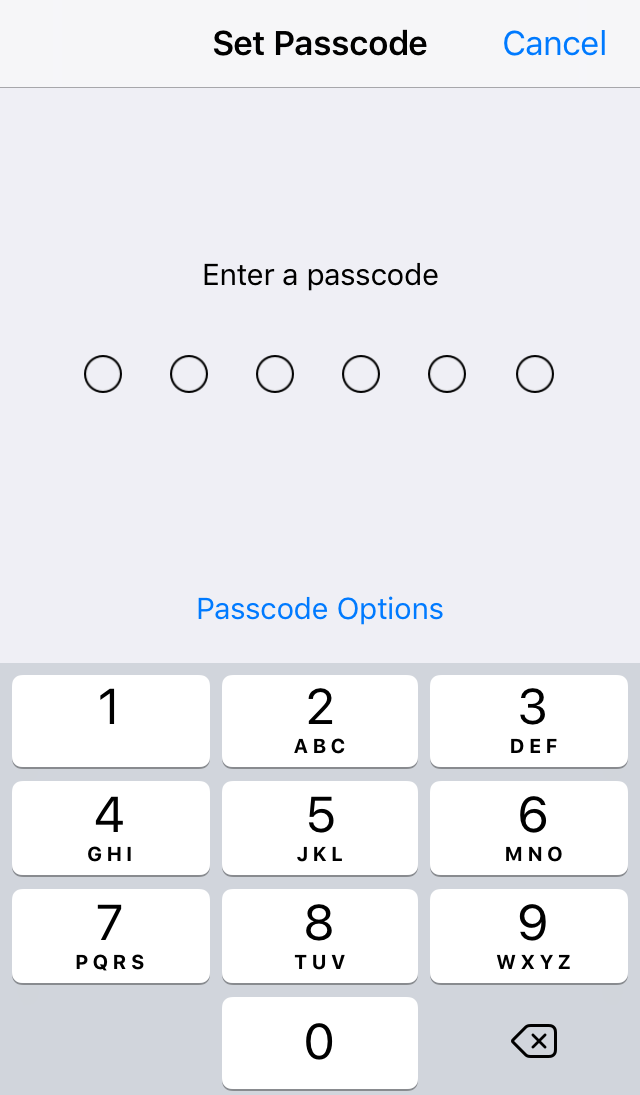
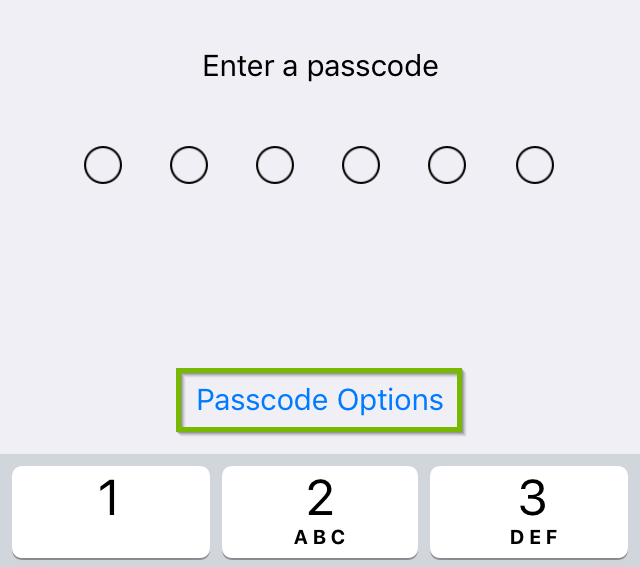
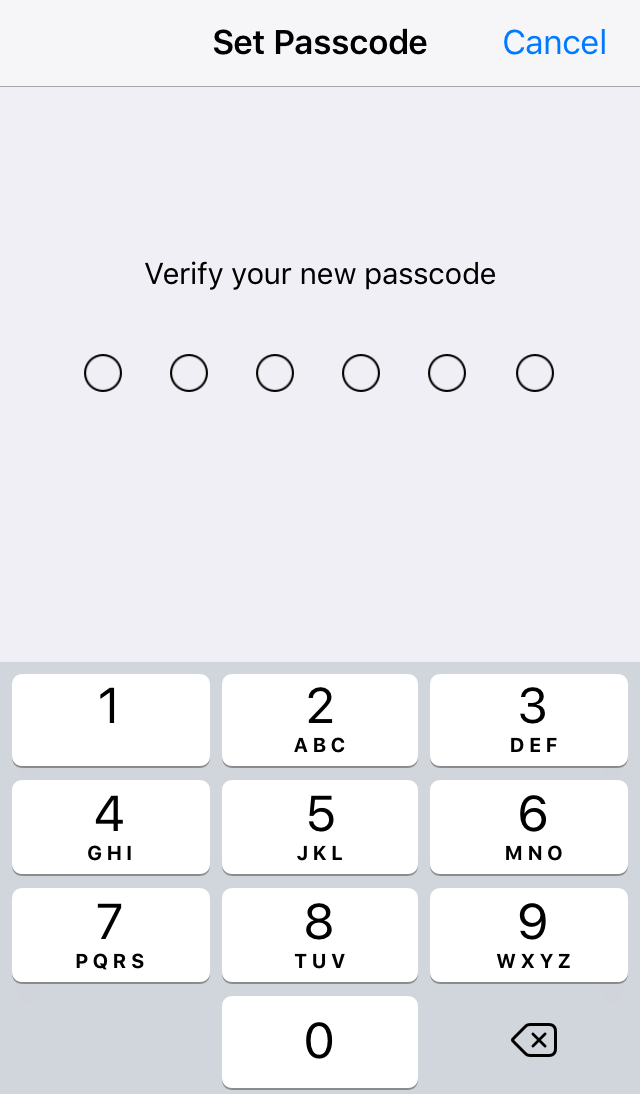
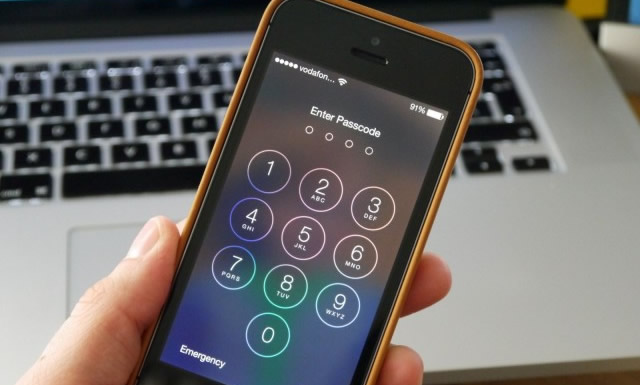
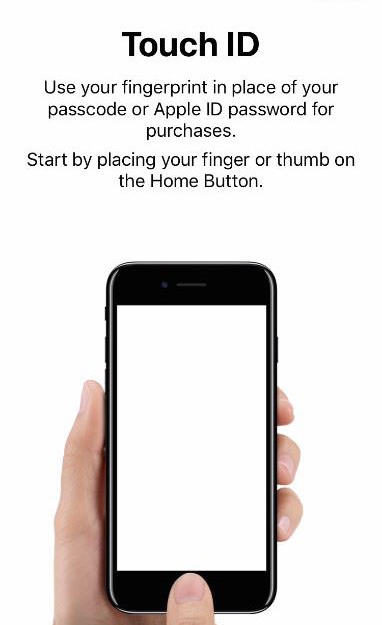
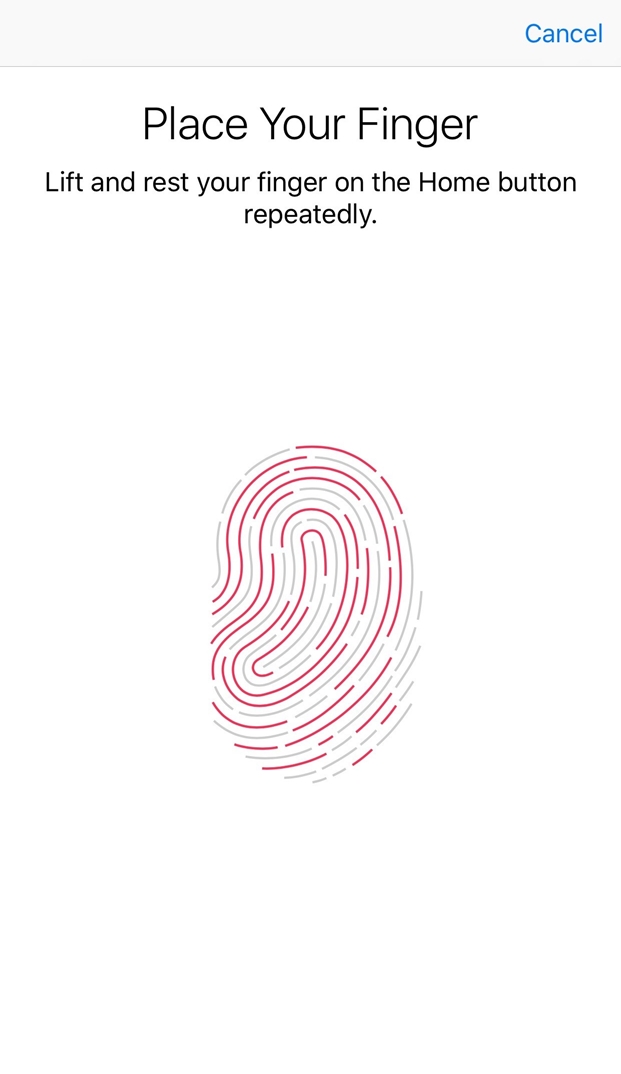
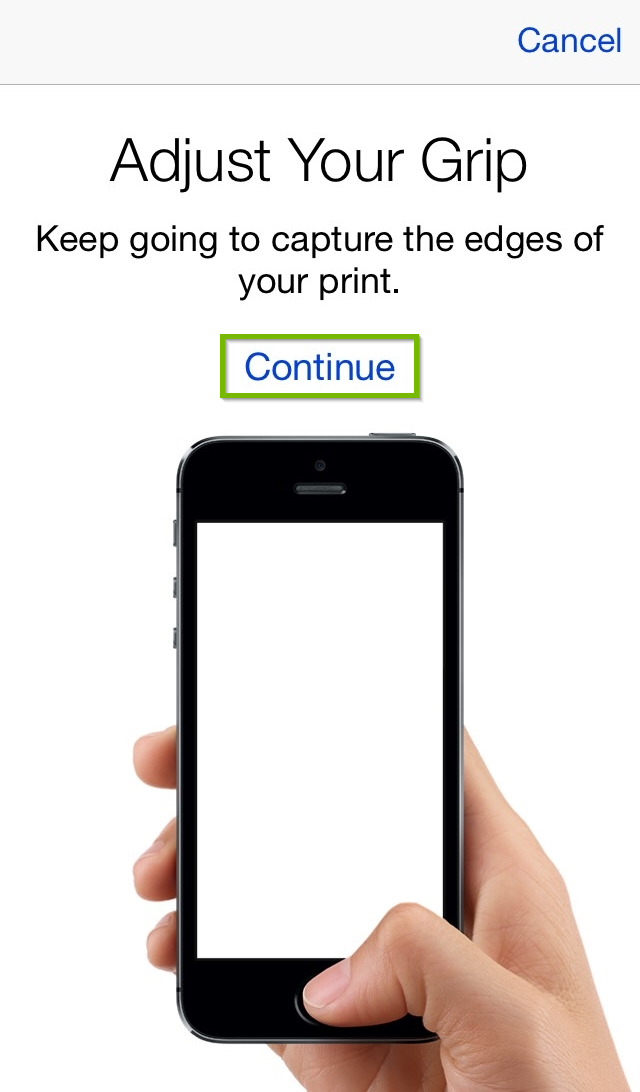
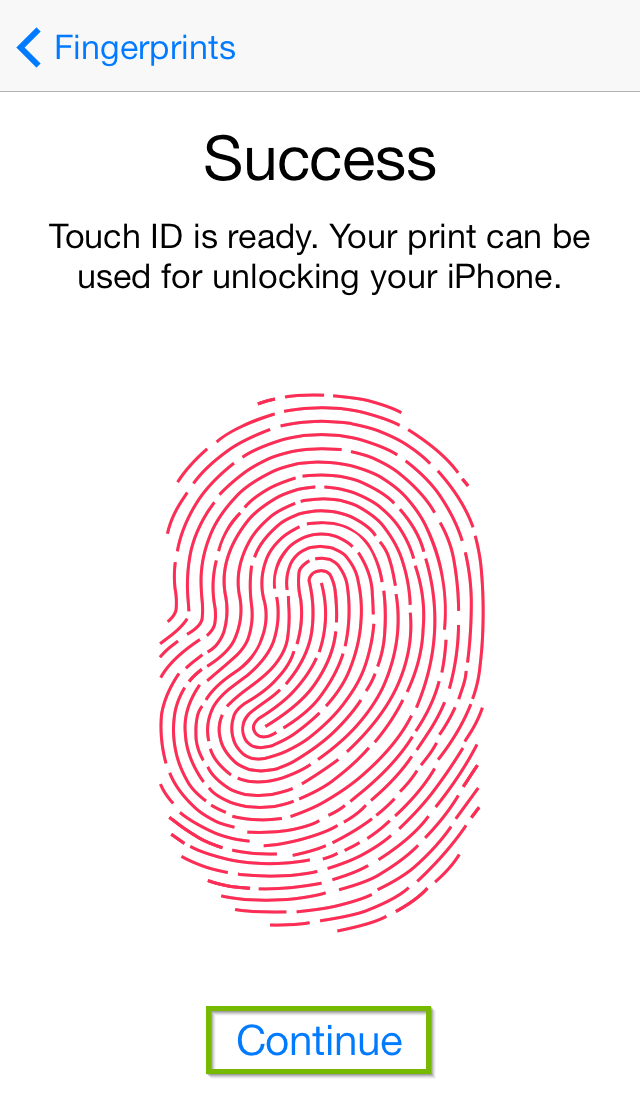
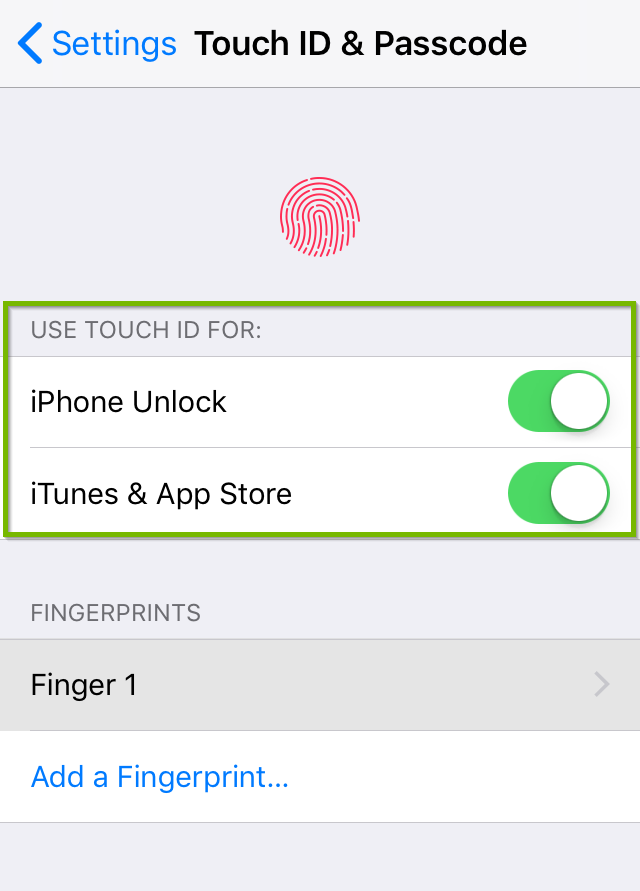
iOS devices have long been protected by numeric passcodes, giving iOS users a way to keep their devices safe from hackers and prying eyes. For a long time, passcodes were only 4-digit numeric codes, but Apple began using a 6-digit passcode as the default option. Longer and more complex passcodes offer greater security, as their complexity makes guessing, hacking, or cracking a passcode much more difficult. This is where custom-length numeric and alphanumeric options come into play.
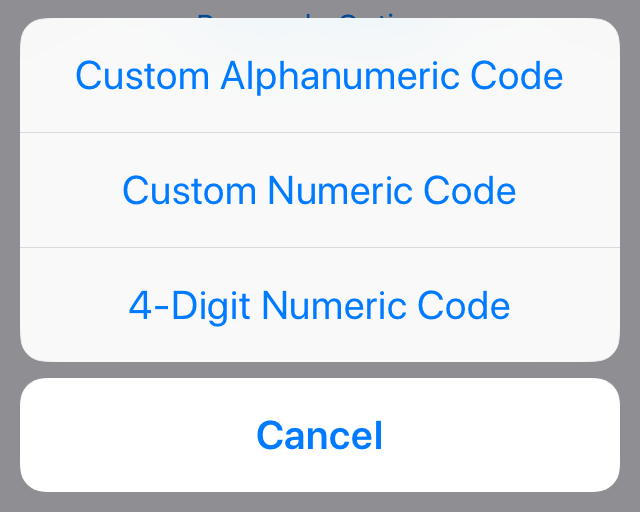
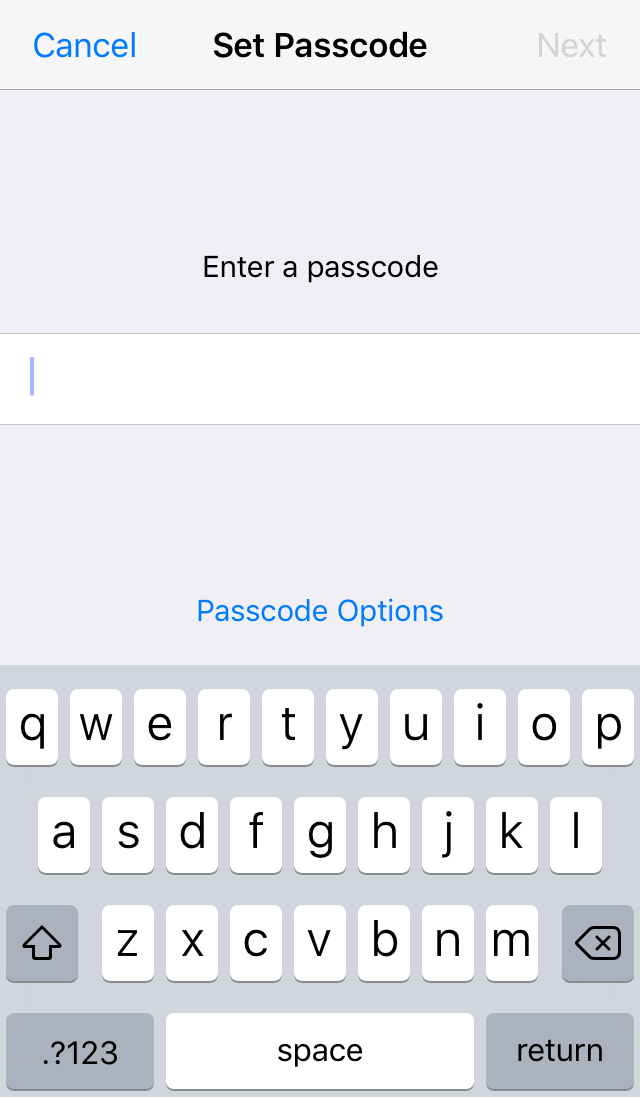
Custom Alphanumeric Code
This allows for a custom-length passcode to be created using both letters and numbers.
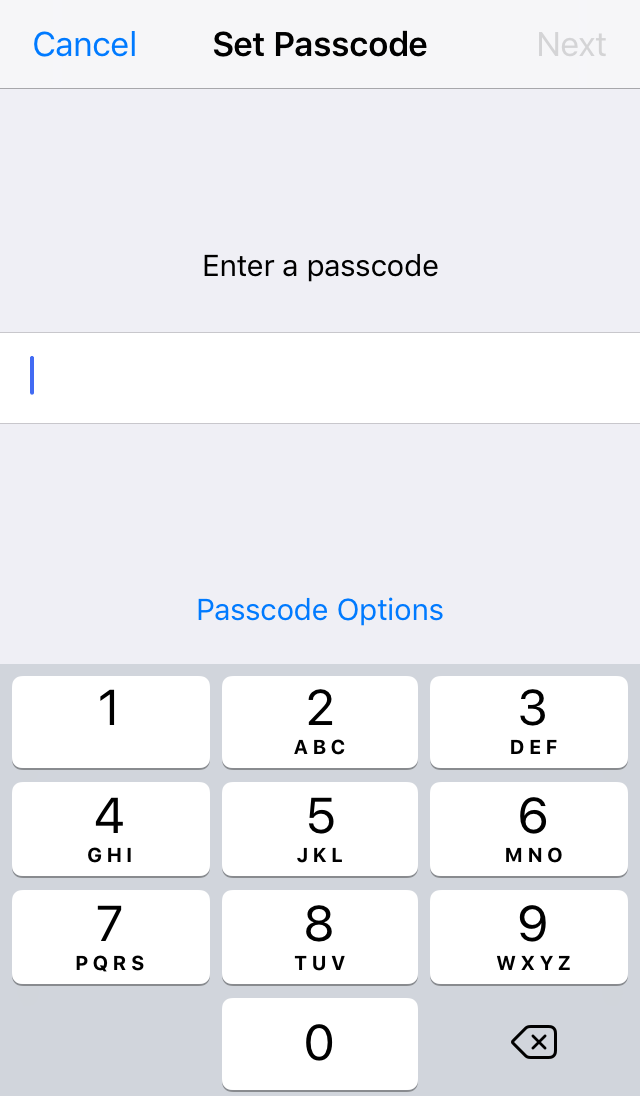
Custom Numeric Code
This allows for a custom-length passcode to be created using numbers only.
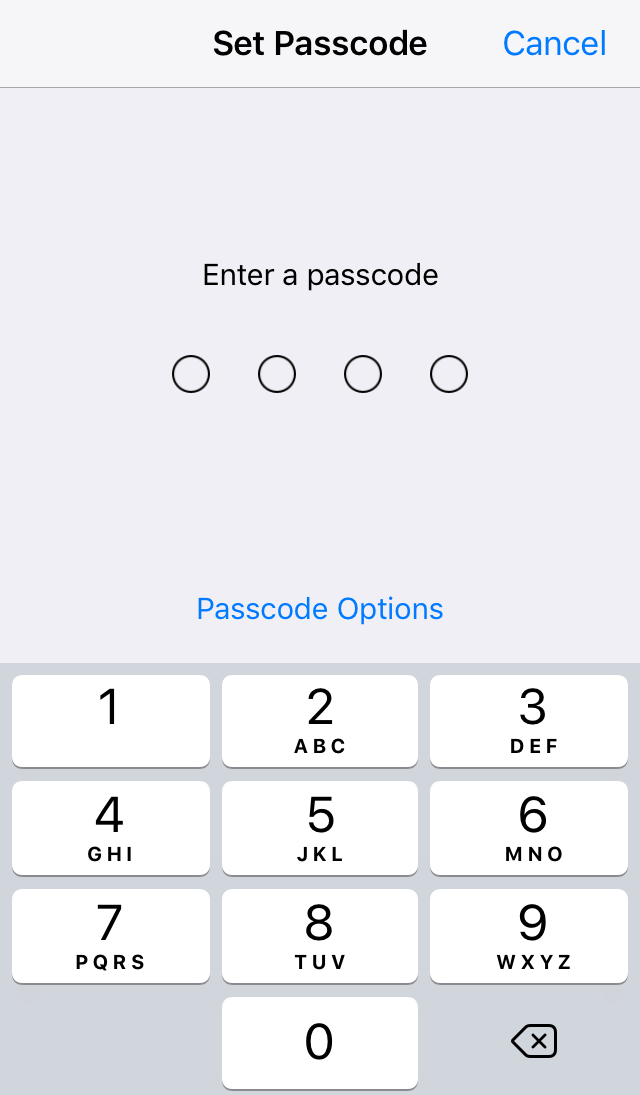
6-Digit Numeric Code
Beginning with iOS 9, Apple began using a six-digit passcode as the default passcode option. This is the most common type of passcode used with iOS devices today.
4-Digit Numeric Code
The 4-digit numeric passcode was the original passcode option that iOS devices used as a standard. This is also commonly referred to as a "PIN-style" passcode.
The following steps are based on iOS devices running iOS 11 and later. For earlier versions, options may be similar, but may not exactly match the instructions provided.
Find My iPhone isn't just handy for locating a missing iOS device it can also be used to lock or erase a device in a worst case scenario.


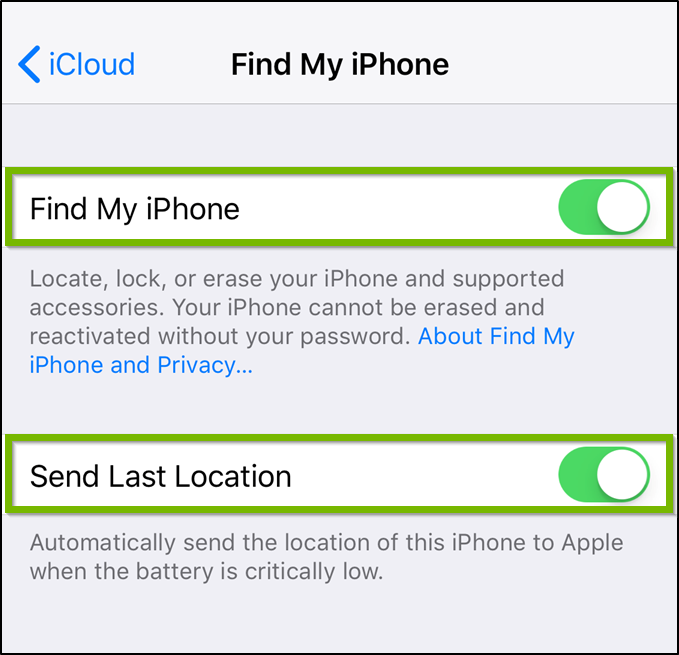
If your device is not connected to an iCloud account, it will need to be signed into one in order for this feature to be available.
Once enabled, there are two ways you can remotely use Find My iPhone:
Find My iPhone will only work on an iPad if it is connected to a cellular network or Wi-Fi. If the iPad does not have connectivity, Find My iPhone will not be able to communicate with the device.
Lock screen notifications generate previews of notifications that appear on your device's screen while it is locked. These previews can contain portions of information you receive in text messages, email messages from VIP senders, and notifications from other apps you have installed. Because these notifications appear on your screen while your device is locked, if it is left out in plain sight, anyone nearby can view this information freely. Depending on what sorts of notifications you may receive while your device is out in the open, this can create a privacy risk that you may wish to avoid.
The following instructions will demonstrate how to disable lock screen notifications. While displaying notifications on your lock screen doesn't always present a privacy risk, disabling them may give you peace of mind. If you would rather lock screen notifications remain on, the following instructions can be skipped altogether.


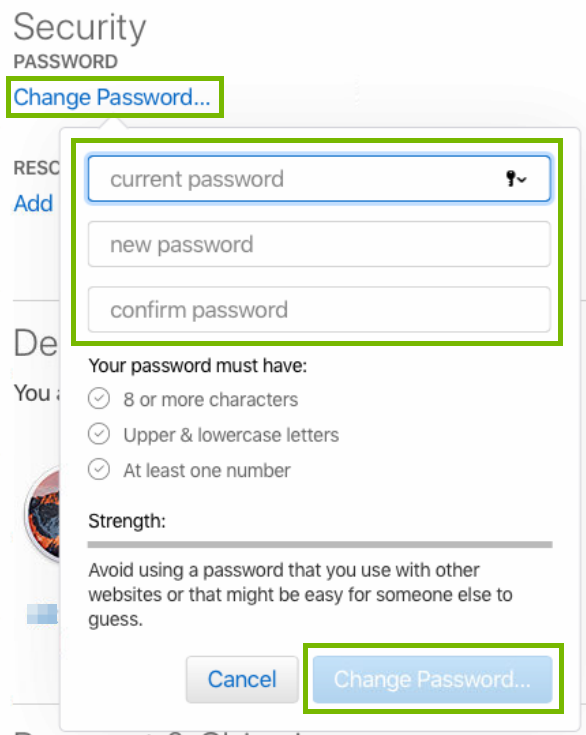
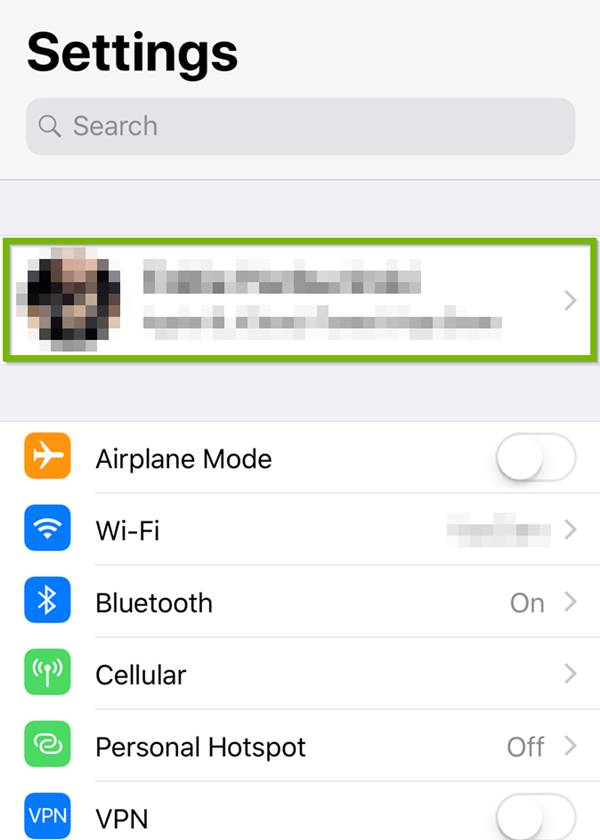
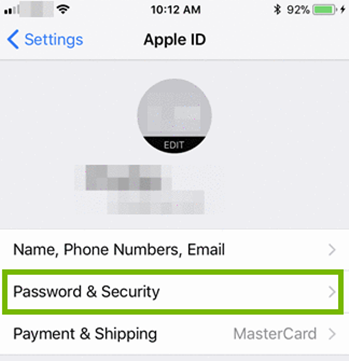
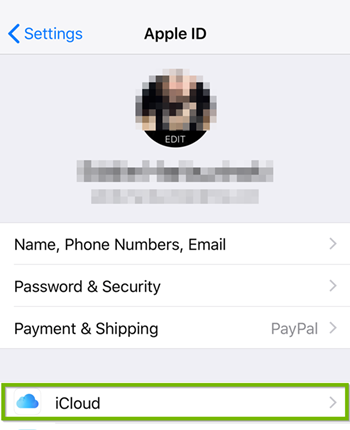
The security of your iOS device is tied tightly to the security of your Apple ID and iCloud accounts. For that reason, it is important to make sure your Apple ID is secure. We can guide you through ensuring you have a strong password selected as well as turning on two-step verification.
Wherever possible, you should pick a password that is impossible to guess and is also resistant to brute-force attacks. Note that some devices or systems do not allow special characters or they may have their own requirements.
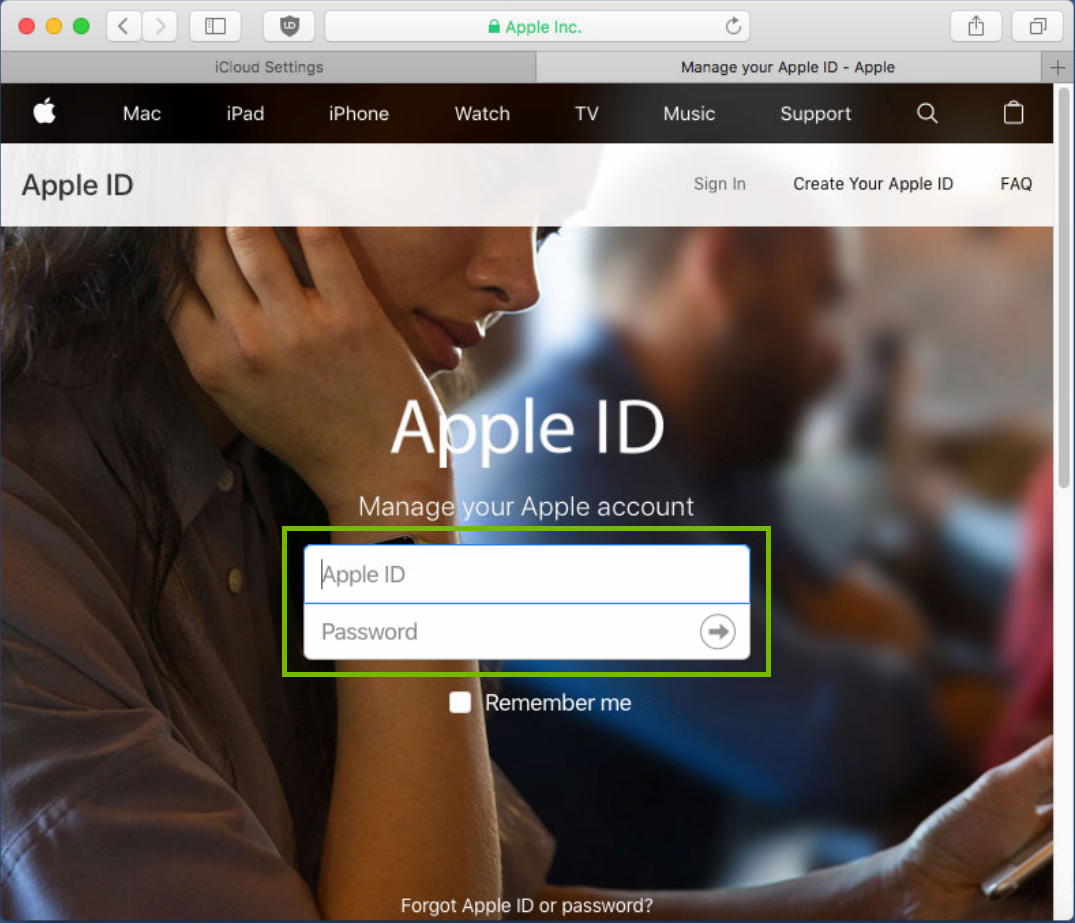
Your Apple ID and password are very important, and you will need them across every Apple device you have; now and into the future.
Enabling a two-step verification for your Apple ID will further prevent unauthorized use of your account.
Two-factor authentication is an extra layer of security for your Apple ID. The first is your password, the second will be a special code or prompt displayed on your iPhone.

You will need to have your iPhone available whenever you are using your Apple ID, such as making purchases from the Apple App Store, or making changes to your Apple ID from your computer.
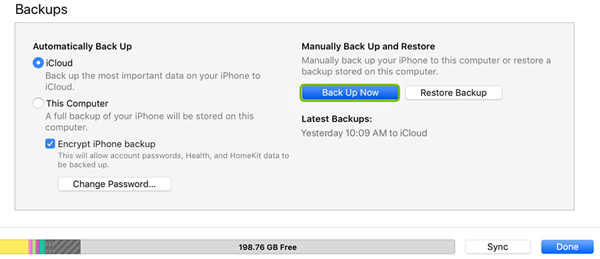
There are two ways to backup your iOS device: iCloud, and to your computer via iTunes.
iCloud has been the default way to backup your iOS devices since iOS 5. The first 5GB of files you backup using iCloud are free. Once this has been filled up, you'll have to pay a monthly fee. Photos and videos can fill up your free 5GB fast. If you take a lot of pictures, you may need to consider upgrading your iCloud storage, or backup using iTunes instead.
While iCloud is the default backup method, it will need to be turned on.
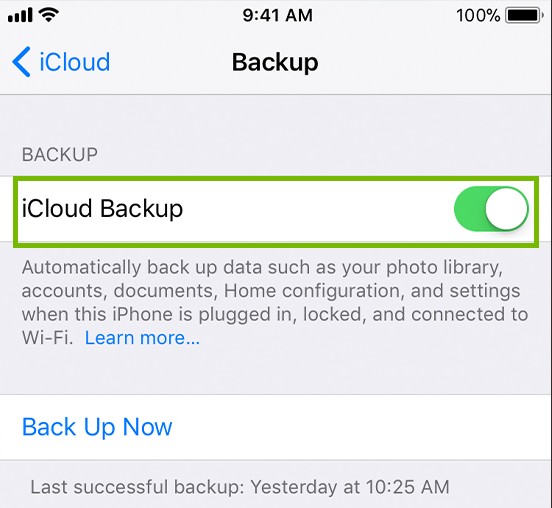

From now on, whenever your iOS device is connected to WiFi and not in use (locked), it will automatically back itself up to iCloud.
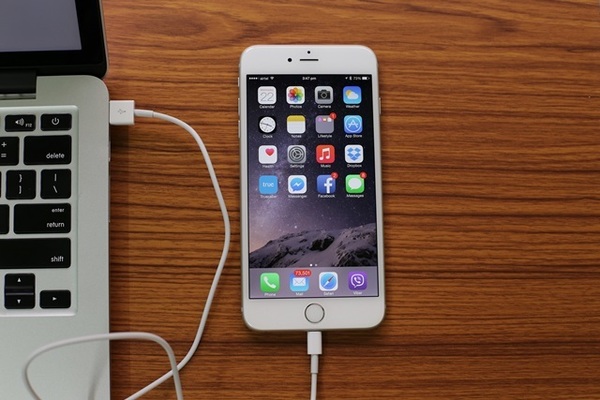
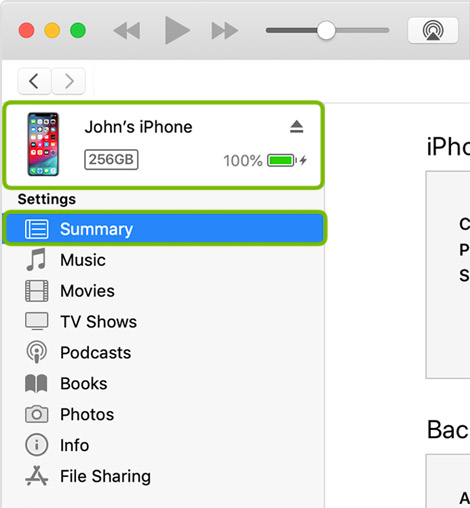
To backup using iTunes, you will need to connect your device to your computer. You'll be using the USB cable that it came with to do this. While this method is free, it is not automatic and will take some time to download all of the data on your device over to your computer.

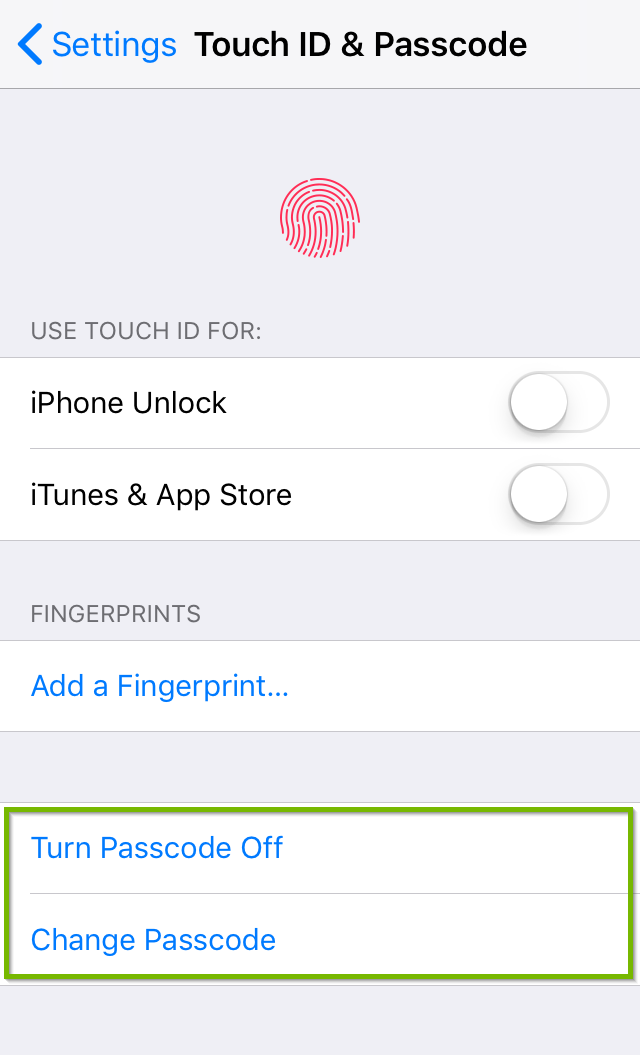
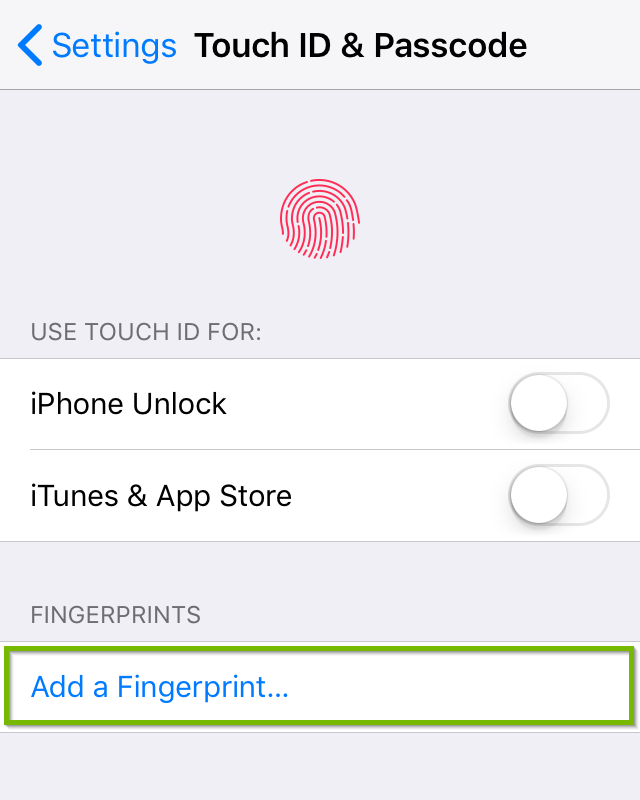
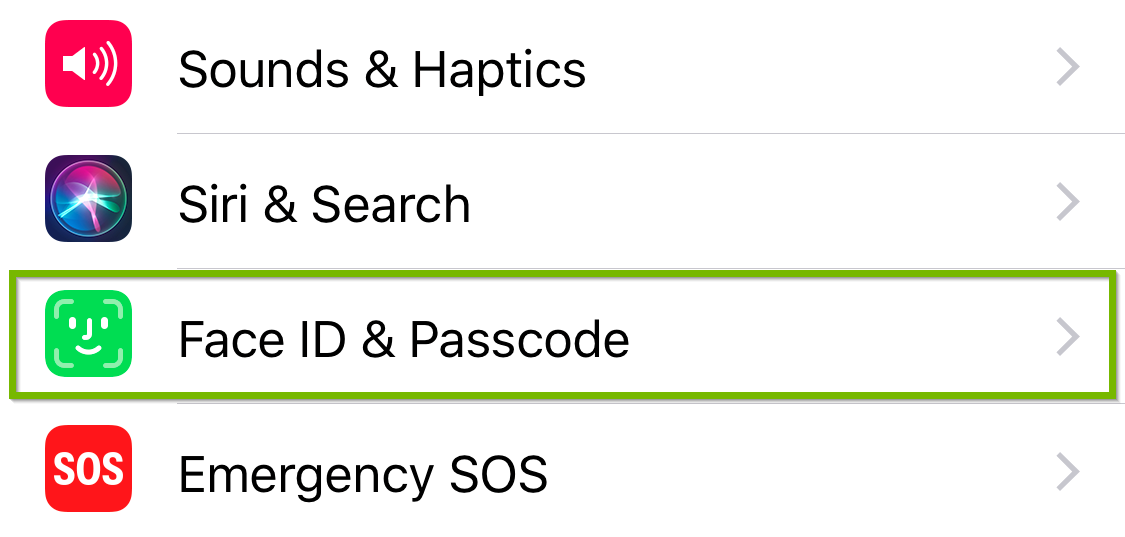
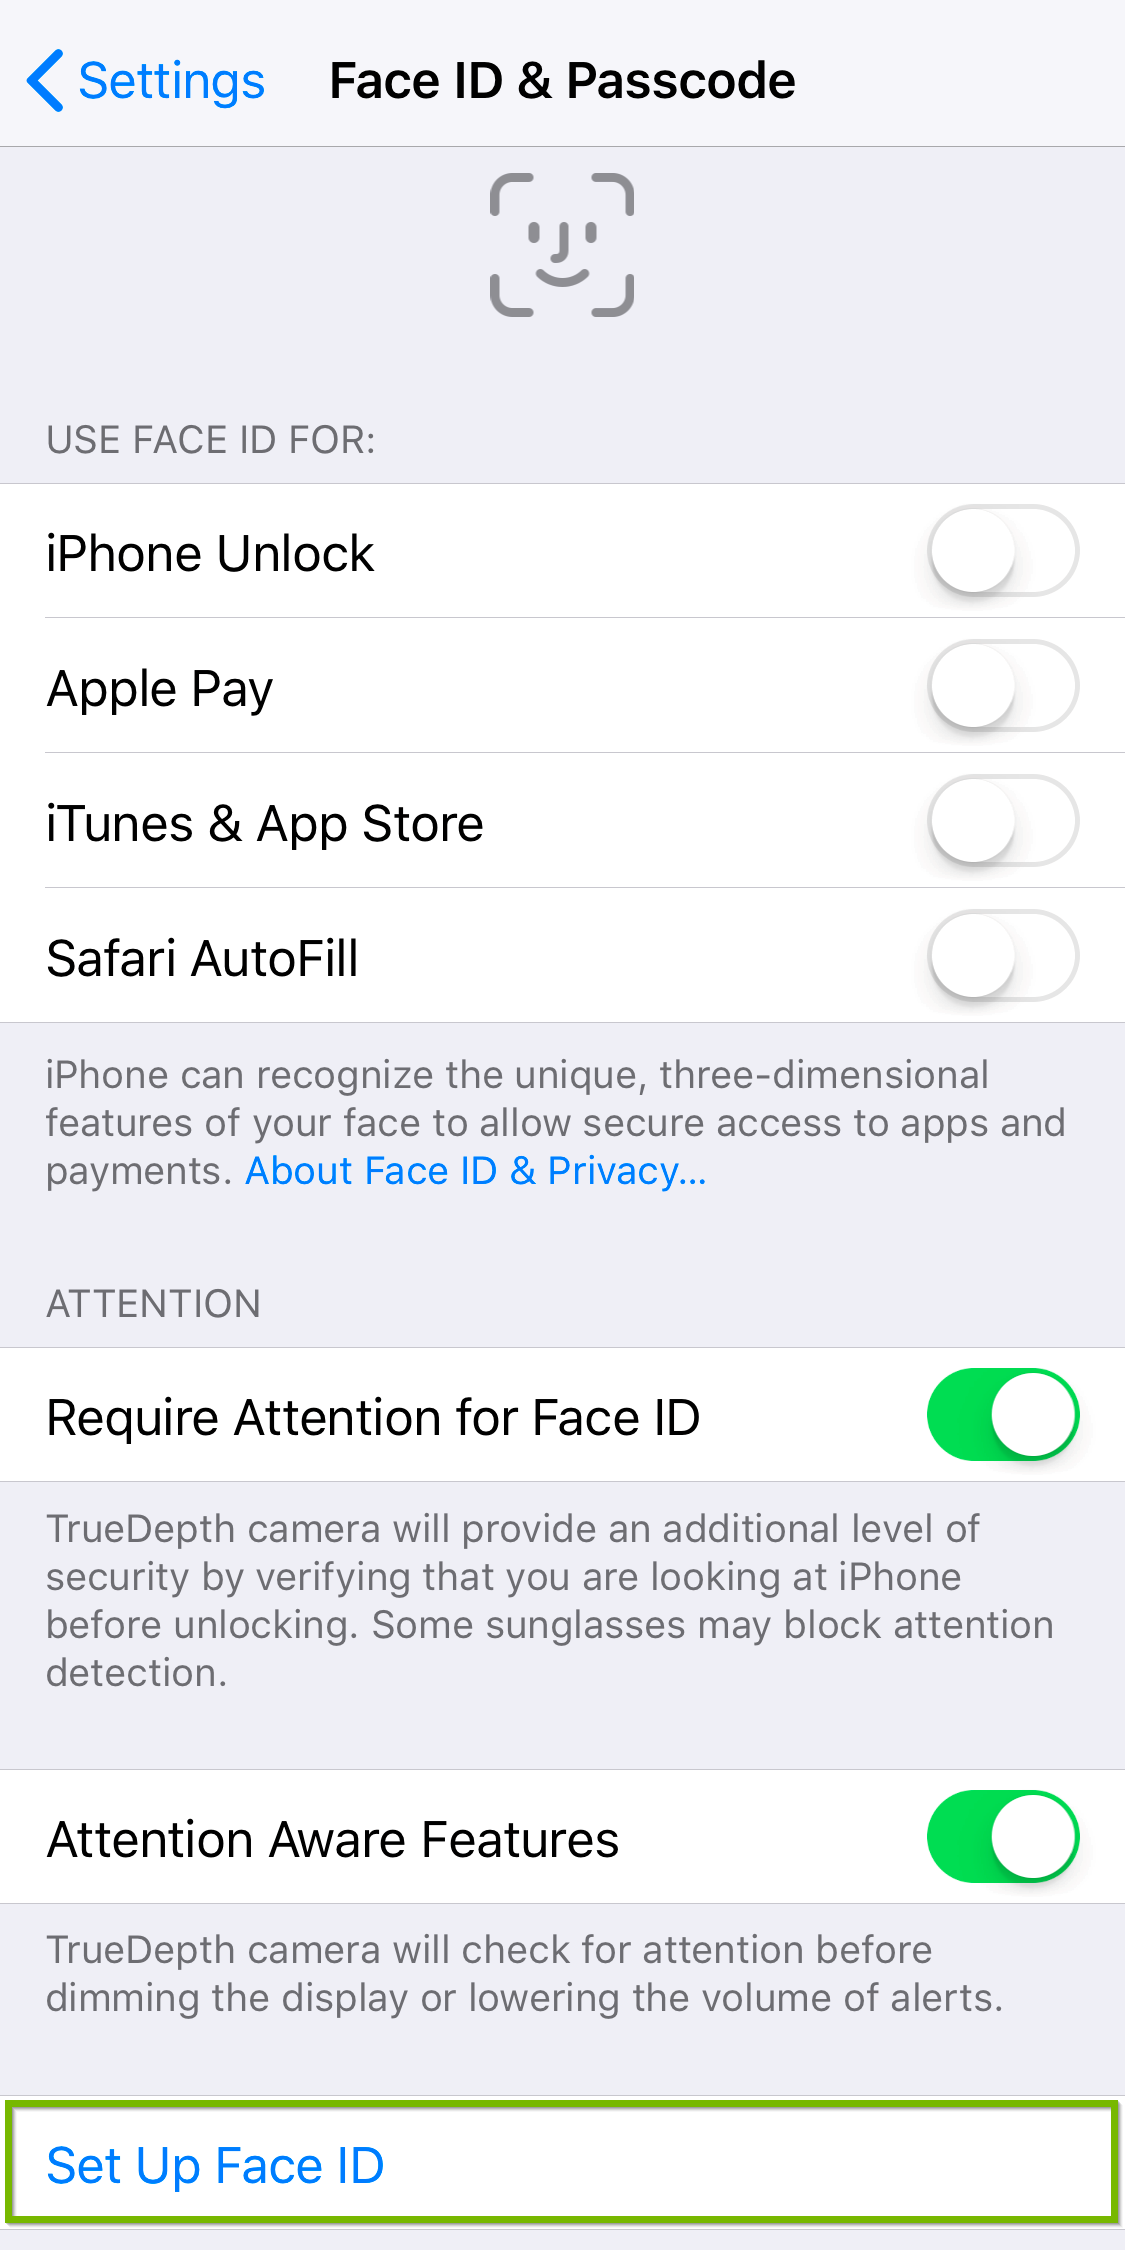
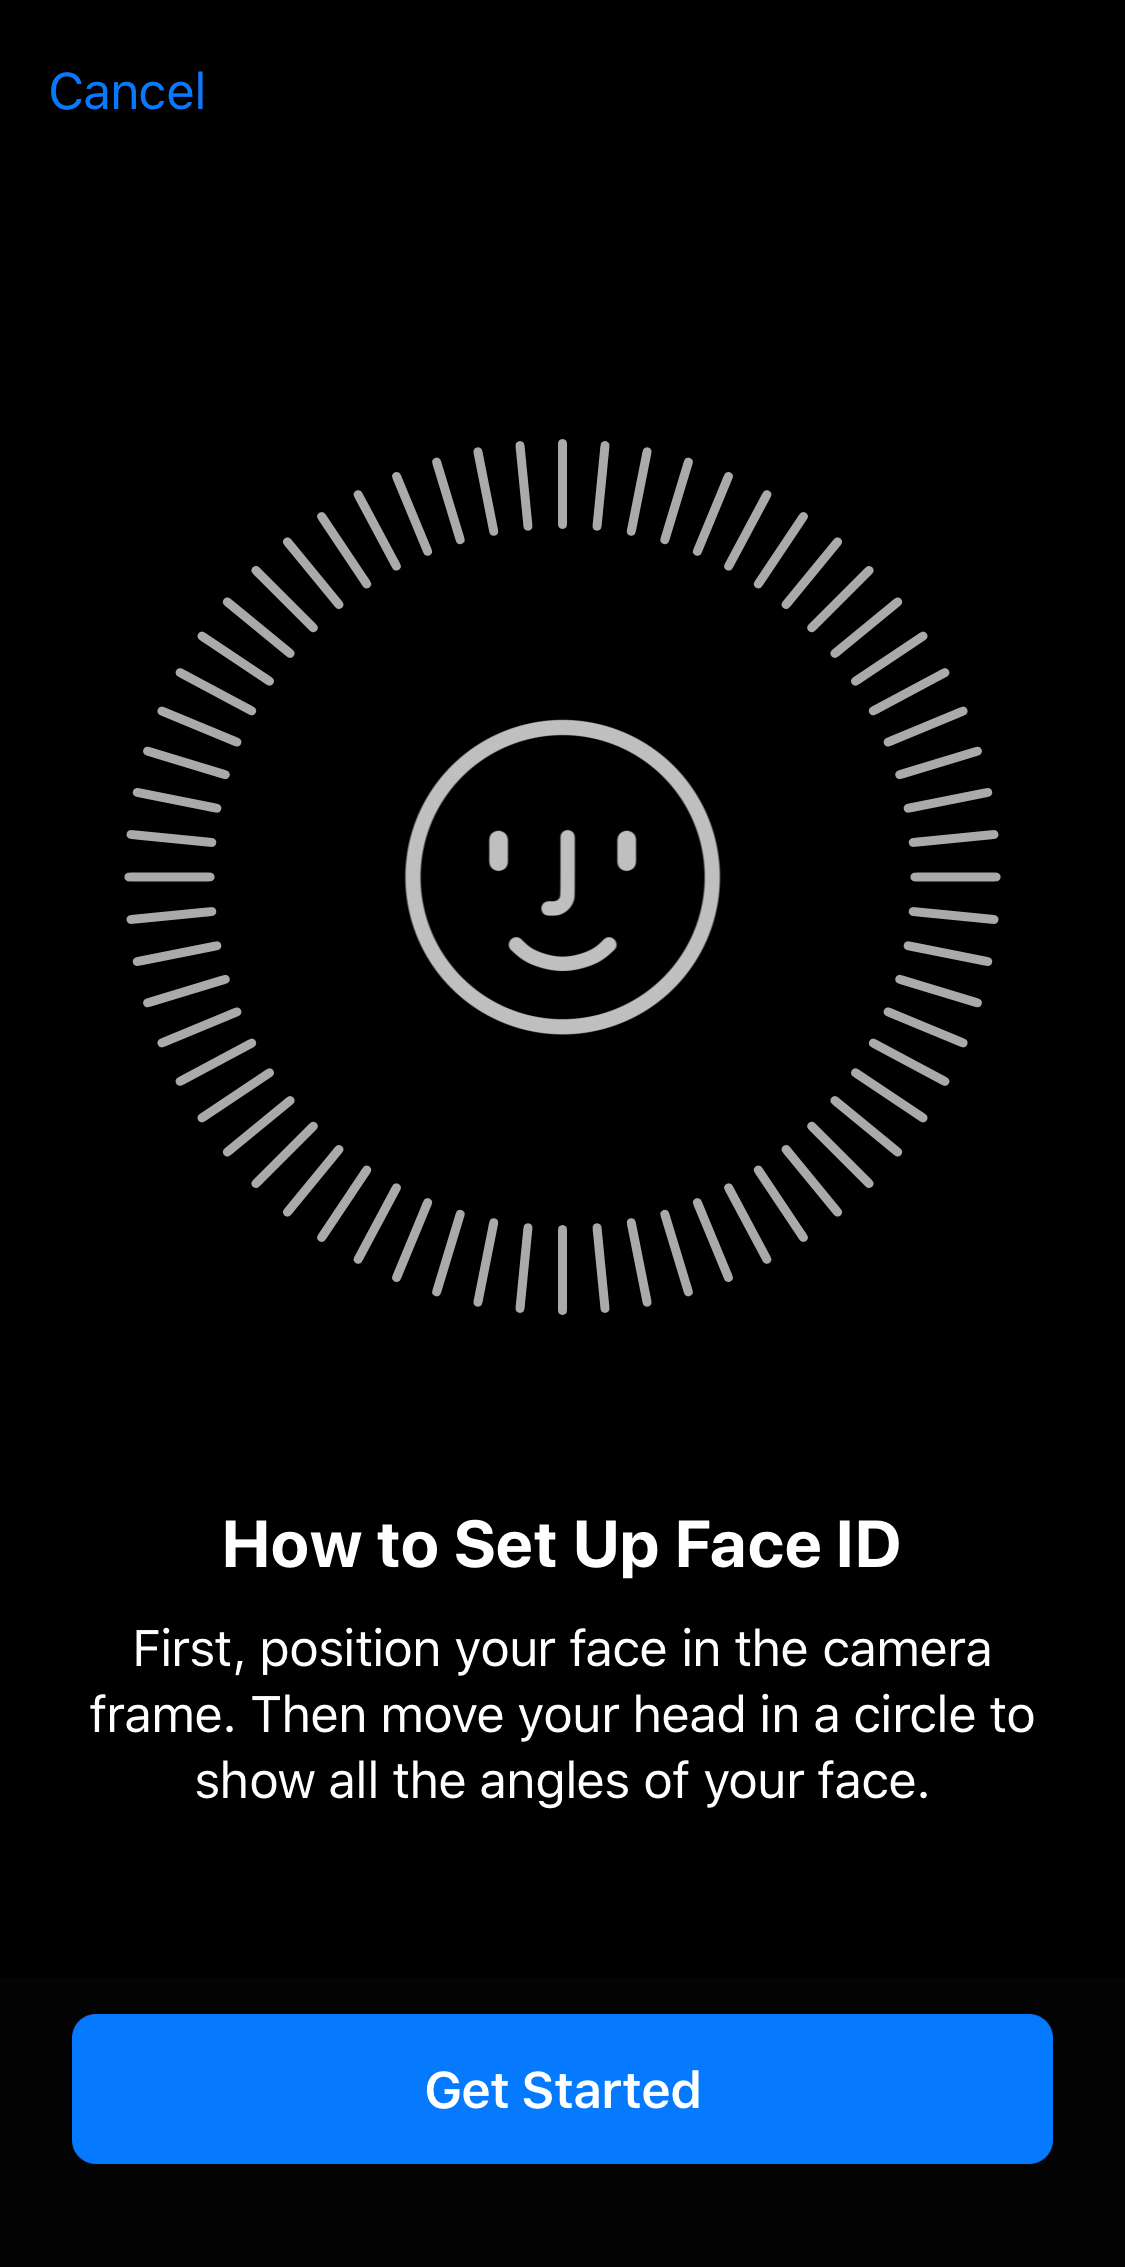
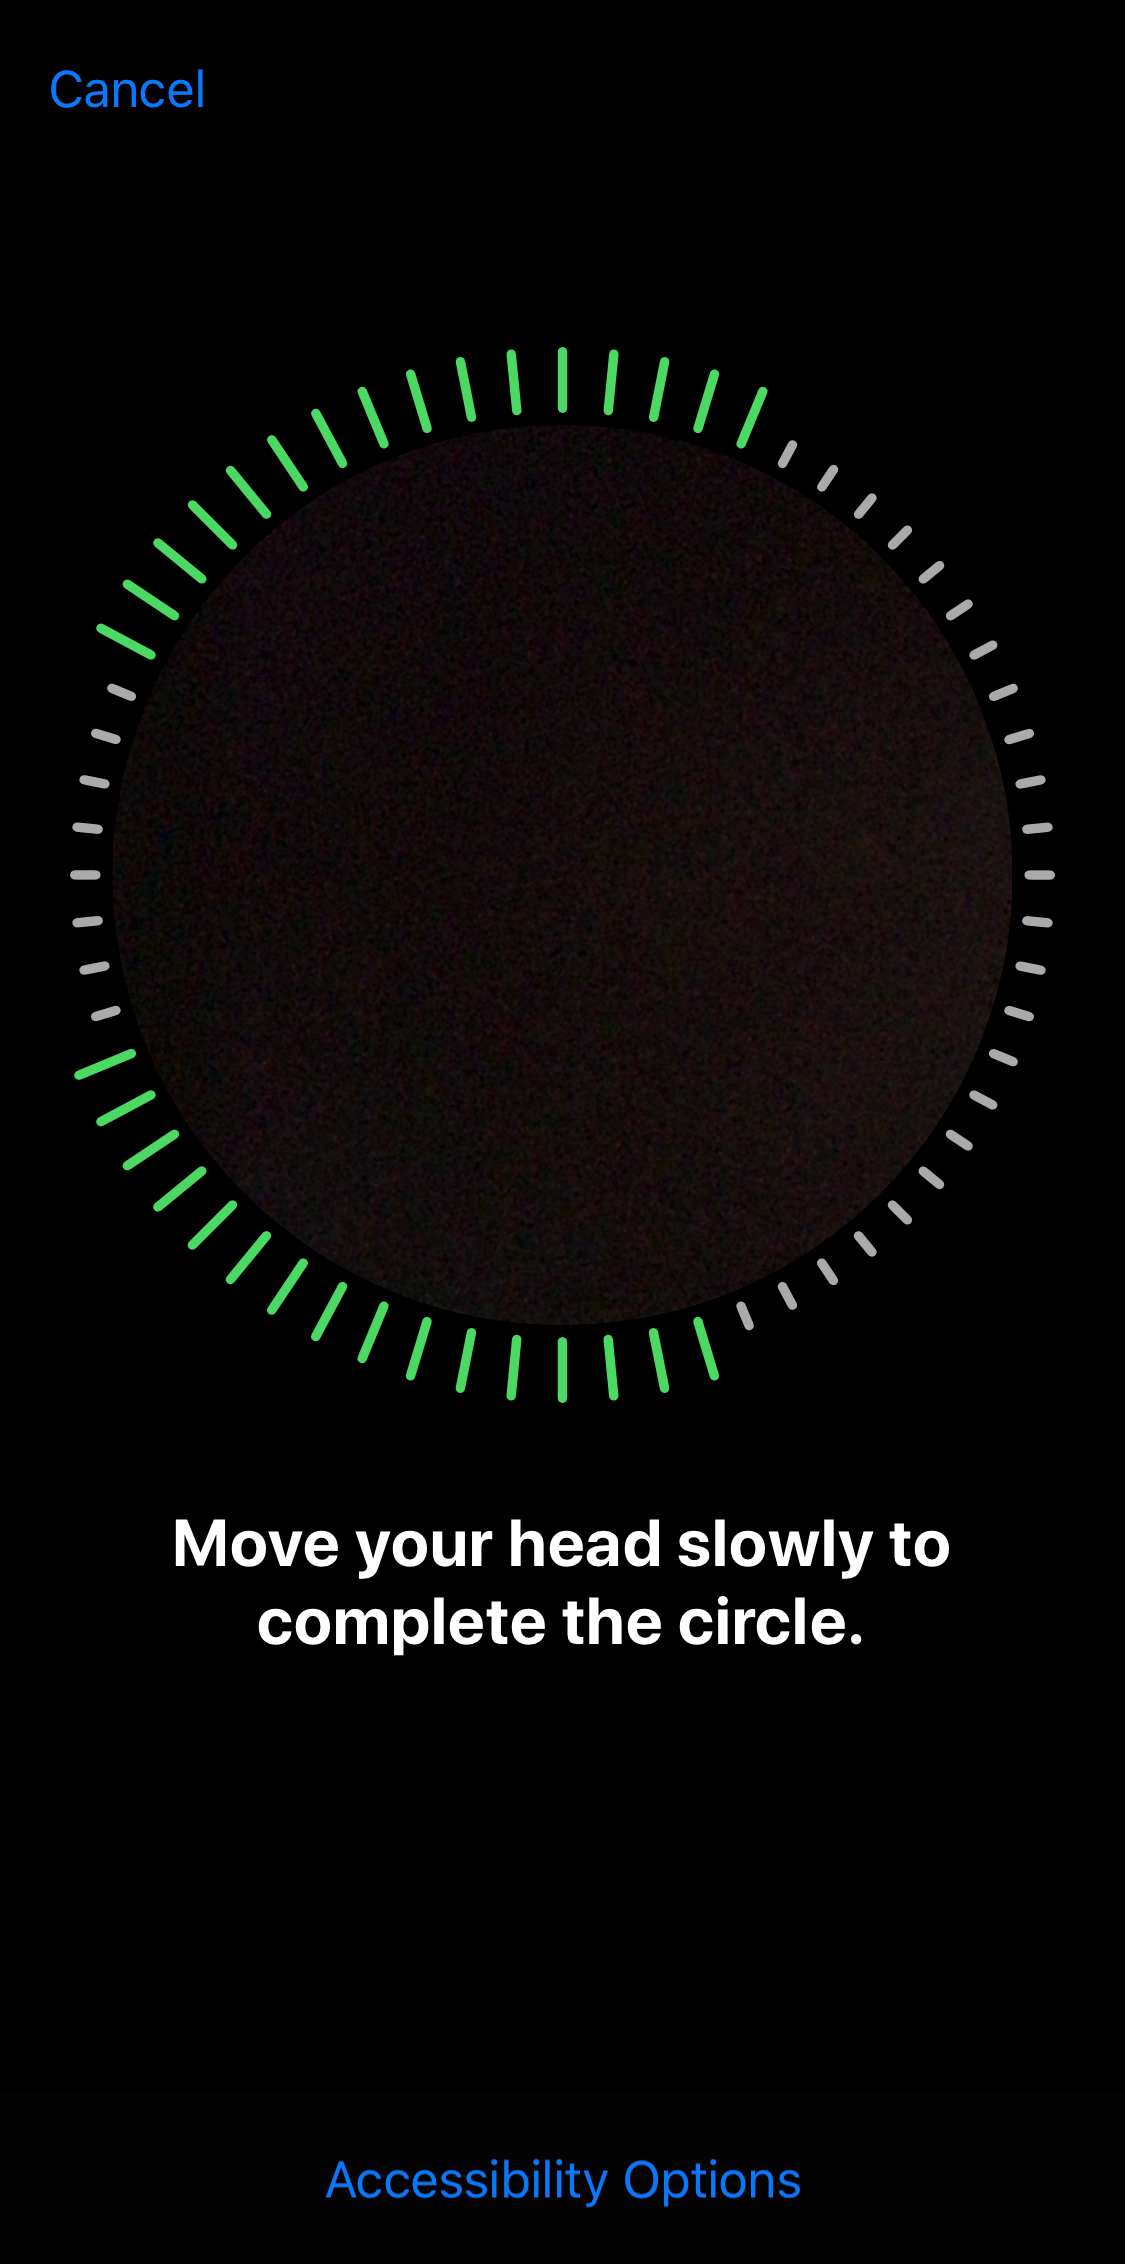
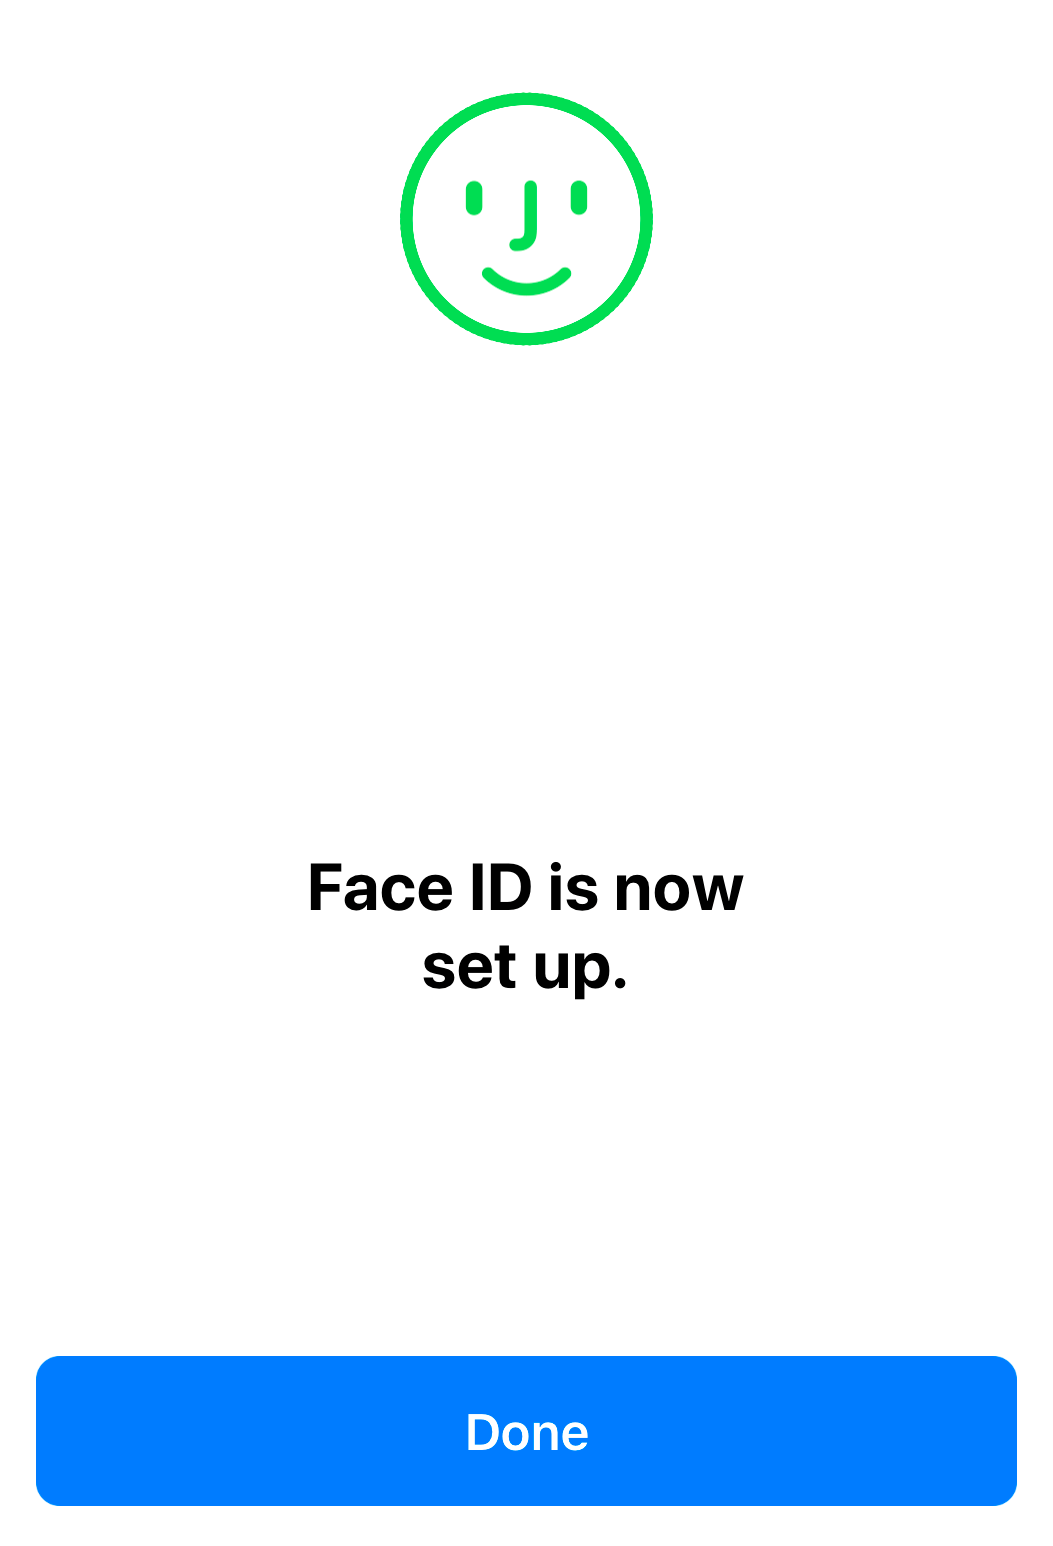
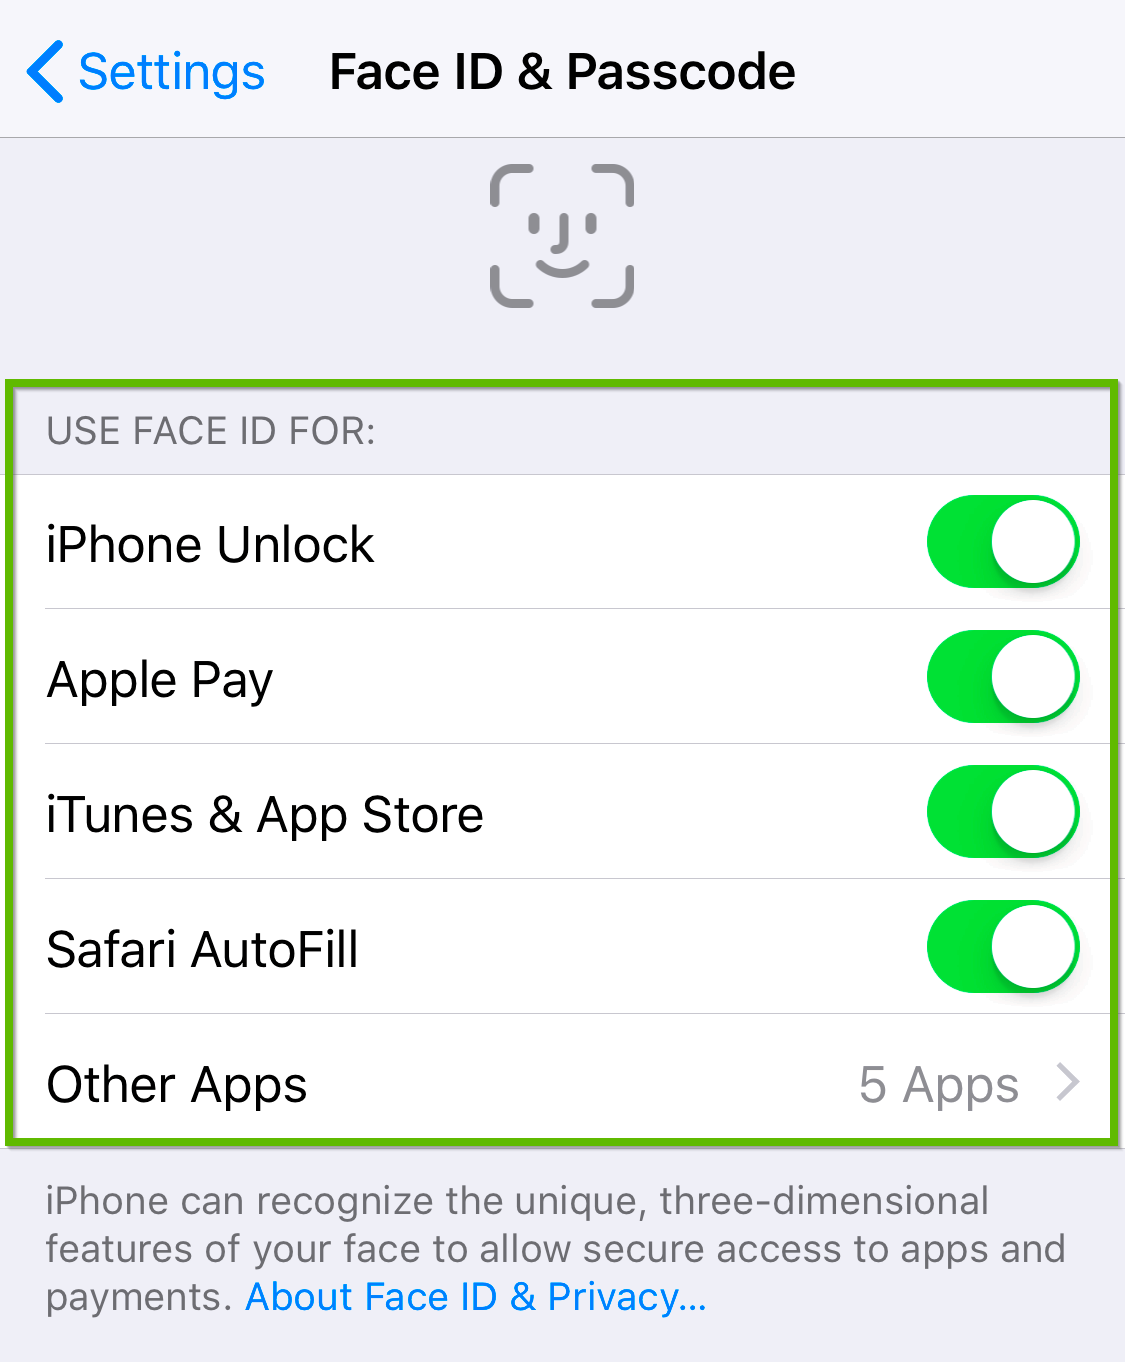
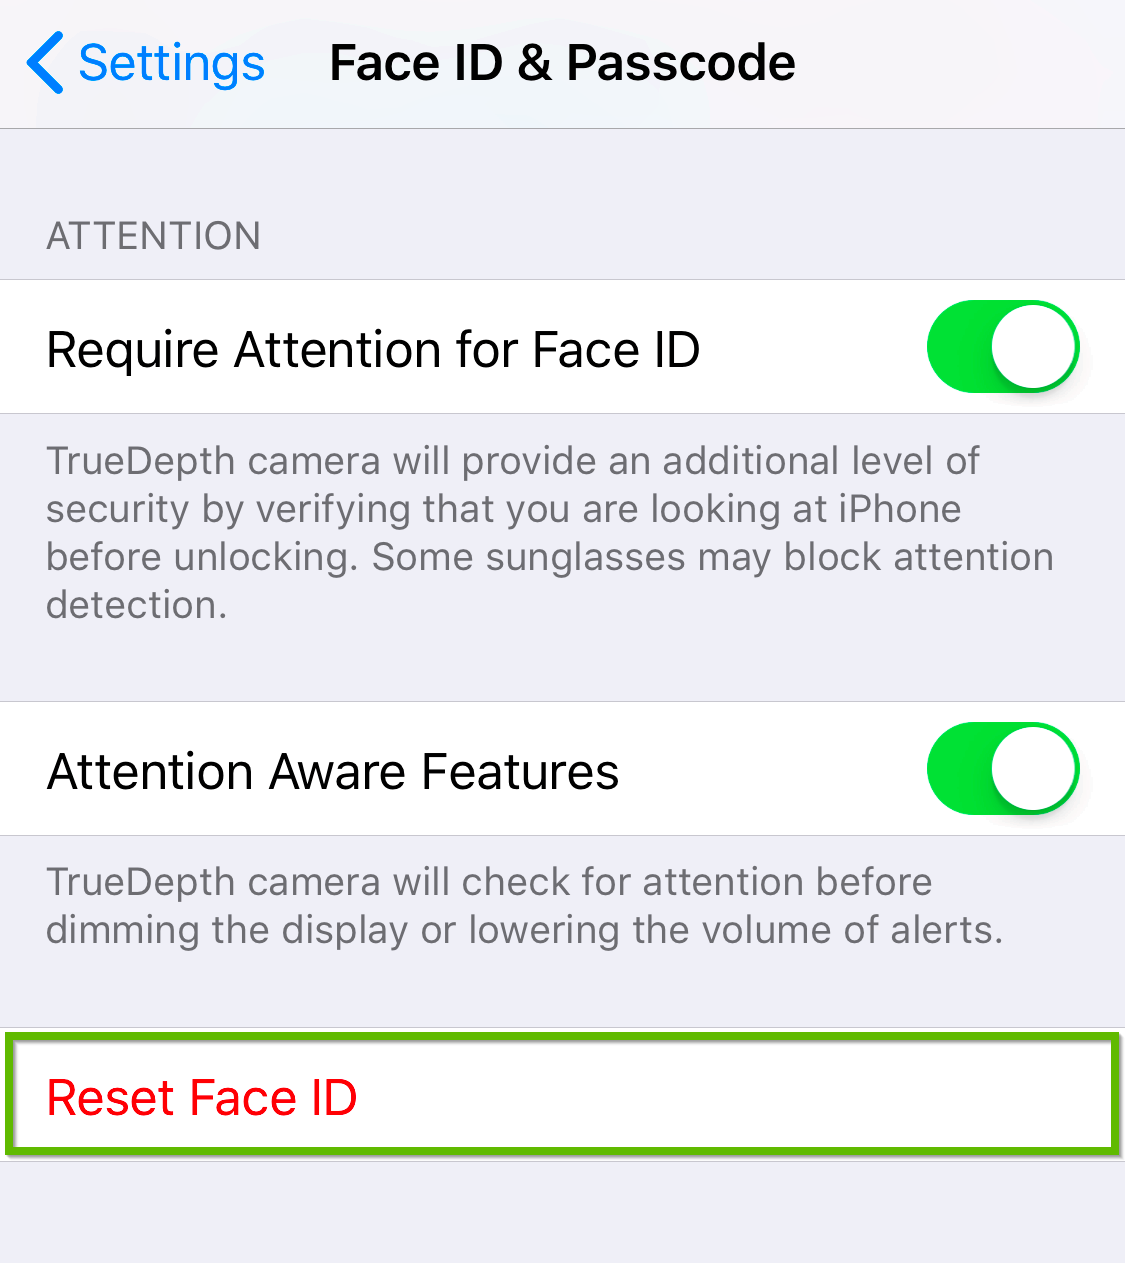
At this time, Face ID is an option that is only available to all iPhone X models and latest iPad Pro running at least iOS 11.


Support.com is committed to your privacy
We do not share or sell your data to third parties. We do use cookies and other third-party technologies to improve our site and services. The California Consumer Privacy Act (CCPA) gives you the ability to opt out of the use of cookies, third-party technologies and/or the future sale of your data. Do not sell my personal information.

Support.com is committed to your privacy
Read our Privacy Policy for a clear explanation of how we collect, use, disclose and store your information
