How to Set Parental Controls on an eero Pro Router
Authored by: Support.com Tech Pro Team
1. Introduction
Your Eero router gives you the power to enable WiFi parental controls. This is done by way of Family Profiles. Profiles can be set up for individual family members, or for individual or groups of devices. You can then set up schedules for internet access on each profile, or pause access entirely if you want those devices completely off the grid. This guide will demonstrate how to configure these parental controls using the Eero app.
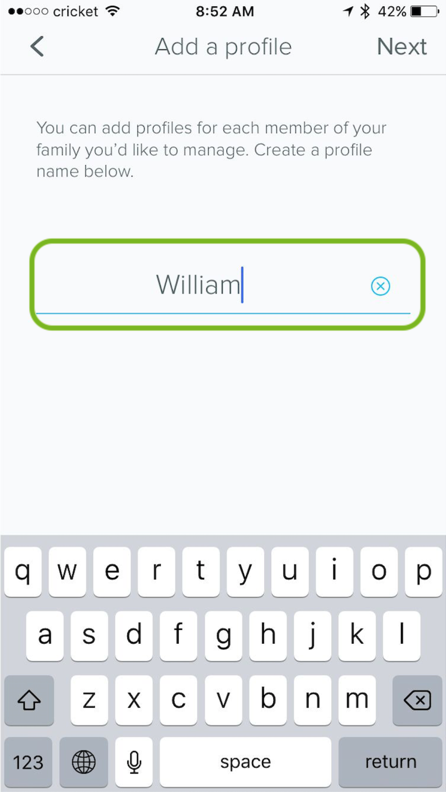
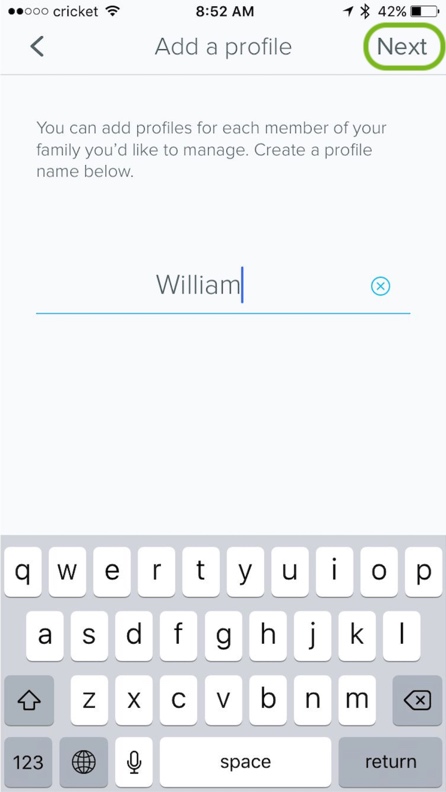
Each profile should be given a name that corresponds to a member of the family who will be using the network.
Once your profile has been named, tap Next.
Now it's time to select the devices that this profile will be accessing. A list of devices that are currently connected to your network will appear. Select any device(s) the user of this profile will be using (1), then tap Save (2).
In order to get the most accurate list of devices shown here, make sure all the devices you wish to apply parental controls to are in your home, powered on, and connected to your WiFi network. Any devices that are not in the home at the time of set up will not be available for selection here.
Setting Restrictions
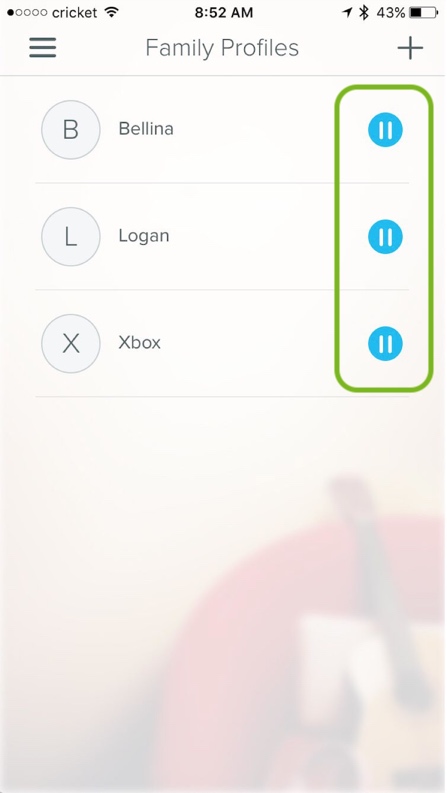
From the Family Profiles screen, tapping the pause button next to any Family Profile will pause internet access for all the devices tied to that particular profile.
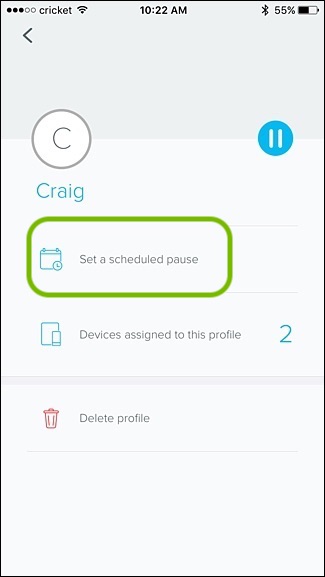
To set a schedule for internet access on any Family Profile, tap the name of any Family Profile, then tap Set a scheduled pause.
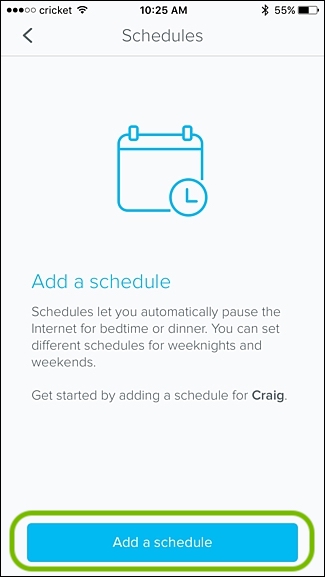
Tap Add a Schedule.
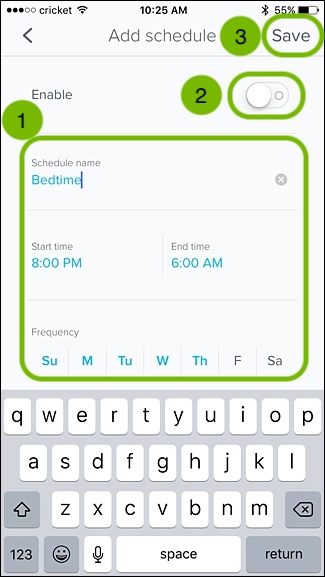
From here, you can name your schedule as well as select the start time, end time & frequency (1). Once your schedule parameters have been set, tap the Enable toggle to enable your schedule (2), then tap Save (3).
You have now successfully configured Parental Controls. This process can be repeated to add additional Family Profiles to the app.
Remove Hidden Spyware In Minutes For Free
Detect and remove spyware, keyloggers, tracking cookies, and other
threats that slow down your PC or steal your data.
65+ Million Downloads
Spyware scanner with AI-powered detection engine + database
.png)